

Send a Purchase Order
Send a Purchase Order
Once a Requisition has been fully approved, a Purchase Order will be generated for each Supplier included in the Requisition, and can then be sent to each Supplier. Read on to learn more about sending Purchase Orders.
Send statuses
- 'NOT SENT': A Purchase Order in a 'NOT SENT' state has been created from an Approved Requisition, but is yet to be sent to the Supplier. Multiple NOT SENT Purchase Orders for the same Supplier can be Consolidated, so that less individual Purchase Orders are sent to the Supplier.
- 'SENT': A Purchase Order in a SENT state has been marked as Sent (manually or automatically, depending on settings), and accordingly it may or may not have been electronically sent to the Supplier.
When marking a Purchase Order as Sent, a user may decide not to electronically send the Purchase Order to the Supplier. This may be because they have already phoned the order through, and don't wish to confuse the Supplier by sending a duplicate Order. A Purchase Order in a SENT state is ready to be Received and Invoiced. You can create one or more Goods Receiving Notes against it, and it can be matched to an Invoice.
Required Permissions
To Send a Purchase Order (or to Mark a Purchase Order as Sent), a user must have the 'Send Purchase Orders' permission enabled.
Mark one as sent
1. Access [Purchase Orders Not Yet Sent] from [Home Dashboard]:
2. You will arrive at the All Purchase Orders table, and the [Not Sent] tab will be pre-selected. In the Send column of the table, you can click the [Send] icon on any Purchase Order you wish to mark as Sent:
3. A window will appear, and here you can decide if you would like to also Send the Purchase Order Electronically to the Supplier by selecting or de-selecting the [Send Purchase Order Electronically] option.
Click [Send] to confirm, and the Purchase Order will be marked as Sent:
4. The status of the Purchase Order has now been transitioned from 'NOT SENT' to 'SENT'. If the [Send Purchase Order Electronically] option was selected, the Electronic Send Event can now be viewed:
Mark as sent in bulk
1. Access [Purchase Orders] → [View All], and select the [Not Sent] tab: 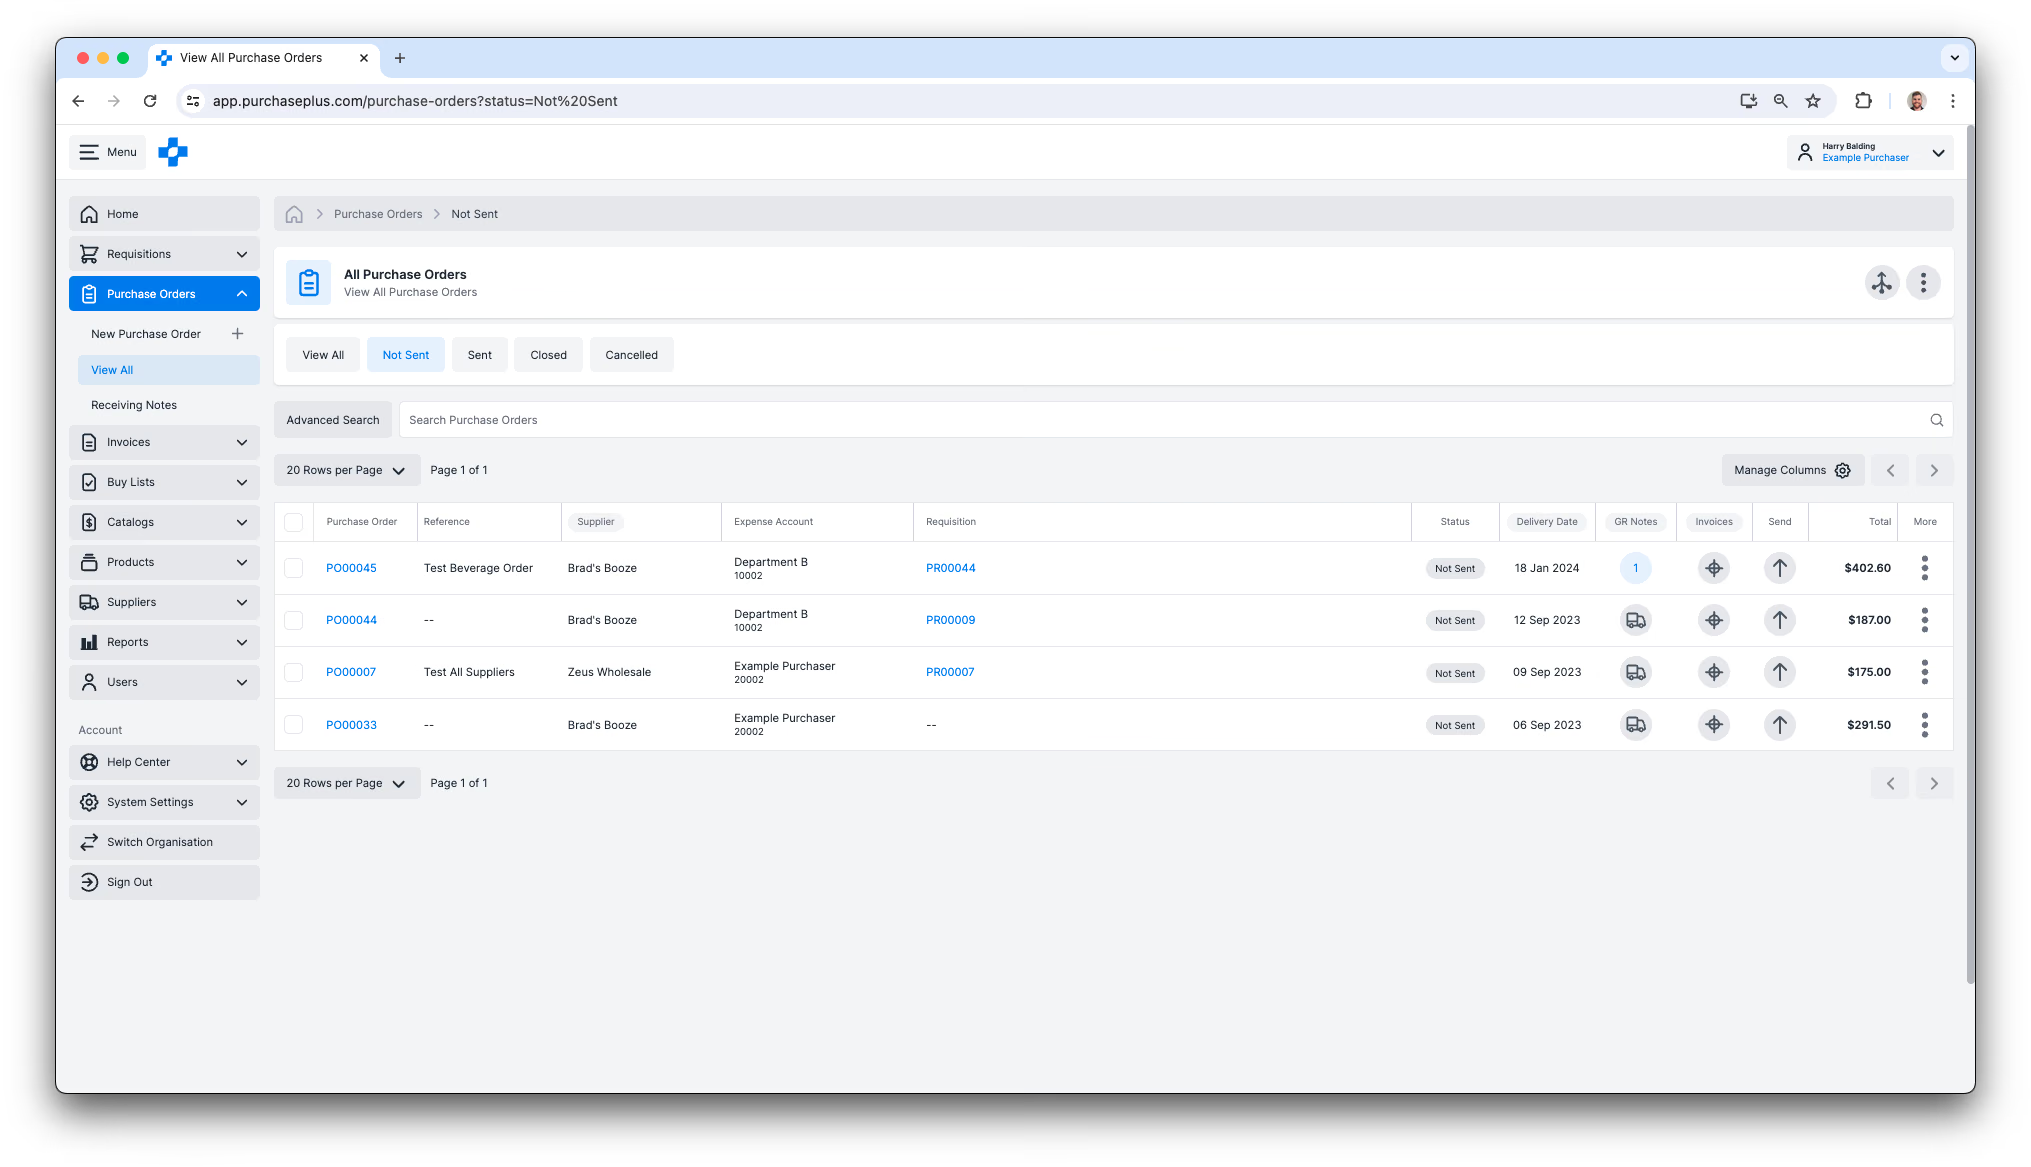 2. Select the Purchase Orders you wish to Mark as Sent, or select all Purchase Orders in the table: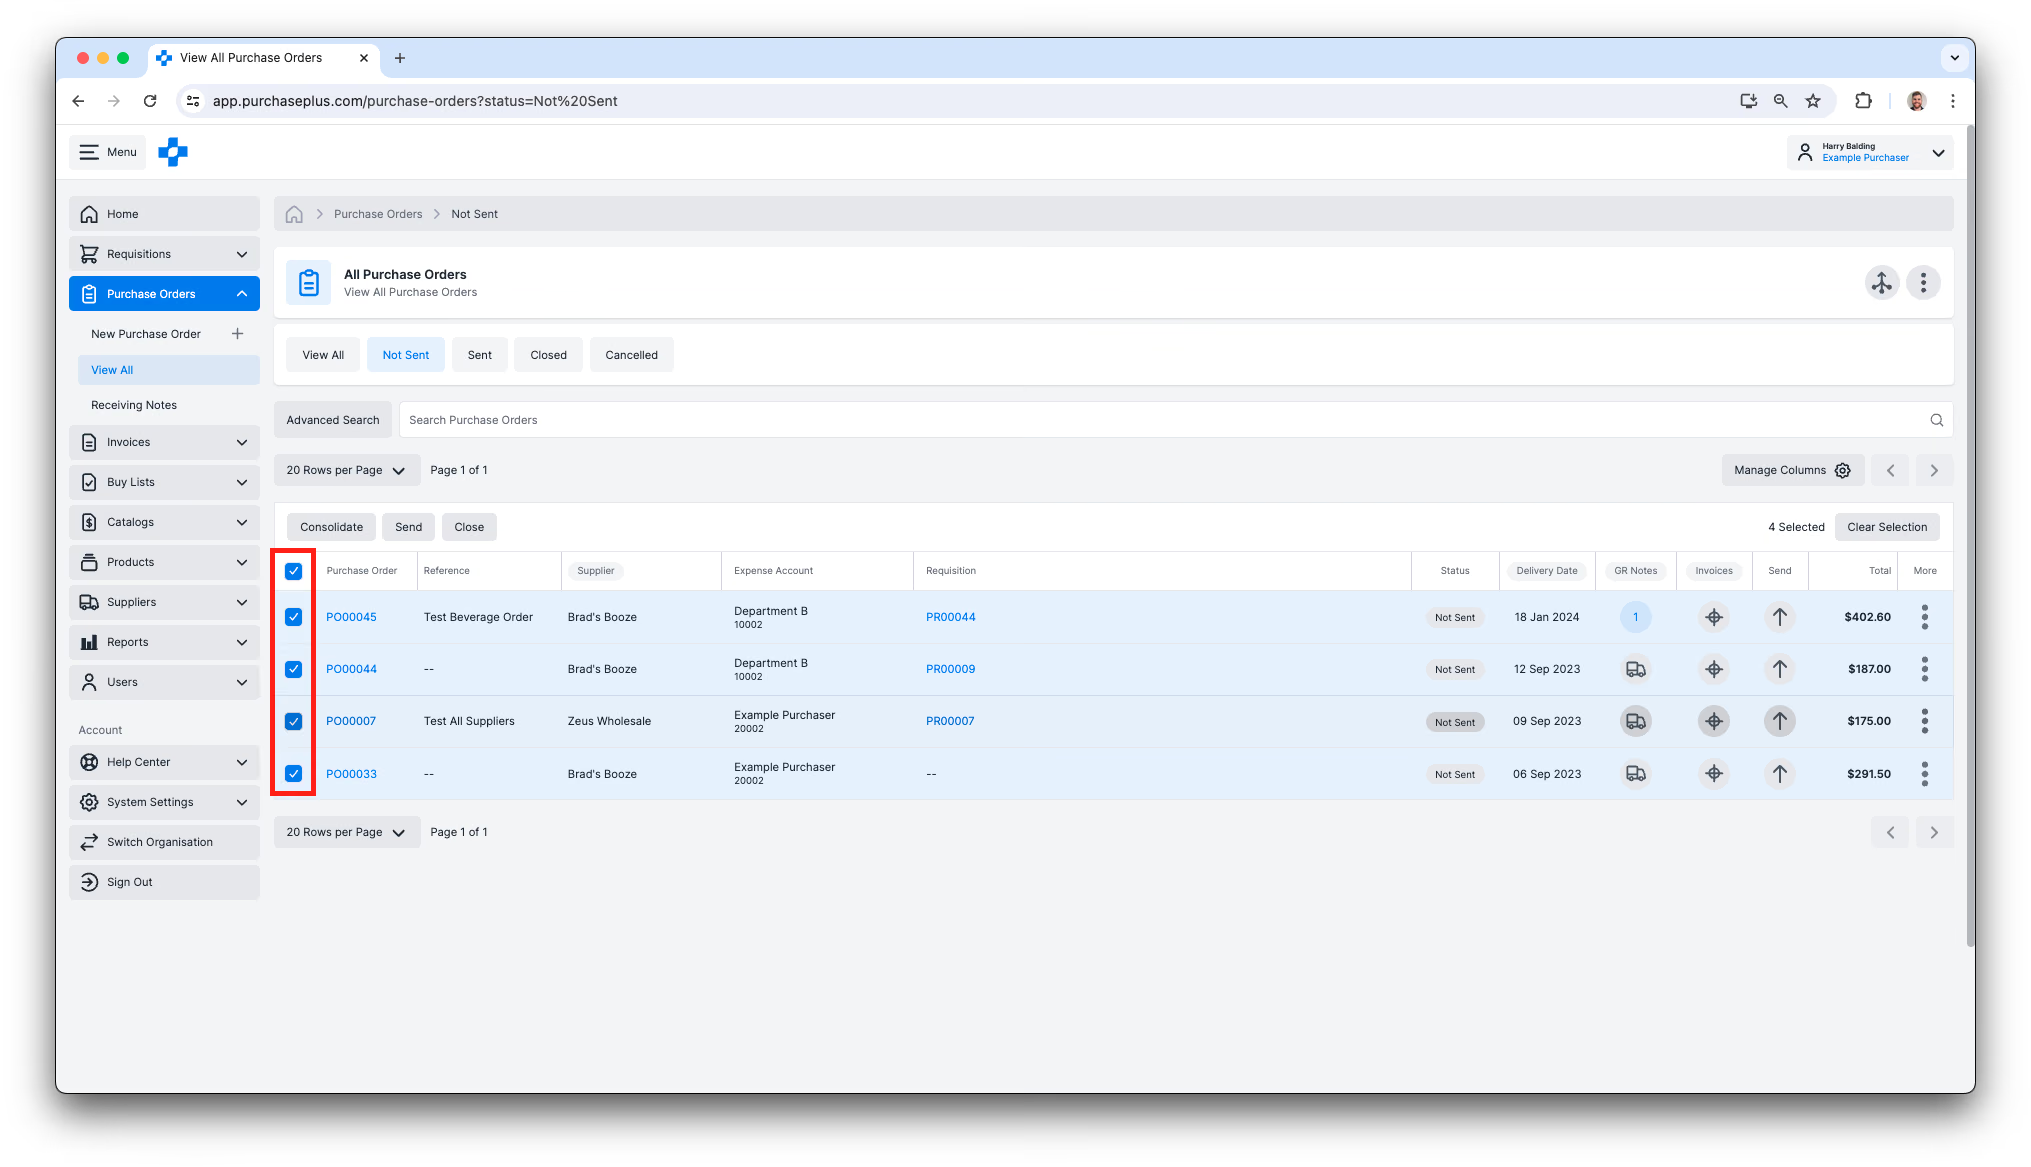
3. Click [Send] and then confirm the action in the dialog box. The selected Purchase Orders will all be Marked as Sent: 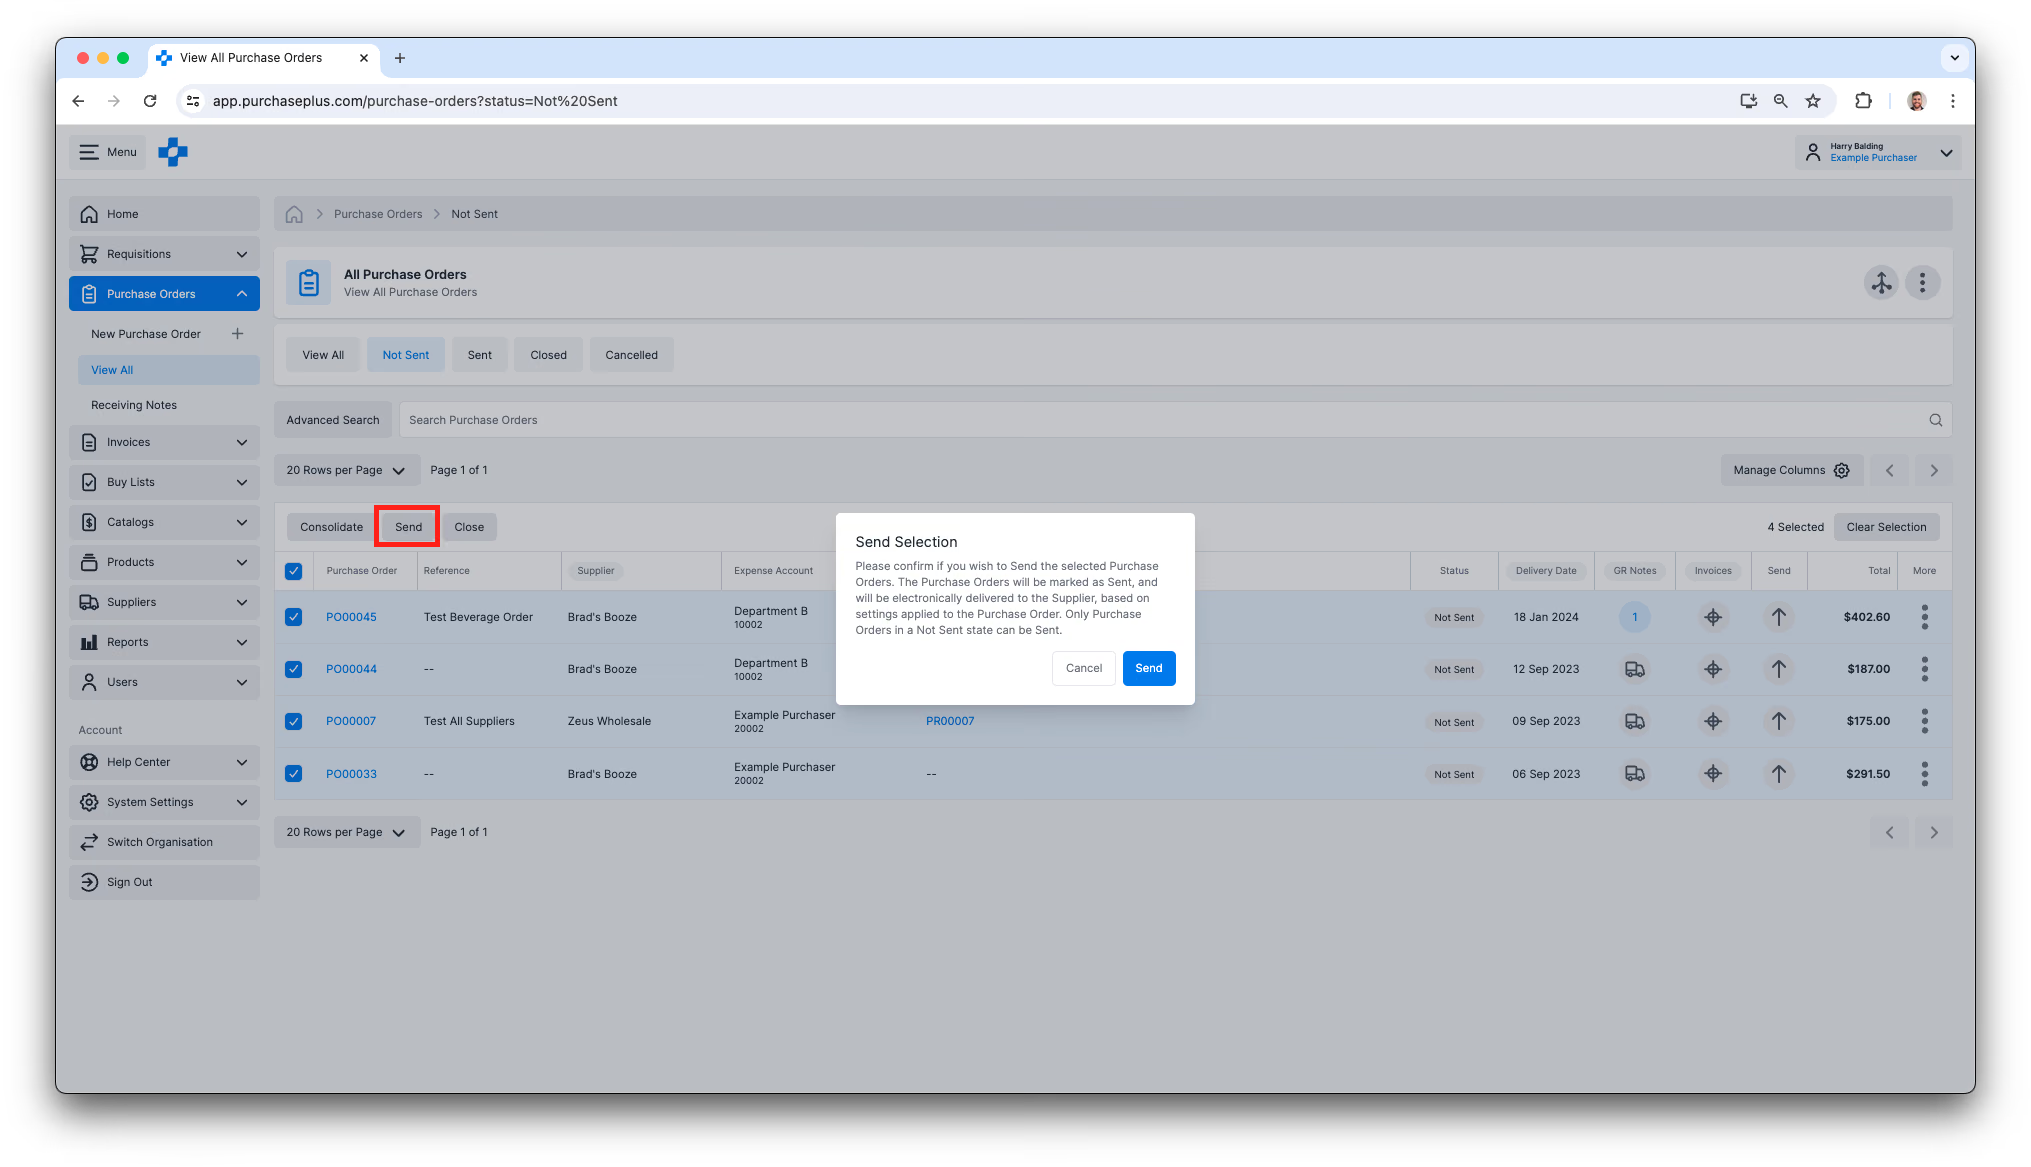
Viewing Electronic Send Events
When a Purchase Order is electronically sent to a Supplier, the destination it is Sent to is configured specifically for that Supplier. The destination may be an email address, or an electronic destination such as an API Endpoint. Our PurchasePlus team works with Suppliers to correctly configure these destinations. Learn more about Supplier Destinations.
To view all Purchase Orders in a 'SENT' state:
1. Navigate to [Purchase Orders] → [View All] and select the [Sent] tab. In the Send column of the table, you will notice that Send button is either Green or Orange, and a count of Send Events appears in a badge on the button.
The pattern for the button colour and badge count is explained below:
- [Green with 0] = Purchase Order is marked as Sent, and the Purchase Order was not sent electronically to the Supplier.
- [Green with 1 or Greater] = Purchase Order is marked as Sent, and the Purchase Order was sent electronically to the Supplier at least once, and all Send Events were successful.
- [Yellow with 1 or Greater] = Purchase Order is marked as Sent, and the Purchase Order was sent electronically to the Supplier at least once, but one or more of the Send Events failed to send:
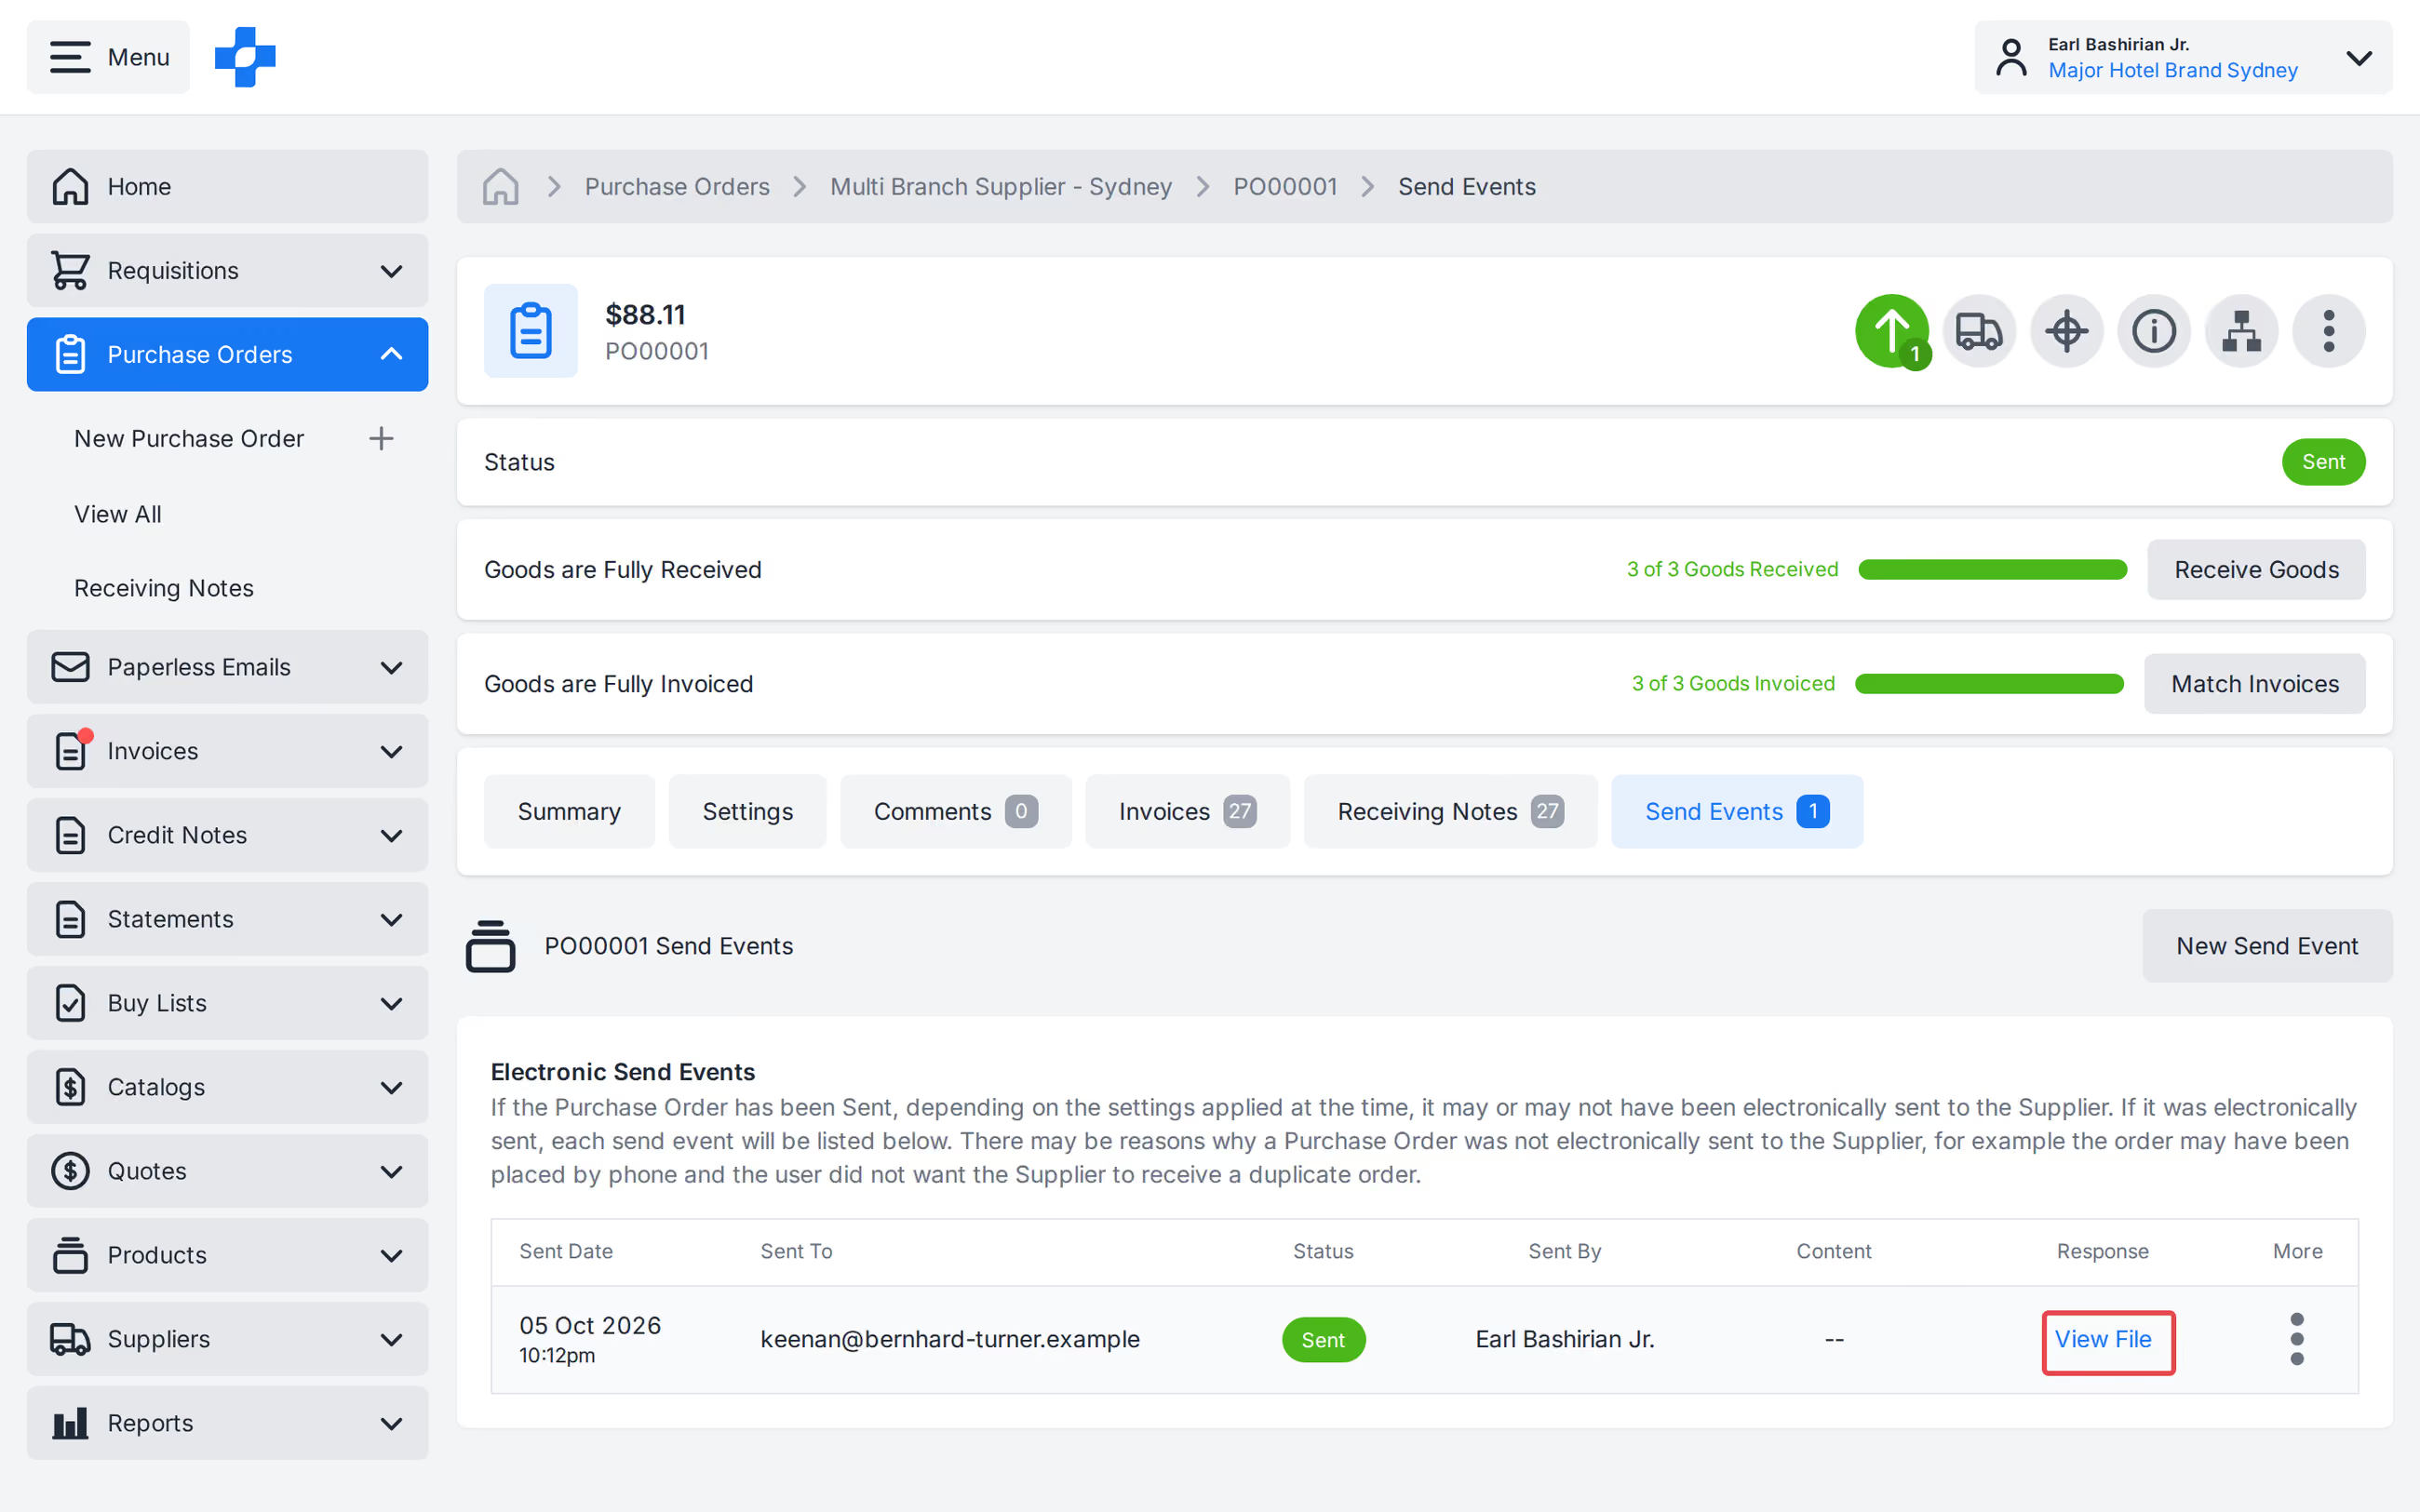
2. Click the [Send] button of a Purchase Order to view information about each Electronic Send Event:
![Click the [Send] button of a Purchase Order to view information about each Electronic Send Event](/images/docs/for-purchasers/send-a-purchase-order-9.avif)
Each Send Event can show [View Content] and, when the response file returned by the Supplier's system was stored, [View File] beside it. -- appears when there is no file. The same actions are available in table view, tile view, and the Requisition confirmation Purchase Order modal.
Re-Sending a Purchase Order
Sometimes you may need to manually Re-Send a Purchase Order (i.e., create an extra Electronic Send Event for a Purchase Order that has already been marked as Sent). This may occur if the Supplier reports non-receipt of the Purchase Order, or if the Supplier's email address was not correct. Follow these steps to re-send a Purchase Order.
- Locate the Purchase Order in PurchasePlus.
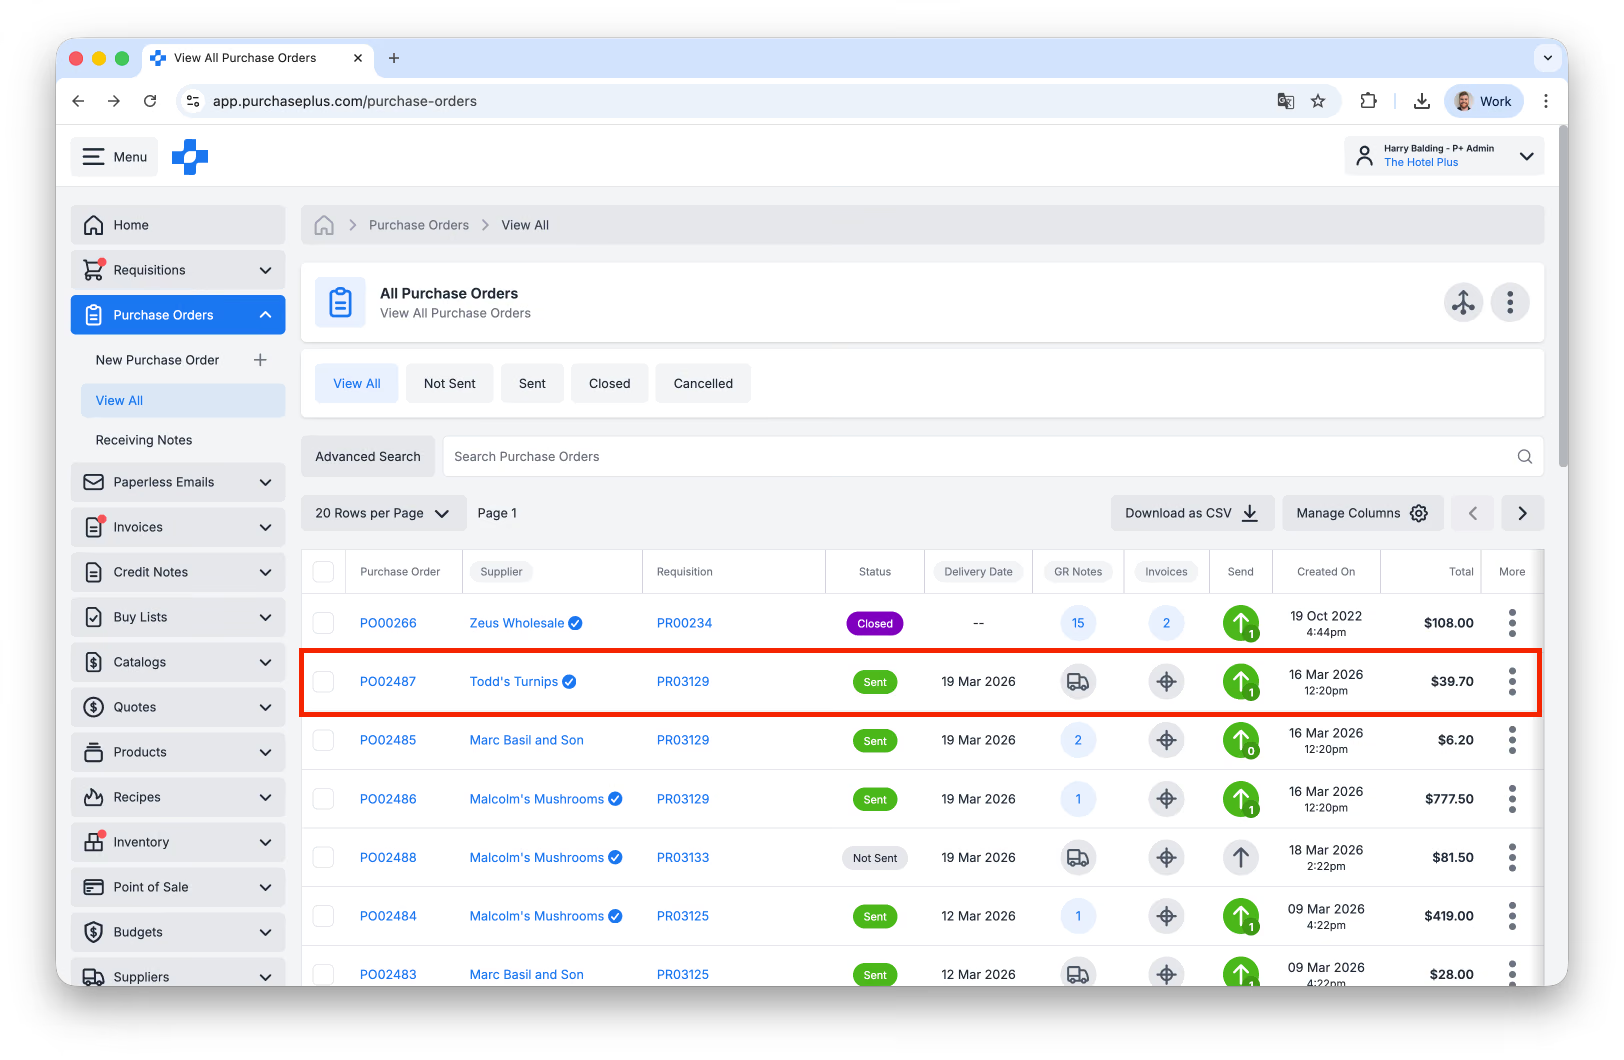
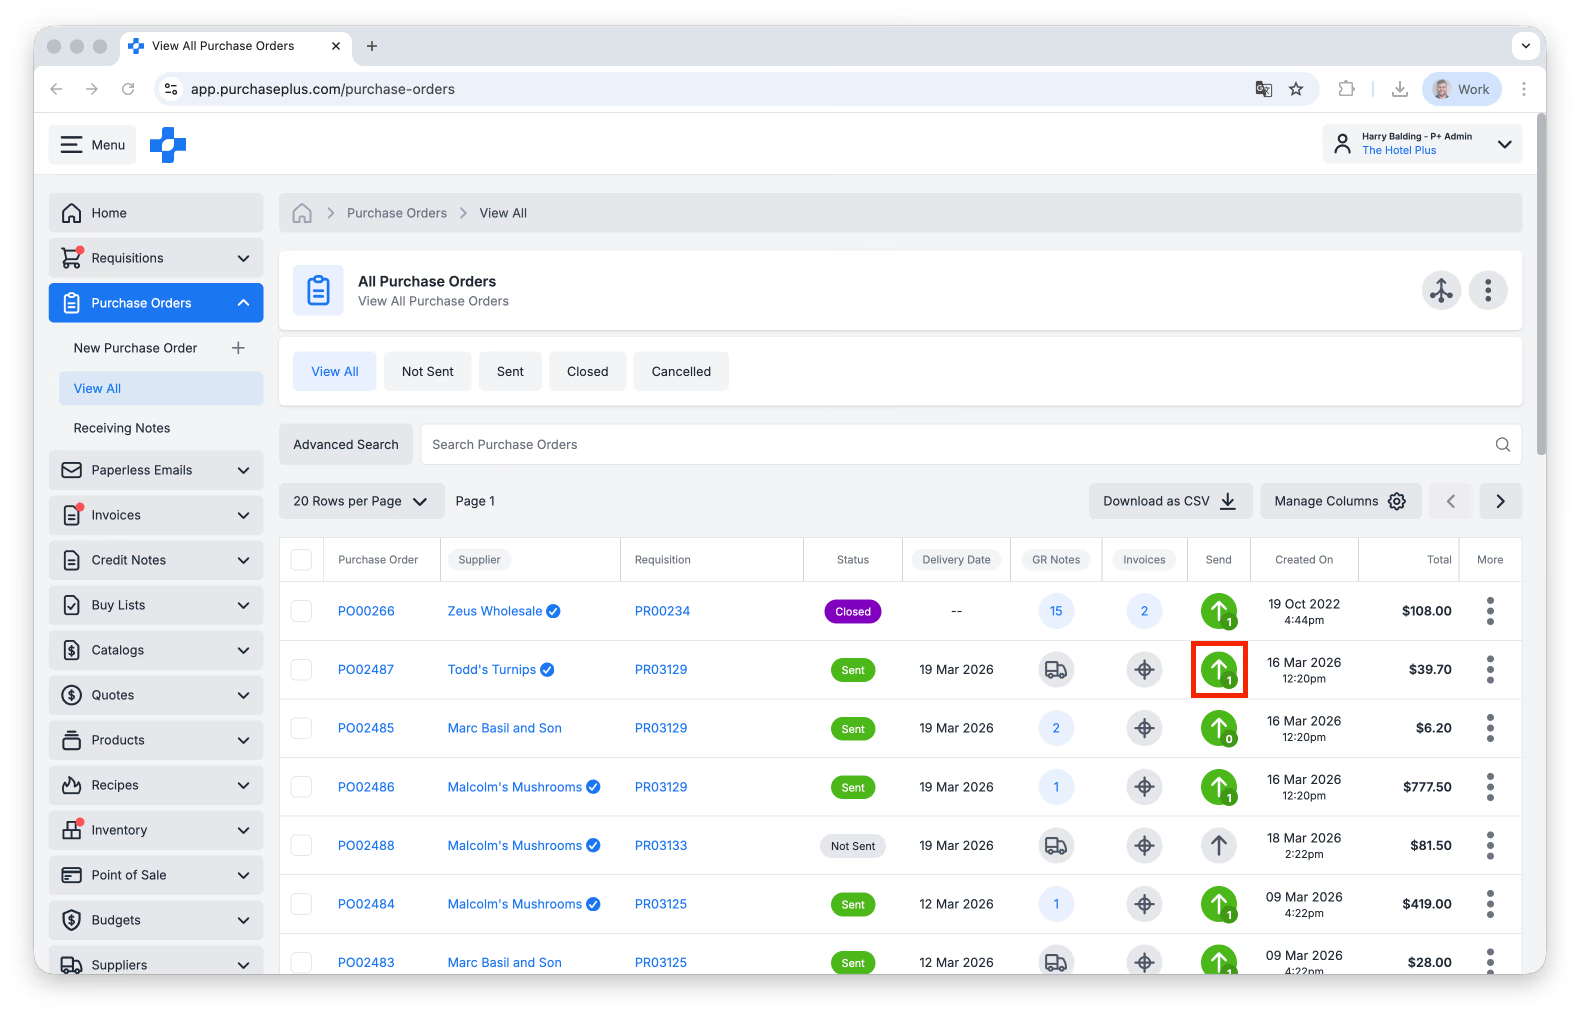
- Click on the [Send Event] column:
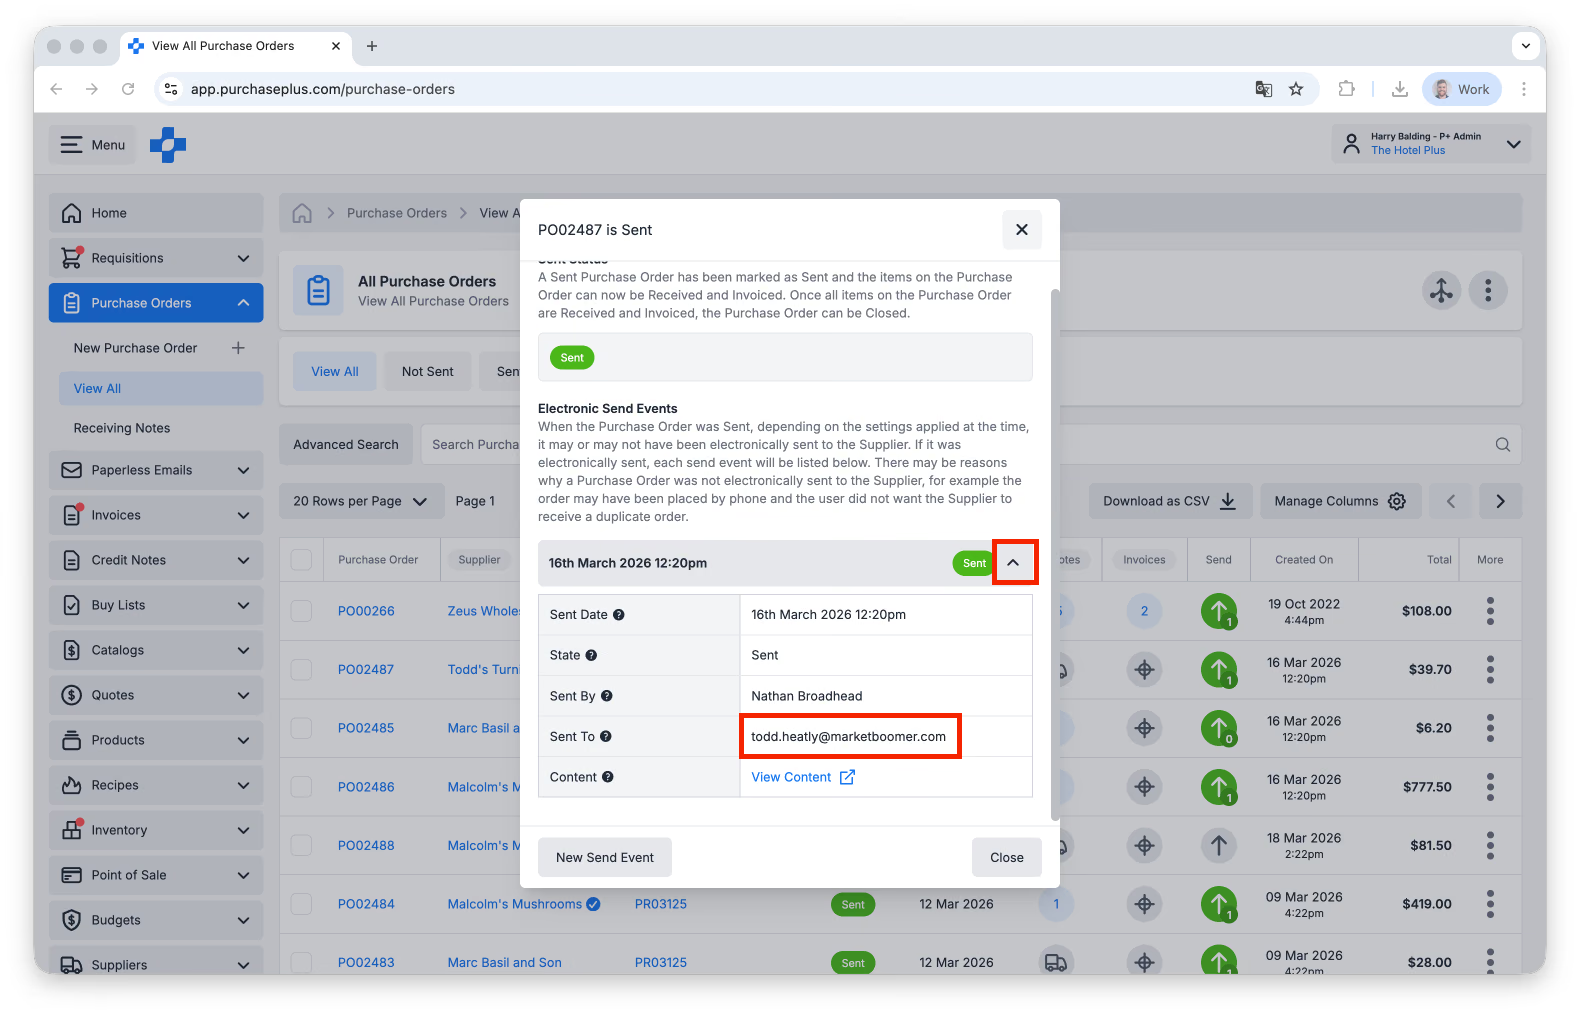
- Click on the previous Send Event(s) to verify the email address to which the Purchase Order was sent:
- Click [New Send Event]:
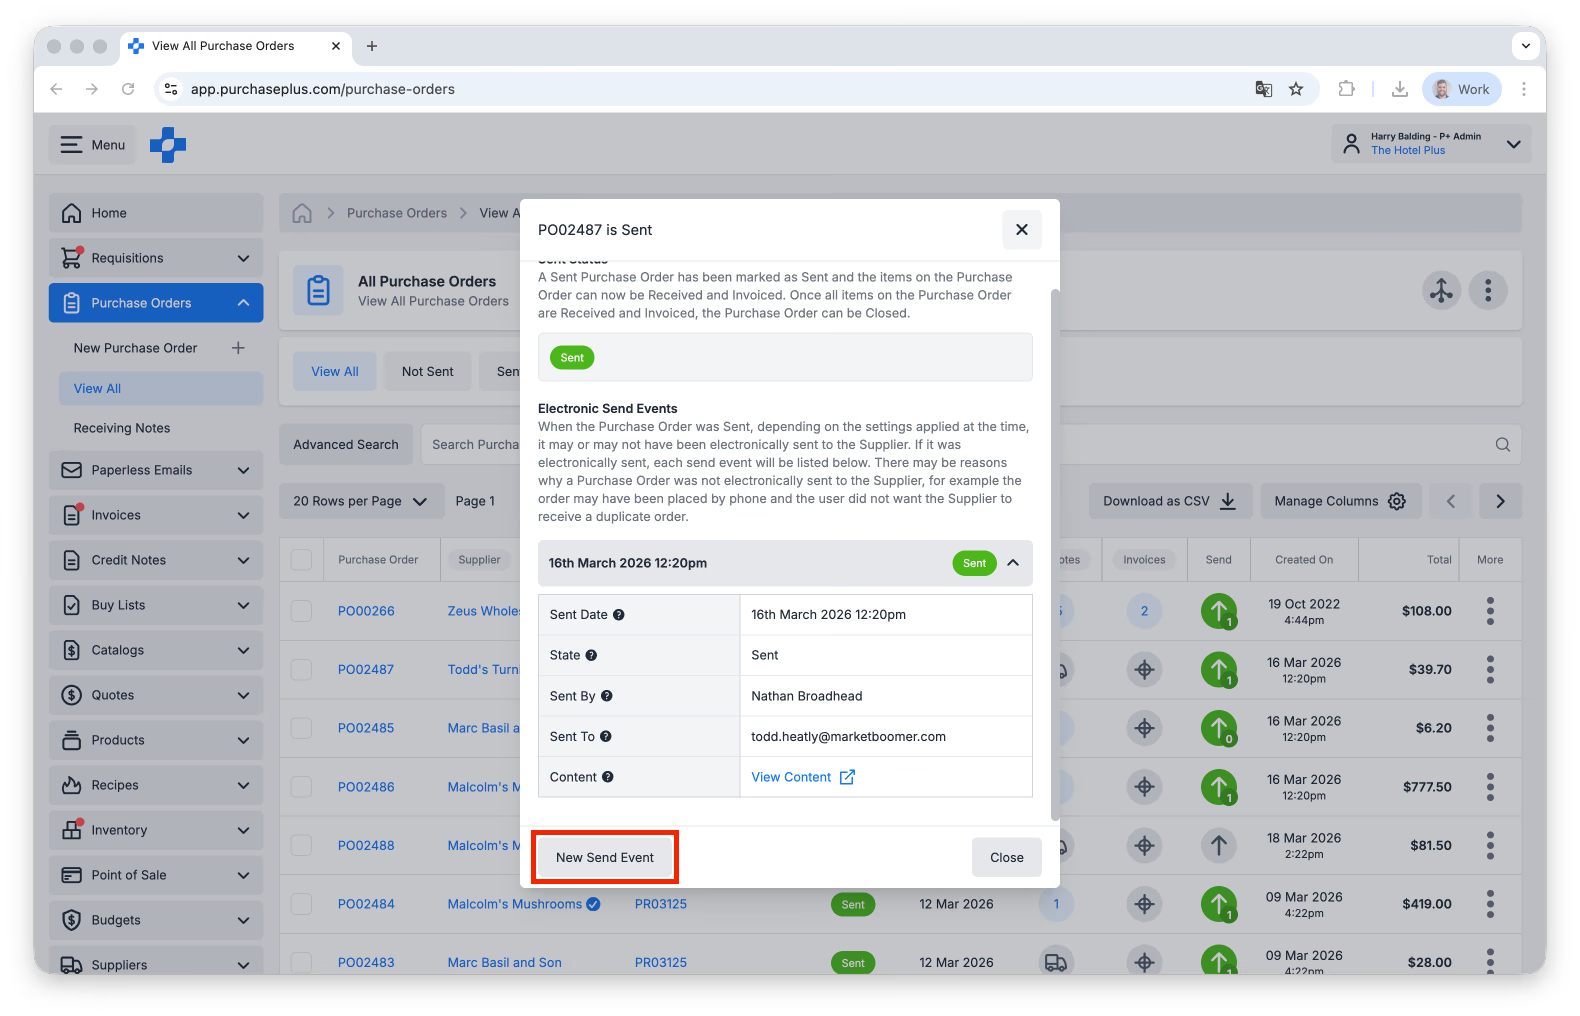
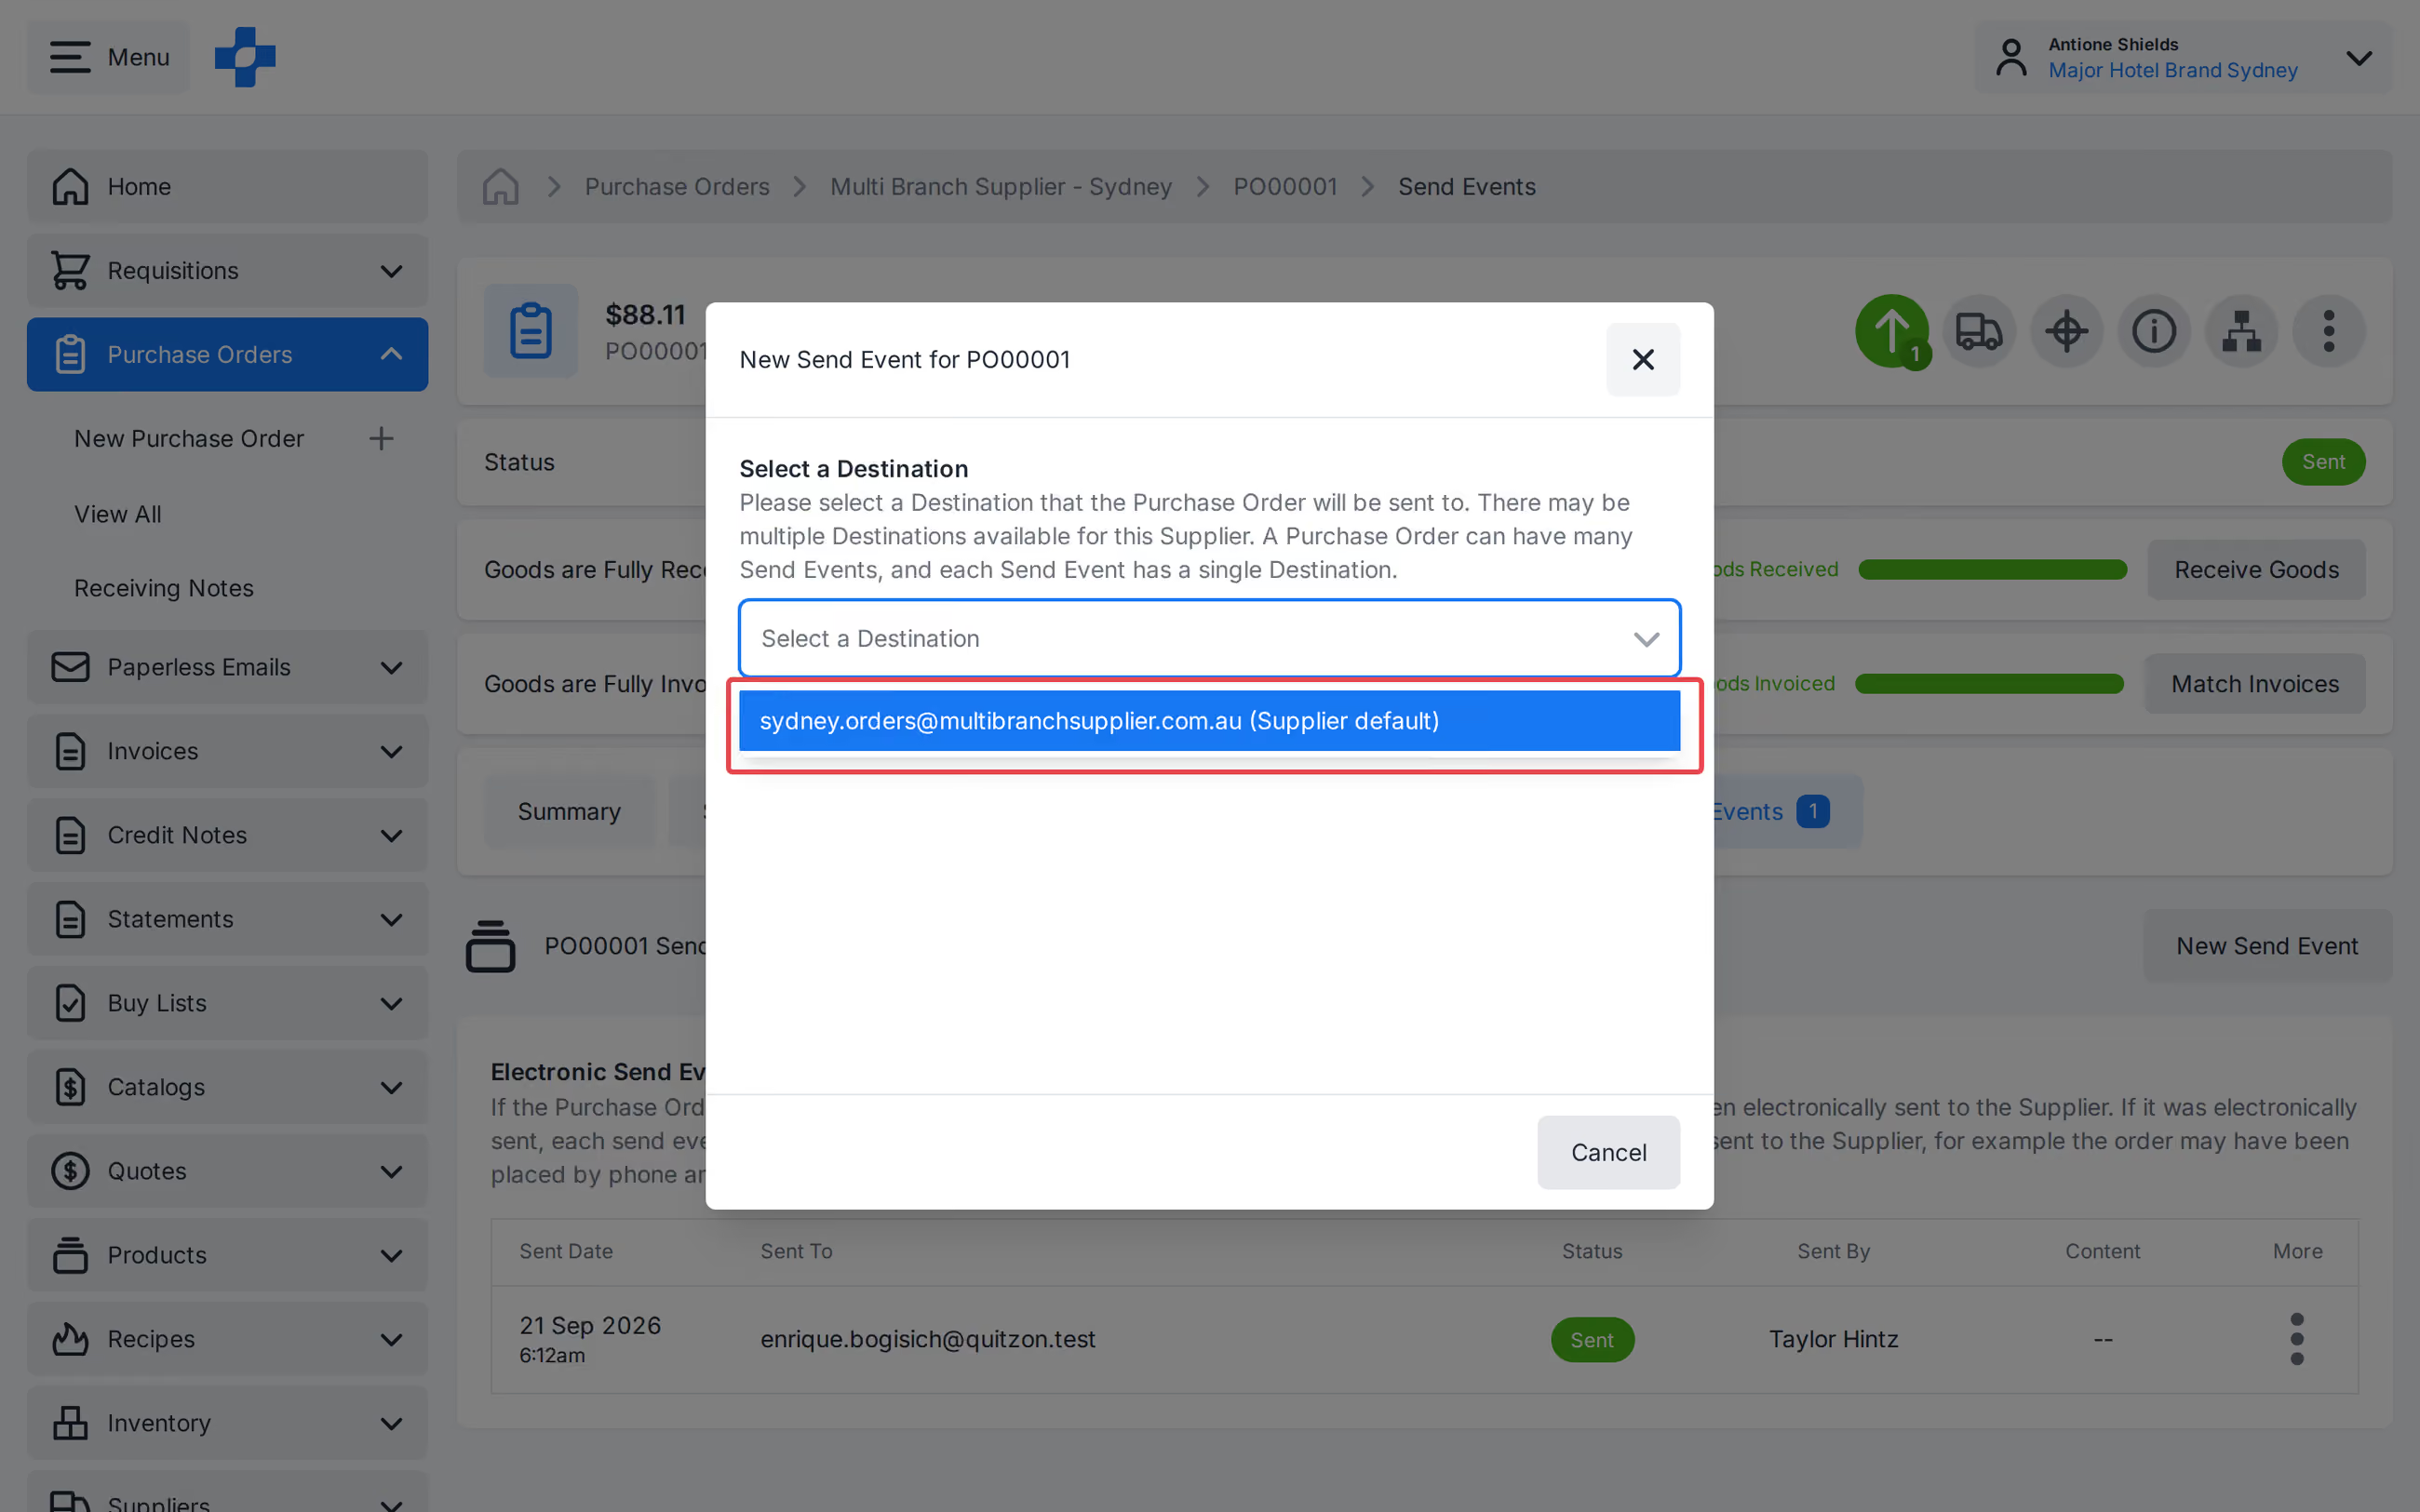
- Select from the Destinations list and click [Send]. The list is the same set automatic send would use. When this Purchase Order has no matching Destinations, the list shows the Supplier's default Purchase Order Destinations, labelled (Supplier default). If required, you can create a new Supplier Destination for this Supplier, if they are a Self Managed Supplier that is owned by your Organisation. If they are a Registered PurchasePlus Supplier, speak to the Supplier and ask that they update their Destinations.
- Your Purchase Order has been re-sent. It is recommended that you follow up with your Supplier to ensure the Purchase Order has been successfully received.