

Create an Invoice
Create an Invoice
PurchasePlus users can create a new Invoice in order to have a digital, programmatic record of an Invoice received from a Supplier that can then be matched to a Purchase Order, reconciled, approved, and exported to an external accounting system.
Create an Invoice
There are three options for creating an Invoice in the User Interface of PurchasePlus: manually creating the Invoice and all of its Lines, dragging and dropping the PDF into our PDF Scanning AI, or using a Purchase Order or Goods Receiving Note as the basis of the Invoice. This article explains these three options.
Additionally, your Suppliers can send an Invoice directly to PurchasePlus, so our software can scan that Invoice into the system, and automatically create (and potentially process) the Invoice from the PDF without users at your organisation taking any action at all. This is an optional feature called the Paperless Invoicing module, and must be enabled in your account by PurchasePlus. Please get in contact with us if you would like this module enabled.
Create manually
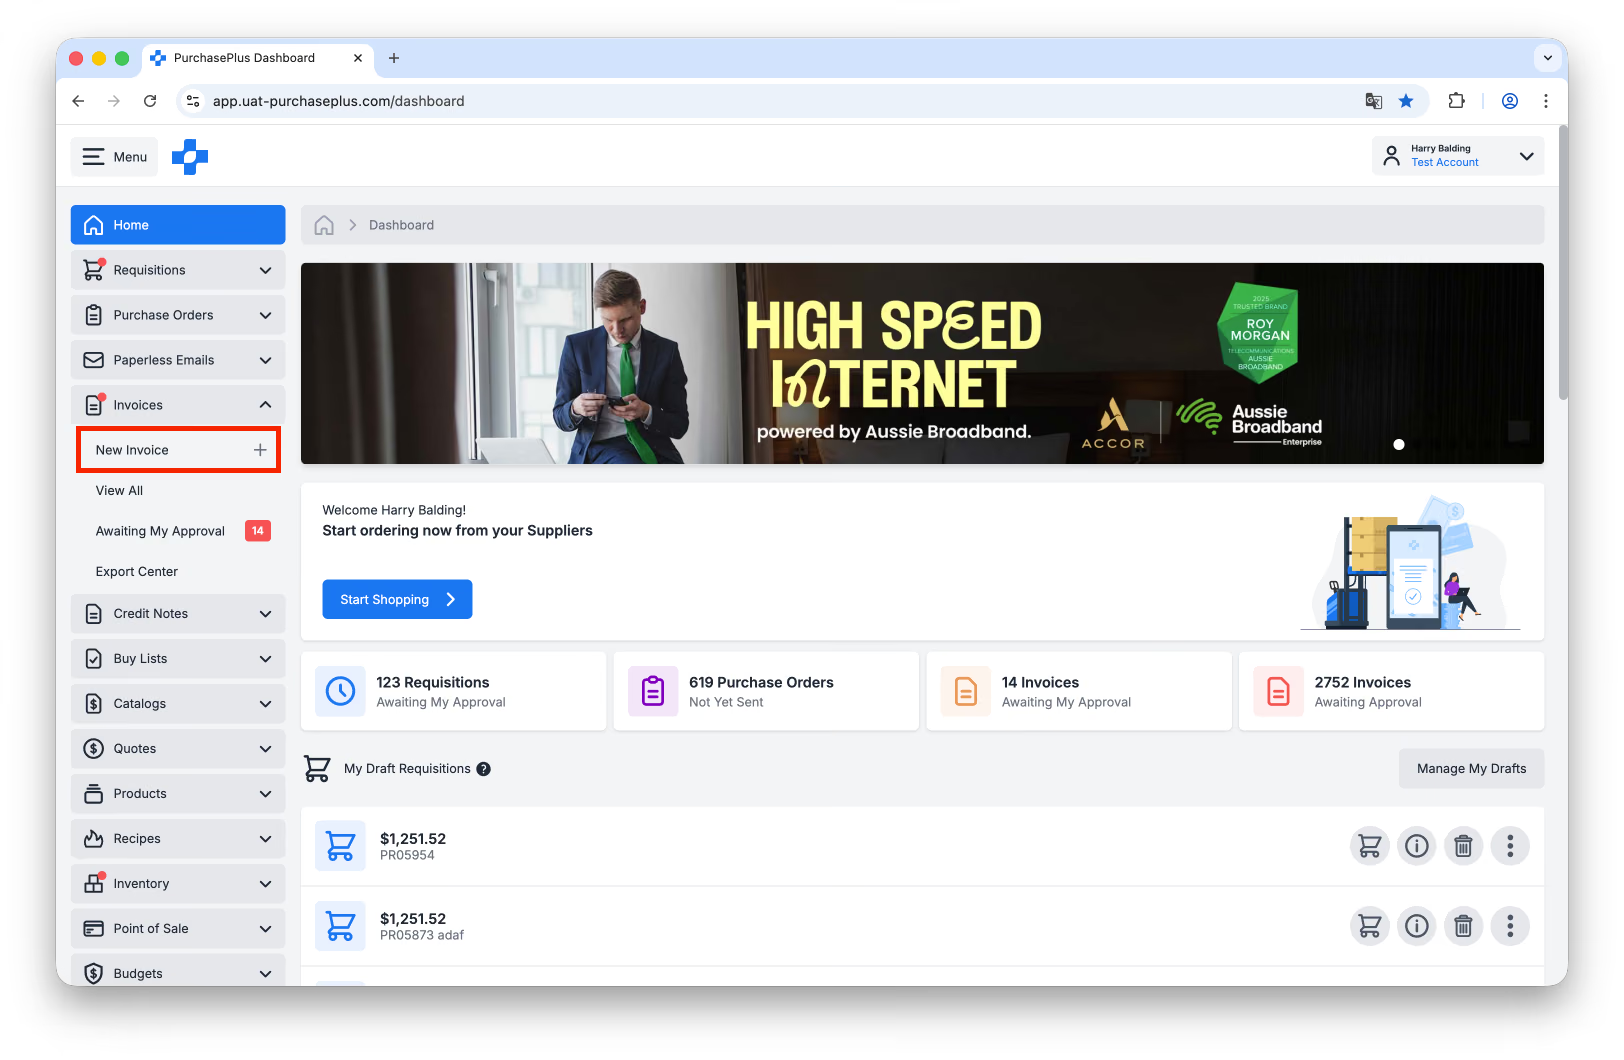
Select [Invoices] → [New Invoice] from the side navigation bar. You will only see this option if you have the appropriate permission (which is called 'Manage Invoices and Credit Notes'). If you do not see this option, please speak with an Administrator at your Organization and ask to have this permission enabled.
You will be presented with three options for creating your new Invoice: 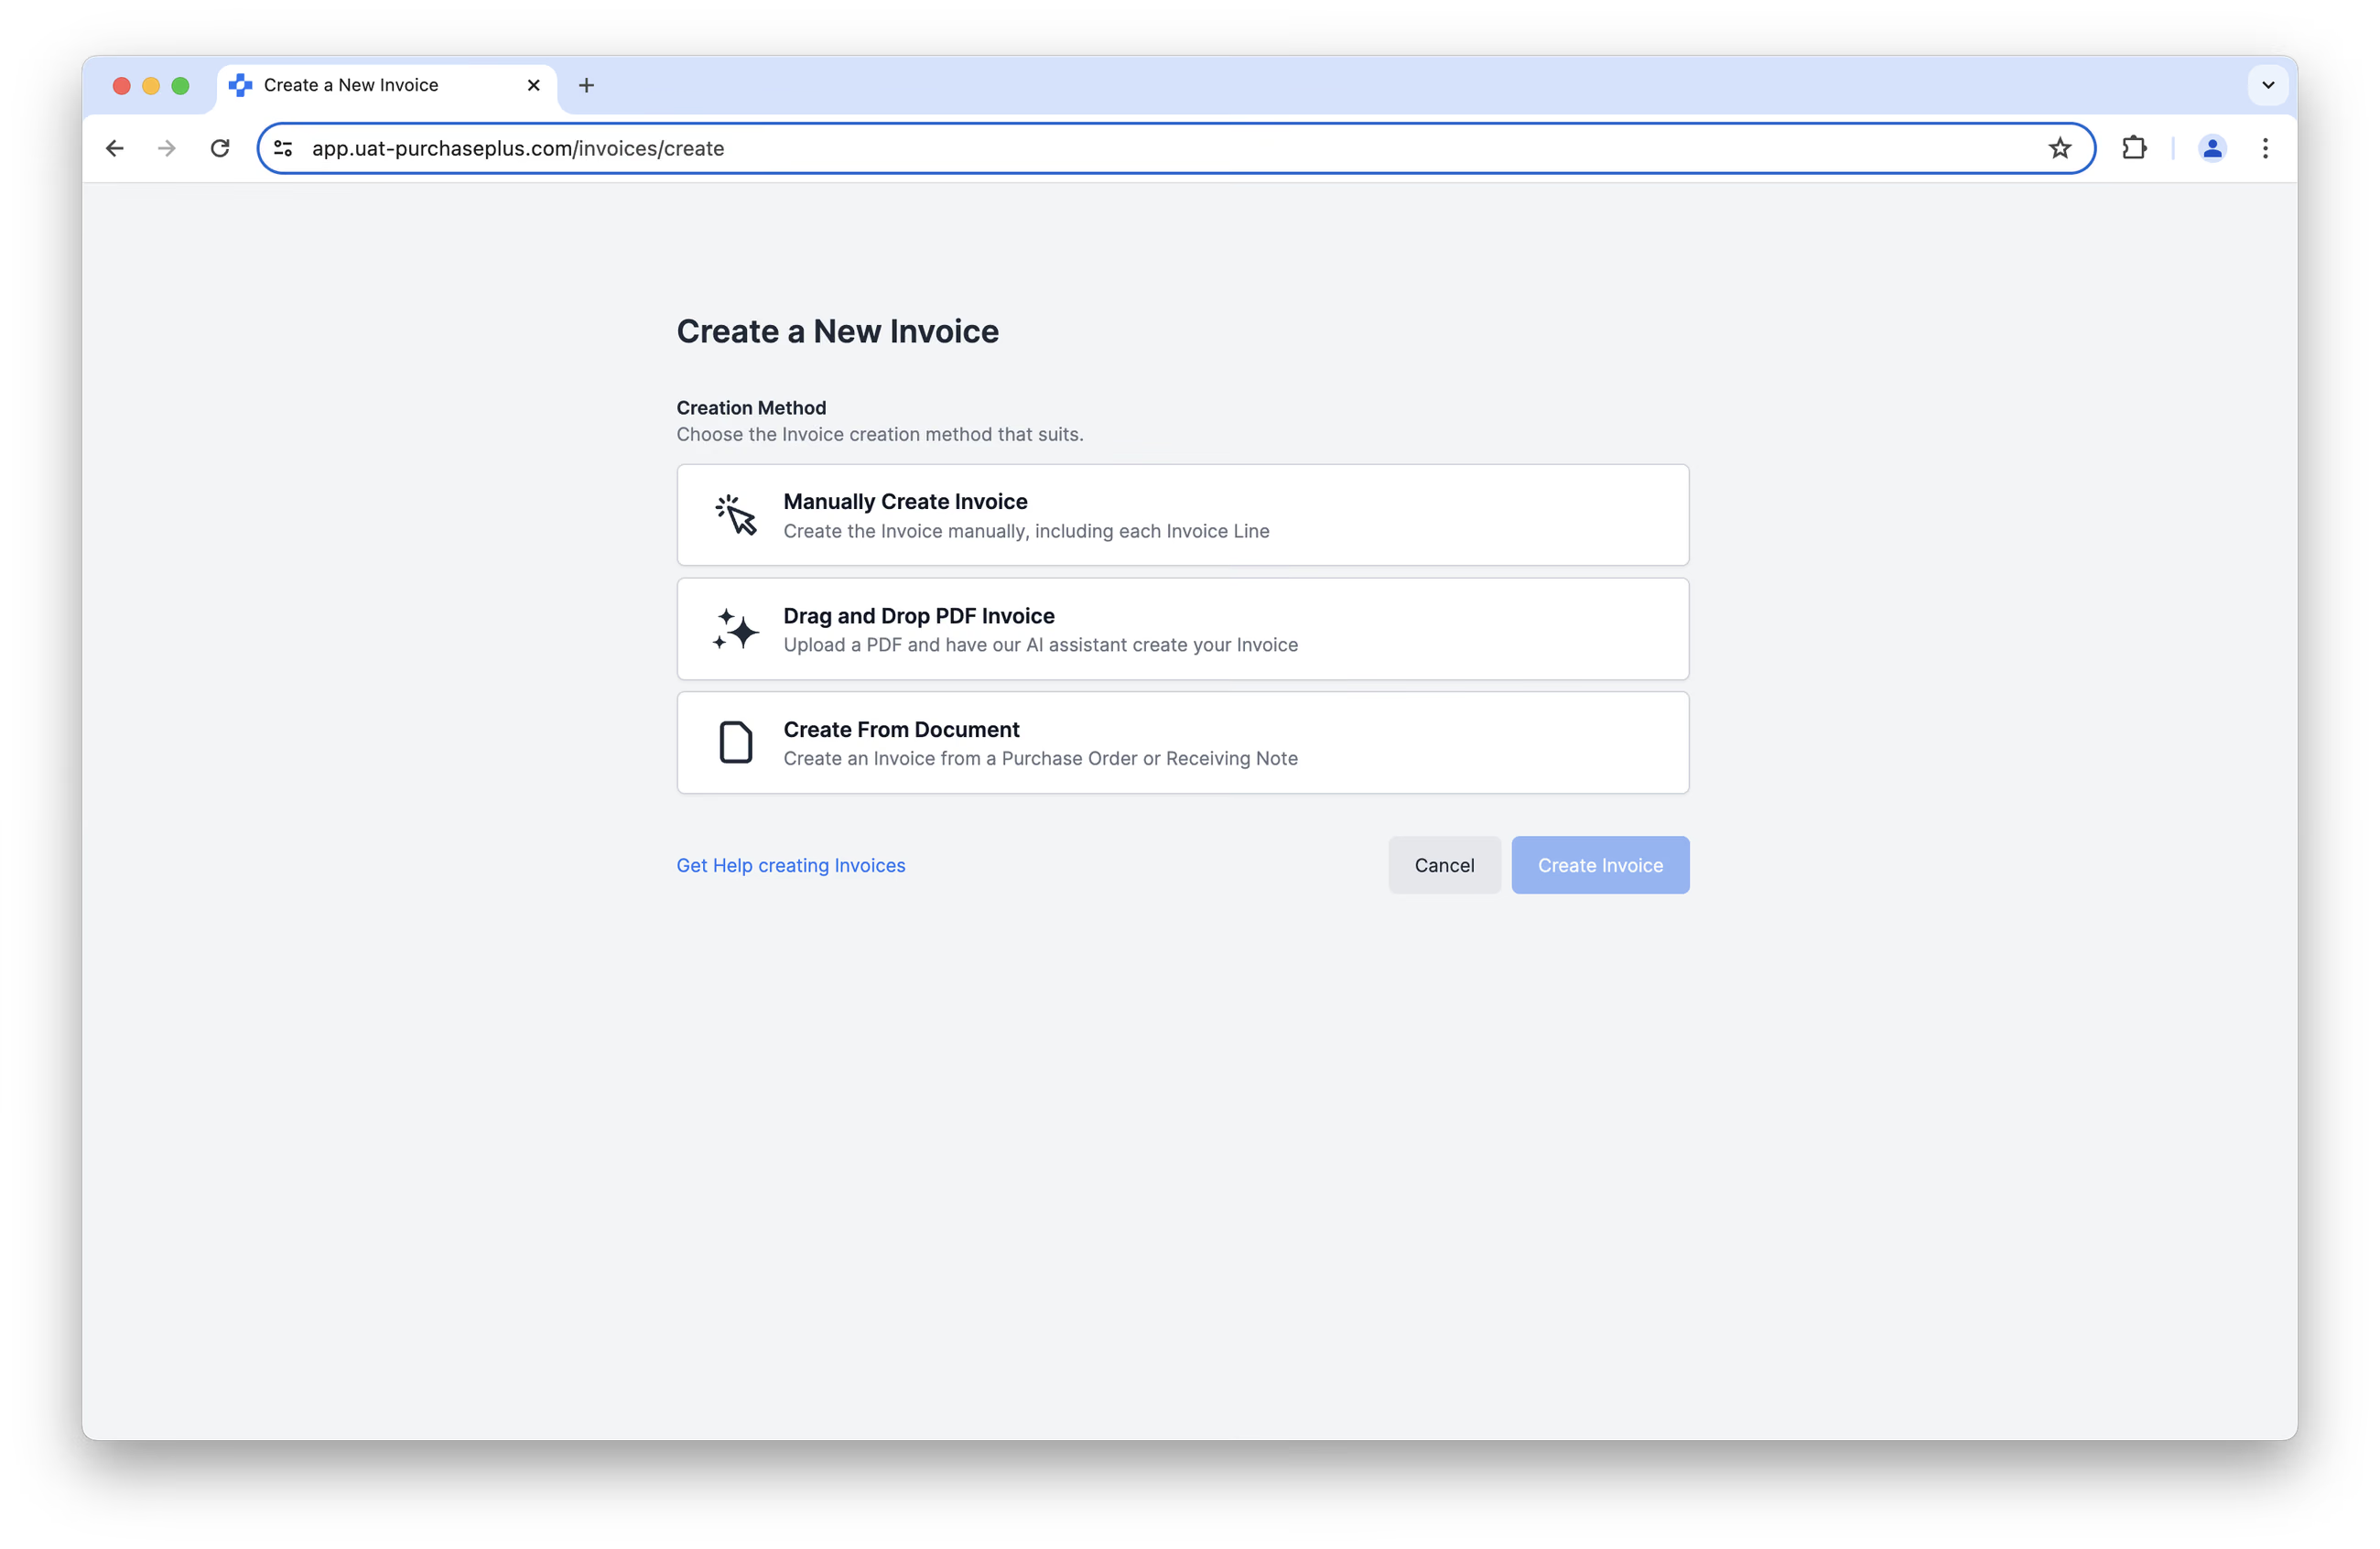
Option 1: Manually Create Invoice
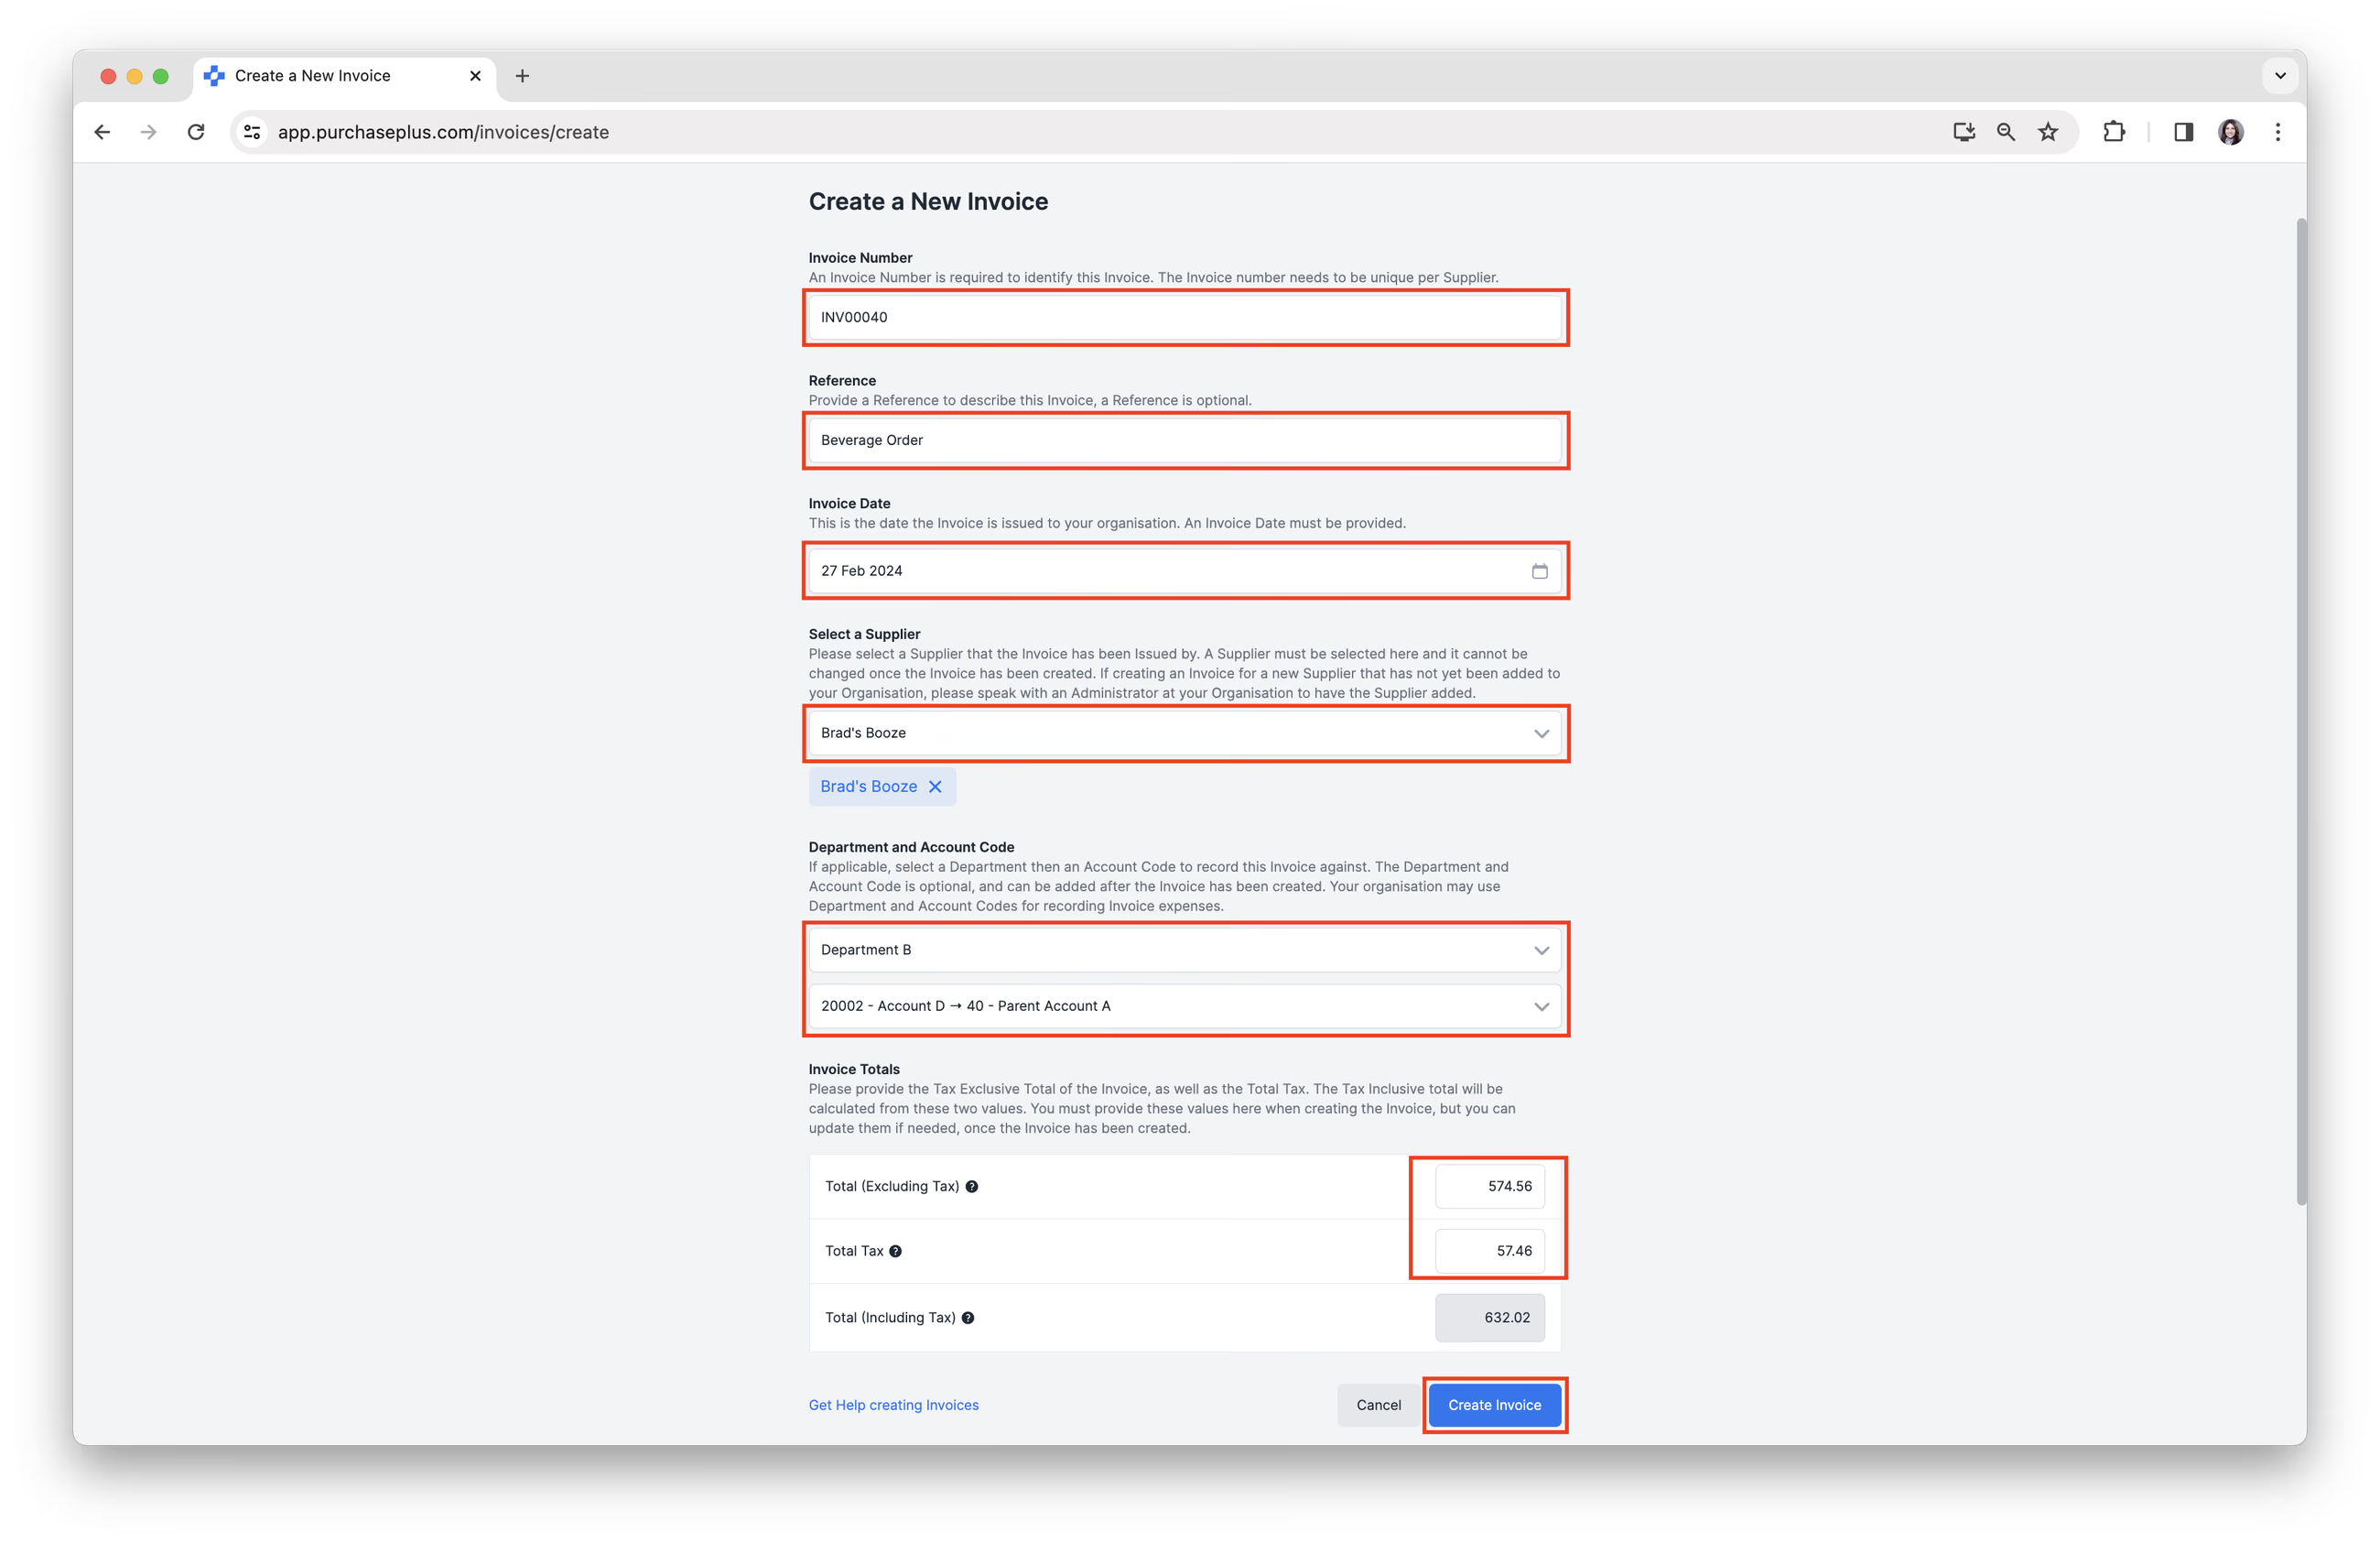
Complete all the applicable fields for the New Invoice and click [Create Invoice]. You can modify the Invoice Tax and Invoice Totals after the Invoice has been created.
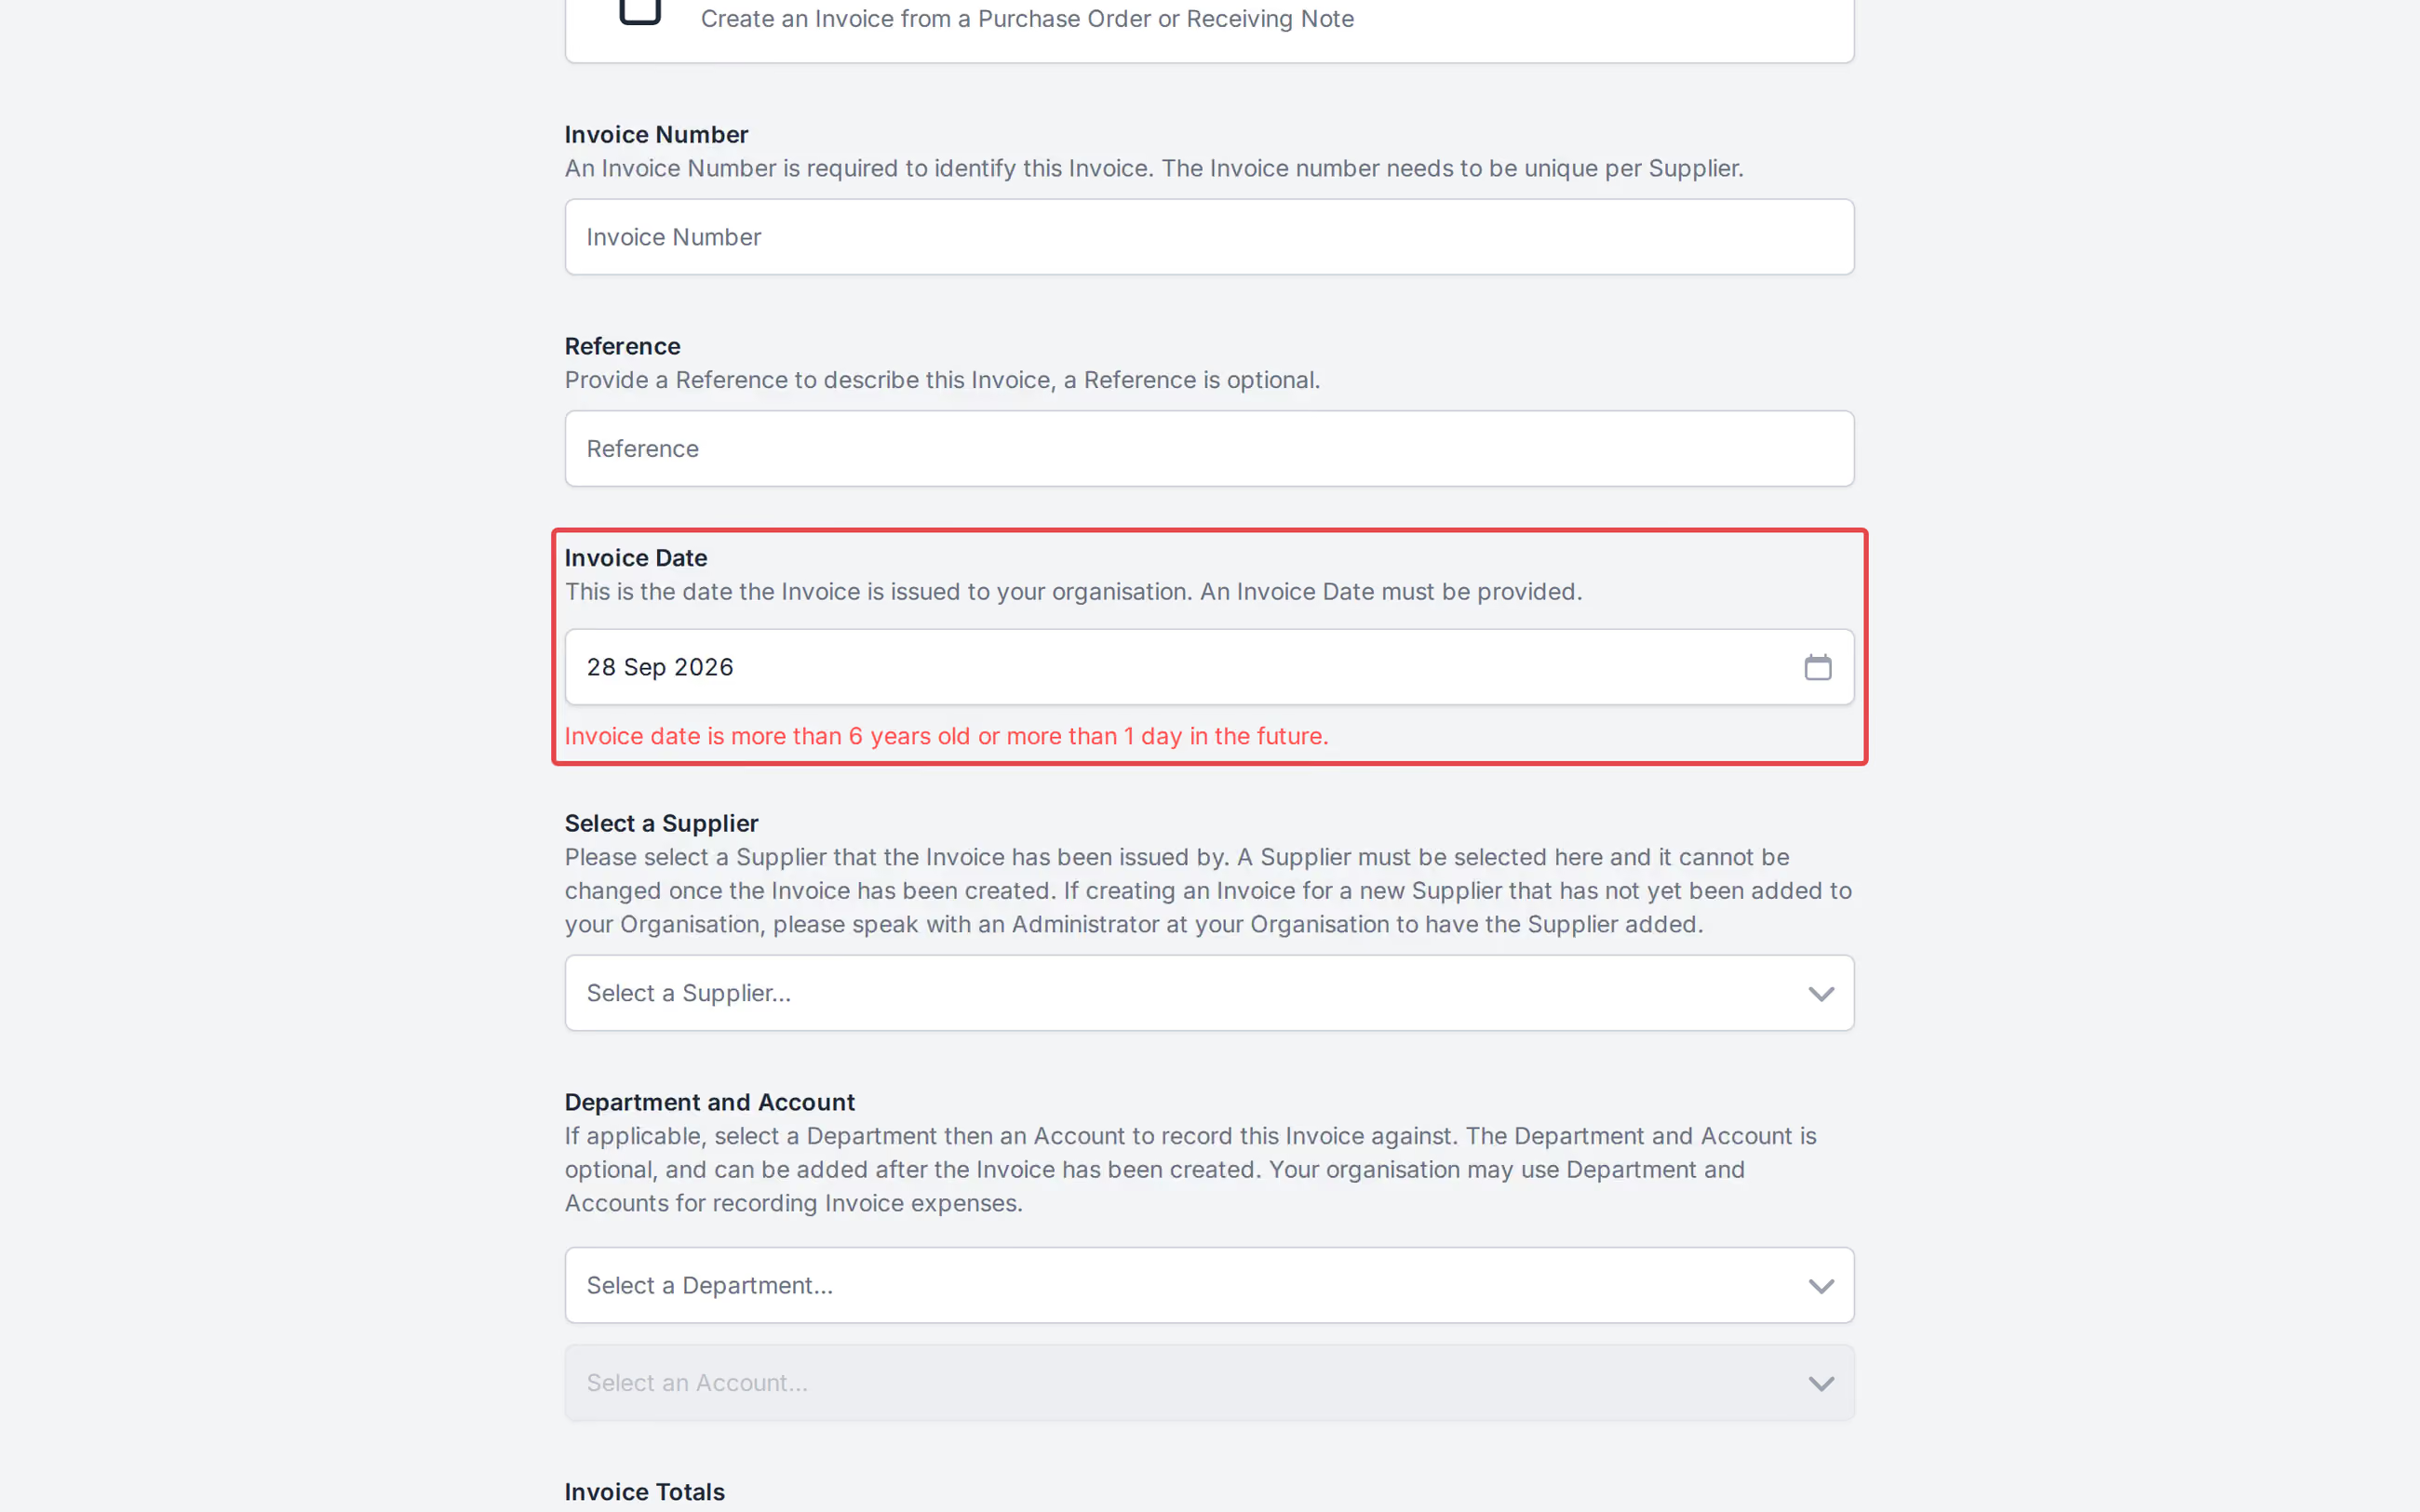
If the Invoice Date is more than 1 day in the future, a warning is shown. That future warning does not prevent you from saving.
Note - An Invoice Date more than 6 years in the past, or more than 6 years in the future, cannot be saved. The same warning appears for a date that is more than 6 years old, and the Invoice will not save until the date is corrected.
Adding Invoice Lines
Once the Invoice is created, you will arrive in the Invoice and find that it will initially contain zero line items. Click [Add Invoice Line] to add one or more Invoice Lines to your Invoice.
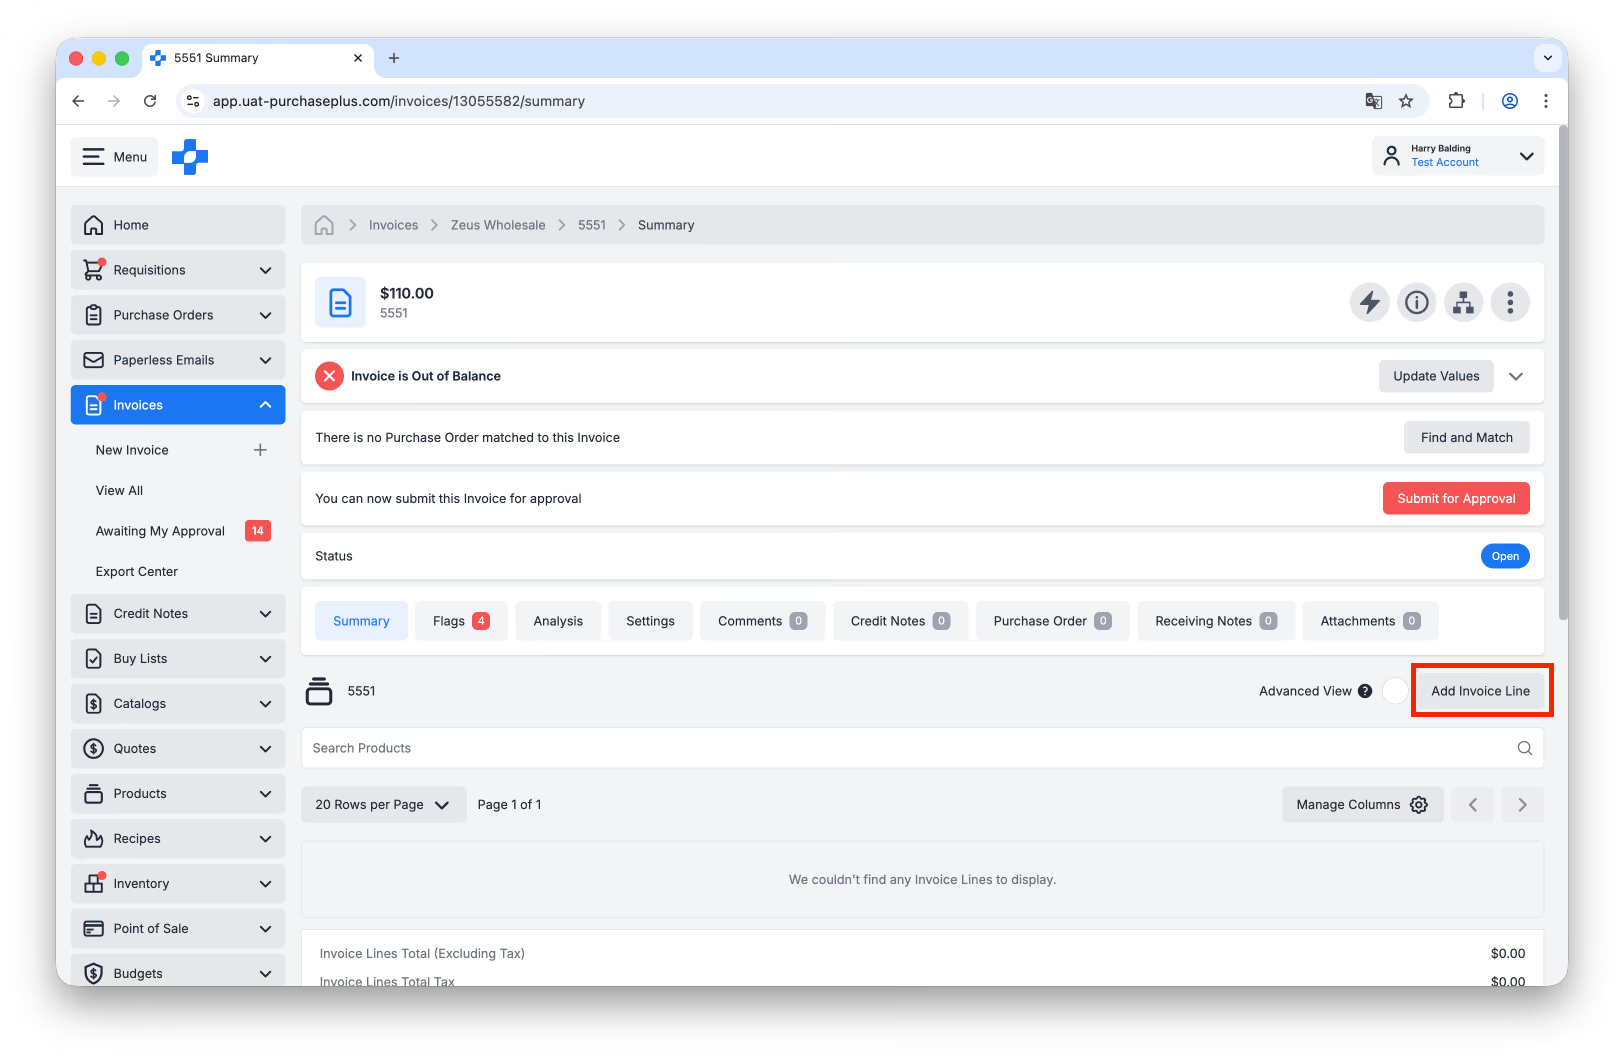
'Adding an Invoice Line' means adding a Product, Quantity, Unit Price and Tax % to the invoice. For each Invoice Line:
- You can [Search by Name or Brand],
- Use [Advanced Product Search], or
- [Create a New Product] if needed.
We recommend using Advanced Product Search to ensure you are adding the correct product to your Invoice.
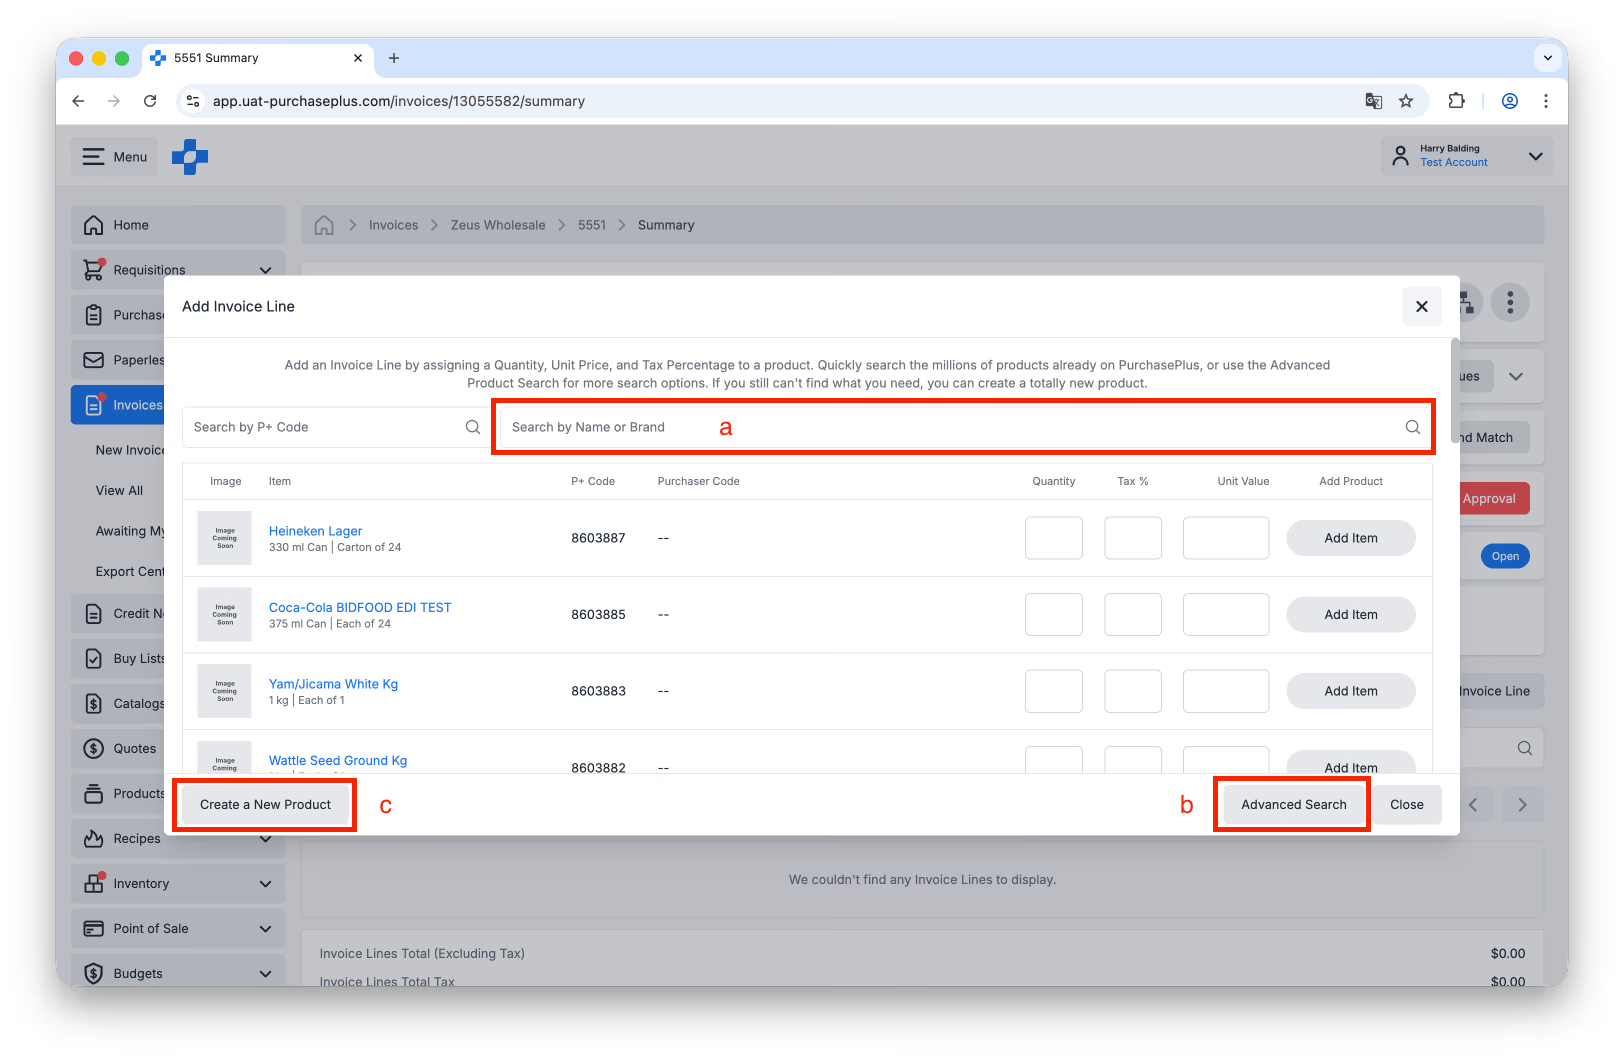
Once you find and have selected the correct Product, complete the Invoice line item fields, then click [Add Invoice Line].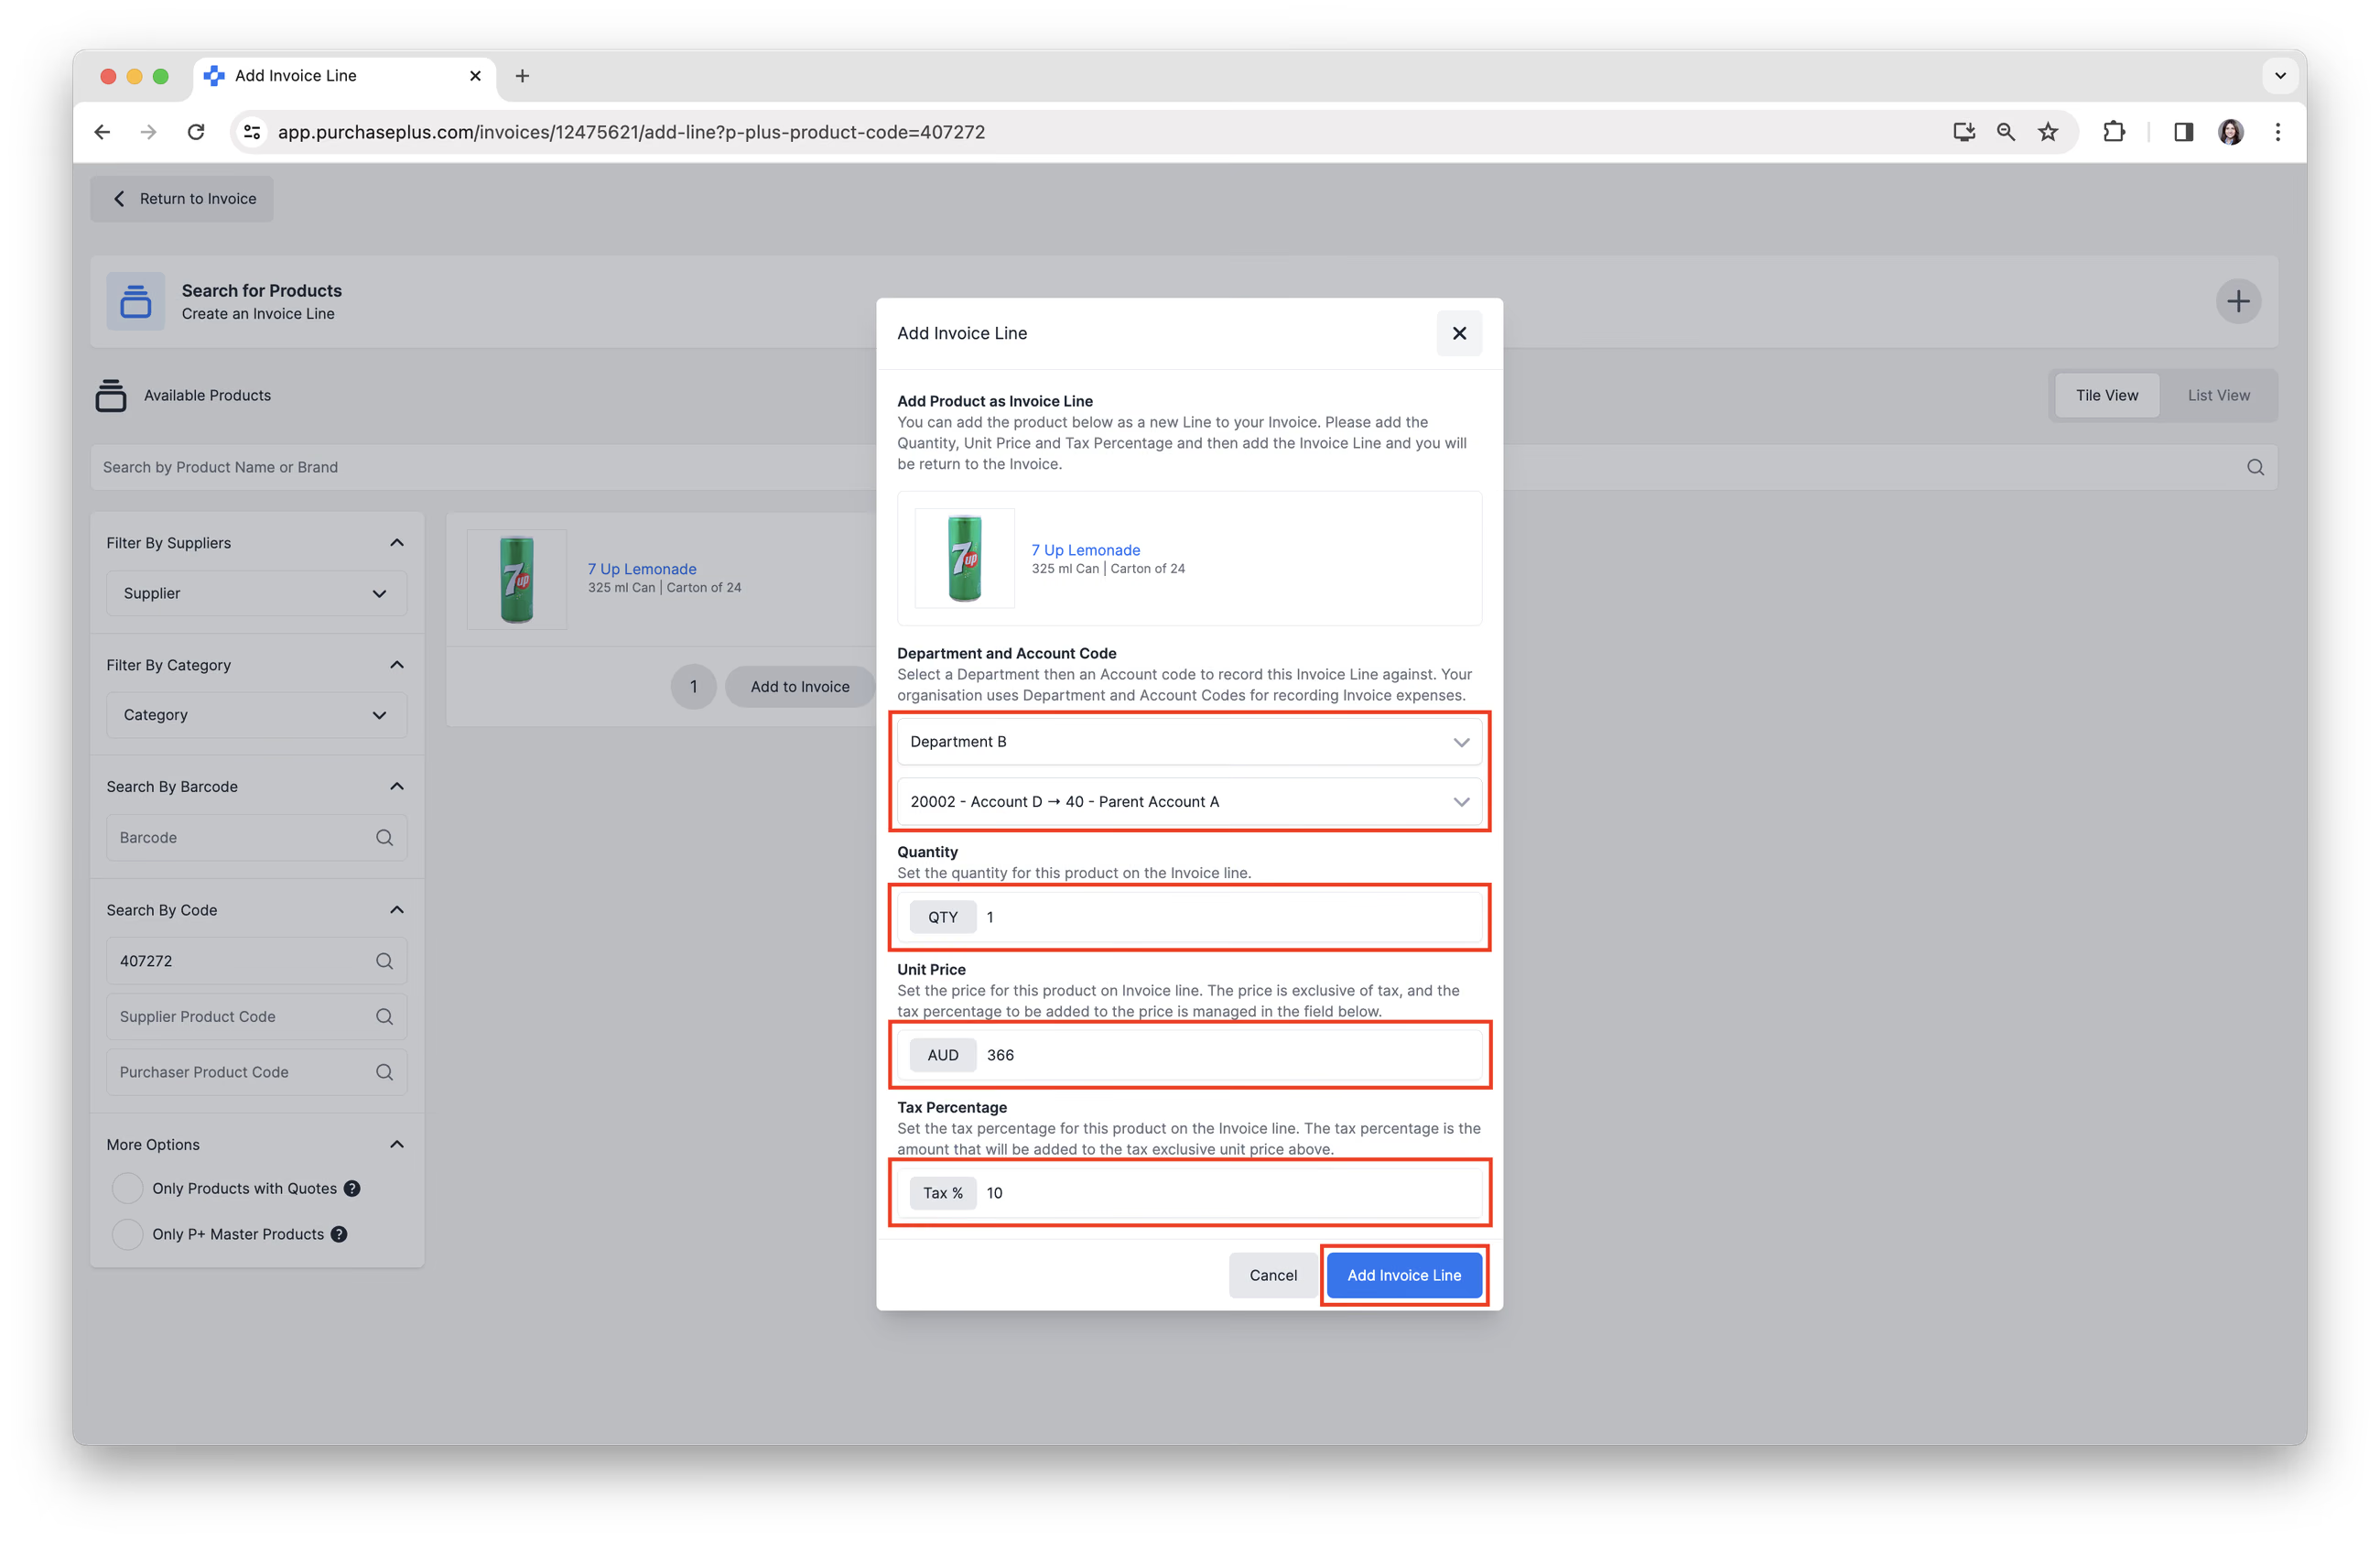
Invoice Lines can have Sub-Lines, which are powerful methods to relate and communicate additional data regarding an Invoice Line. For more information about Sub-Lines, please see our article: Update Invoice Lines using Advanced Mode.
Option 2: Drag and Drop PDF Invoice
Please Note: This feature is experimental, and currently will only be successful for simple PDF Invoices, with simple line items. Please try it out, and we will continue improving this feature in the coming weeks so that more complicated multi-page Invoices will be supported.
This option uses our AI Scanning feature. On a desktop, drop the PDF in the upload field, select the Supplier, and decide whether to mark the Scanning Task as Locked.
On a phone, creating an Invoice from a scan uses the same guided capture as [Create New Scanning Tasks]. Click [Open Camera] to photograph each page, then [Use Scan], or upload a PDF from your device. Desktop upload is unchanged.
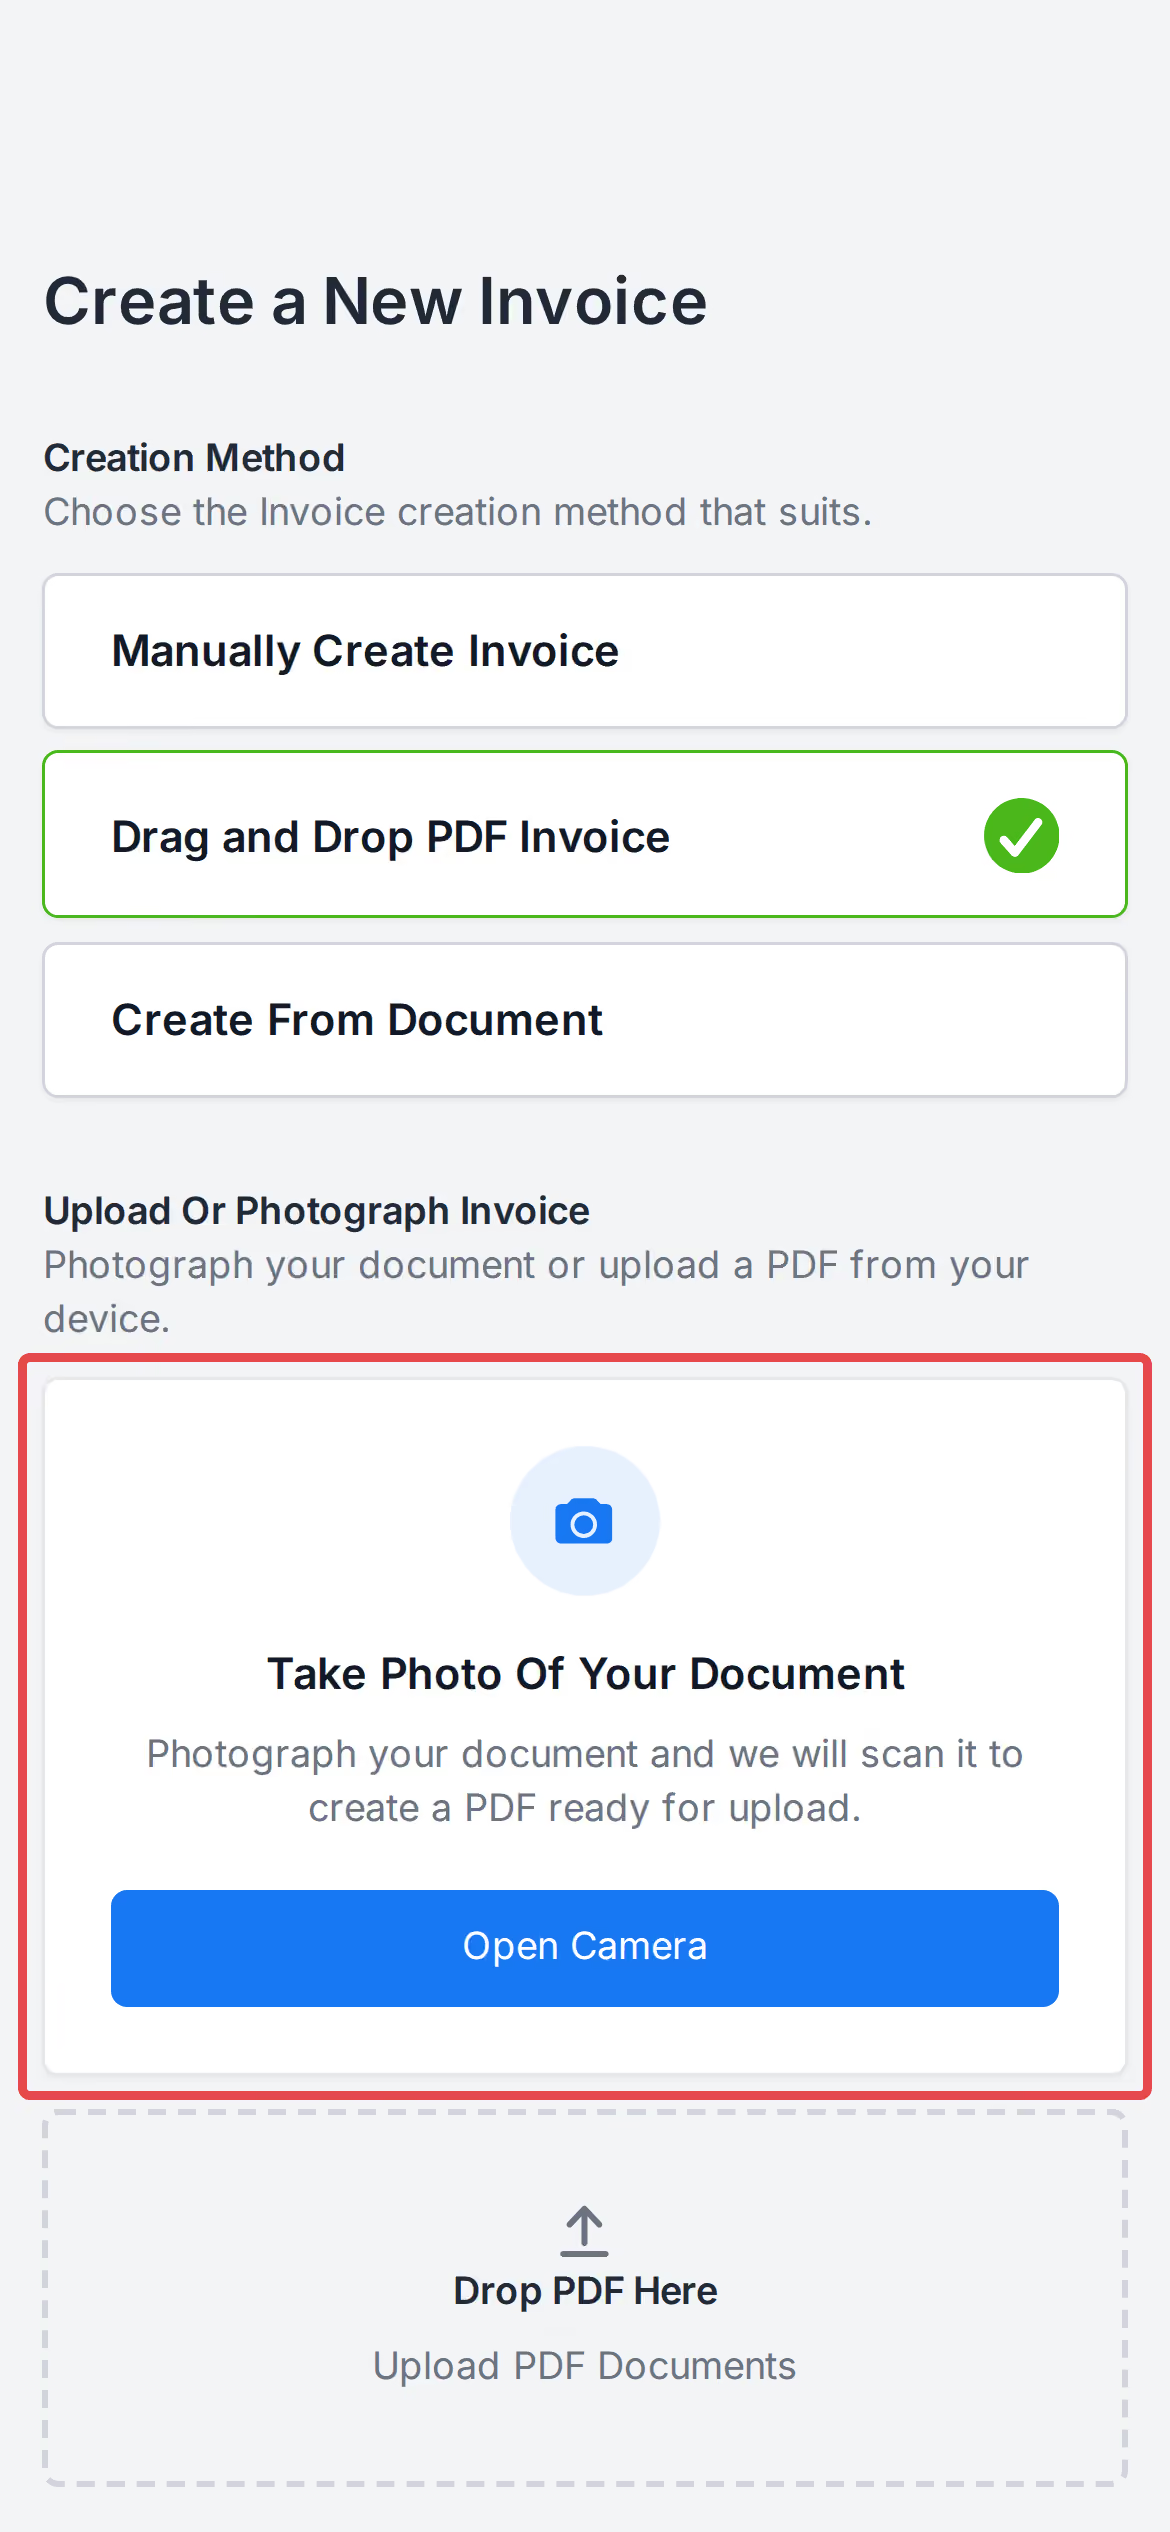
If the [Mark as Locked] option is selected, the Scanning Task will be Locked and will remain in the Scanned state. Manual human review will be required prior to an Invoice or Credit Note being created:
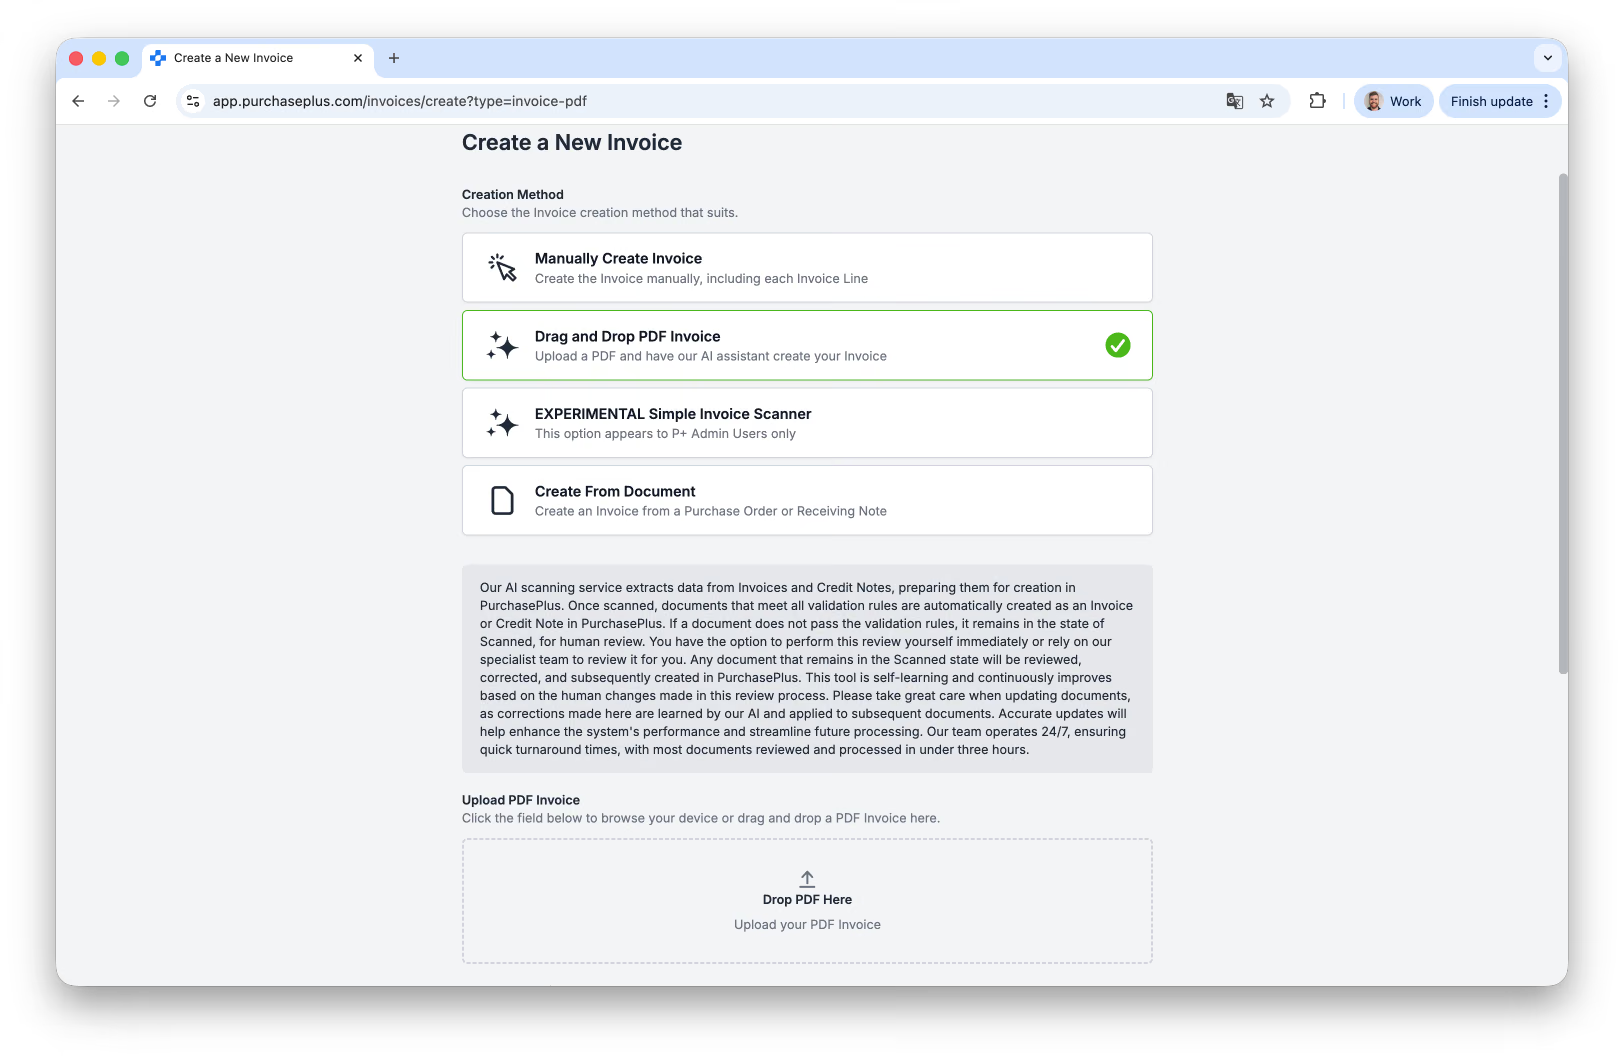
And the supplied PDF will be scanned using our new AI technology and then created in PurchasePlus as an Invoice.
Certain Invoice header details will be detected and pre-filled by our AI Scanner, like:
- Supplier (if a match is found),
- PO Number (if a PO Number is available),
- Department and Account Code (if applicable).
Similarly, our AI Scanner will detect and pre-fill certain Invoice Line-level details, like:
- Product (if a match is found in our database), and
- Category and Sub-Category of each new product on each Invoice Line (if available).
The Invoice scan must be checked by a PurchasePlus user at your Organisation, prior to it being officially created as a regular Invoice. Once you are happy with the Invoice, click [View Invoice] in the top-right hand corner of the screen:
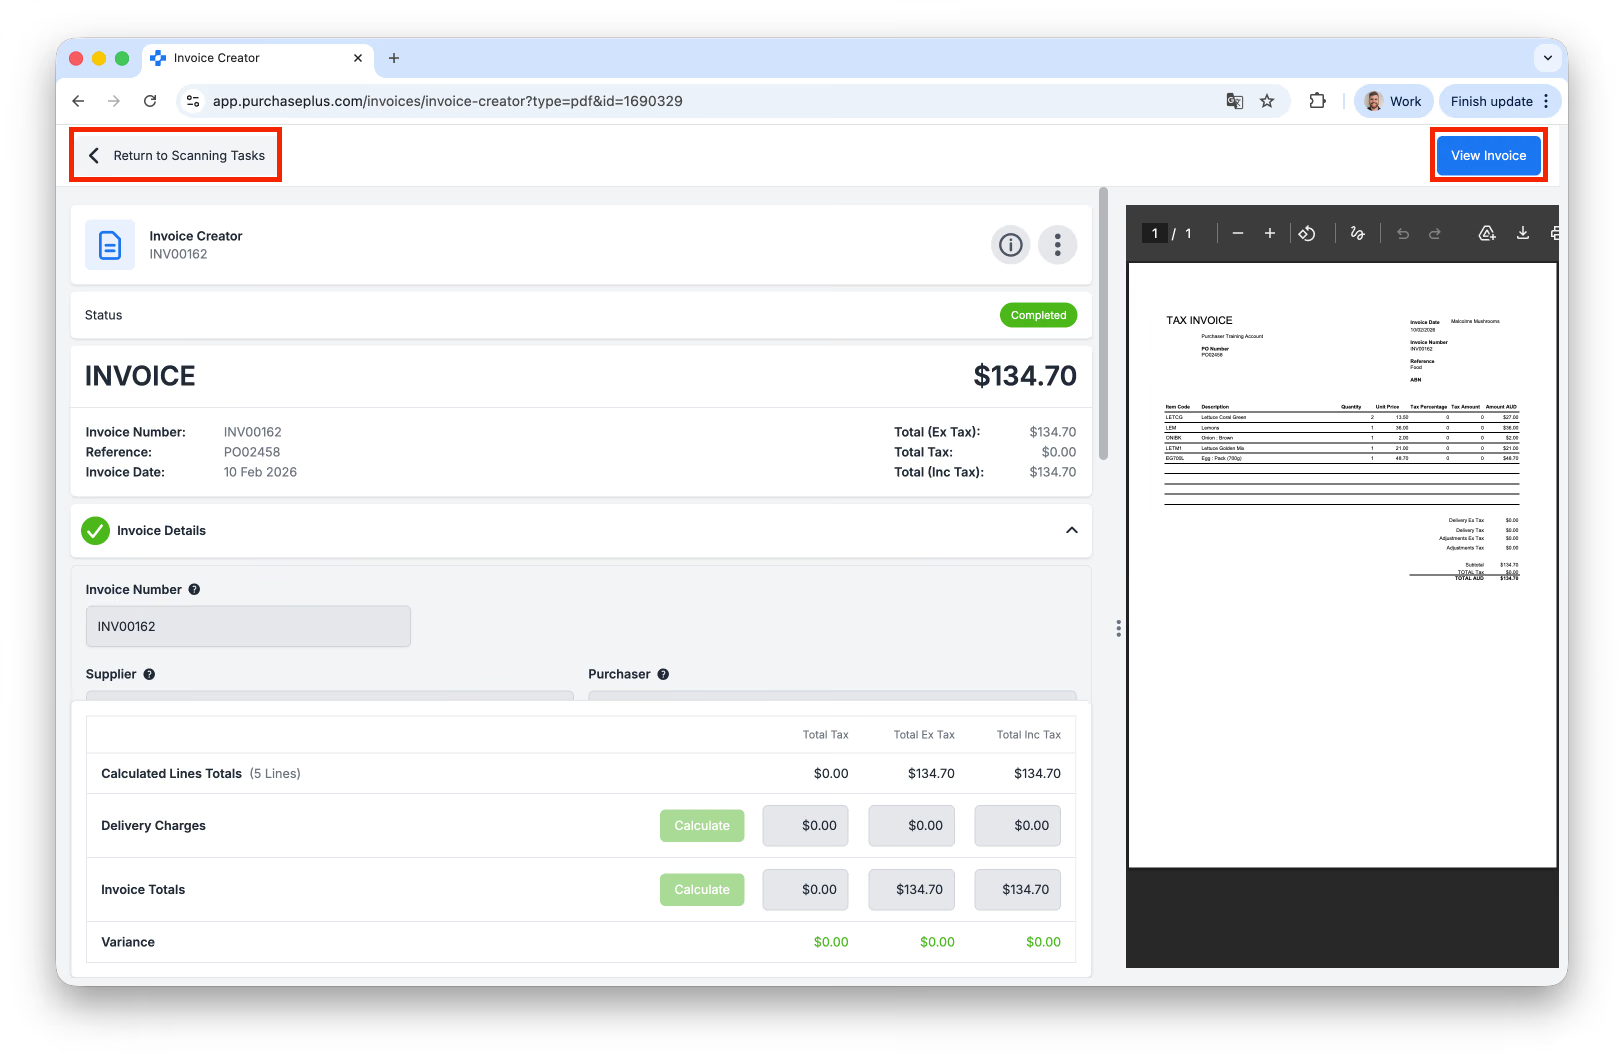 Depending on your Organisation's configuration, clicking [View Invoice] in the image above may automatically process the Invoice against your Flag Settings and Thresholds, so that it initially appears in an Awaiting Approval or Reconciled state (instead of an Open State). If this setting is not enabled, the Invoice will be appear in an Open State, ready for manual review.
Alternatively, if enabled for your Organisation, you may upload a Invoice in [Invoices] → AI Scanning Inbox as a Scan Task, and the AI Scanner will create the Invoice or Credit Note in a similar fashion as the method described above.
Option 3: Create from Document
Select a Purchase Order or Goods Receiving Note in the drop-down fields:
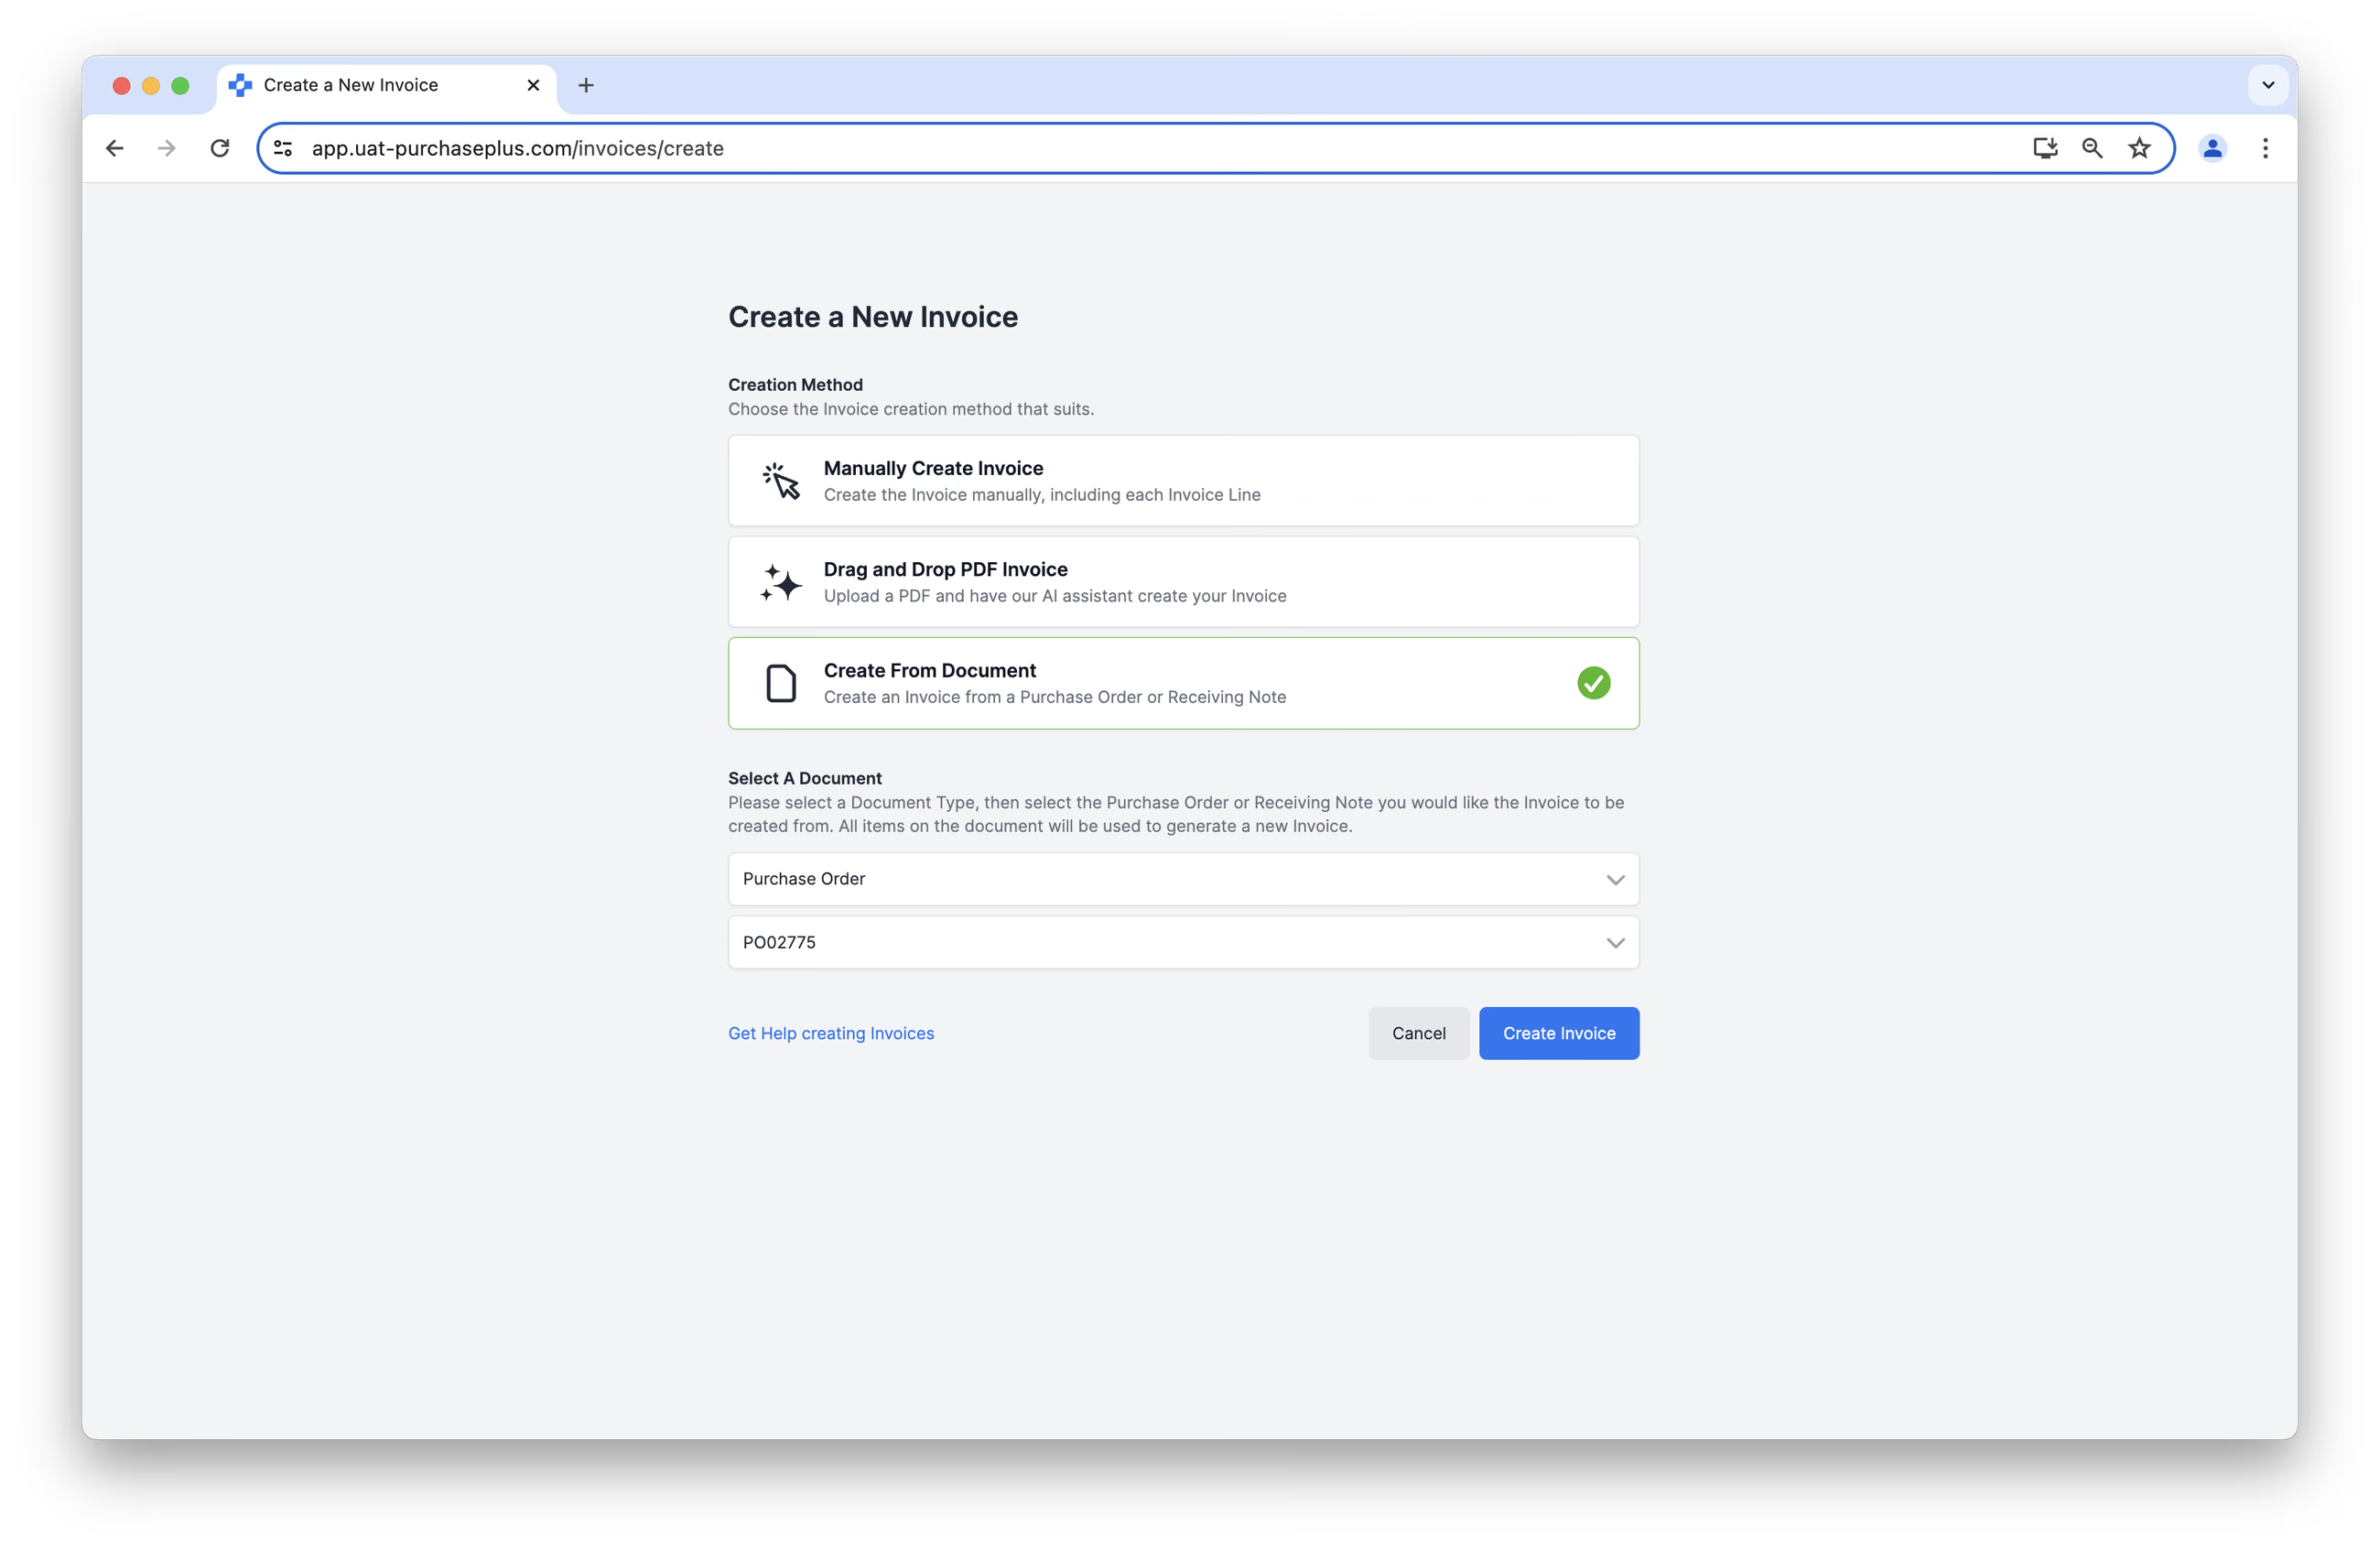
And the Invoice will be generated from the information on the selected Purchase Order or Goods Receiving Note. Once again, the result must be checked by a PurchasePlus user at your Organisation, prior to it being officially created as a regular Invoice.
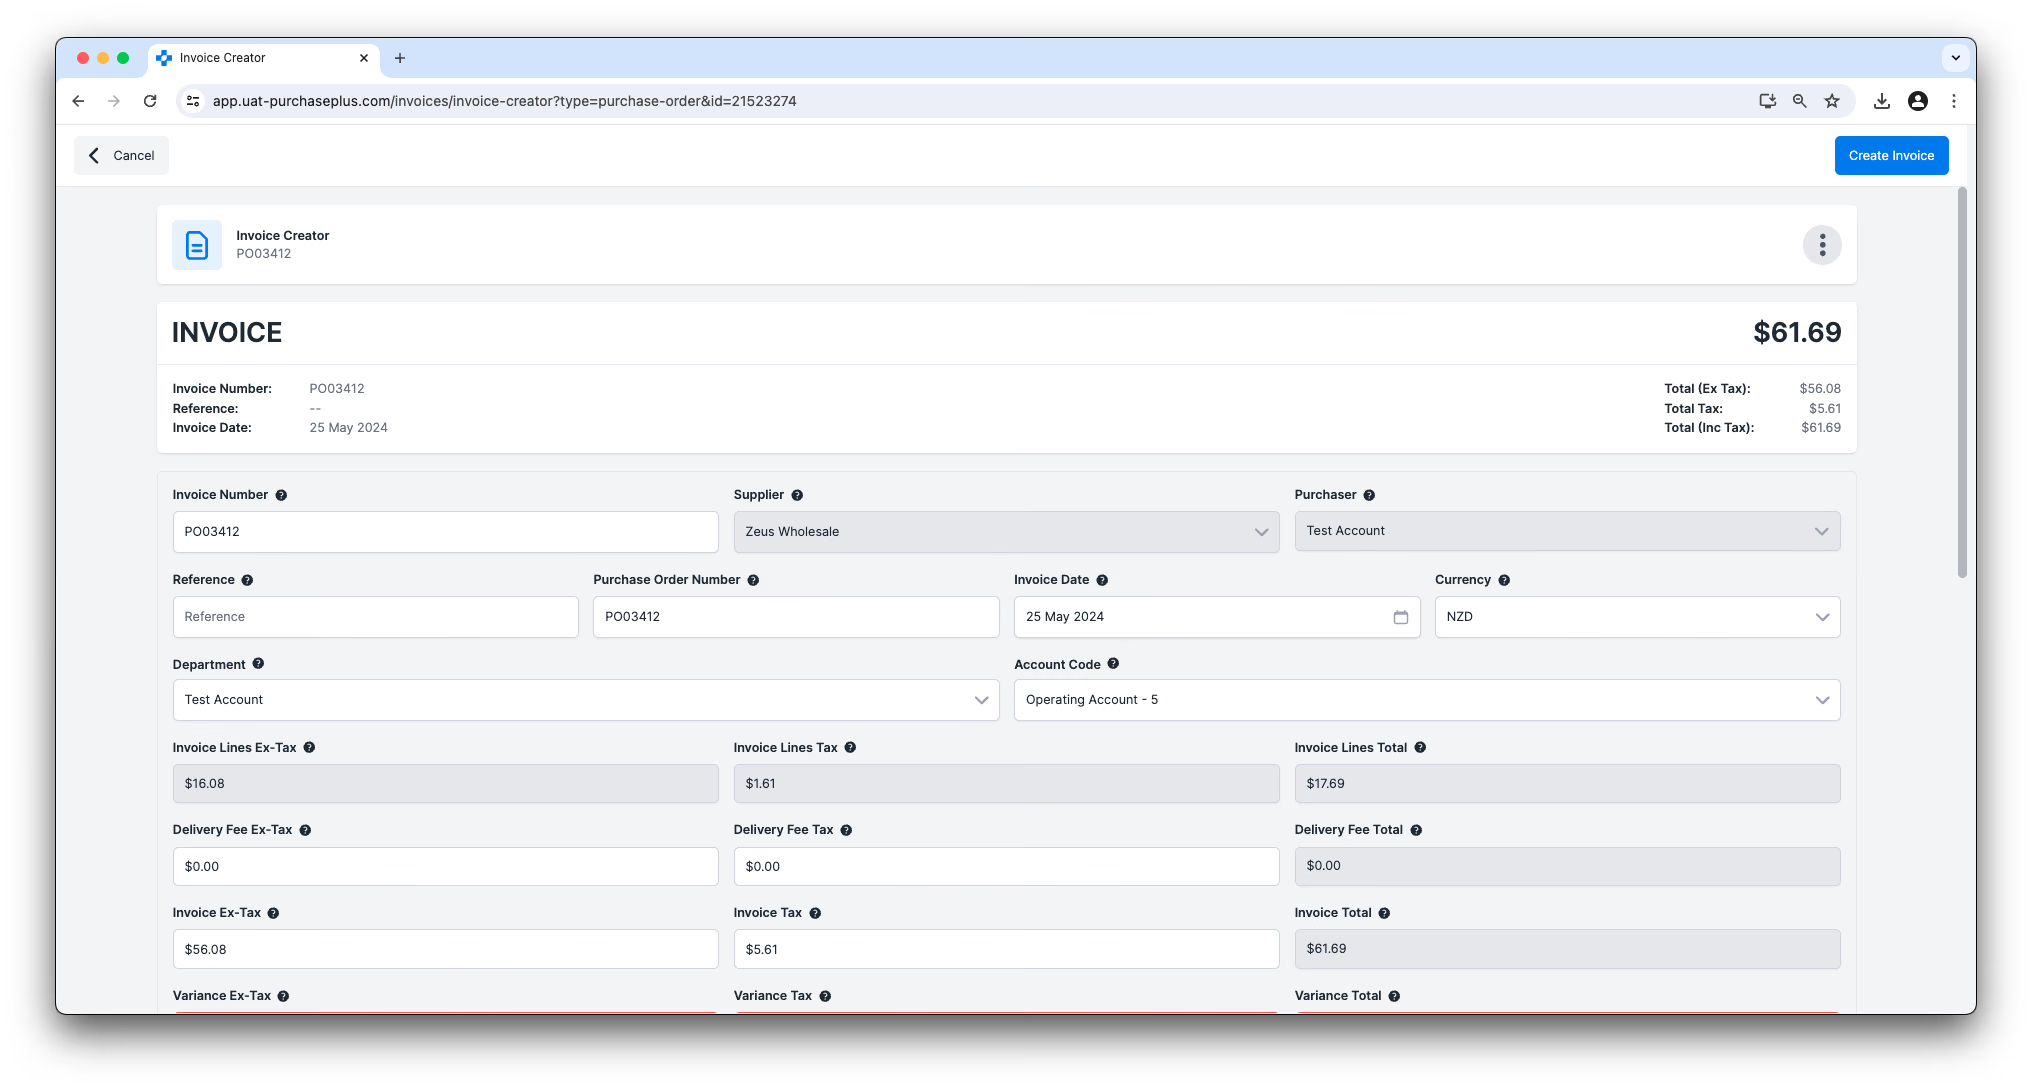
As with Option 2, depending on your Organisation's configuration, clicking [Create Invoice] in the image above may automatically process the Invoice against your Flag Settings and Thresholds, so that it initially appears in an Awaiting Approval or Reconciled state (instead of an Open State).
Match Invoice to Purchase Order
1. If applicable, you will need to match a Purchase Order to your Invoice. Click [Find and Match] Purchase Order, to match the Invoice to the appropriate Purchase Order.
2. Select [Match] the correct Purchase Order, then click [Apply Match].
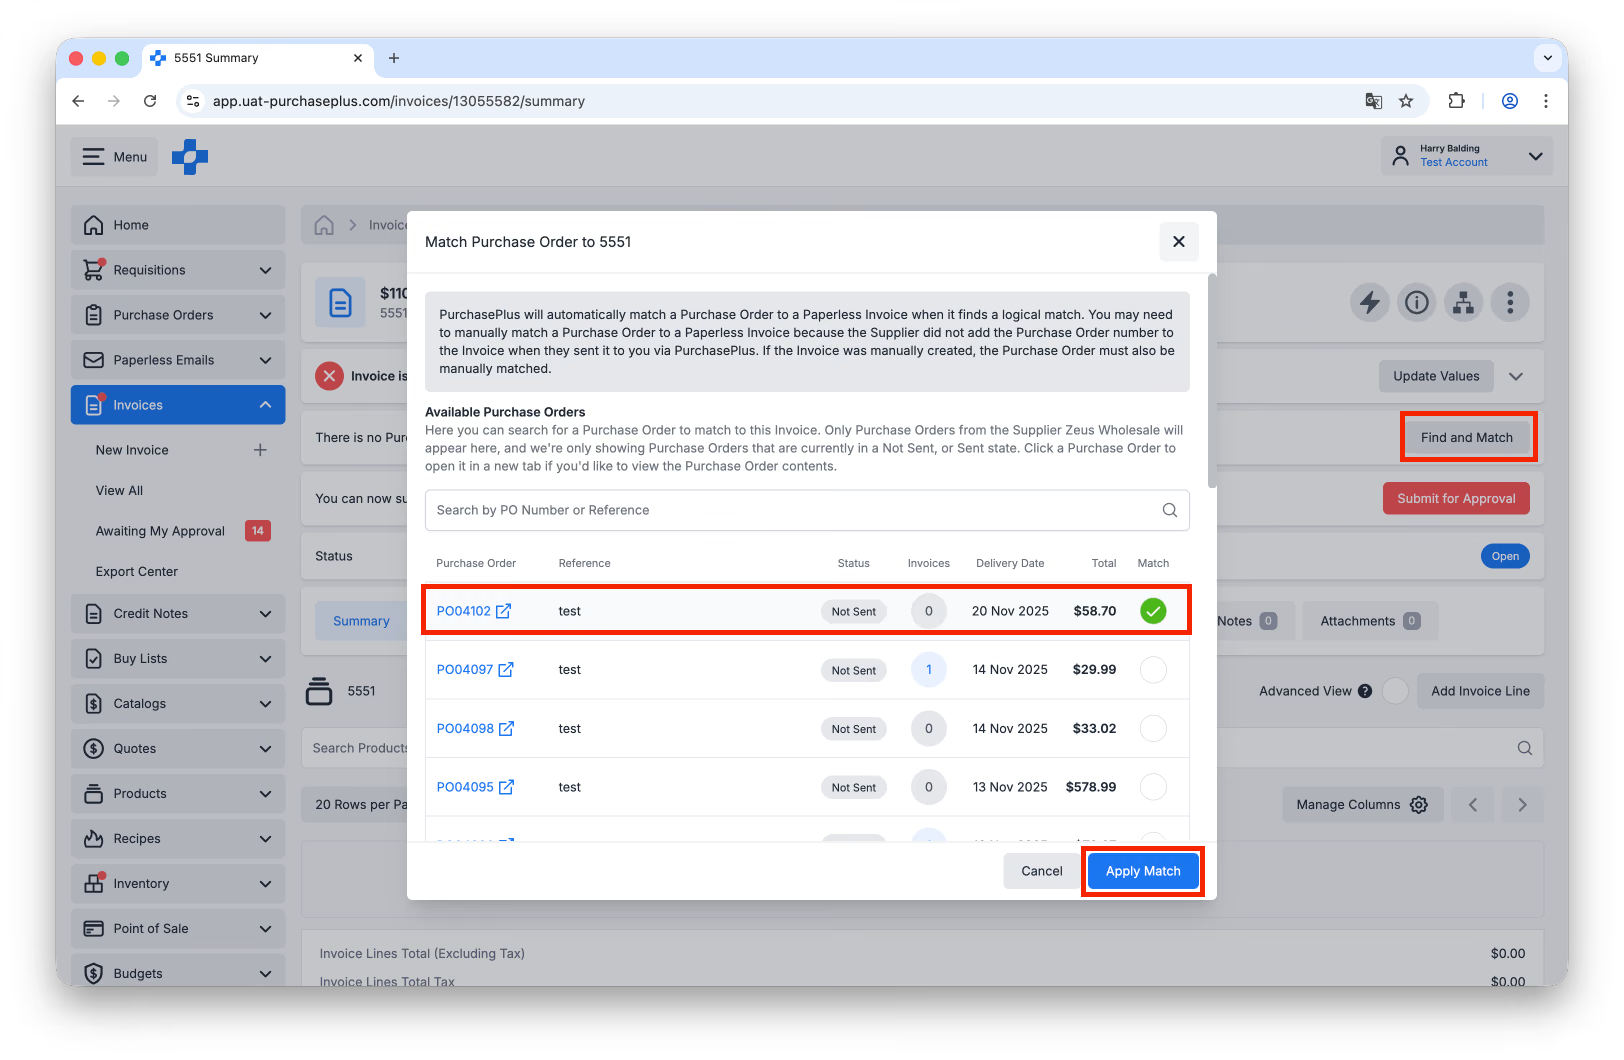
Please see our Match a Purchase Order to an Invoice article to learn more about matching Invoices and Purchase Orders.
Review Invoice Flags
Depending on how your Organization has been configured, Flags may be raised on the Invoice (or on each Invoice line), and these may be required to be resolved before the Invoice can progress to the Reconciled state and be eligible for Export. For example, there may be an unacceptable discrepancy between the Unit Price on the Invoice and the corresponding line on the matched Purchase Order.
After addressing all the Flags on the Invoice, you will be able to choose whether to mark the Invoice as Reconciled or Submit for Approval. If you have the option to Submit the Invoice for Approval, it will need to undergo a review and approval process by another user within your Organization in order to progress to the Reconciled state. Conversely, if you have the option to mark the Invoice as Reconciled, it means that you have successfully addressed all the Flags and you are able to progress the Invoice directly to the Reconciled state.
Once in a Reconciled state, yourself or another user from your Organisation can decide that the Invoice is ready to be Exported to your external accounting platform.
See our Approve an Invoice article to learn more about reviewing and approving Invoices.