

Stocktakes
Stocktakes
Stocktake
A Stocktake is a method of verifying the quantity of Stock Items that are being held in a Stock Location. A Stocktake is conducted at a Stock Location, and has a defined ‘Period’ (i.e. a calendar year and a month). The Stocktake allows users at your Organization to count the Actual number of Stock Items in the Location, so that this count can then be compared to the Expected number of Stock Items in the Location. The difference between the Actual and the Expected count must be accounted for in a Variance Transfer, prior to the Stocktake being Closed.
The abilities to Manage Stocktakes and Close Stocktakes are controlled by independent user permissions, such is the importance of Stocktakes in good Inventory Management. Users with Manage Stocktakes can also delete an In Progress Stocktake.
Viewing Stocktakes
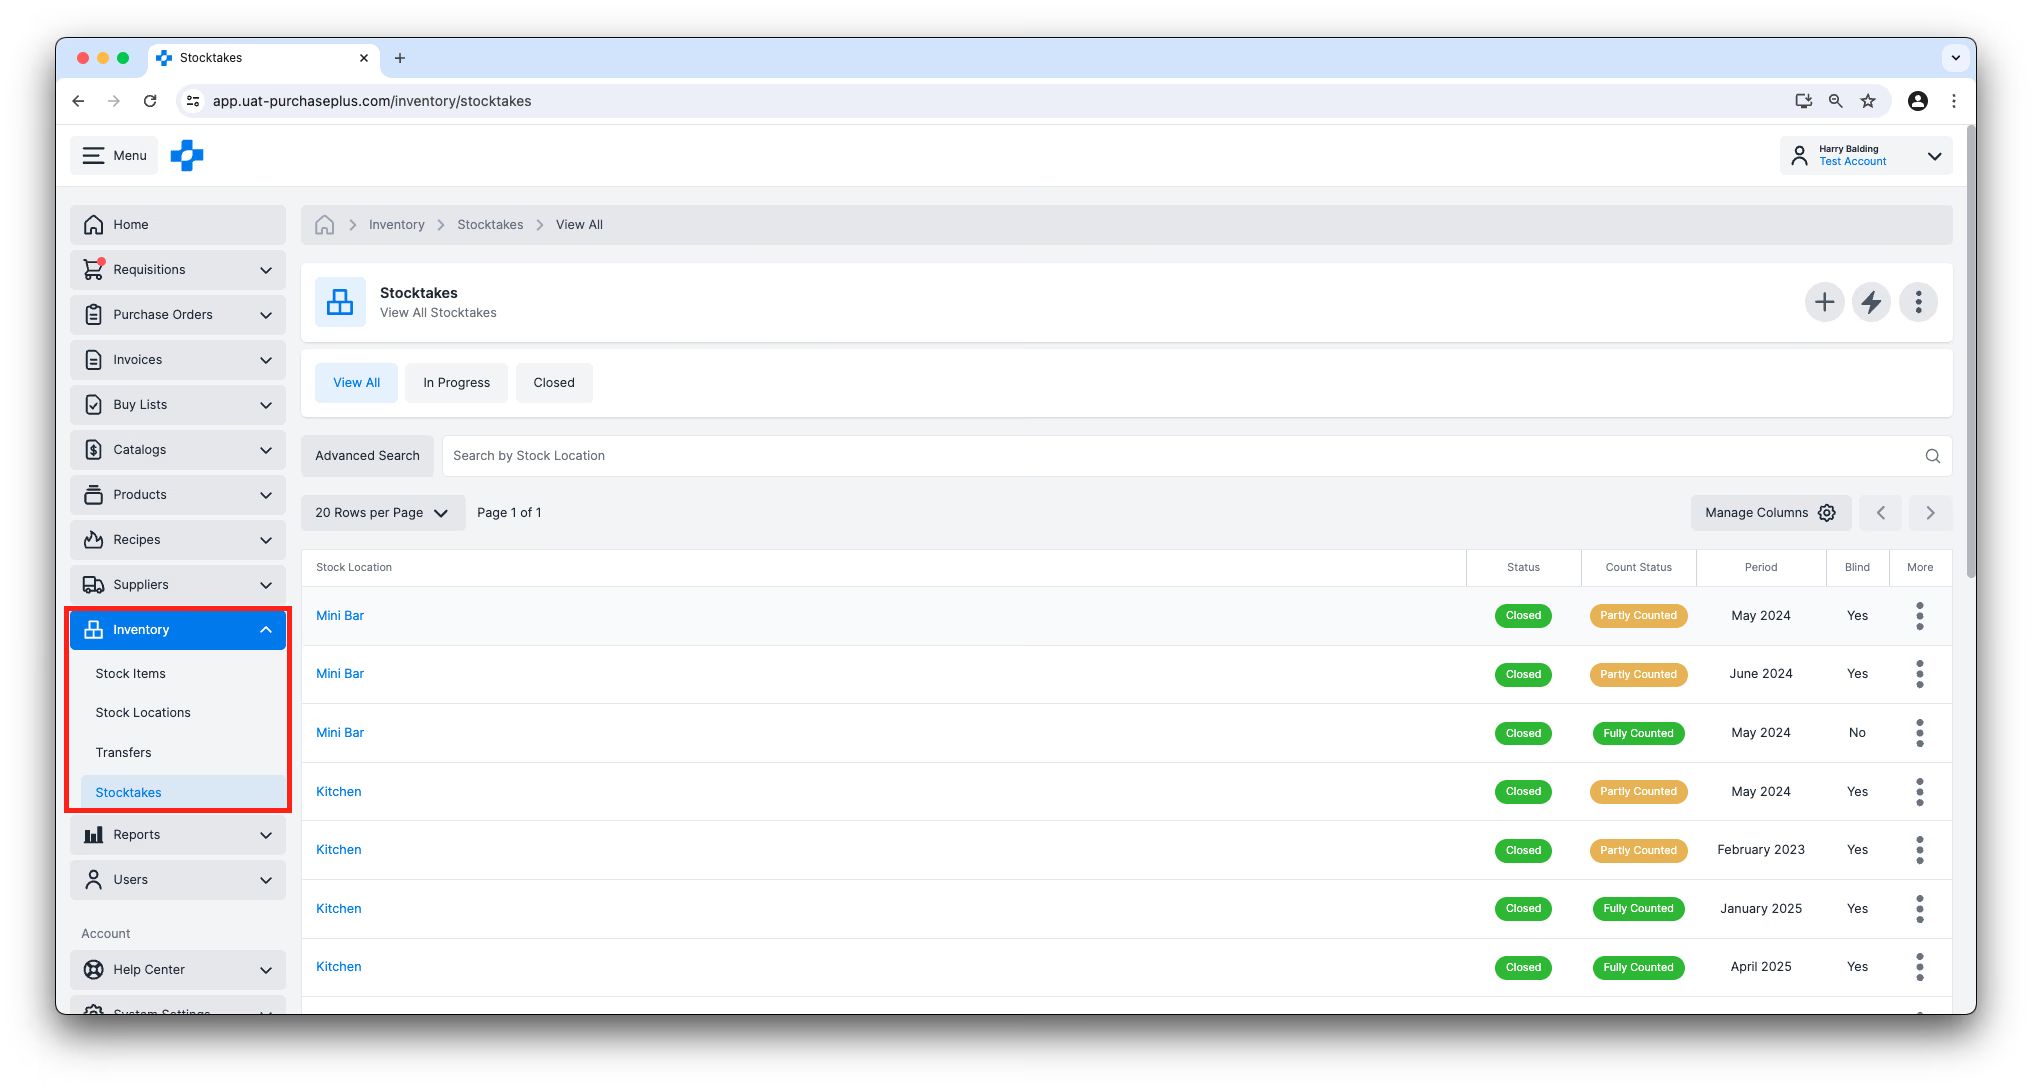
Users can view their Organization’s Stocktakes by navigating to [Inventory] → [Stocktakes] in the side navigation bar.
You can view the details of any single Stocktake in the table by clicking the Stock Location Name on the far left of the table.
Stocktake Status
A Stocktake can be in one of two States:
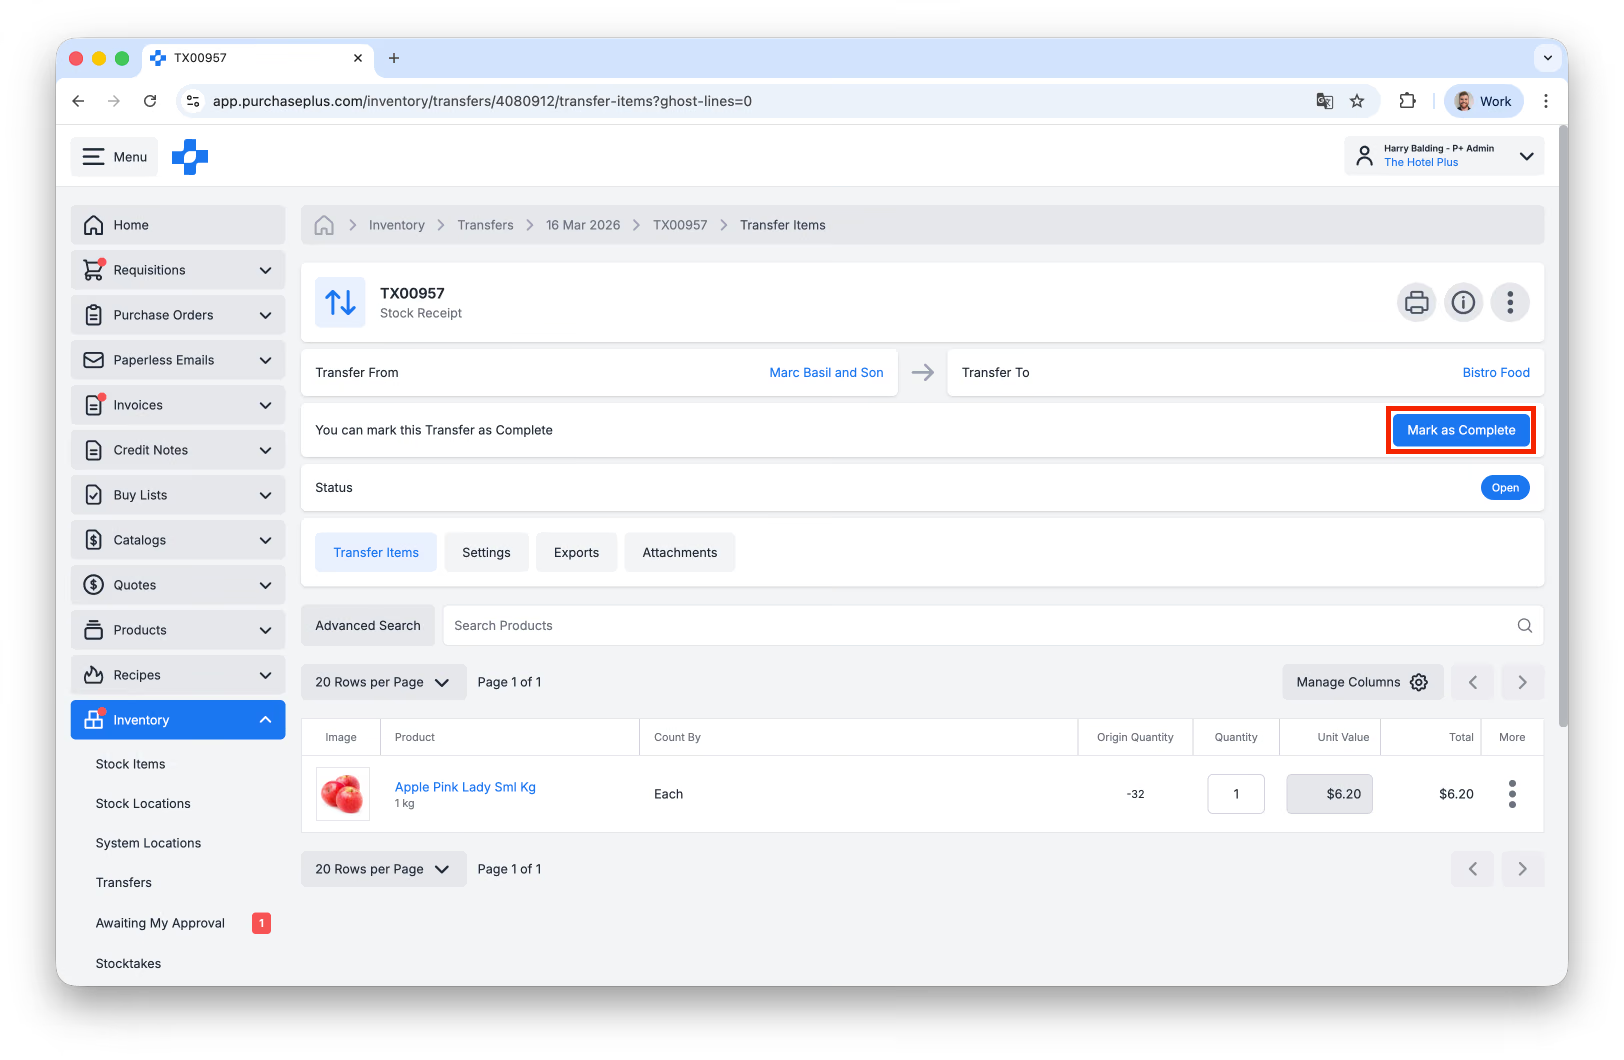
- In Progress: The Stocktake has been started and is ongoing. When a Stock Location has an In Progress Stocktake, Stock Receipts into Inventory are not automatic. Rather, users must locate the Stock Receipt Transfer and manually [Mark as Complete] when they are ready to do so. Once the Stocktake is Complete, Stock Receipts into Inventory are automatic again.
- Closed: The Stocktake has been marked as Complete, and any Variances have been accounted for.
Count Status
A Stocktake also has a Count Status, and this is different from the Stocktake Status. The different Count Statuses are:
- Not Counted: None of the Stock Items in the Stock Location have had a count recorded against them.
- Partially Counted: Some but not all of the Stock Items in the Stock Location have had a count recorded against them.
- Fully Counted: All of the Stock Items in the Stock Location have had a count recorded against them.
Starting a New Stocktake
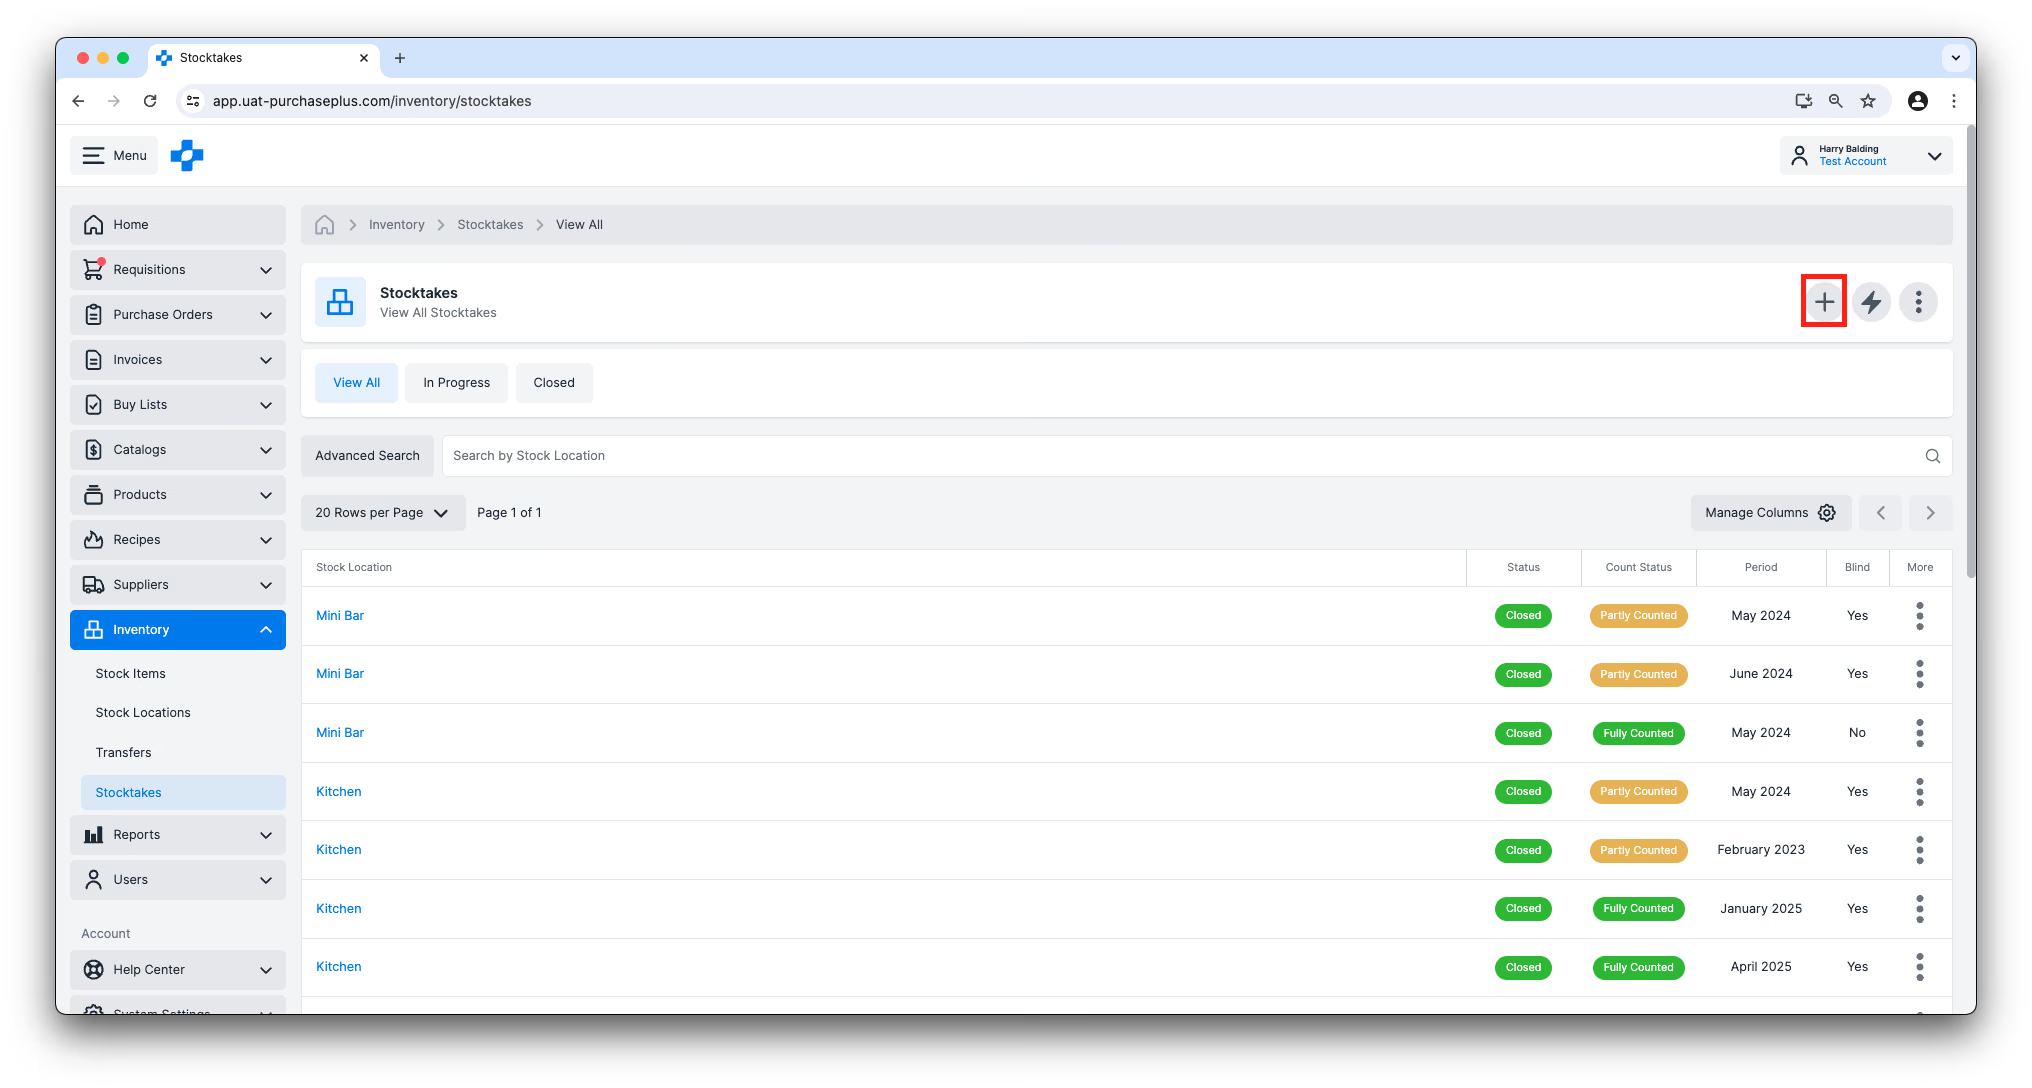
Users with the Manage Stocktakes permission can click the [Start a New Stocktake] button on the [Inventory] → [Stocktakes] page.
Users have the option to start a Stocktake at a Single Location or at All Locations:
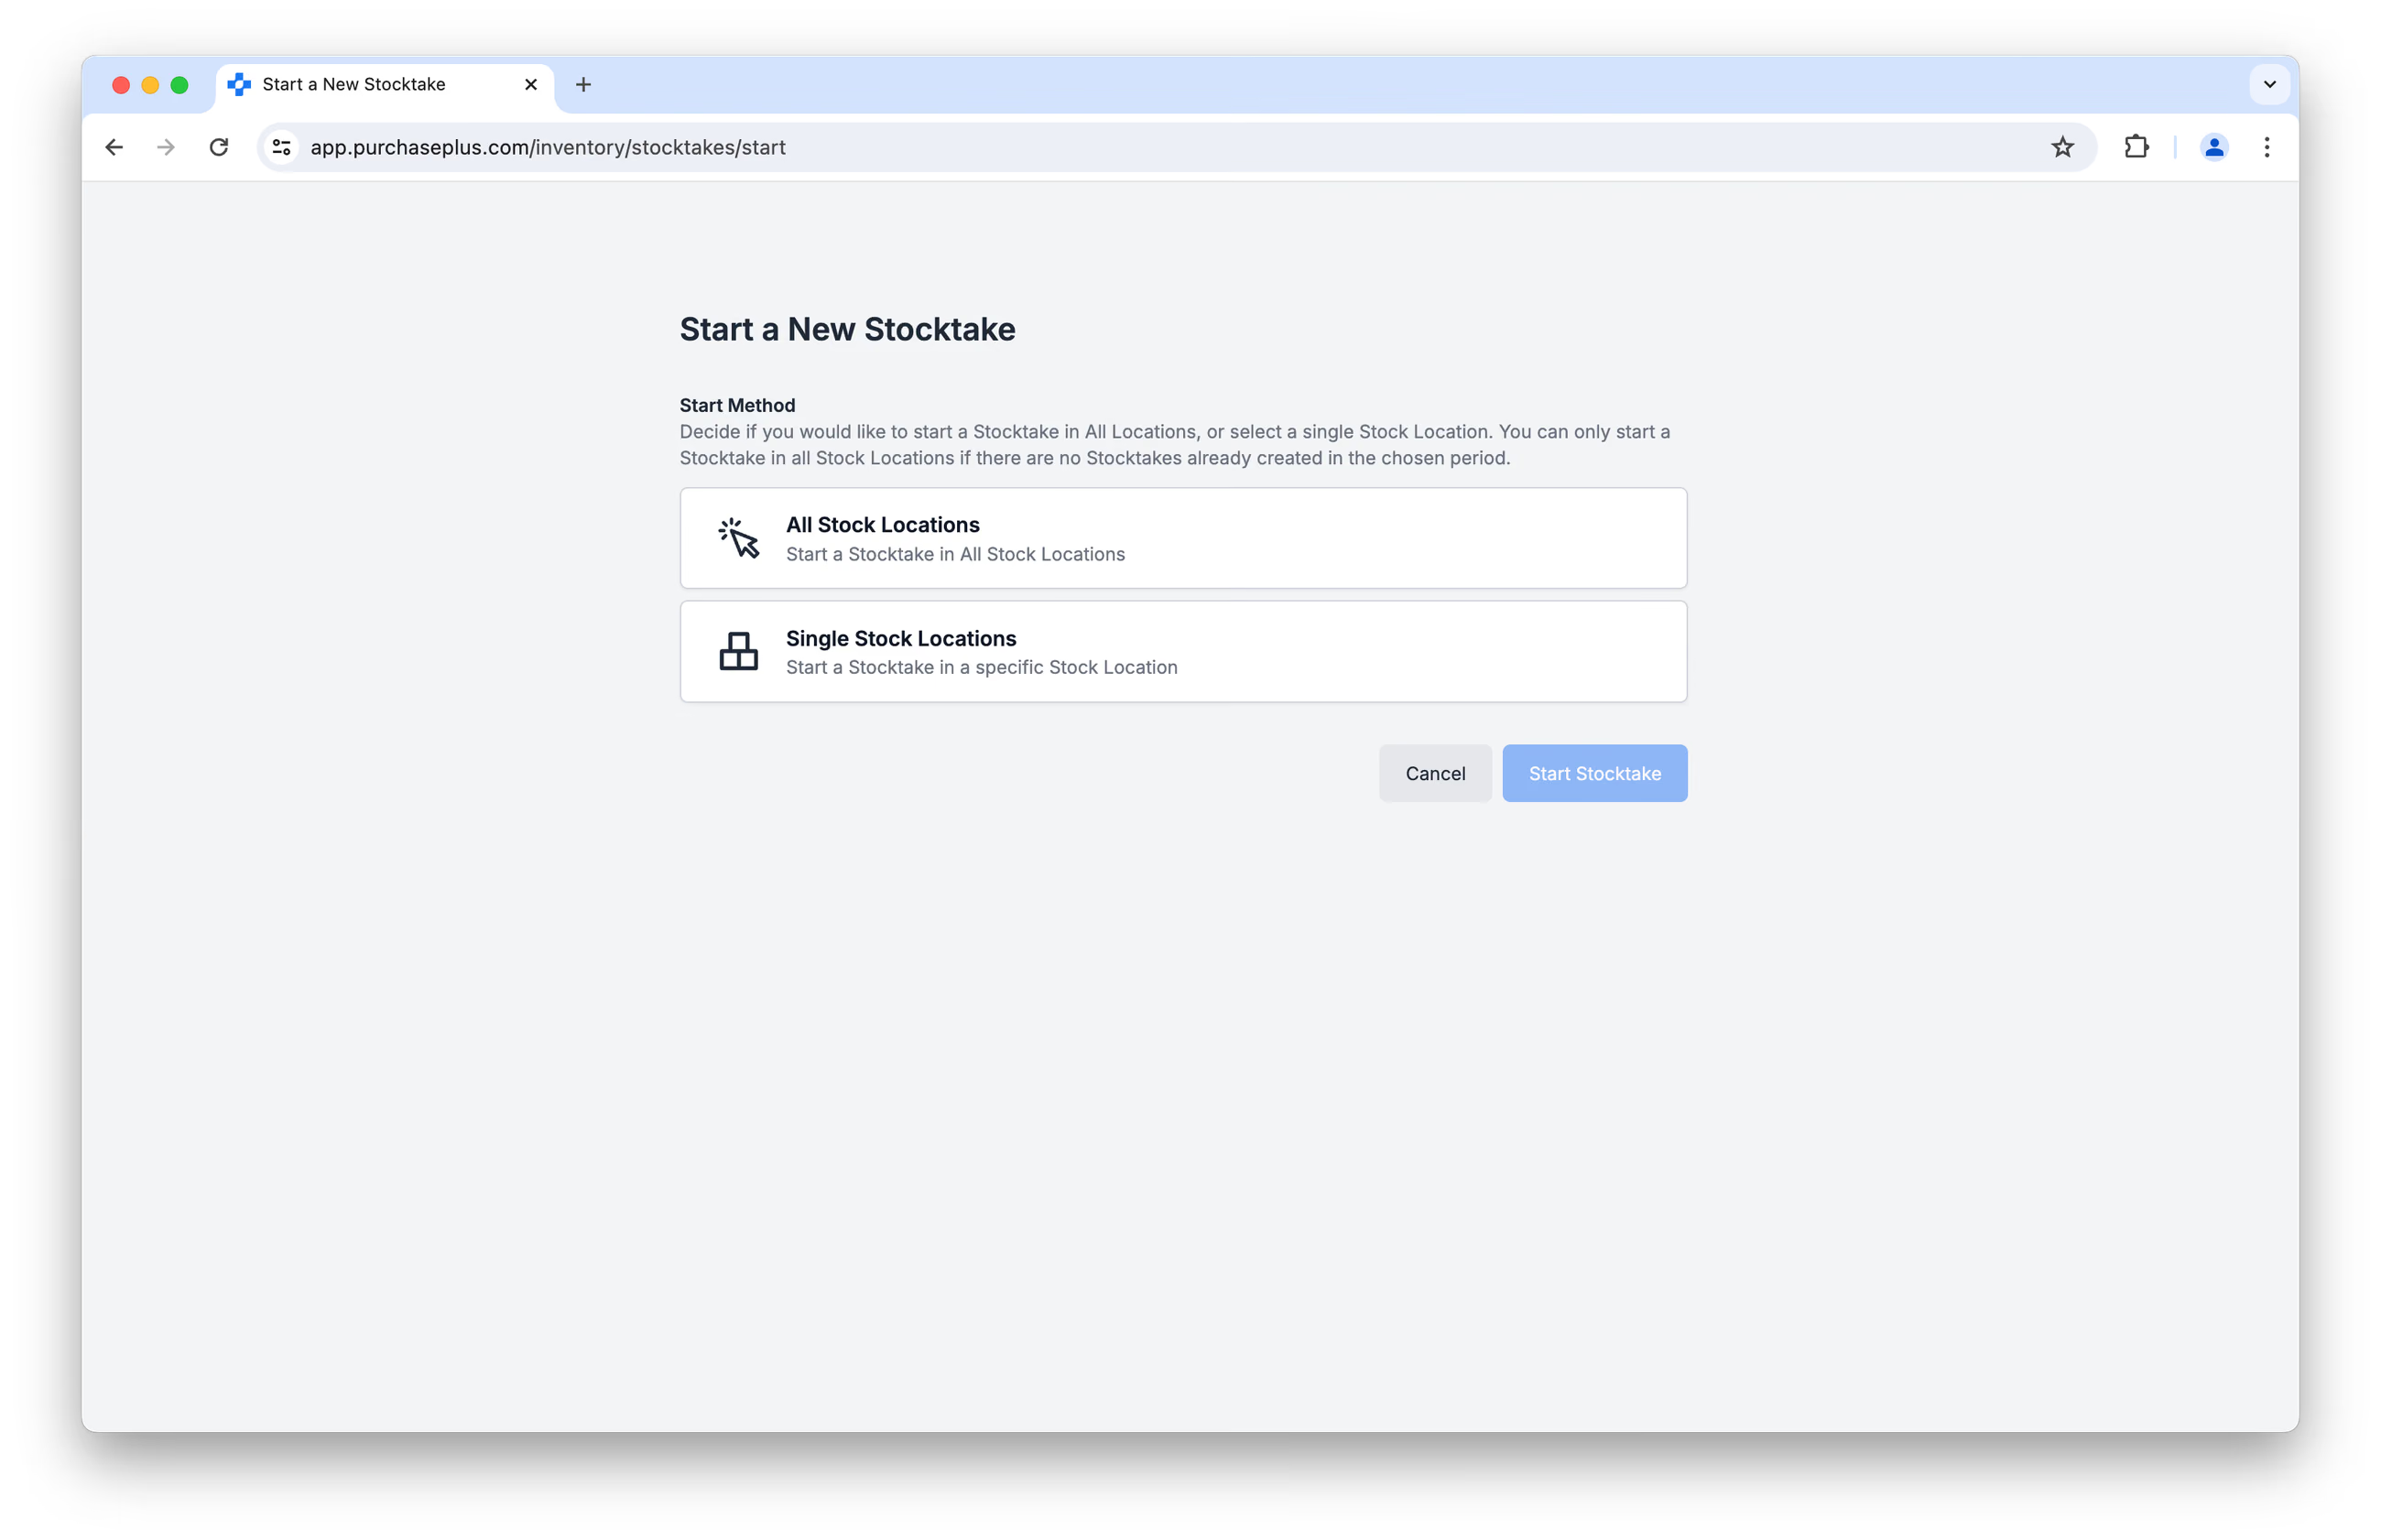
Starting a Stocktake at a Single Stock Location.
Selecting 'Single Stock Location' will open a New Stocktake at the defined Stock Location with a status of ‘In Progress’, and a Count Status of ‘Not Counted’.
Starting a Stocktake at All Stock Locations.
Selecting 'All Stock Locations' will open a New Stocktake at every Stock Location in your current Organisation, with a status of ‘In Progress’, and a Count Status of ‘Not Counted’. Please note: you cannot Start Stocktakes at All Locations if there are any Stocktakes already created in the chosen Stocktake Period.
Stocktake Period
Each Stocktake must have a 'Stocktake Period', which is usually the calendar month and year in which the Stocktake takes place. You can Create a Stocktake in a Stocktake Period that already has a Closed Stocktake.
Blind Stocktakes
When creating (or updating) a Stocktake, a user can make the Stocktake ‘Blind’, meaning that the users conducting the Stocktake will not see a count of how many Stock Items are expected to be in the Location. This can be an effective way of ensuring that the Stock Items are carefully counted. Only users with the 'Close Stocktakes' permission will be able to view the expected count of a Stock Item in a Blind Stocktake.
Conducting Stocktakes (Counting)
Any user can add a count of a Stock Item in the Stocktake, even if they do not have the ‘Manage Stocktakes’ permission.
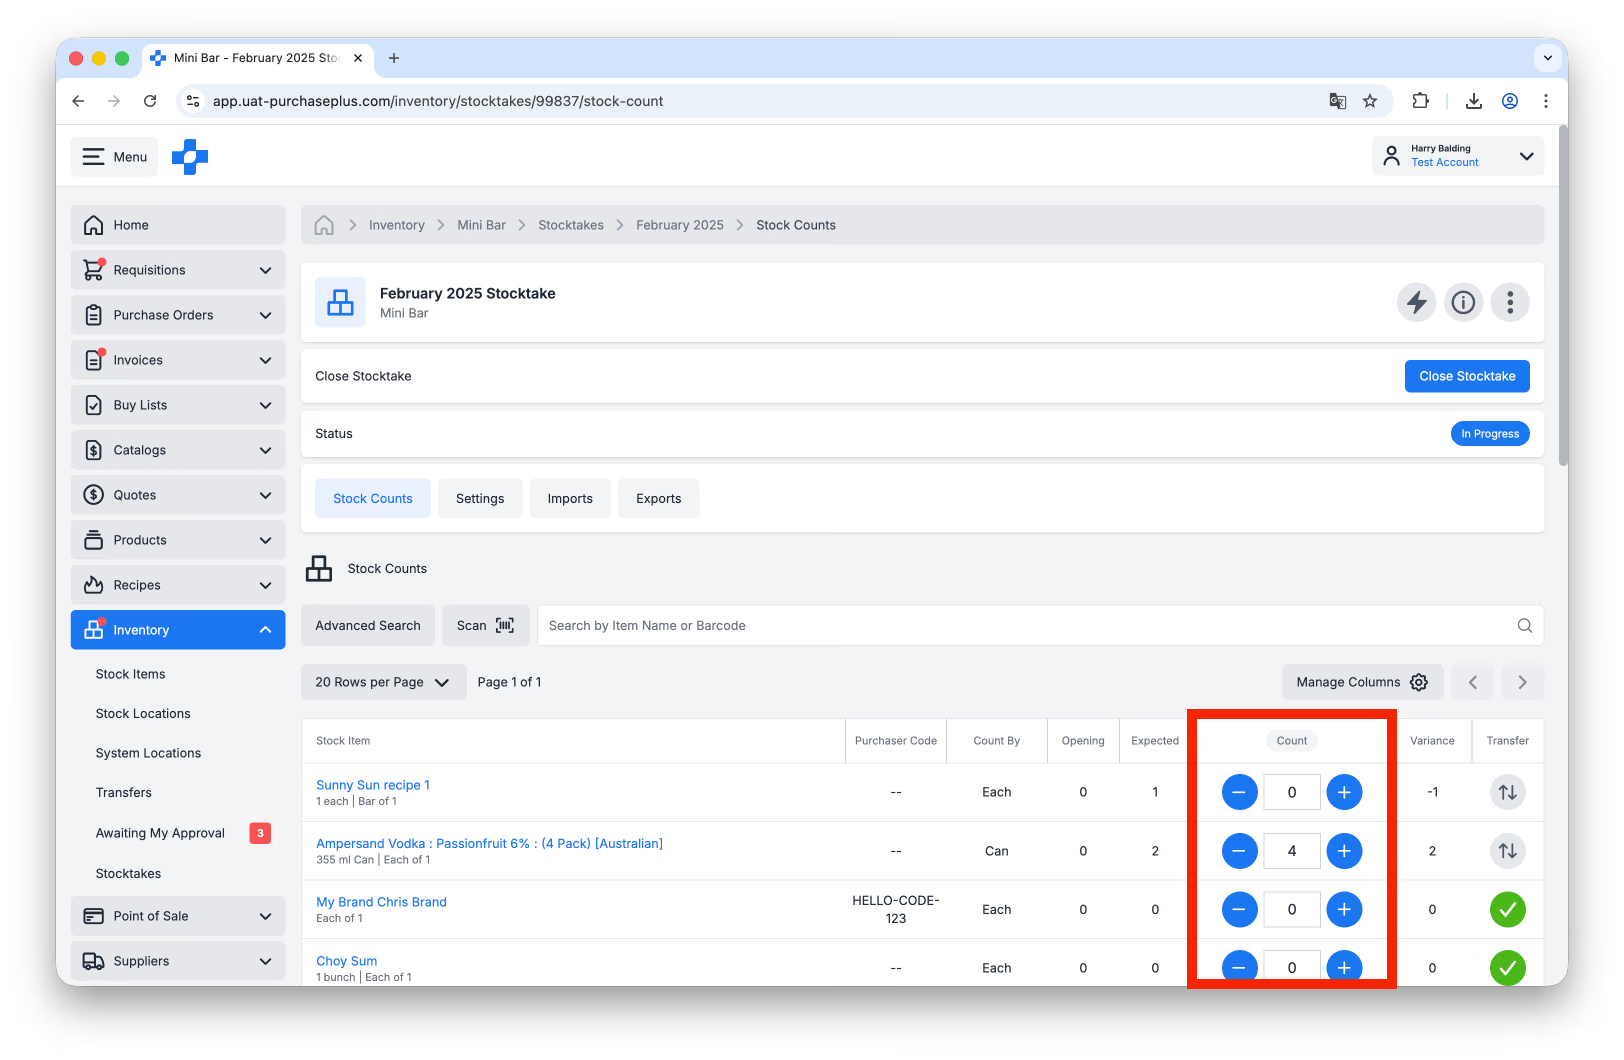
The user can directly input the quantity of the Product into the [Count] column, and/or use the Up or Down steppers to either side of the input field:
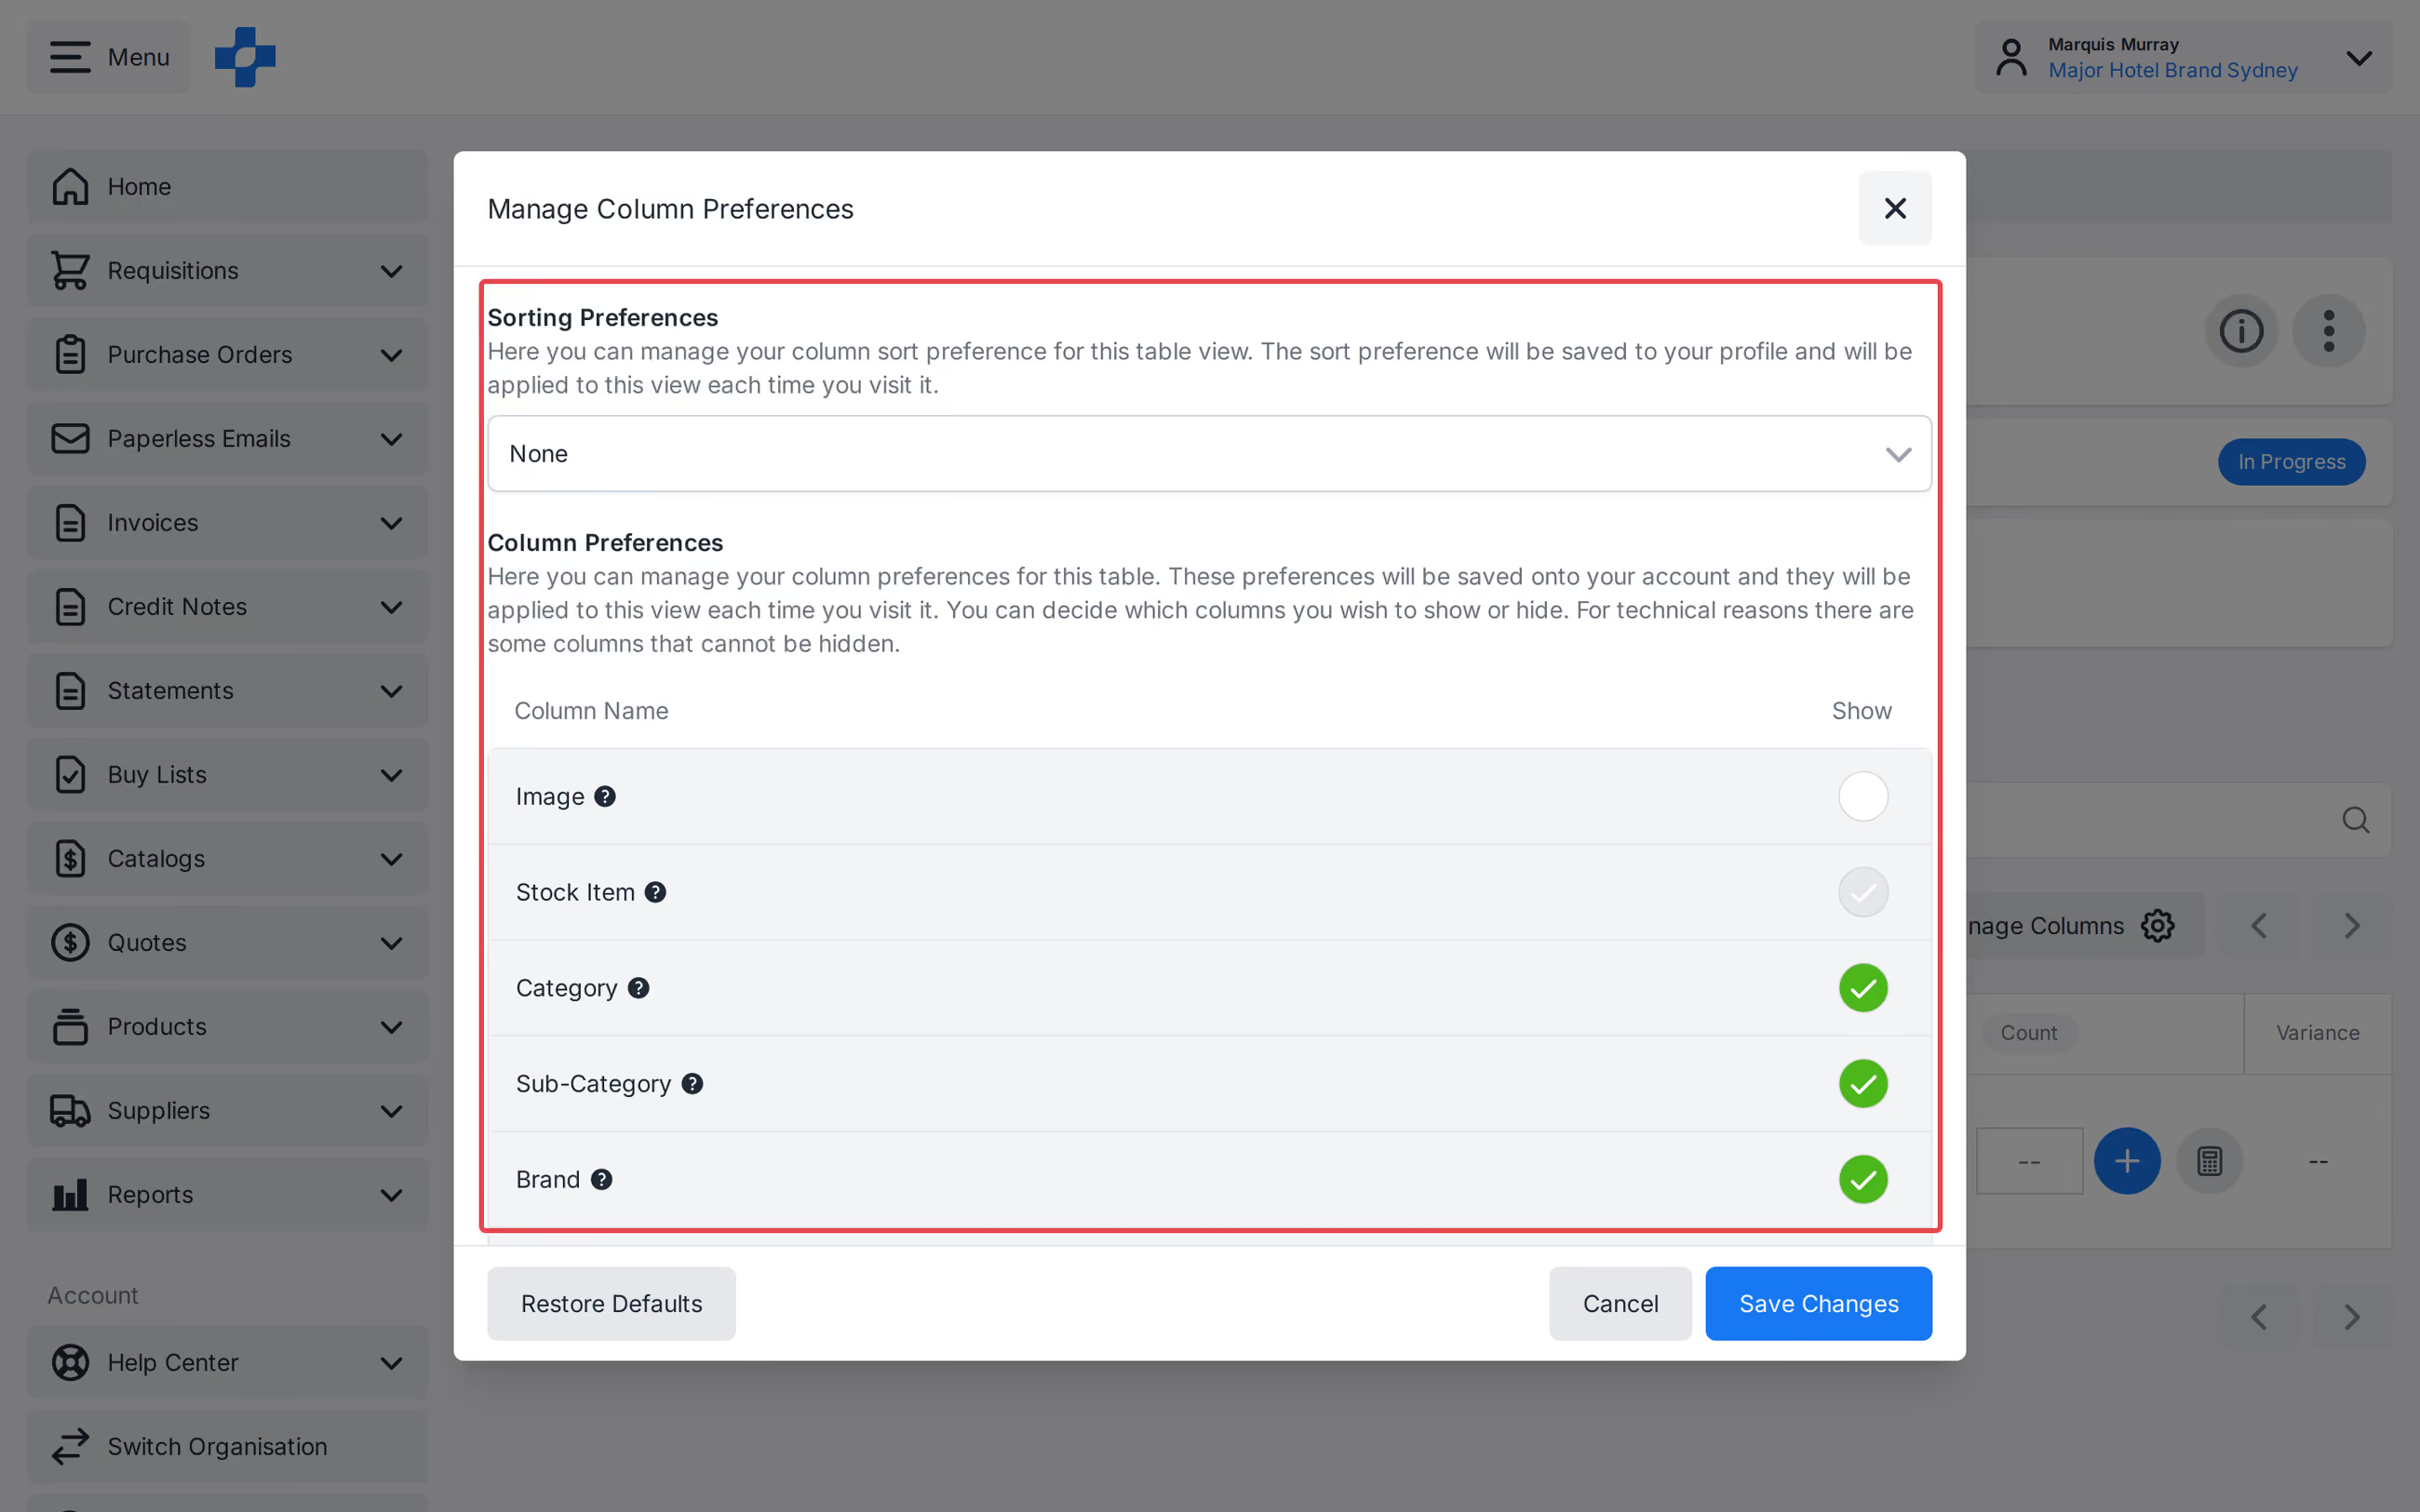
Use [Manage Columns] to show Category, Sub-Category, and Brand on the Stock Count. Sort the list by Category, Sub-Category, Brand, Stock Item, or Purchaser Code. Use [Manage Sorting] to drag Stock Items into a walk-around order for that Stock Location. Column sort and the custom walk-around order are used one at a time; select [None] in sorting preferences to restore the saved custom order.
Once all Stock Items have had a count added to the Stocktake, the Stocktake’s Count Status will be updated to ‘Fully Counted’.
Scan by Barcode
A user may search by any Barcodes that have been added to the Stock Item in PurchasePlus to accelerate the counting process, subverting the need to scroll through a (potentially long) list of Stock Items in a Stock Location.
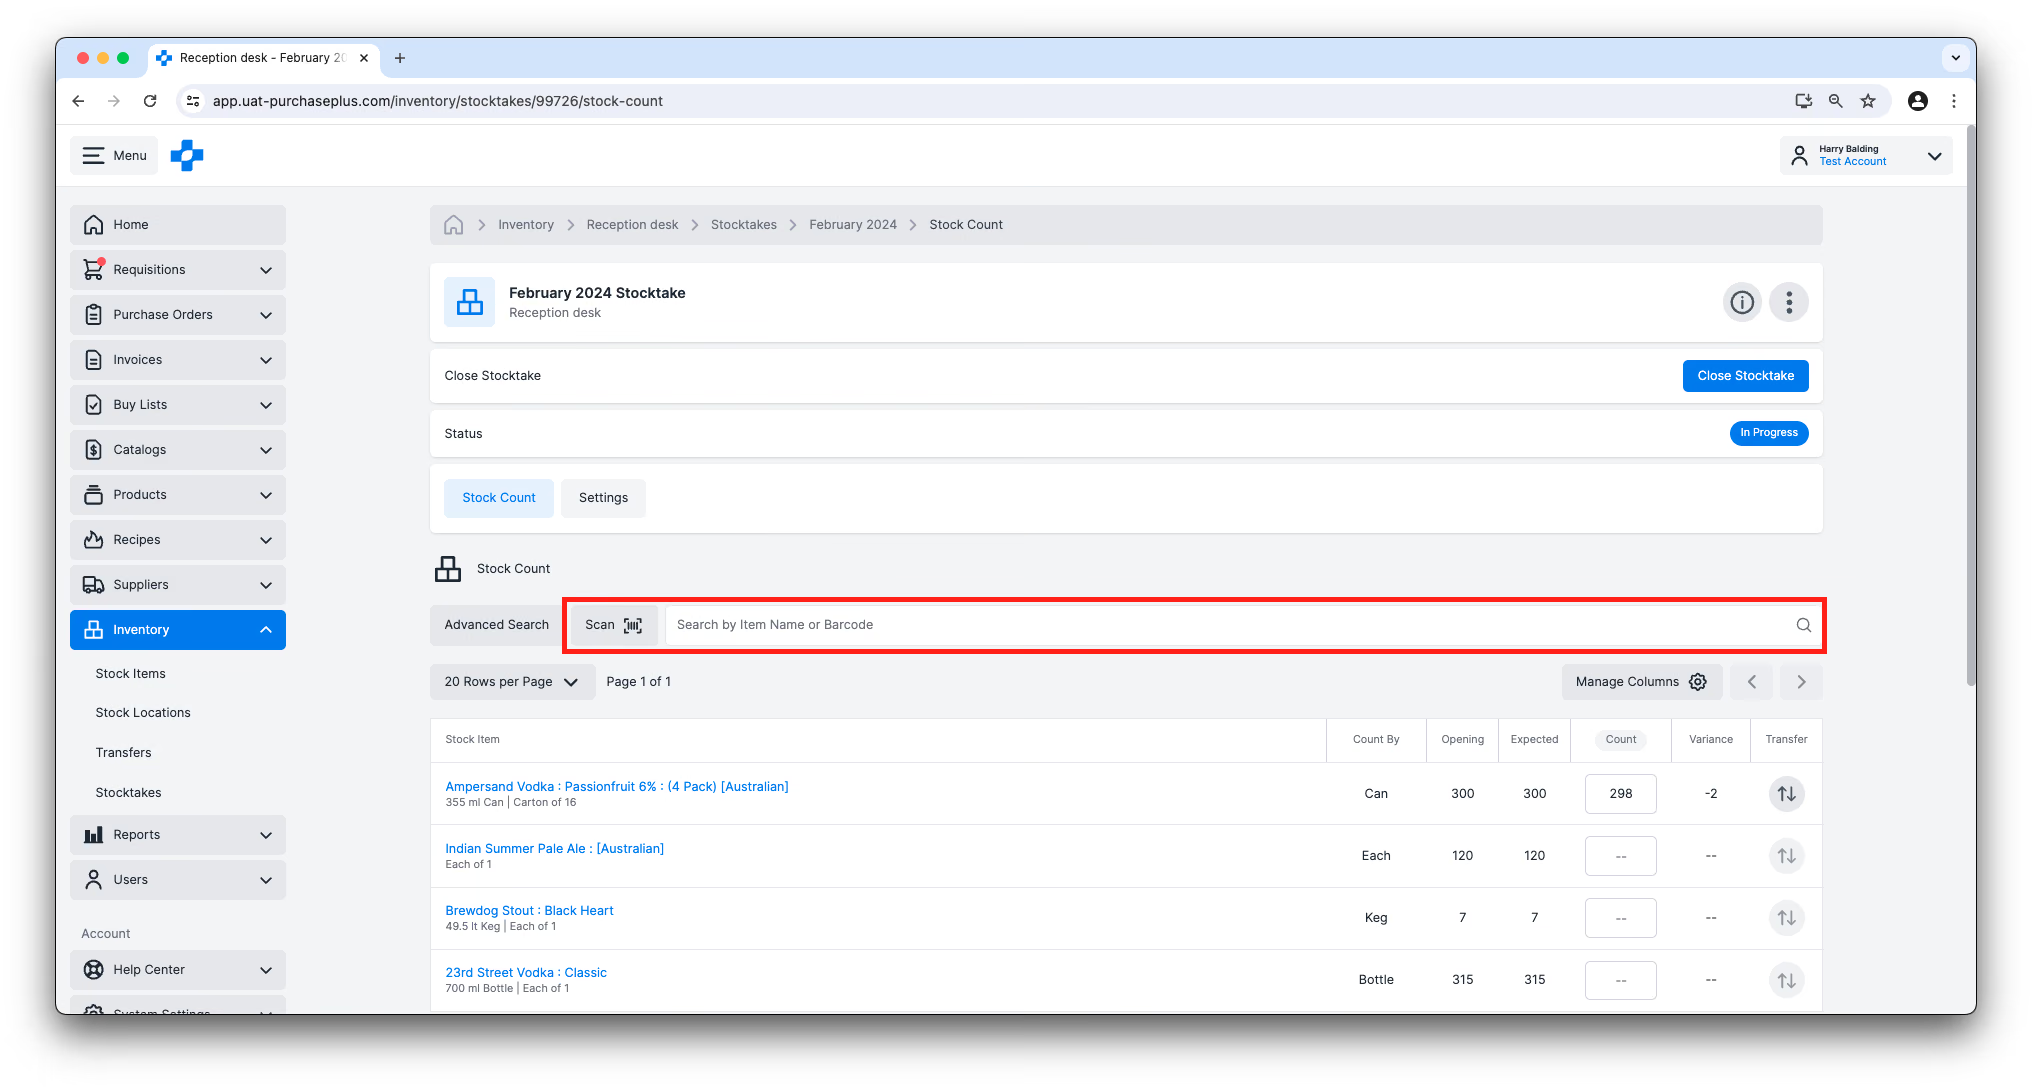
Please view our Barcode Scanner User Guide for more information.
Variance Management
Stocktakes with 'Variances' - i.e. a different Expected Count from an Actual Count - must be rectified before they are Closed.
Variances can be viewed line-by-line:
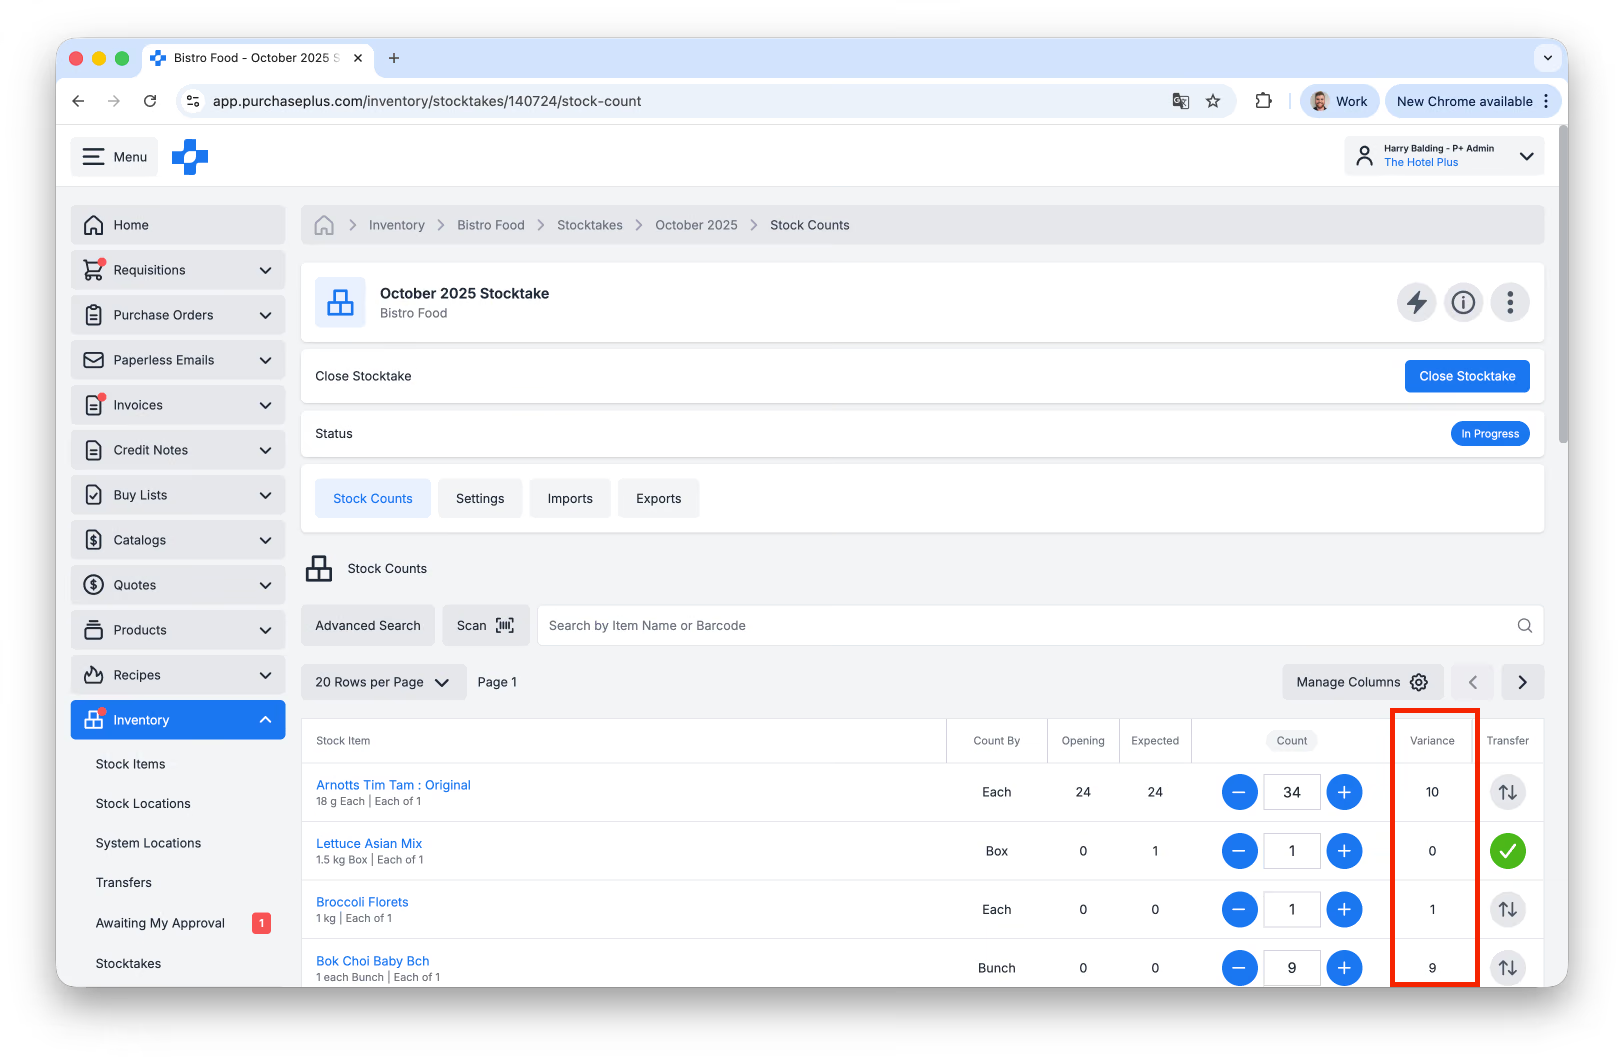
...and the Total Variance Value of an In-Progress Stocktake can be viewed in the Info Panel in the header of the Stocktake:
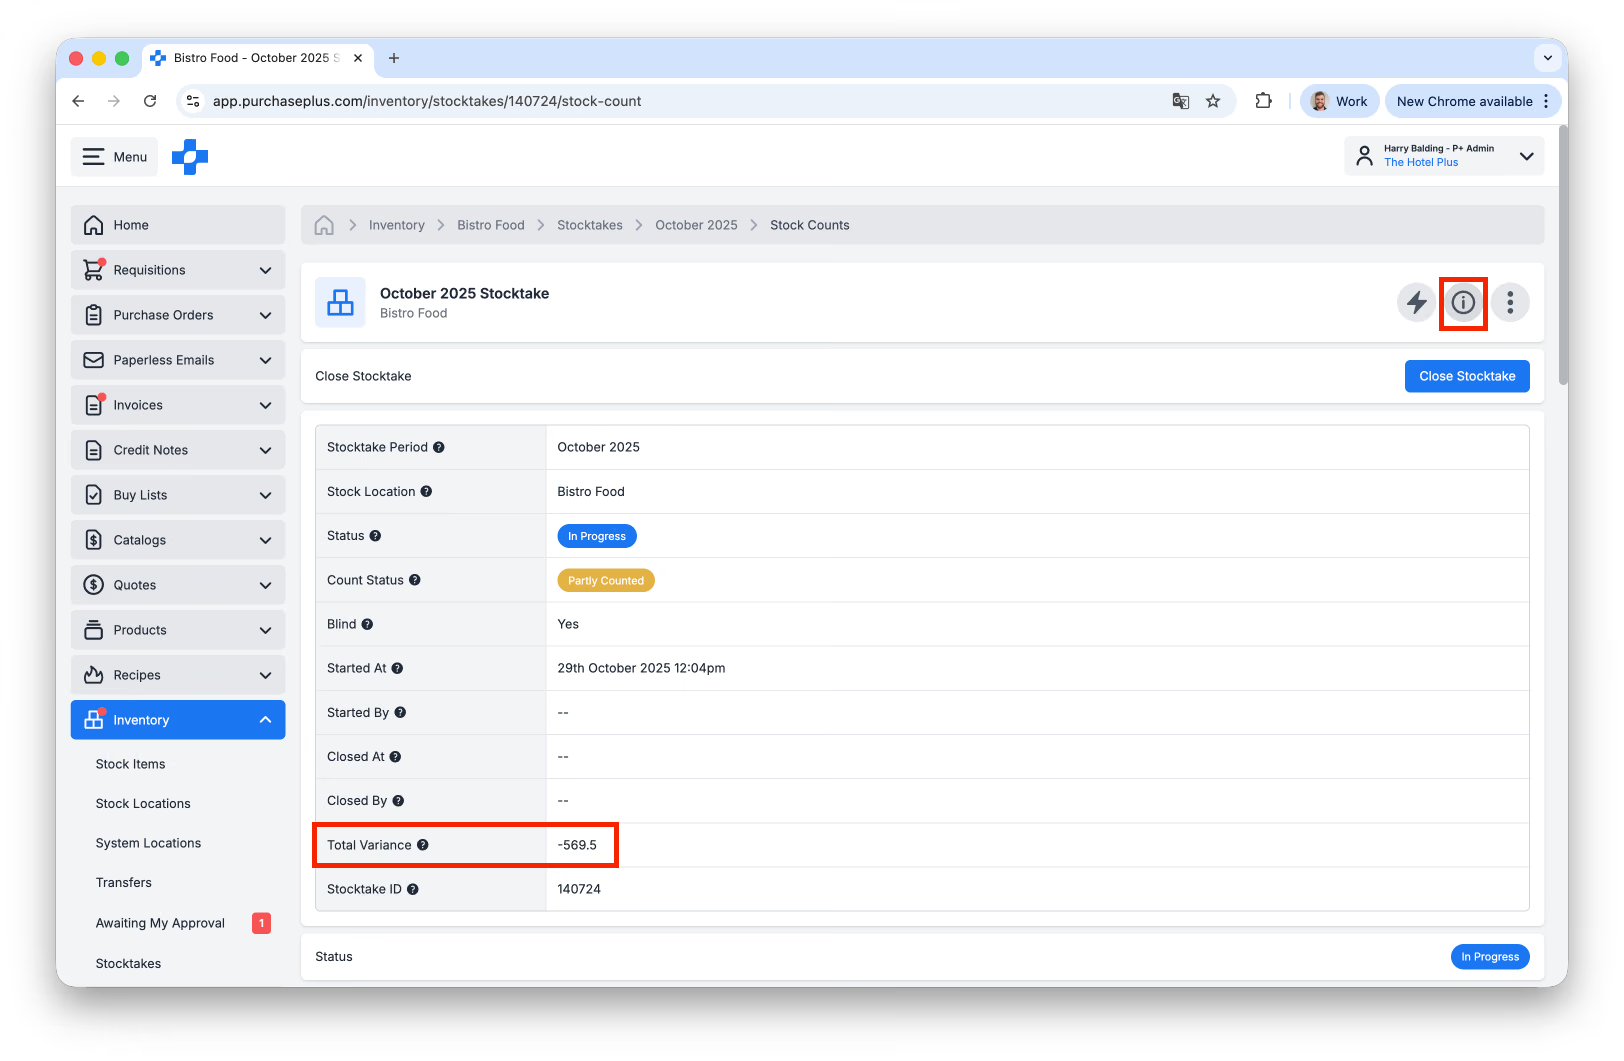
Variances must be managed by completing a Stock Variance Transfer from the Stock Location to an Expense Location (or another Stock Location, if you know where the Stock Item was moved to). This is primarily for the purpose of updating the Stock Item Quantity in the original Stock Location to reflect the actual count.
Variances can be transferred line-by-line (previously known as [Quick Transfer]):
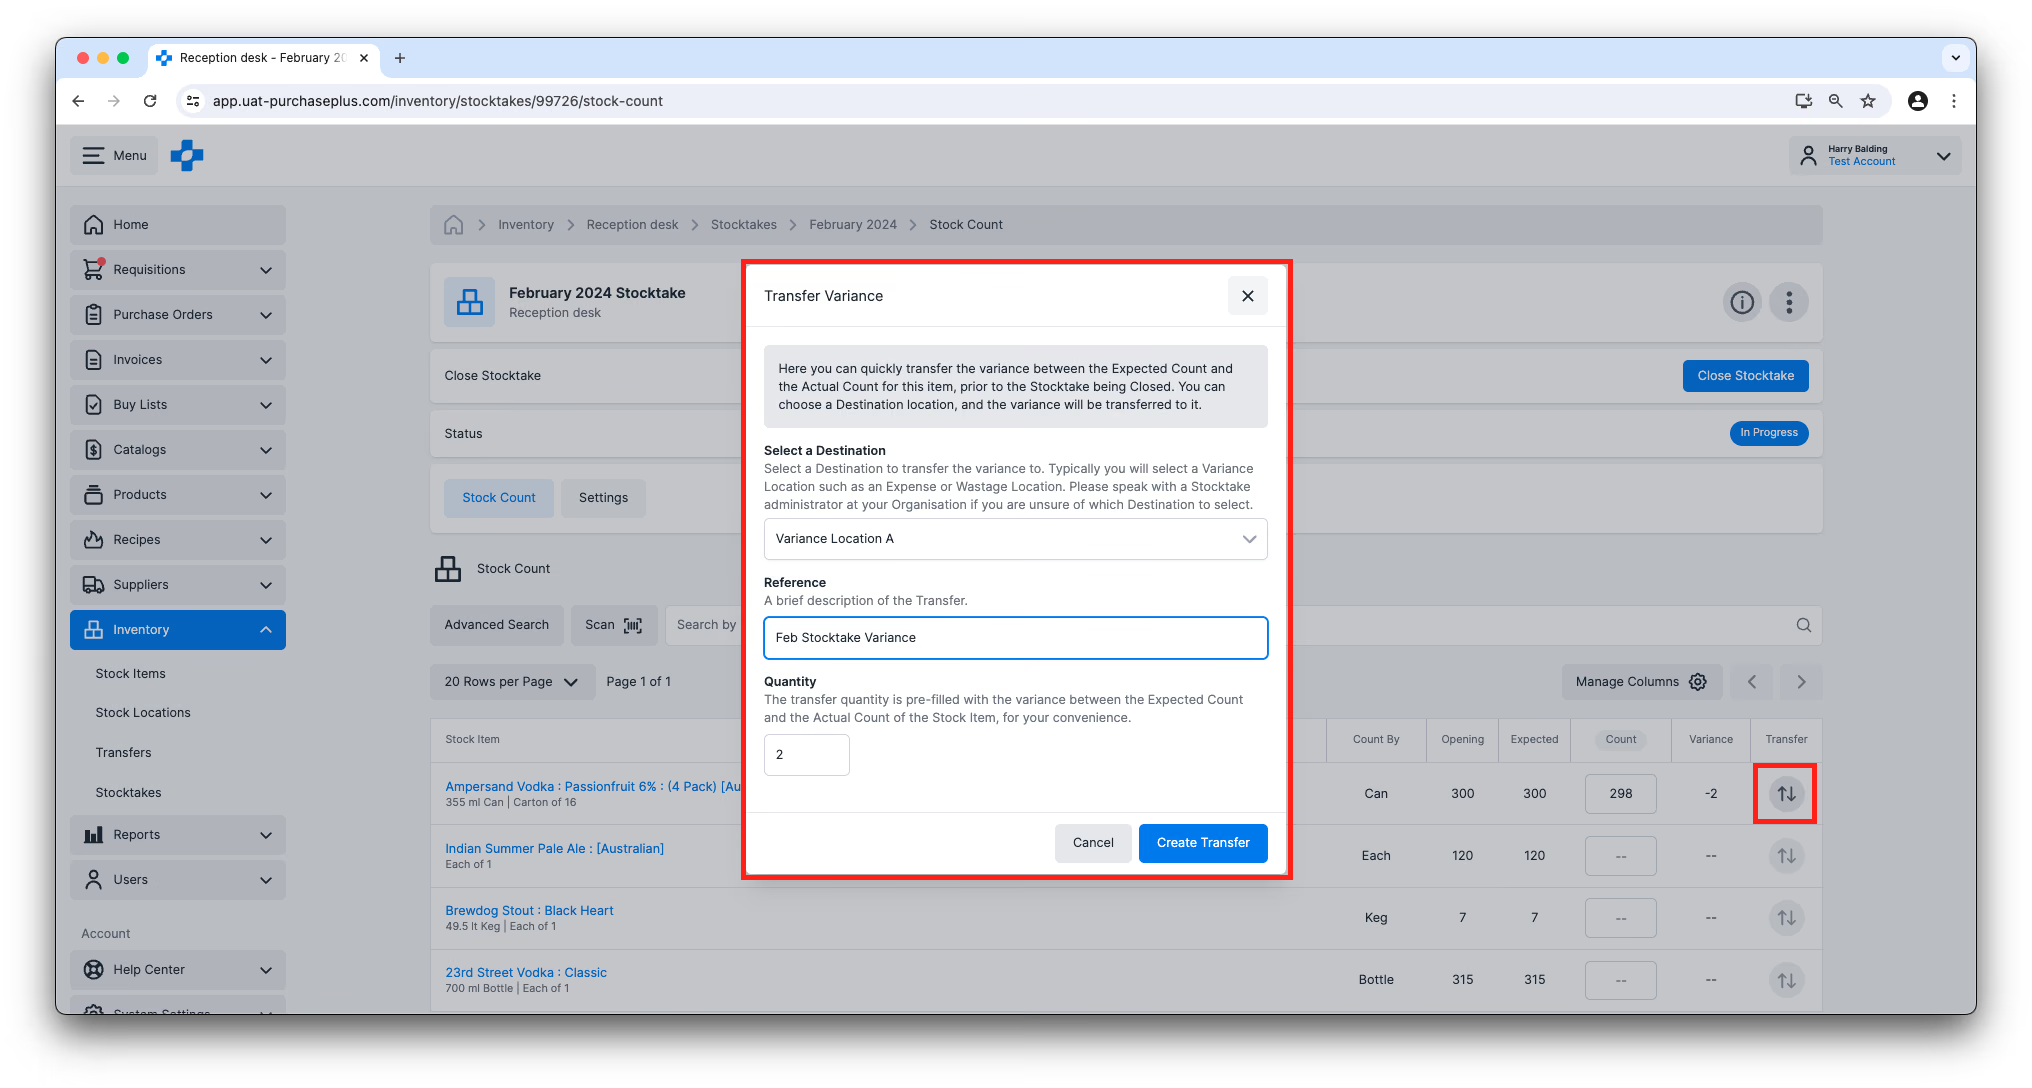
..Or Variances can be transferred in-bulk, using the [Transfer All Variances] button in the header of the Stocktake:
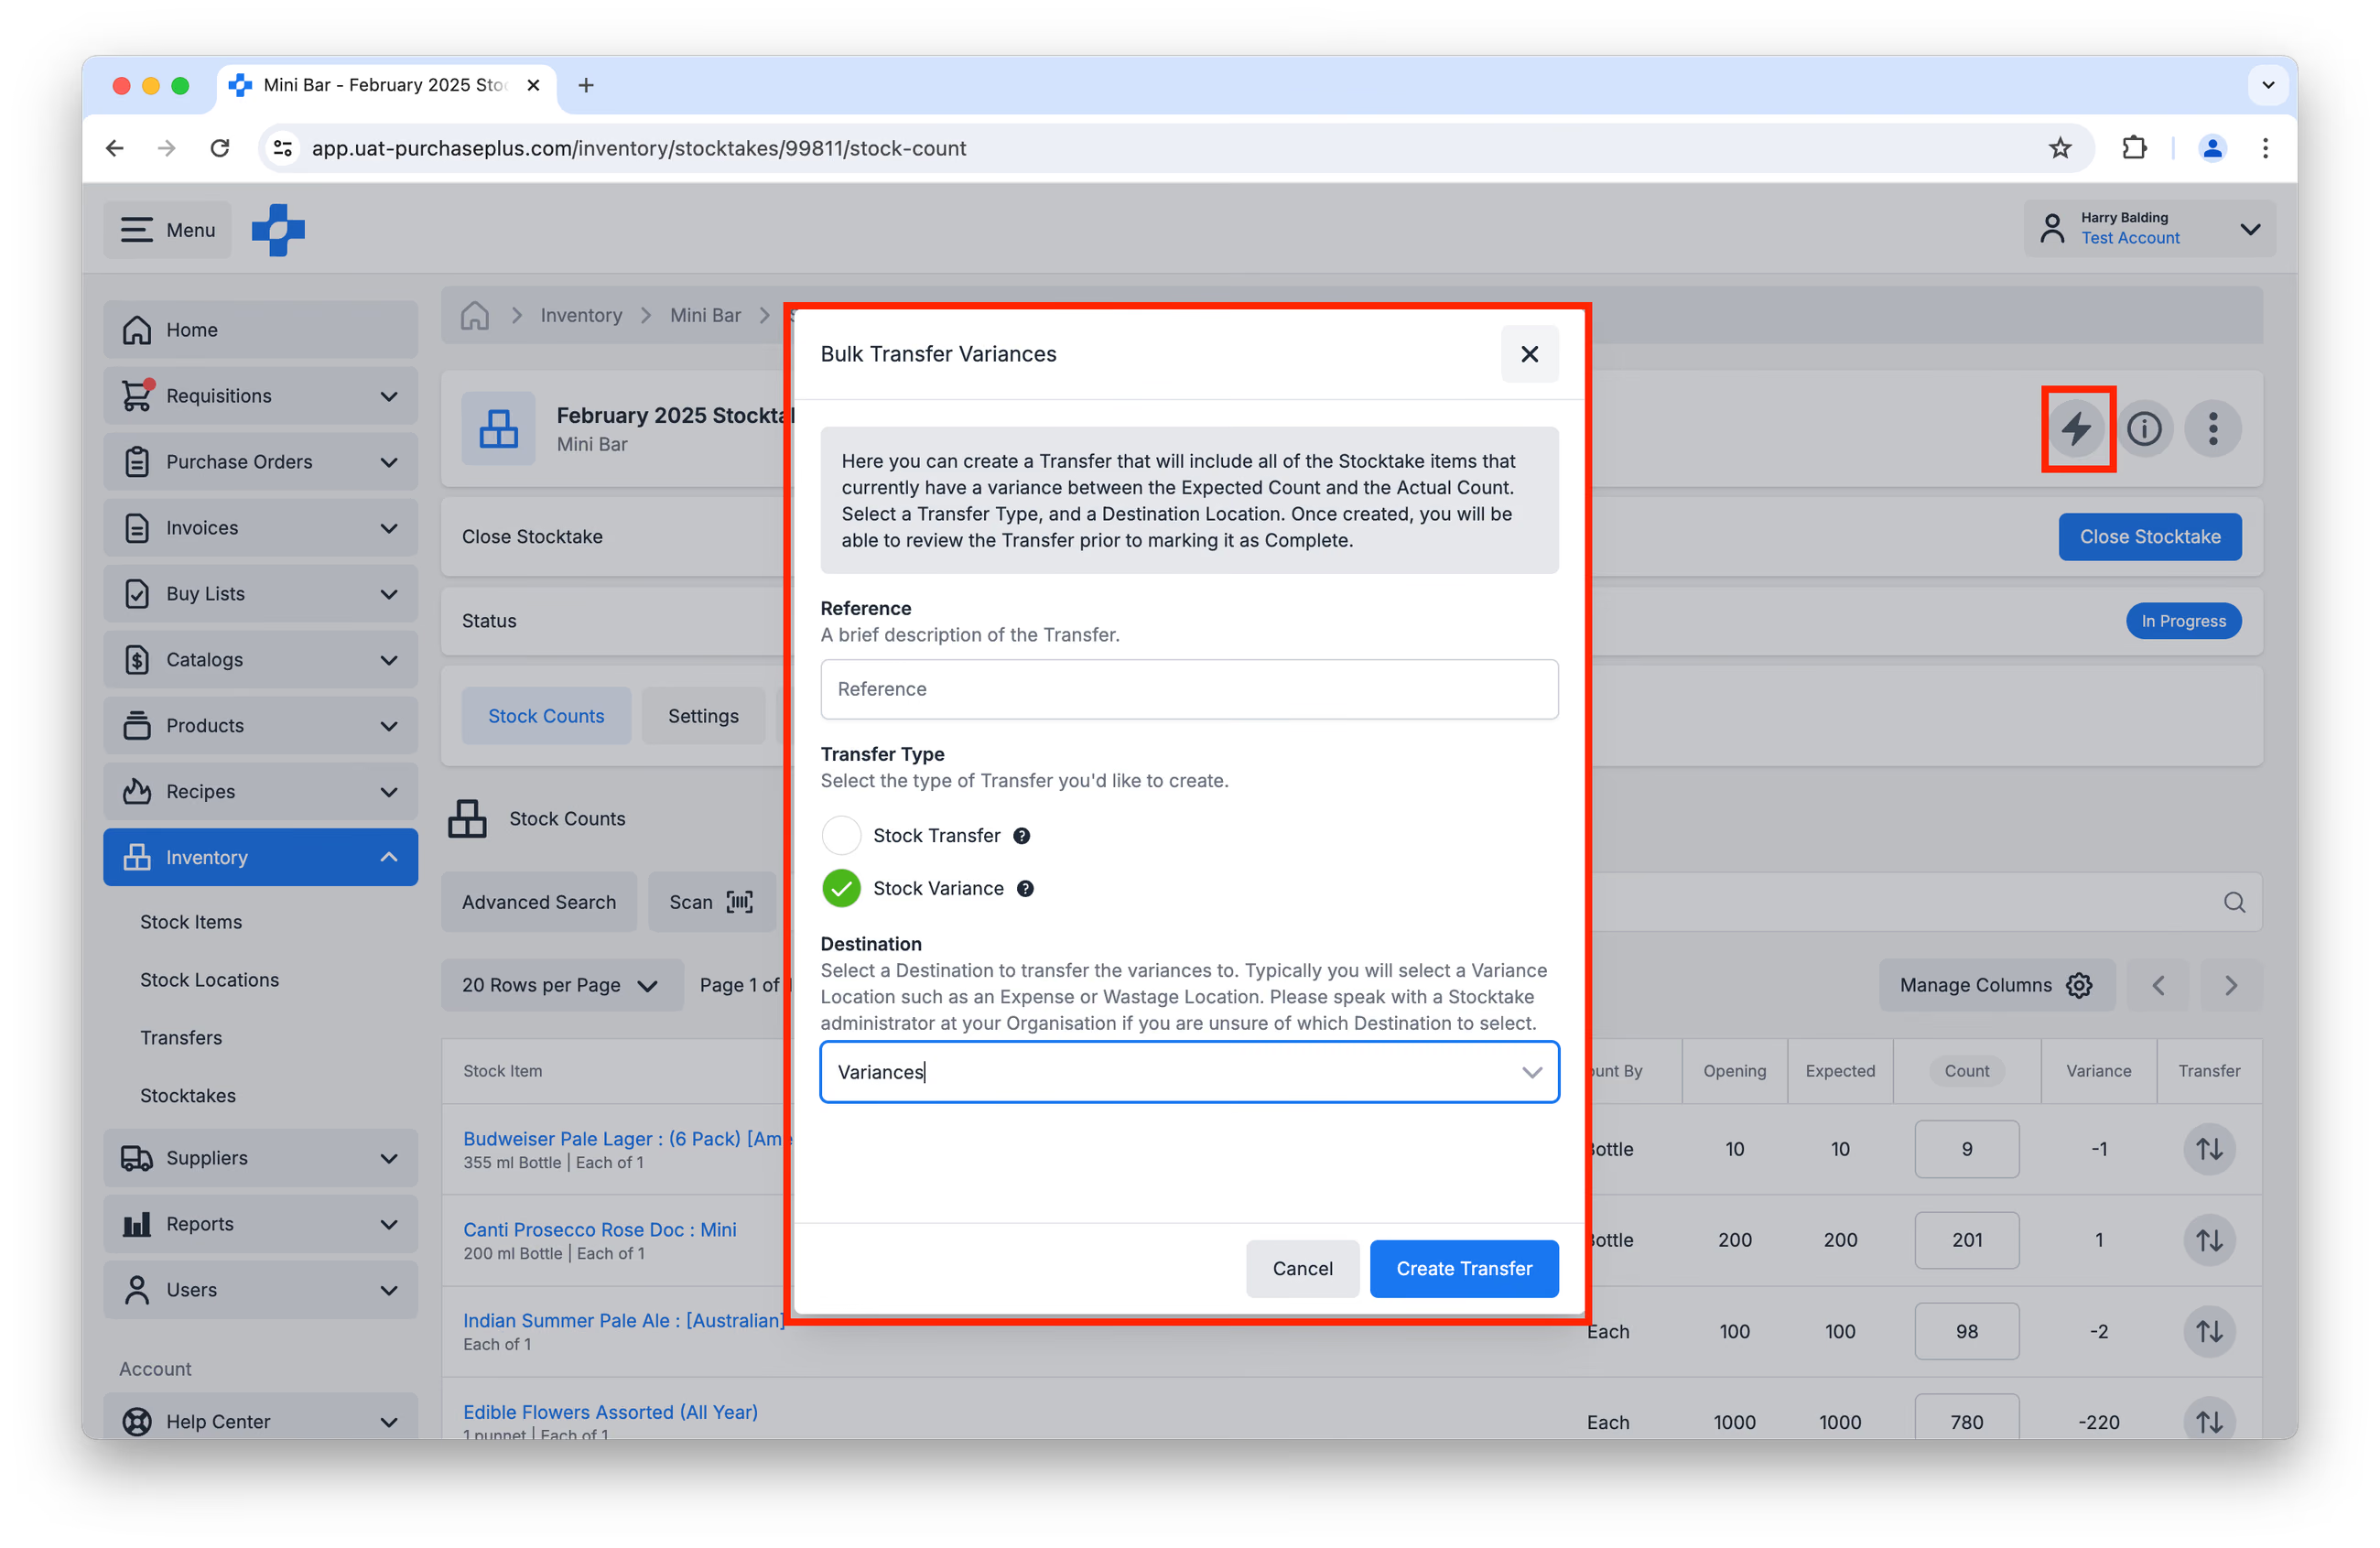
To manage Stocktake Variances via Transfers, a user must have the Manage Transfers permission.
Importing or Exporting a Stocktake Count
Users with the 'Close Stocktakes' permission can Import the Stock Count of any Stocktake while it is in the status of In Progress, by using the [Create New Import] button on the [Imports] tab of the Stocktake:
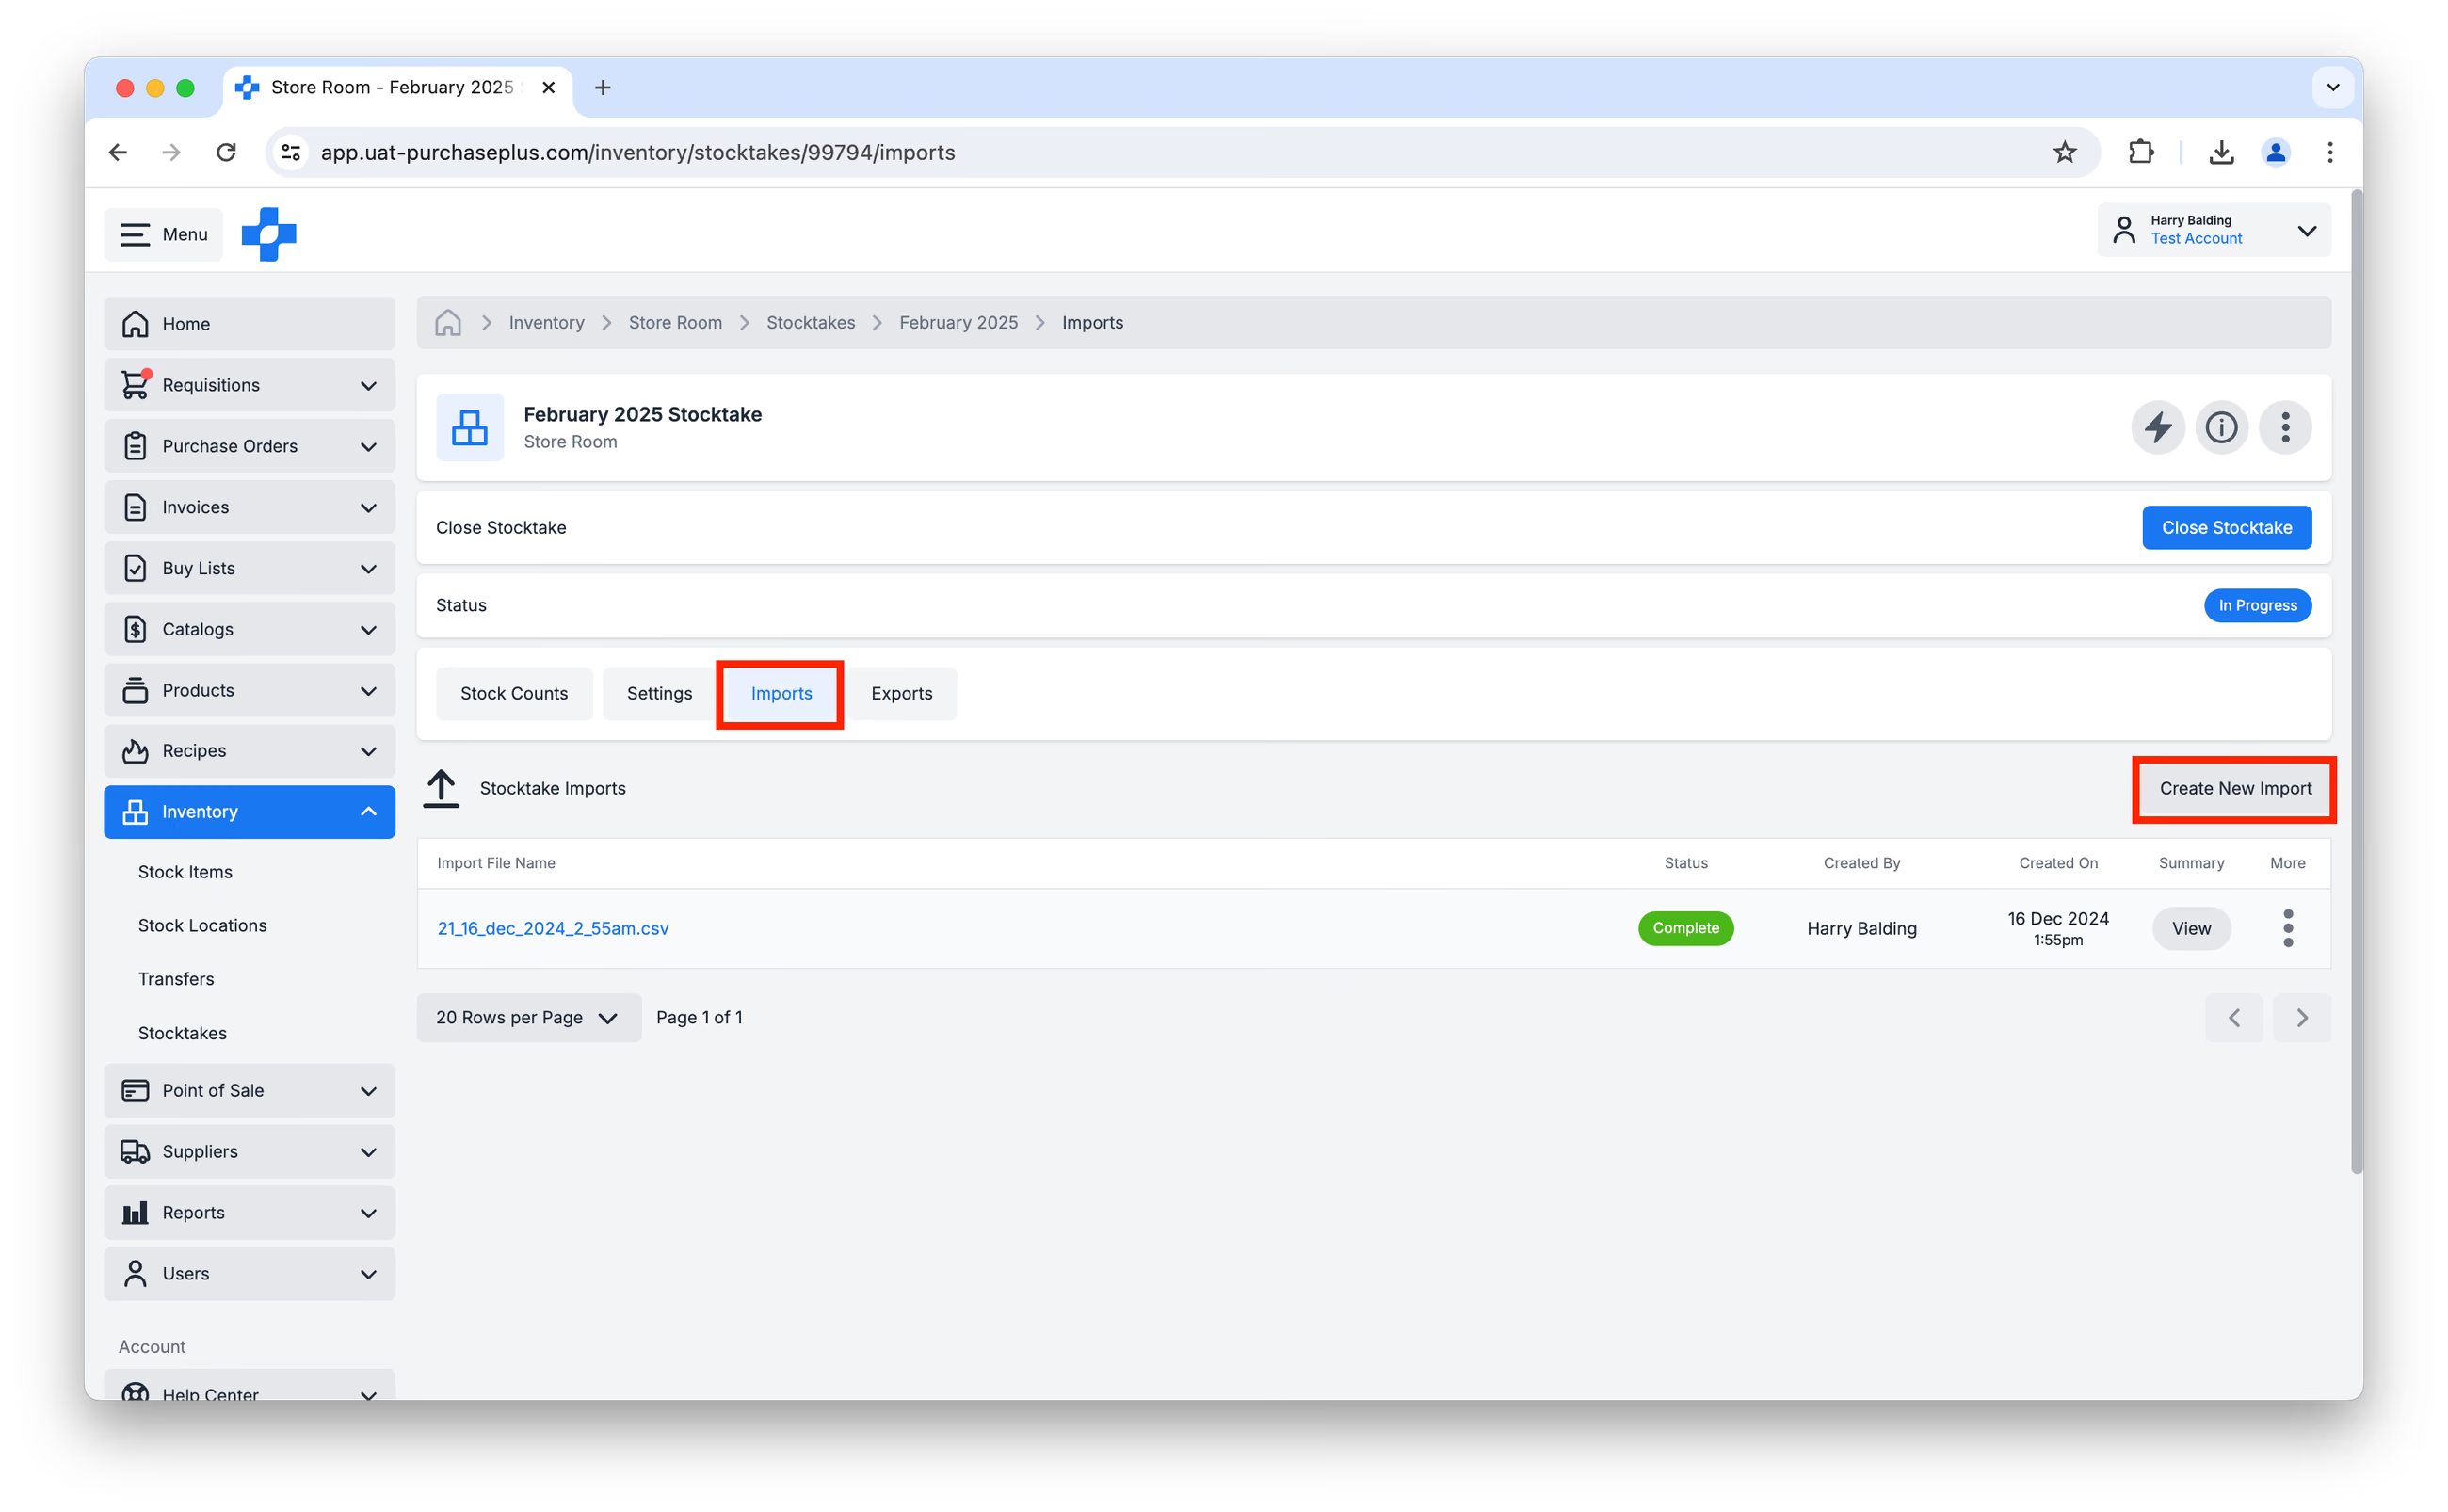
The Import File CSV only needs three columns:
- stock_take_id
- stock_count_id
- quantity
It is highly recommended that if you are going to use the Import functionality, that you use the Export functionality first, so you have access to the correct Stock Count ID's (which are different values to Product ID's).
To Export a Stocktake, navigate to the [Exports] tab of the Stocktake, then click [Create New Export] and download the generated file. You may then add your counts (i.e. Quantities) to the spreadsheet, and Import the file.
You may remove a row from the spreadsheet, if desired. When the file is imported, this Stock Item's Quantity in PurchasePlus will remain as it was before the import. It will not have its Quantity updated to 0, nor will it be removed from the Stock Location. Additionally, you are not able to add any Stock Items to the Stock Location via a spreadsheet import.
Offline Mode
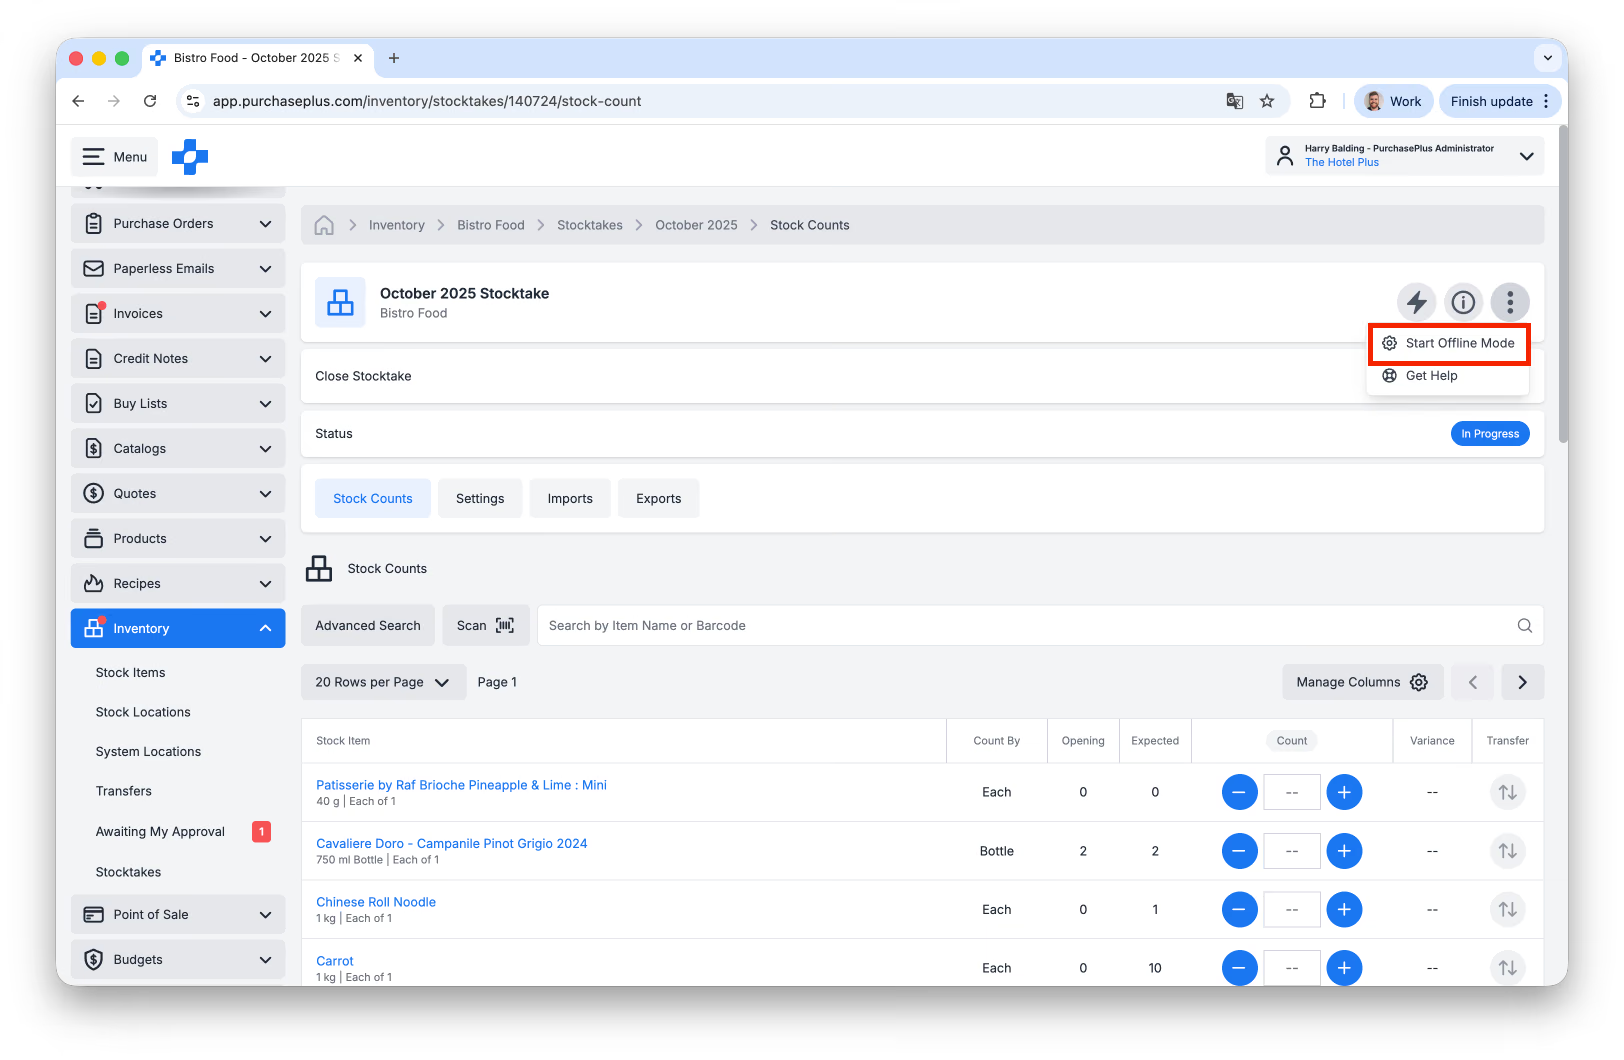
Stocktakes can be conducted in Offline Mode when connectivity is low.
Offline Mode allows the user to undertake the Stocktake if their device loses connection to the internet. Counts stay on the device until the server confirms each one.
- Click [More Options] → [Start Offline Mode] in the header of the Stocktake.
- Enter counts as usual.
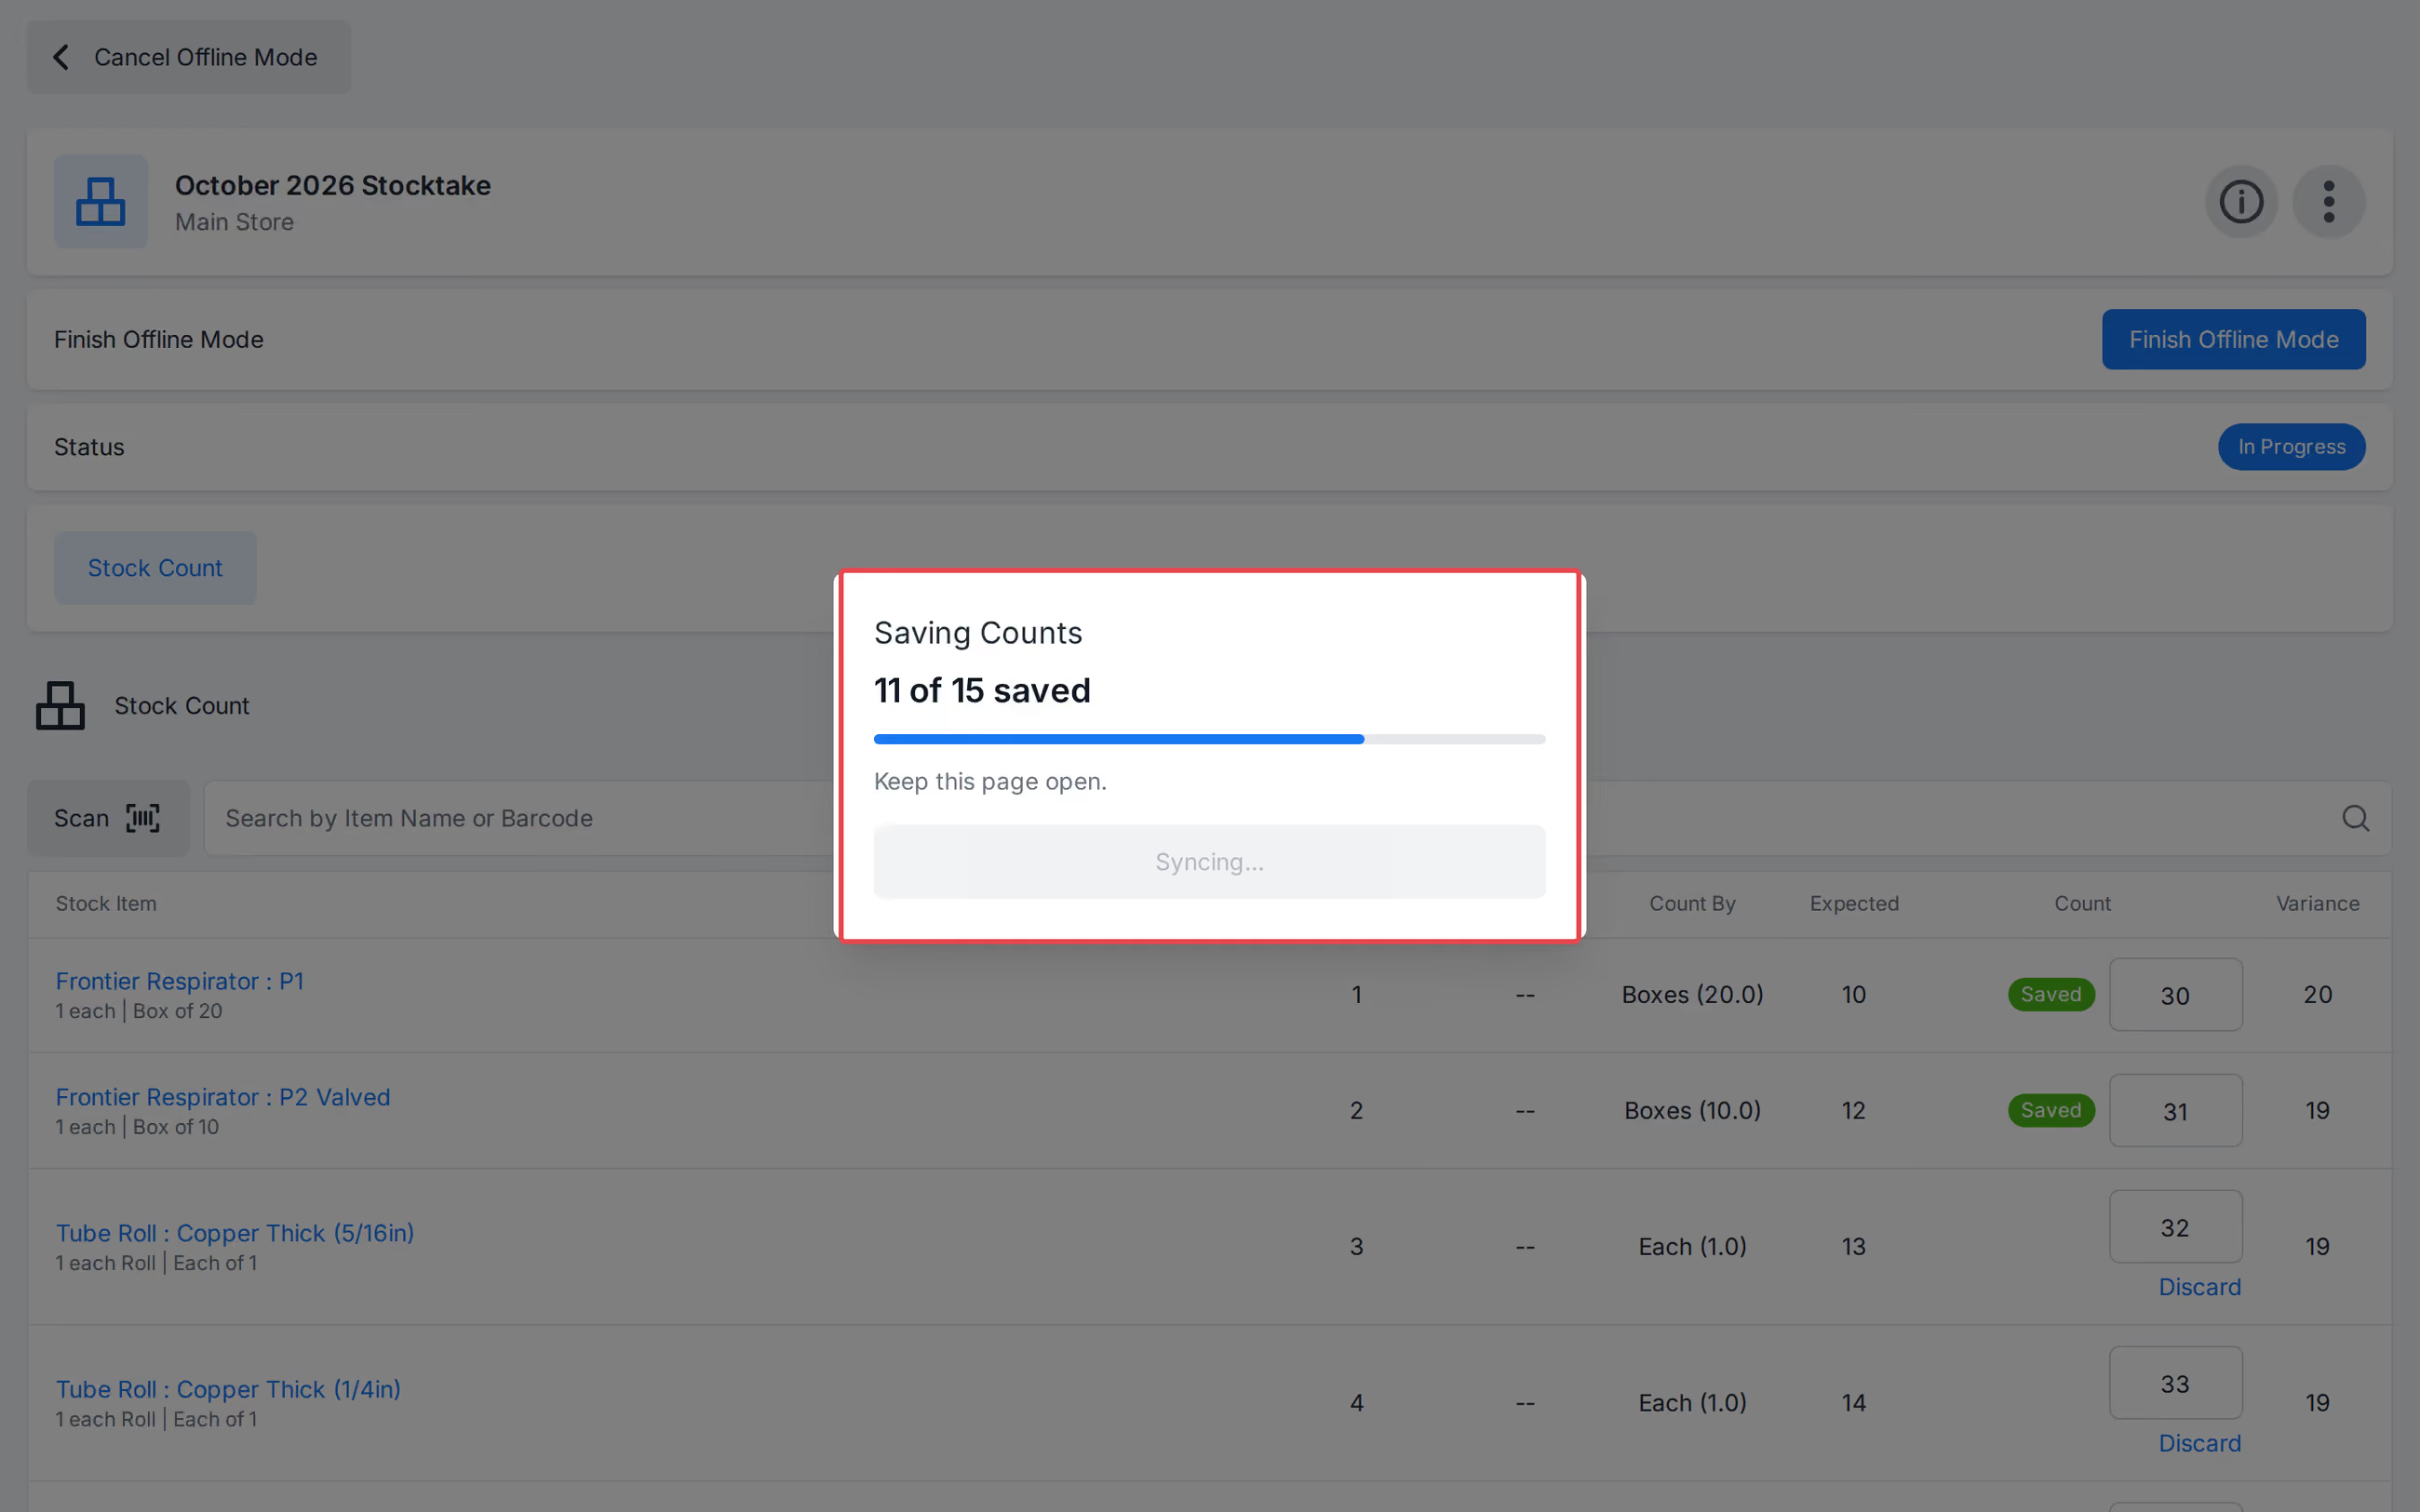
- Reconnect to the internet and click [Finish Offline Mode]. The Saving Counts modal shows N of M saved. The Stocktake finishes only after every remaining count is confirmed.
Note - Failed counts stay on the device, with [Close] and [Retry]. [Discard] on a line removes that line's unsaved count. Counts are kept if you reload the page.
Closing a Stocktake
A Stocktake is able to be Closed if:
- It is in the In Progress status.
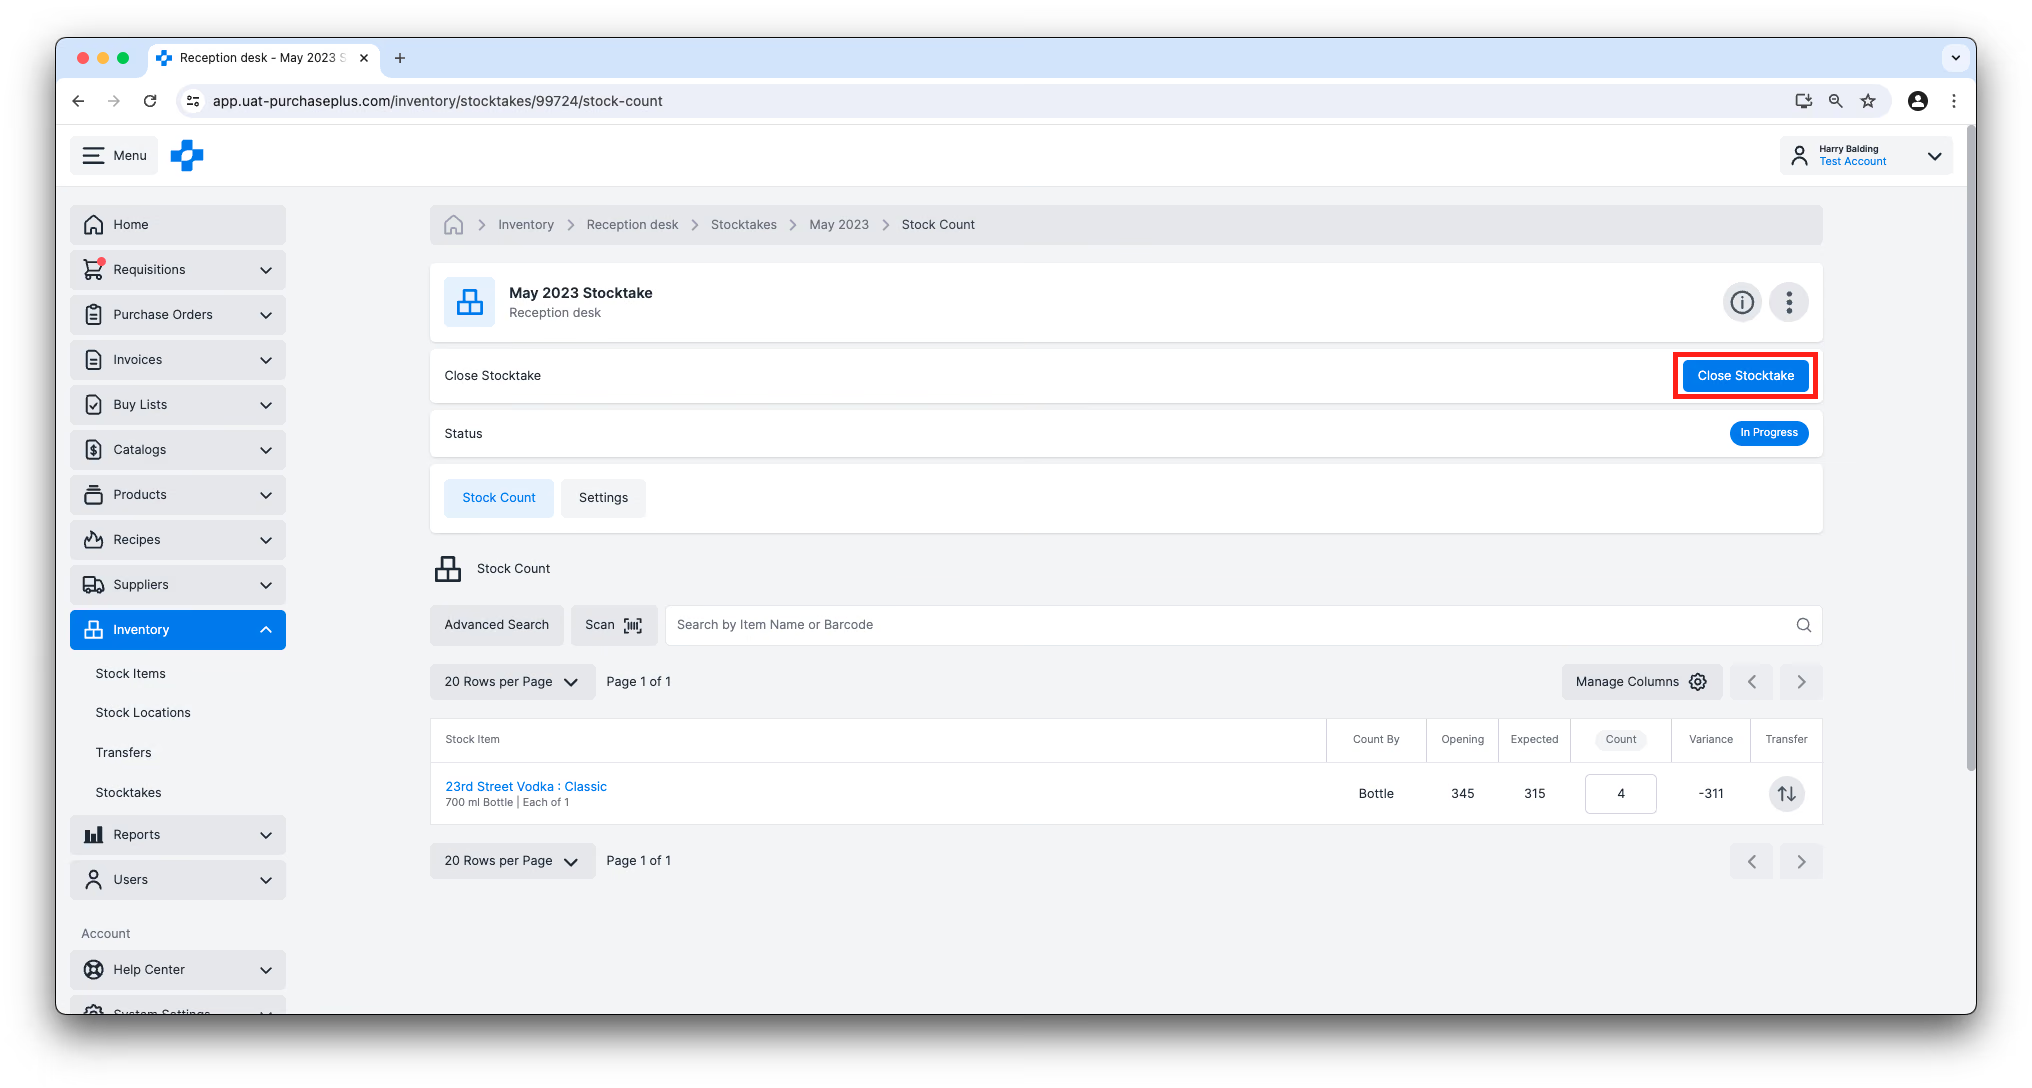
- [Recommended] All of the Stock Counts have a count recorded against them. It is possible to close a partially-counted Stocktake. Clicking [Close Stocktake] when the Count Status is either 'Not Counted' or 'Partially Counted' will pre-fill all Stock Items that have not been counted with their current Expected Count.
- There are no unaccounted Variances between the Expected Count and the Actual Count for any of the Stock Items included in the Stocktake.
To Close a Stocktake, click the [Close Stocktake] button in the header of the Stocktake. This ability is controlled by the ‘Close Stocktakes’ permission.
Closing All Stocktakes
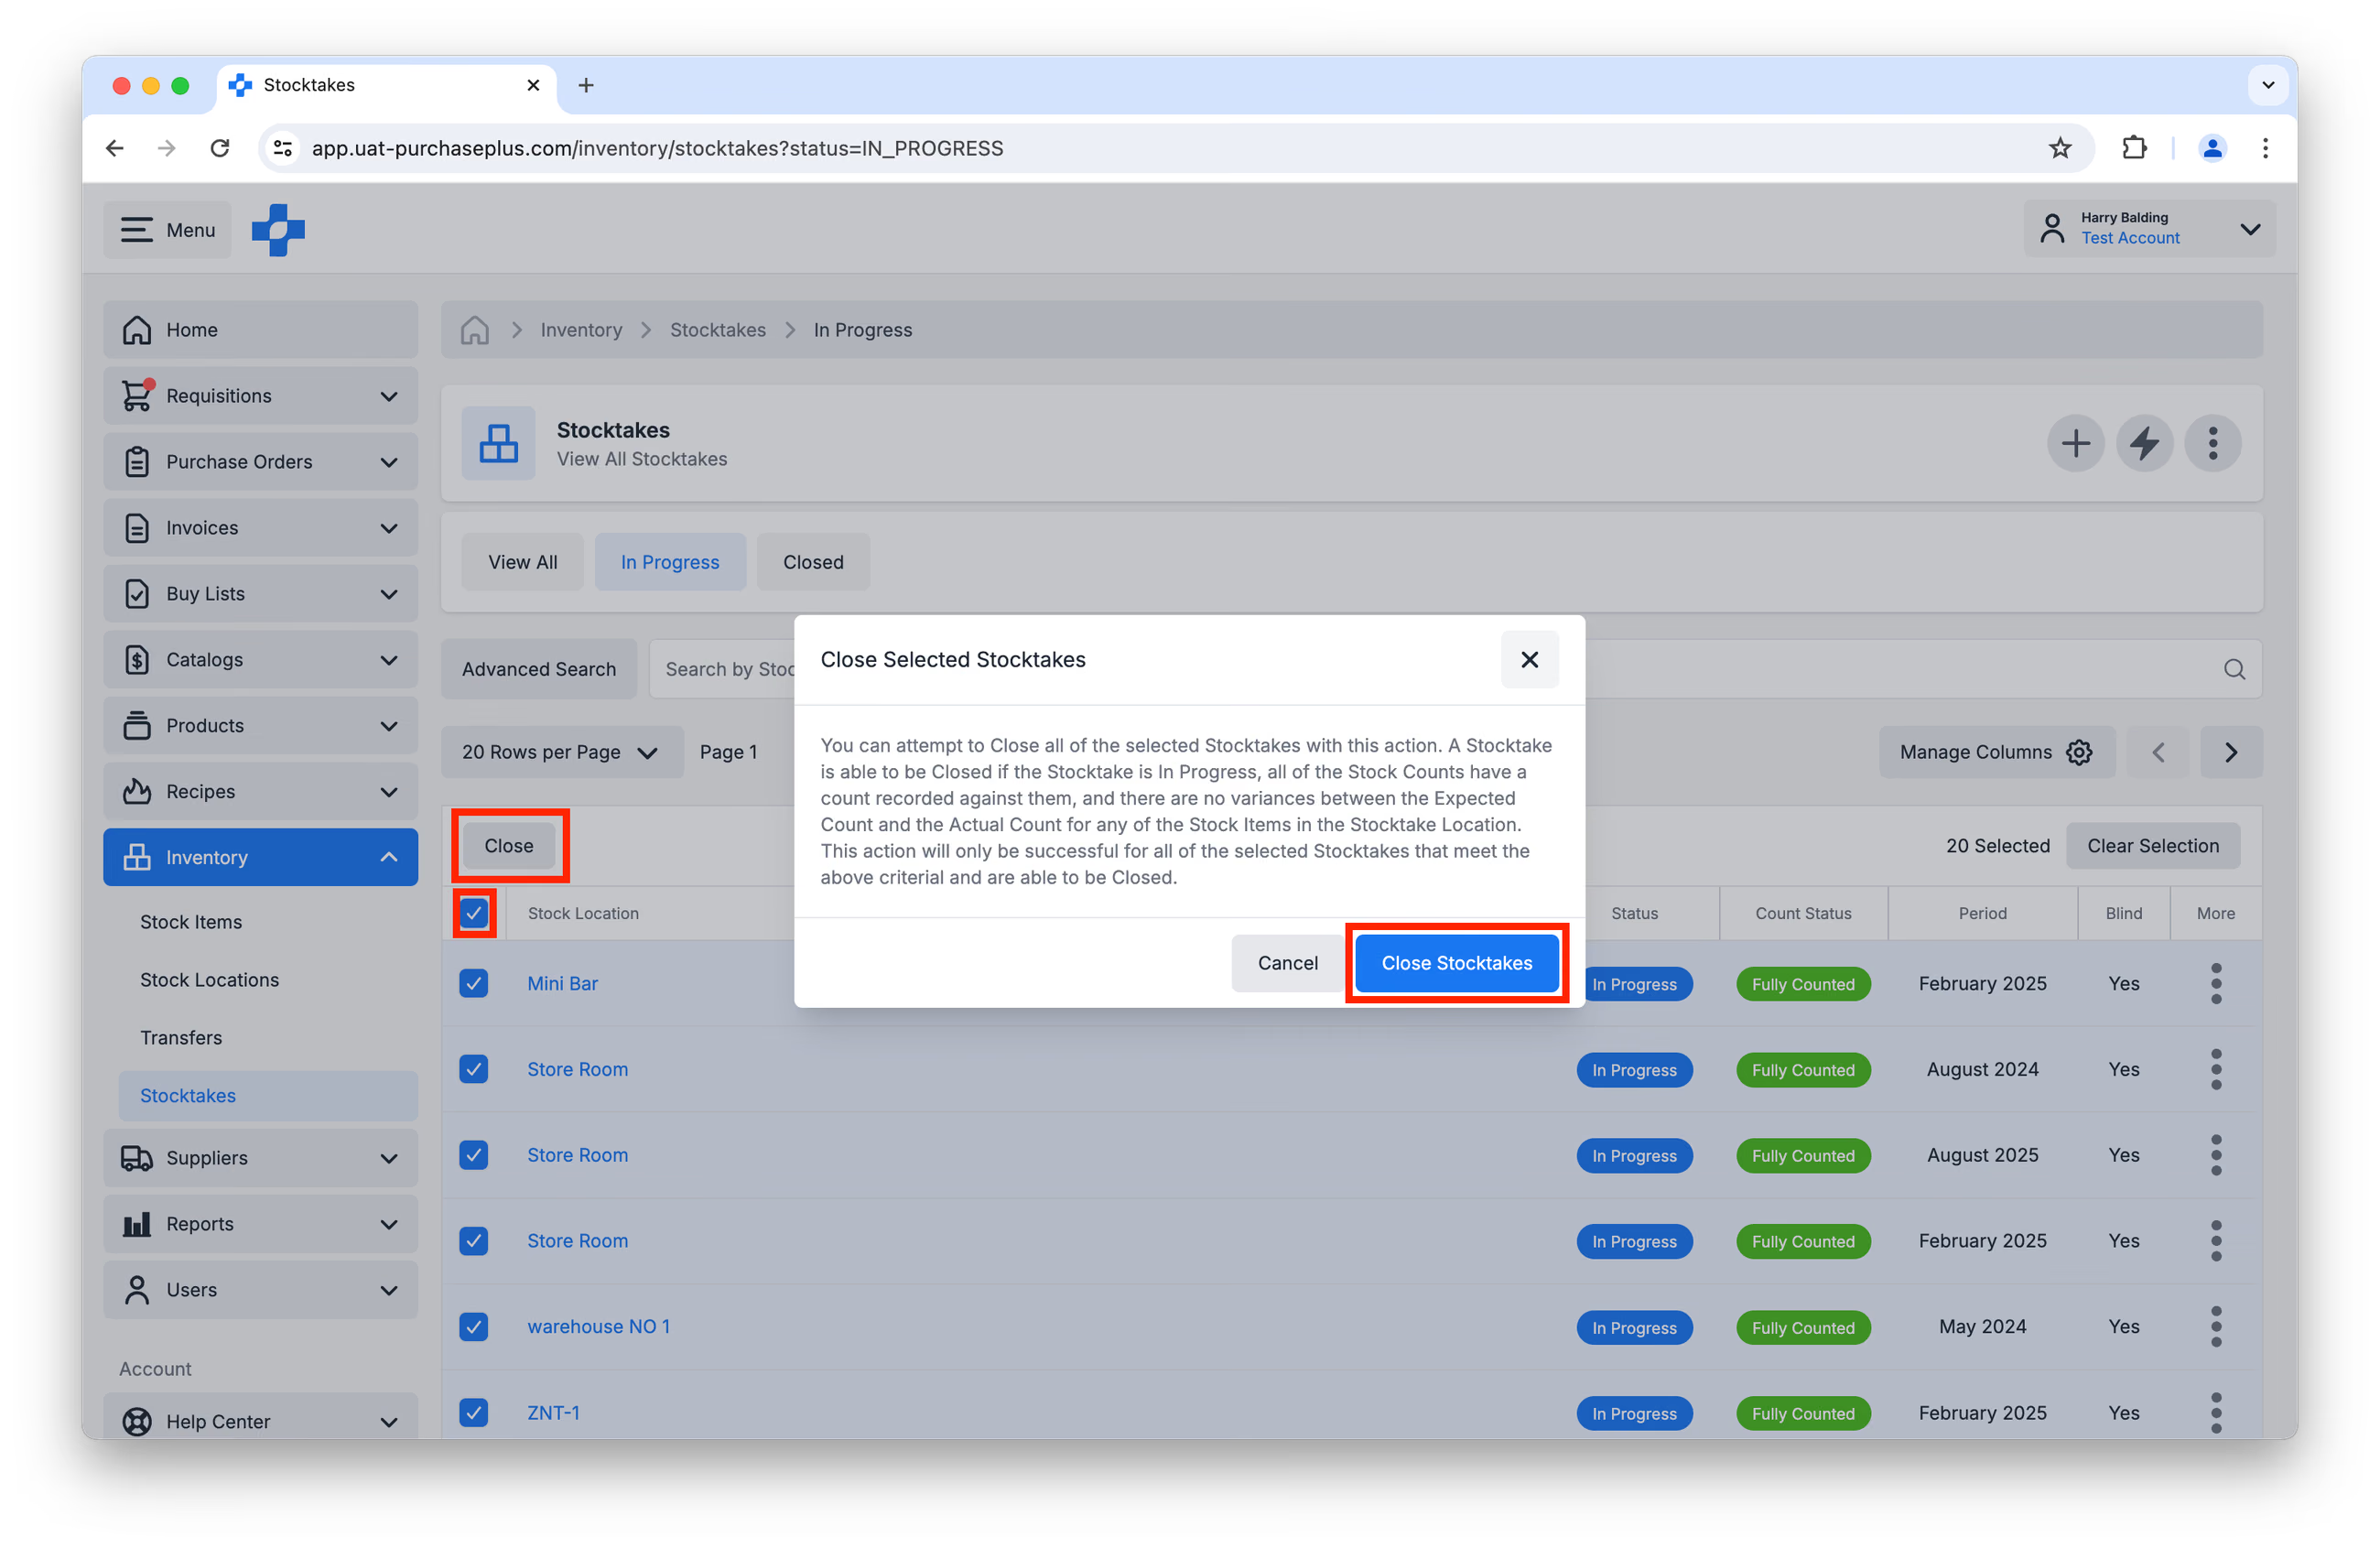
Additionally, you can Close multiple Stocktakes using the multi-select column on the All Stocktakes table view. Please note: This action will only be successful for all of the selected Stocktakes that meet the above criteria for Closing a Stocktake.
Delete an In Progress Stocktake
Users with Manage Stocktakes can delete an In Progress Stocktake and its counts from the Stocktakes list, the tiles view, or the Stocktake page.
- Open [Inventory] → [Stocktakes].
- Open the In Progress Stocktake, or open [More Options] on that row.
- Click [Delete Stocktake].
- Click [Delete Stocktake] on the confirmation.
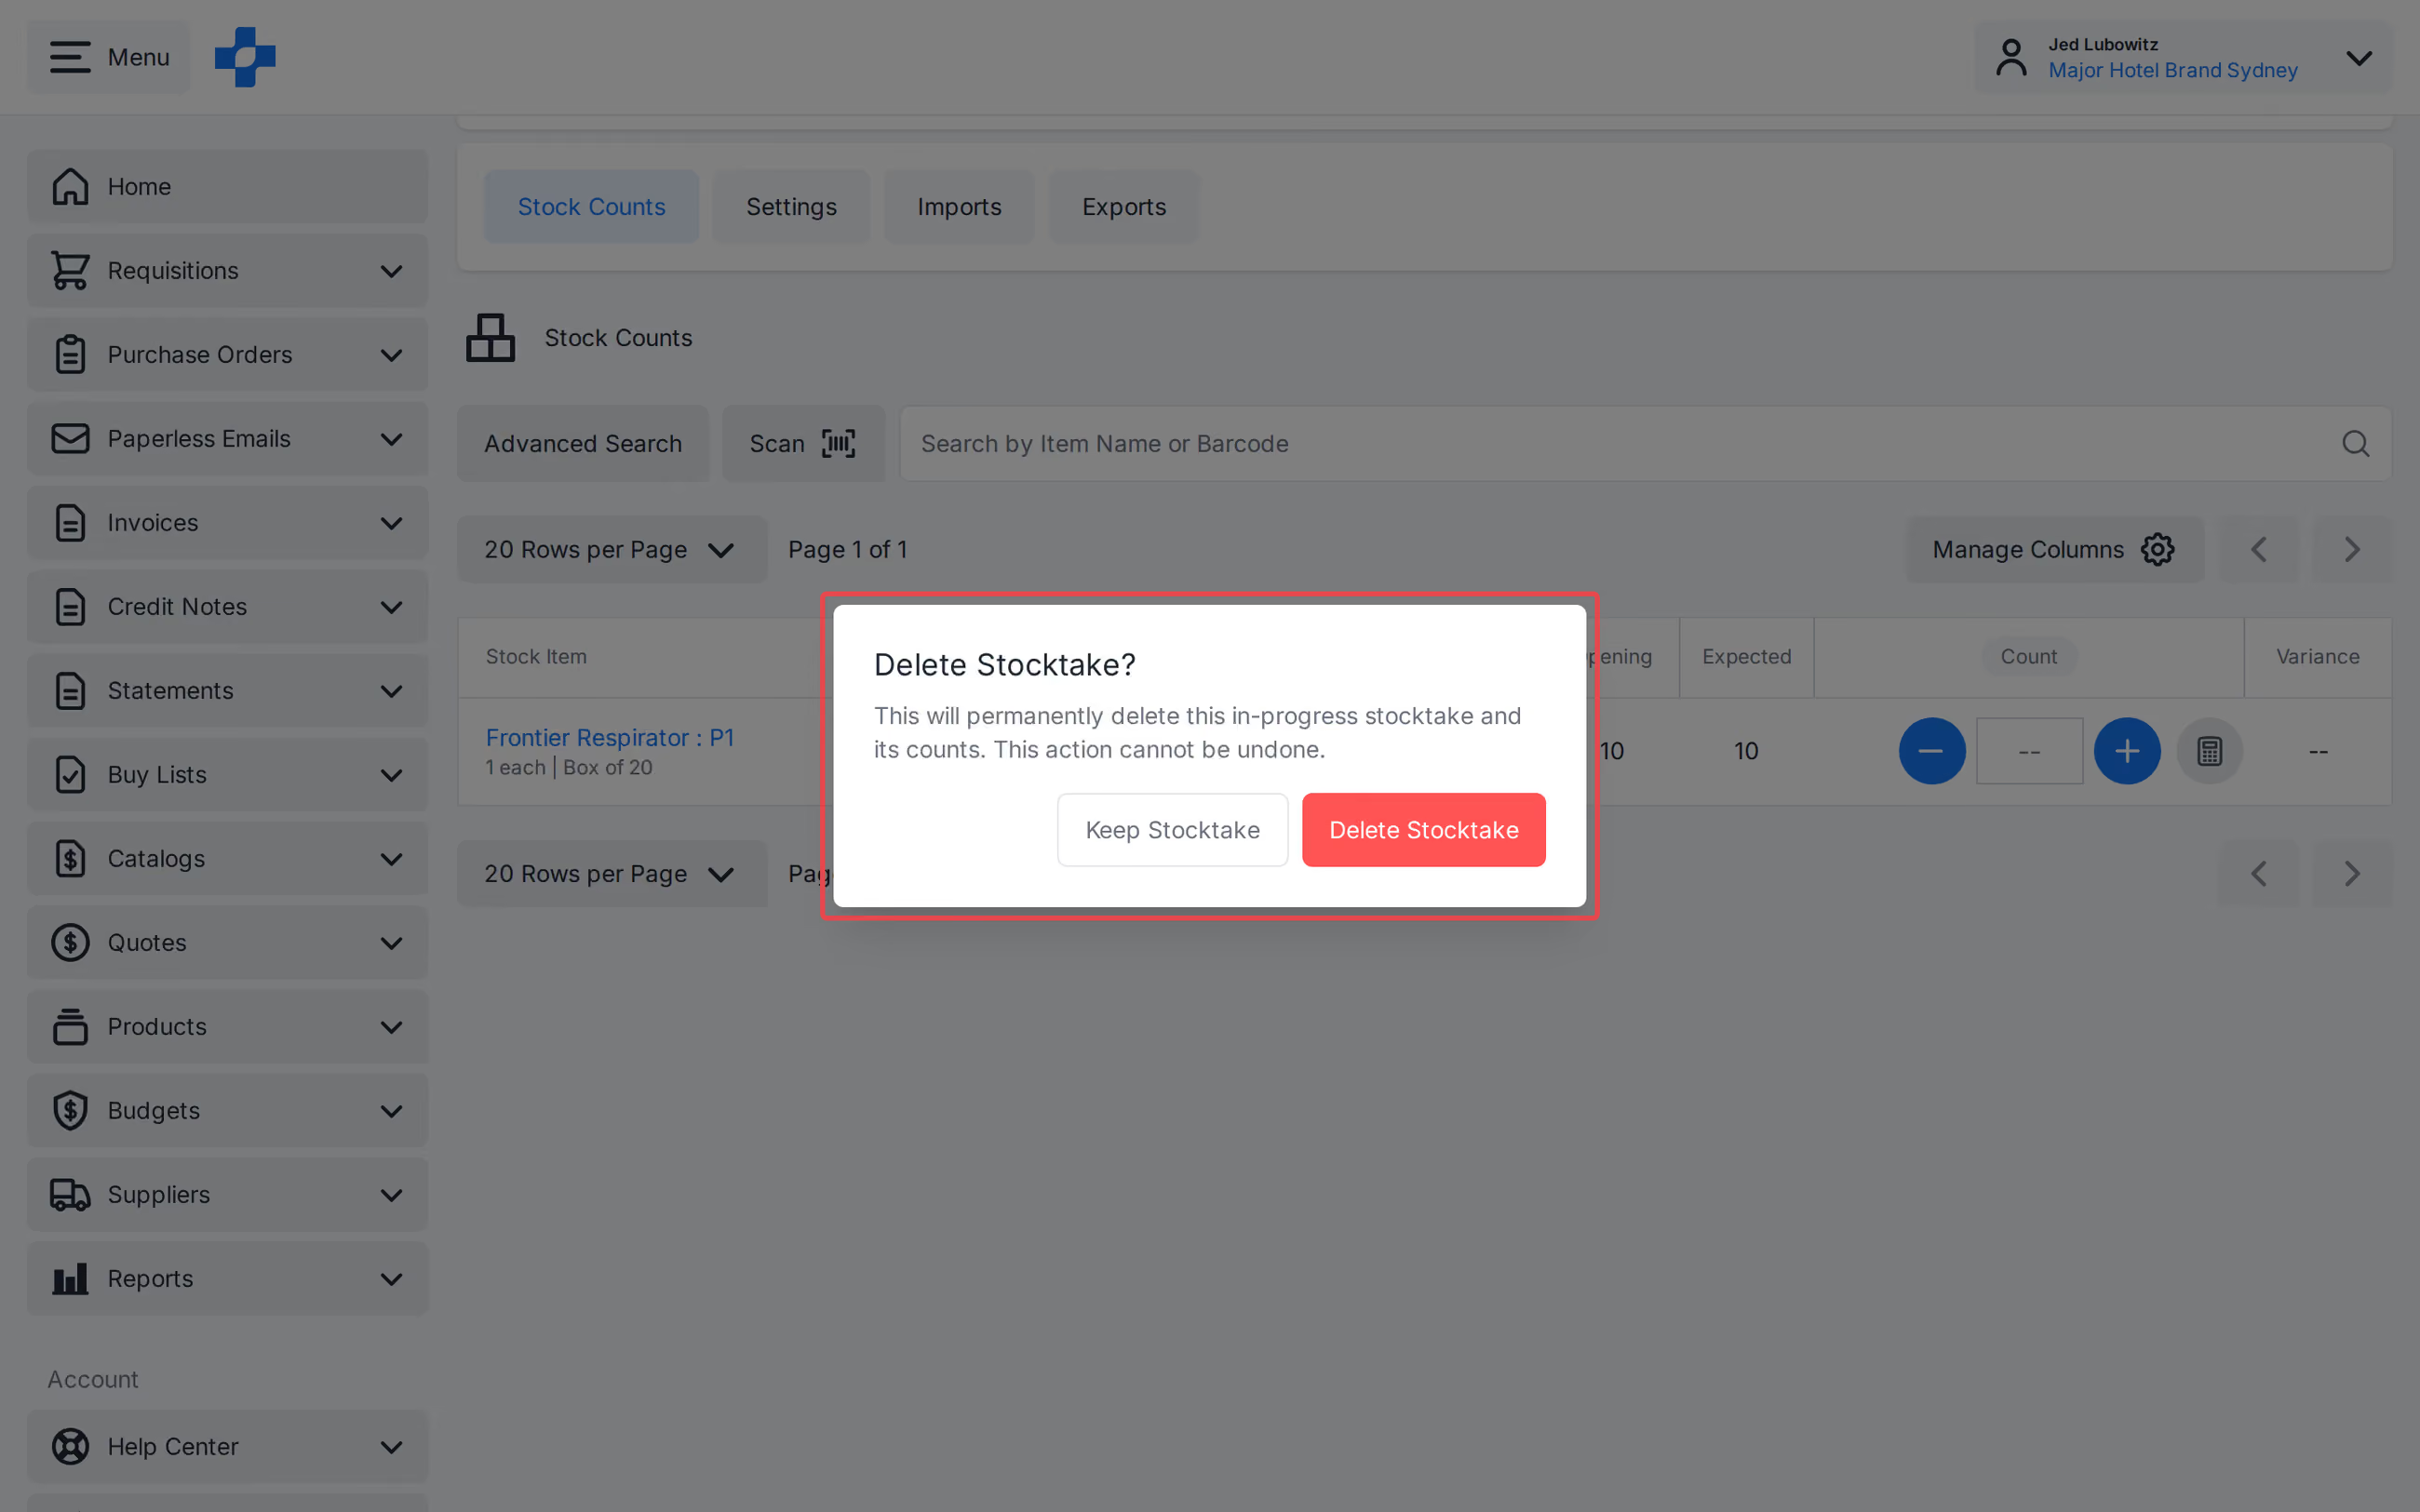
Note - A Closed Stocktake cannot be deleted.
Clearing Expense Locations
The [Clear Expense Locations] action zeros out the quantity of all Stock Items in all Expense Locations. This action will automatically create an Accounting Transfer for each Expense Location, and transfer the balances of the Stock Items from the Expense Location to the Period-End Cost of Goods Used System Location. Typically, Expense Locations are Cleared just prior to closing all of your Stocktakes, for a given period.
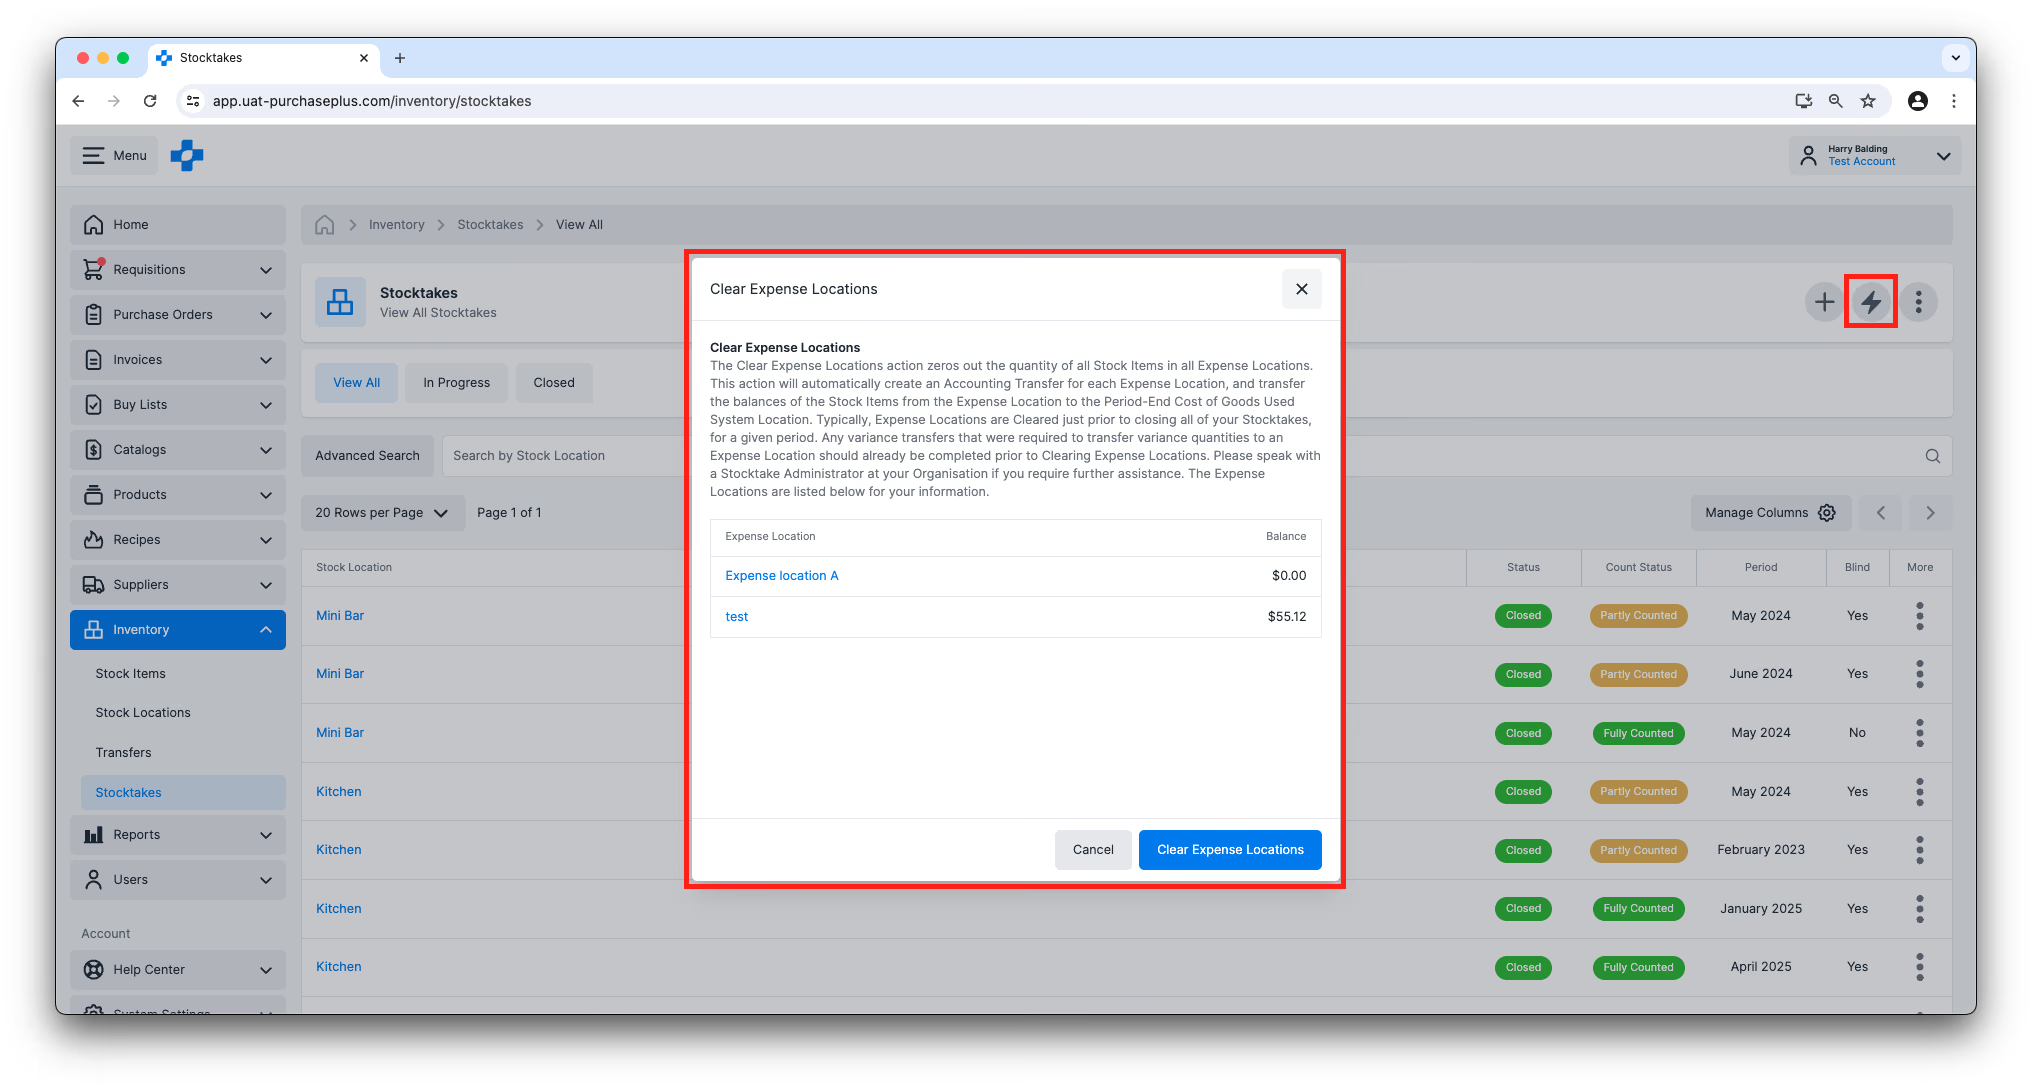
Any variance transfers that were required to transfer variance quantities to an Expense Location should already be completed prior to Clearing Expense Locations.
Next: end-of-month stocktake
The above information is designed to give you a baseline understanding of Stocktakes and how they work in PurchasePlus.
For a step-by-step guide on How to Complete an End of Month Stocktake with our platform, including the use of additional features not listed in this article, please visit:
/docs/for-purchasers/end-of-month-stocktake-process
This is Part 5 of our Introduction to Inventory series.
- Read Introduction to Inventory, Part 1
- Read Introduction to Inventory, Part 2: Stock Items
- Read Introduction to Inventory, Part 3: Stock Locations
- Read Introduction to Inventory, Part 4: Transfers
How do I start using the Inventory Module?
If your Organization would like to begin using the PurchasePlus Inventory module, please contact your Account Manager or our friendly Customer Success Team for assistance with enabling the module, and to organize training for your users.
Note for Purchasers using Legacy PurchasePlus
The Inventory module in PurchasePlus has been redesigned, and is materially different to the Legacy PurchasePlus Inventory module. Organizations migrating from Legacy PurchasePlus to PurchasePlus will be given additional migration support.