

Create a Credit Note
Create a Credit Note
A Credit Note is a document that indicates a return of funds to a Purchaser. It is commonly issued by a Supplier following the cancellation of a Purchase Order, Invoice error, or lost or damaged goods. Credit Notes may be used to refund a transaction either in whole or in part.
create a Credit Note
To create a Credit Note in PurchasePlus, a user must have the ‘Manage Invoices and Credit Notes’ Permission.
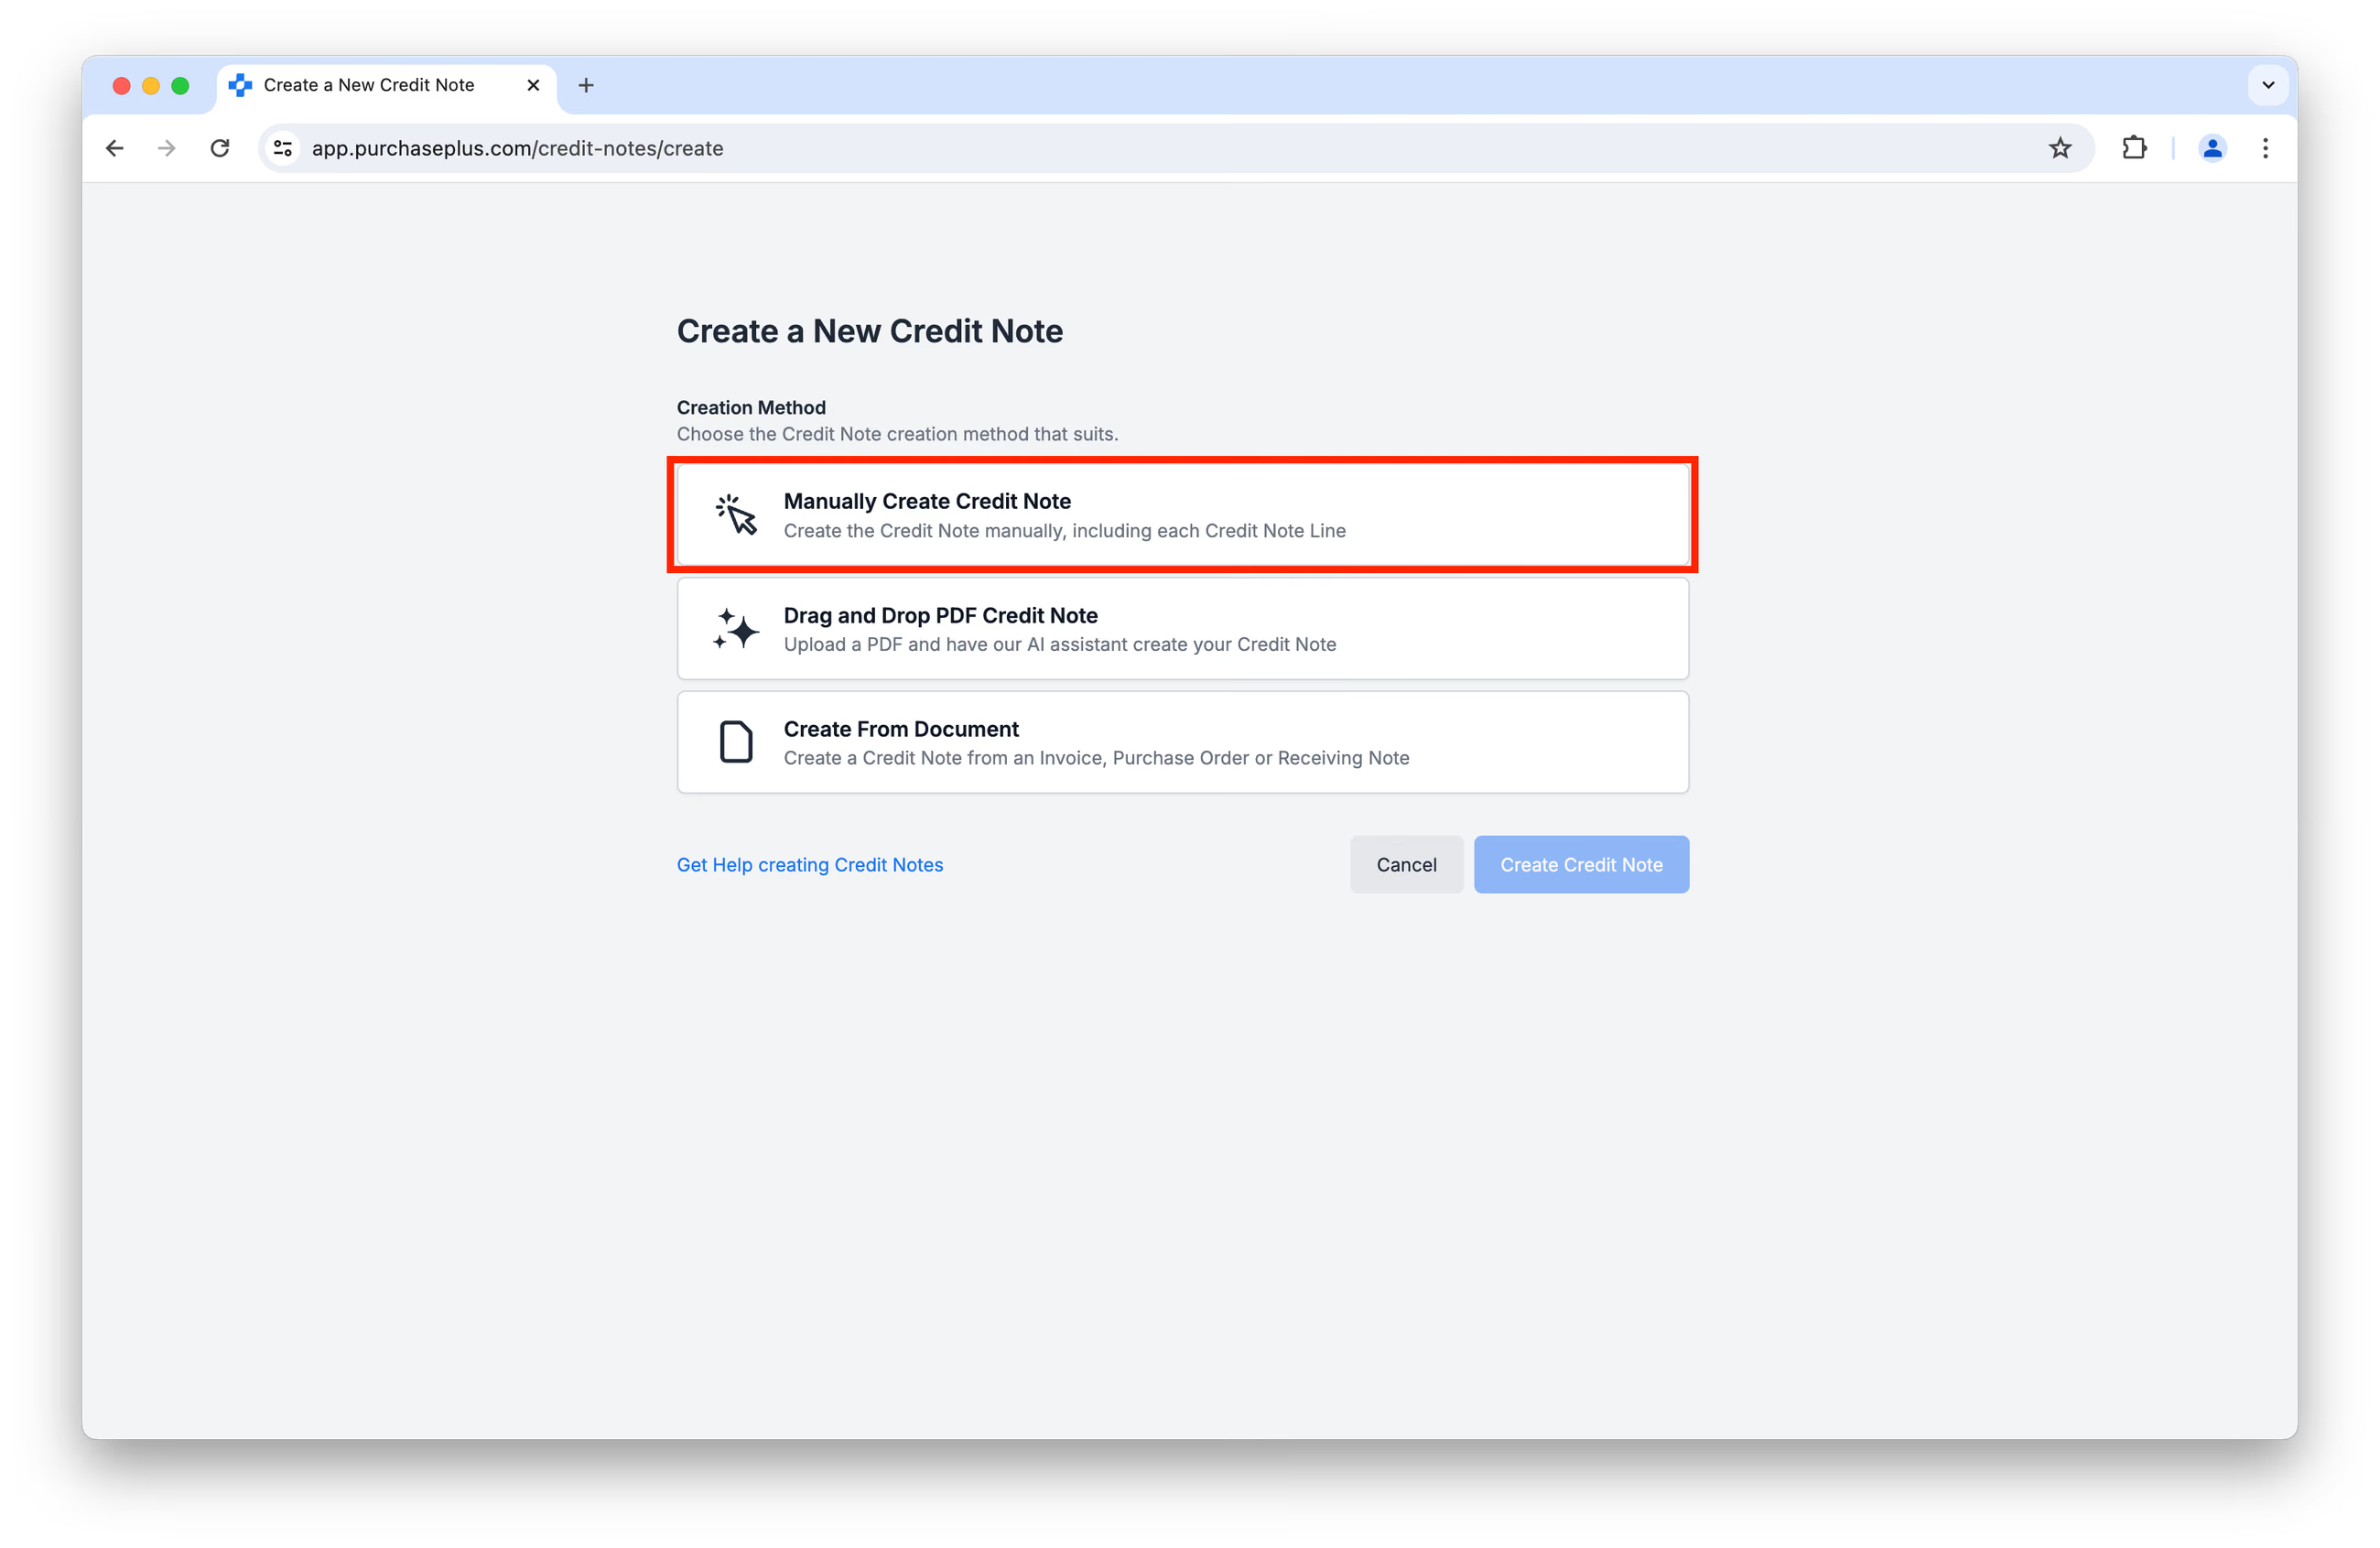
There are three methods that permitted users can use to create a Credit Note in PurchasePlus. It is recommended that all users that create Credit Notes should familiarise themselves with the first method before making use of the powerful, automation-focused second and third methods.
- Method 1: Manually creating the Credit Note
- Method 2: Uploading a PDF into our AI Scanning tool,
- Method 3: Selecting an Invoice, Purchase Order or Goods Receiving Note as the basis for the Credit Note.
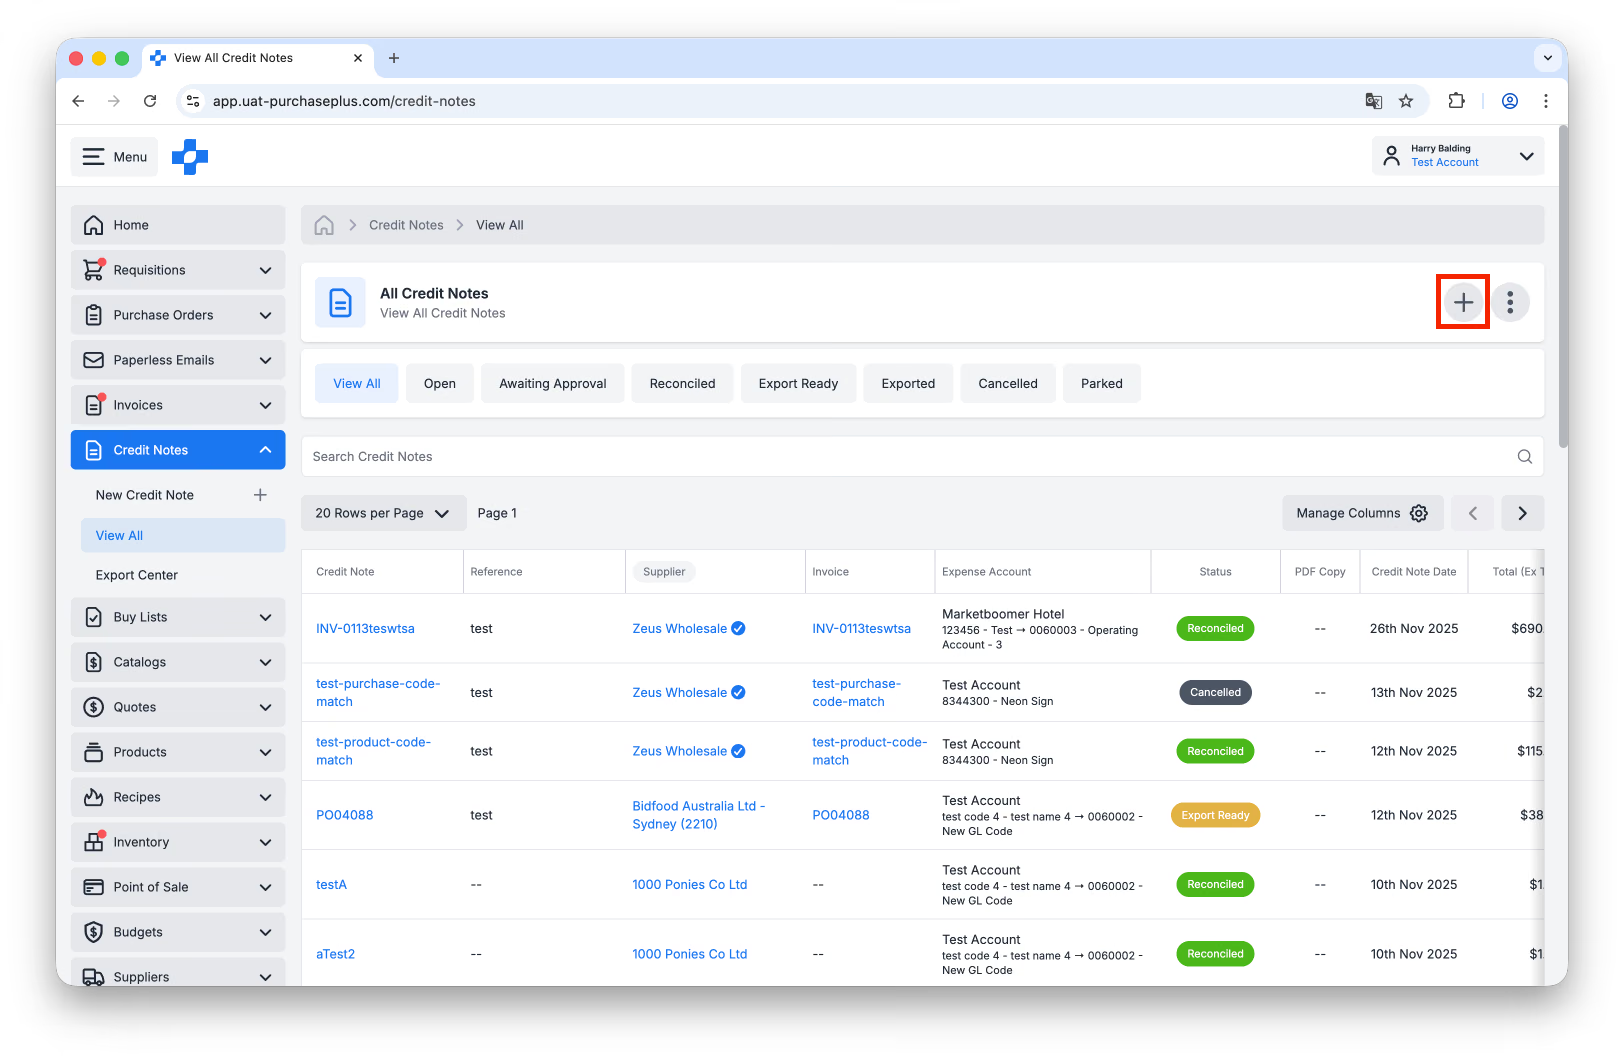
Each of the three methods can be initiated from the [Credit Notes] → [View All] area in the side navigation bar and then clicking [Create New Credit Note] button:
Method 1: Manually Creating a Credit Note
From the resulting [Create Credit Note] screen, select [Manually Create Credit Note]:
This will prompt you to provide some details about the Credit Note, such as a Reference, Account Code and so on:
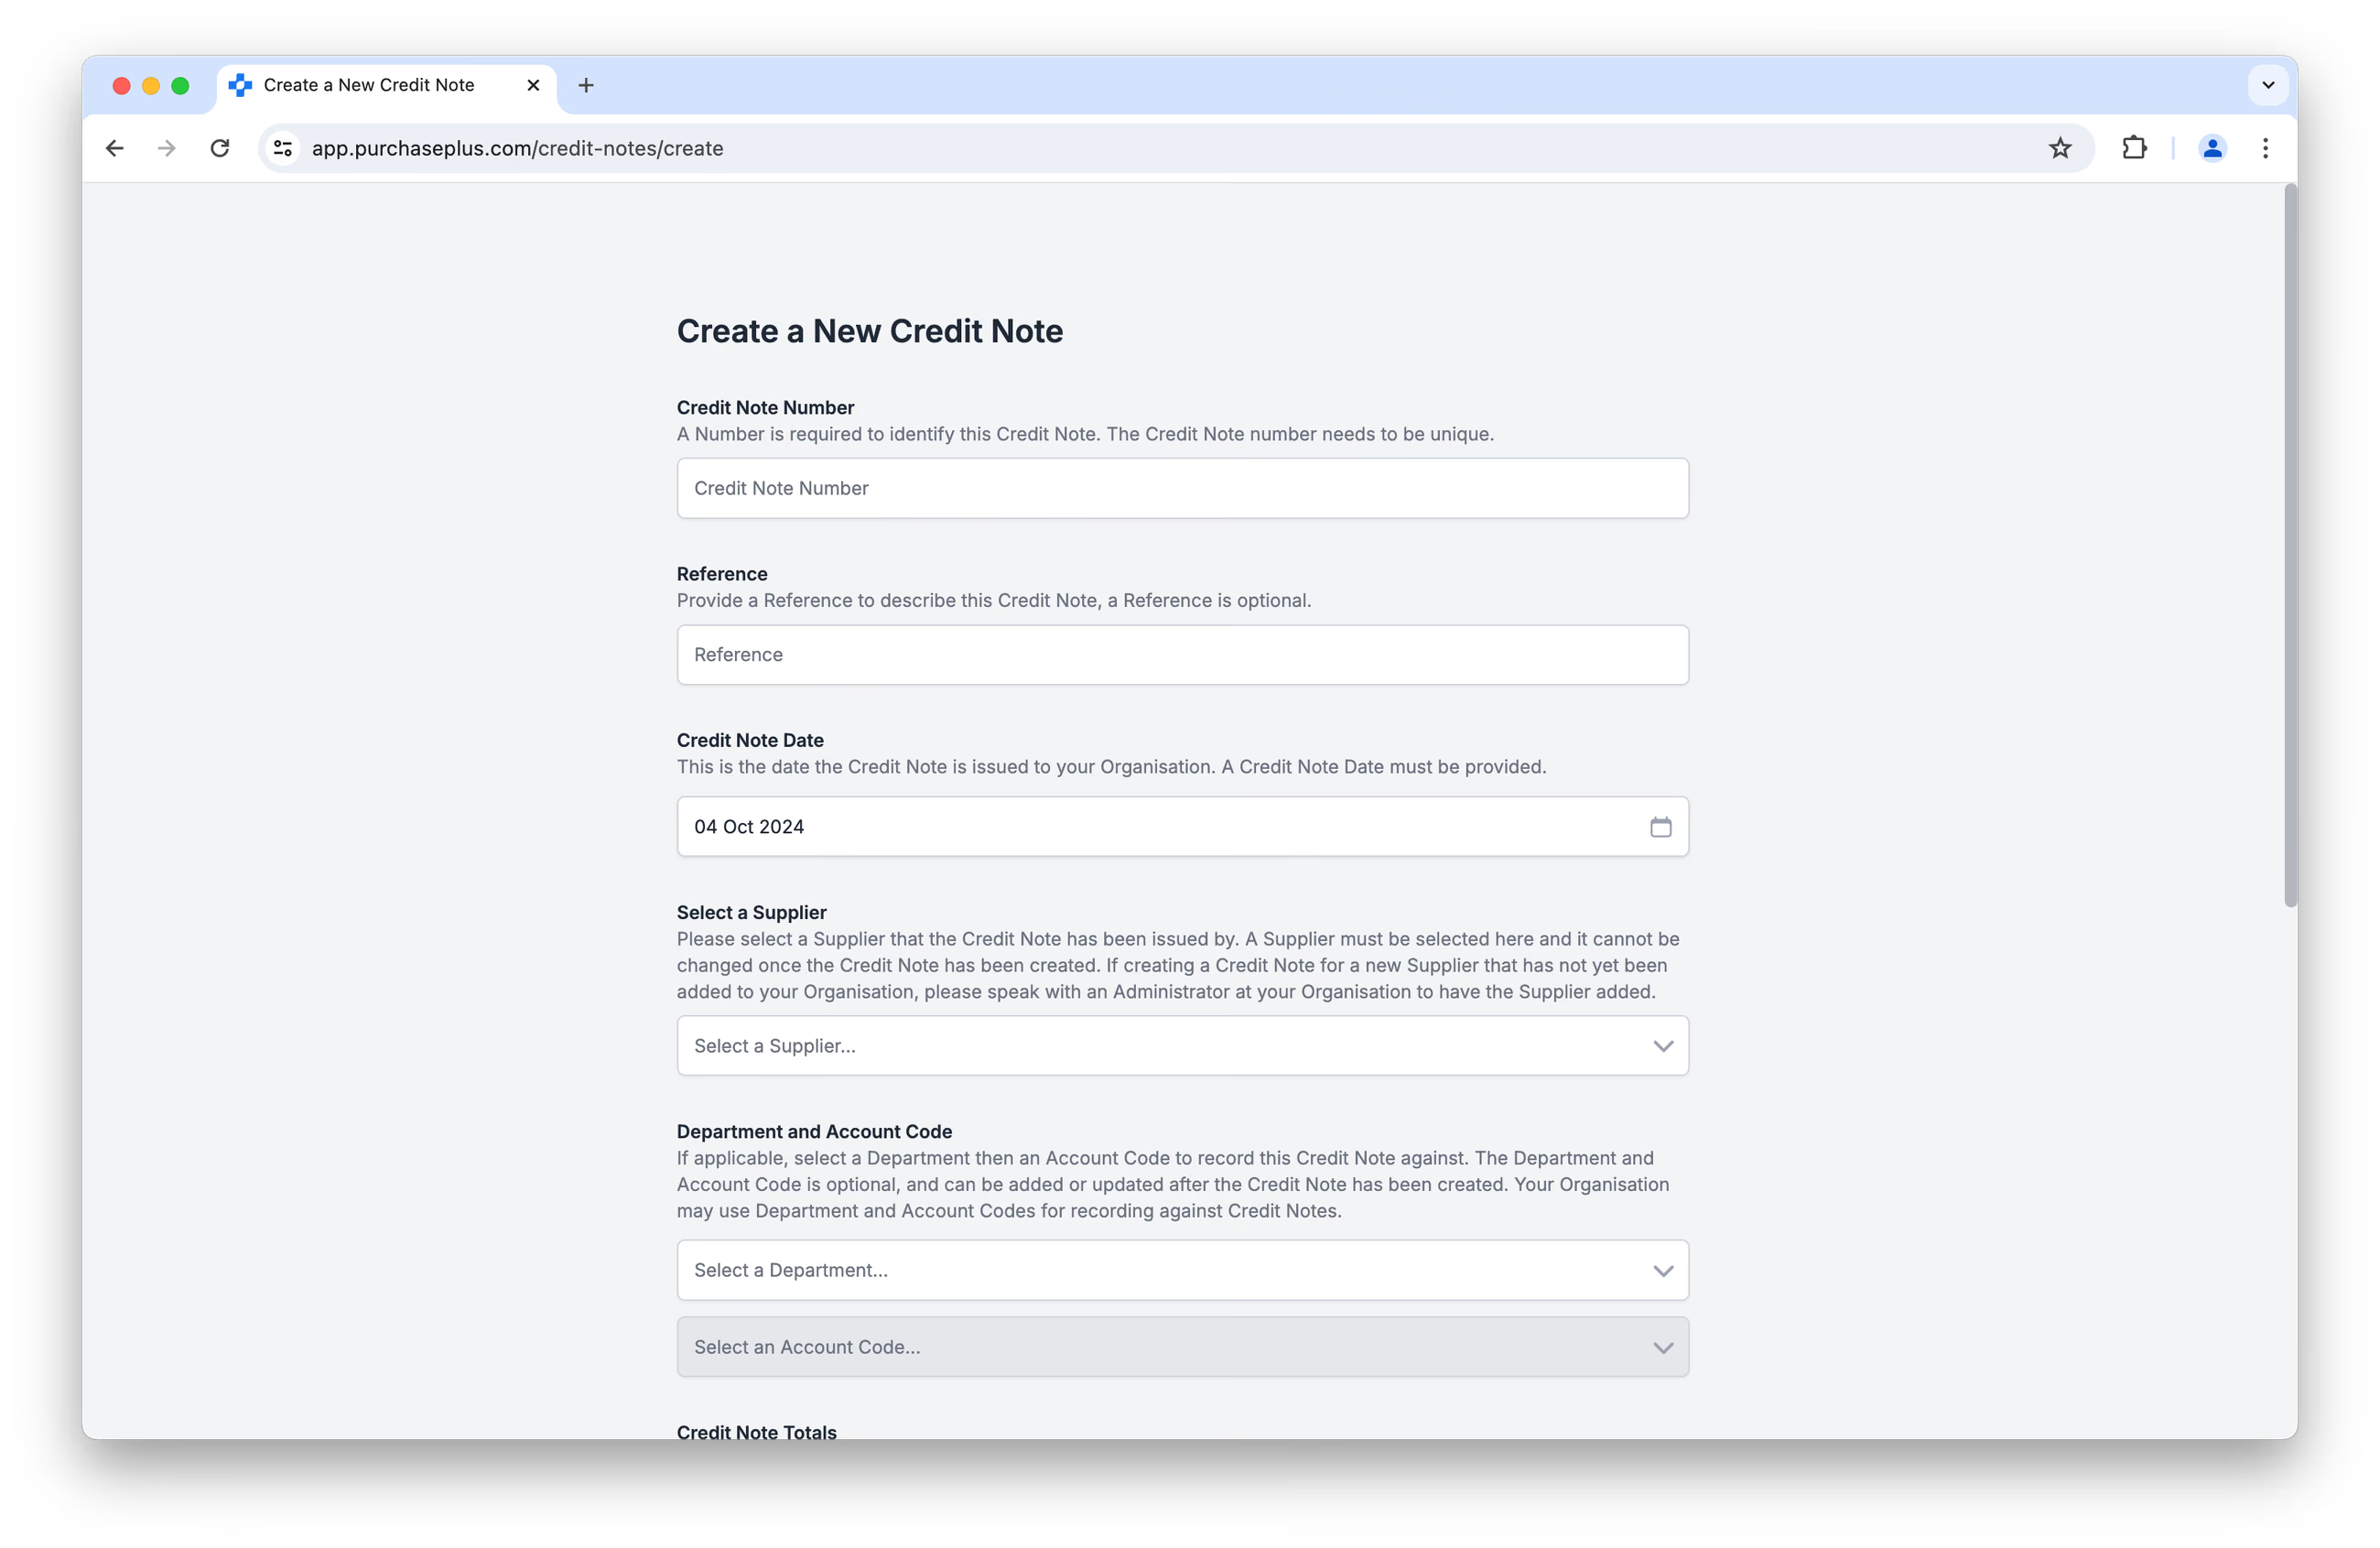
You must also provide a Total (excluding Tax) and a Total Tax value on this initial creation screen (above), but you can update these details later.
Once these details are supplied, click [Create Credit Note] at the bottom of the screen.
Adding Lines to a Credit Note
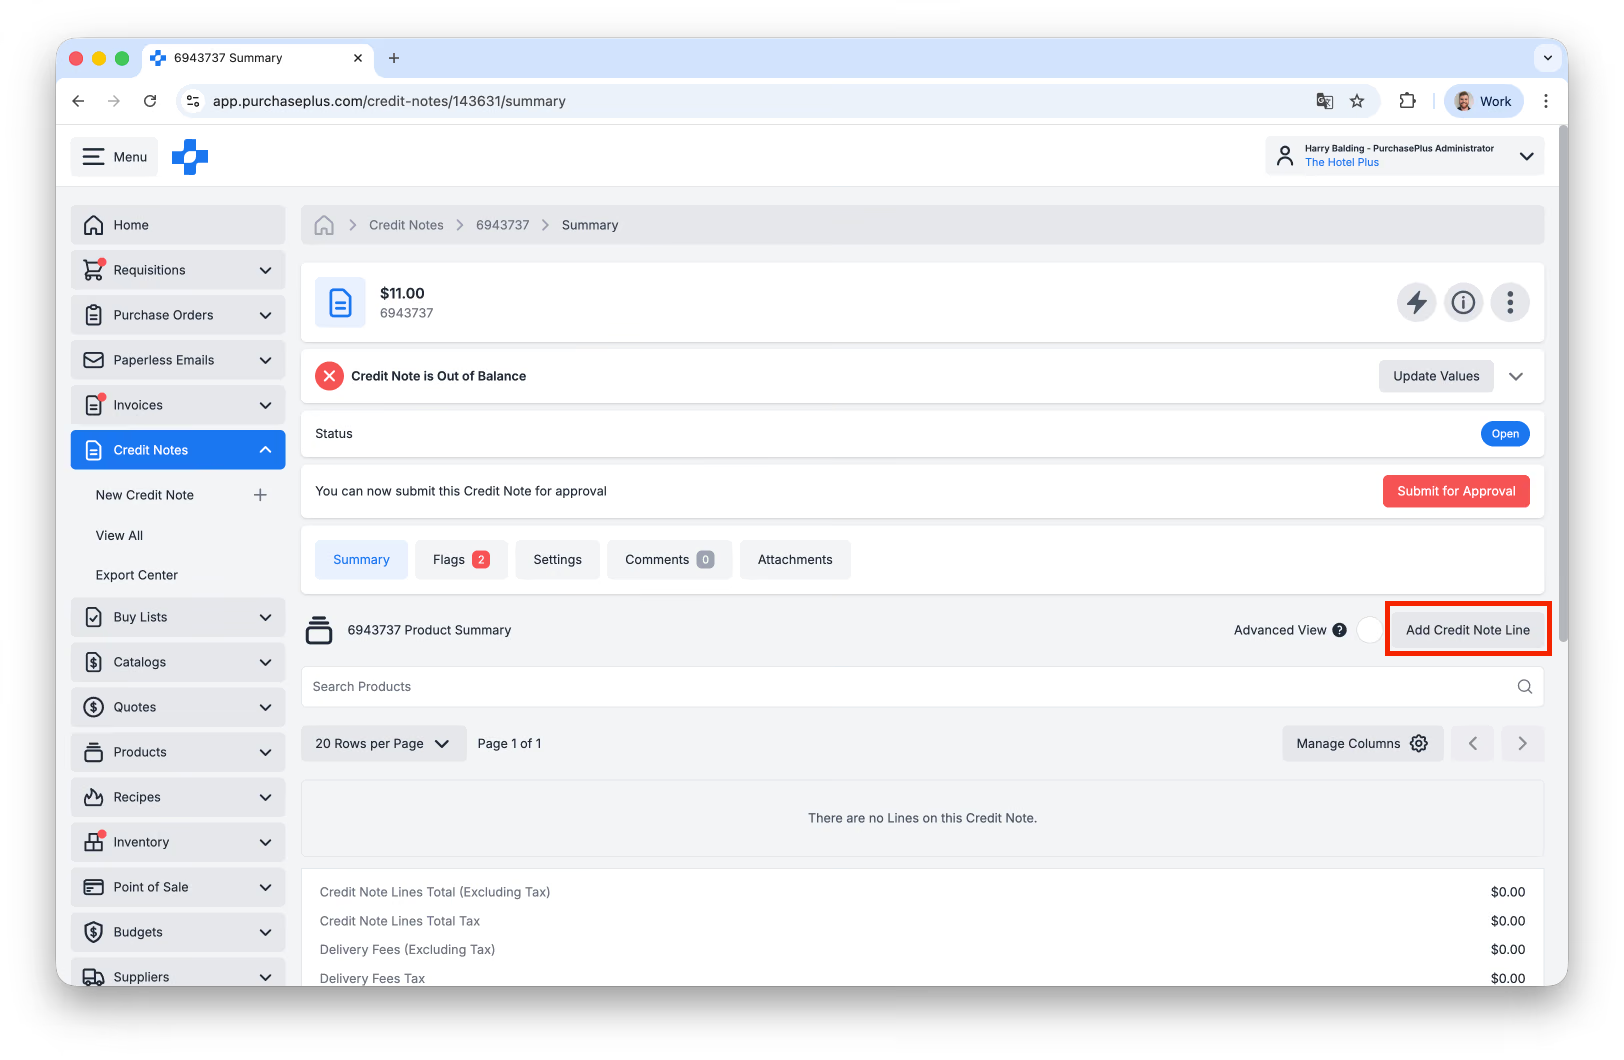
Once the Credit Note is created, you will find that it will initially contain zero Lines. Click [Add Credit Note Line] to add one or more Lines to your Credit Note:
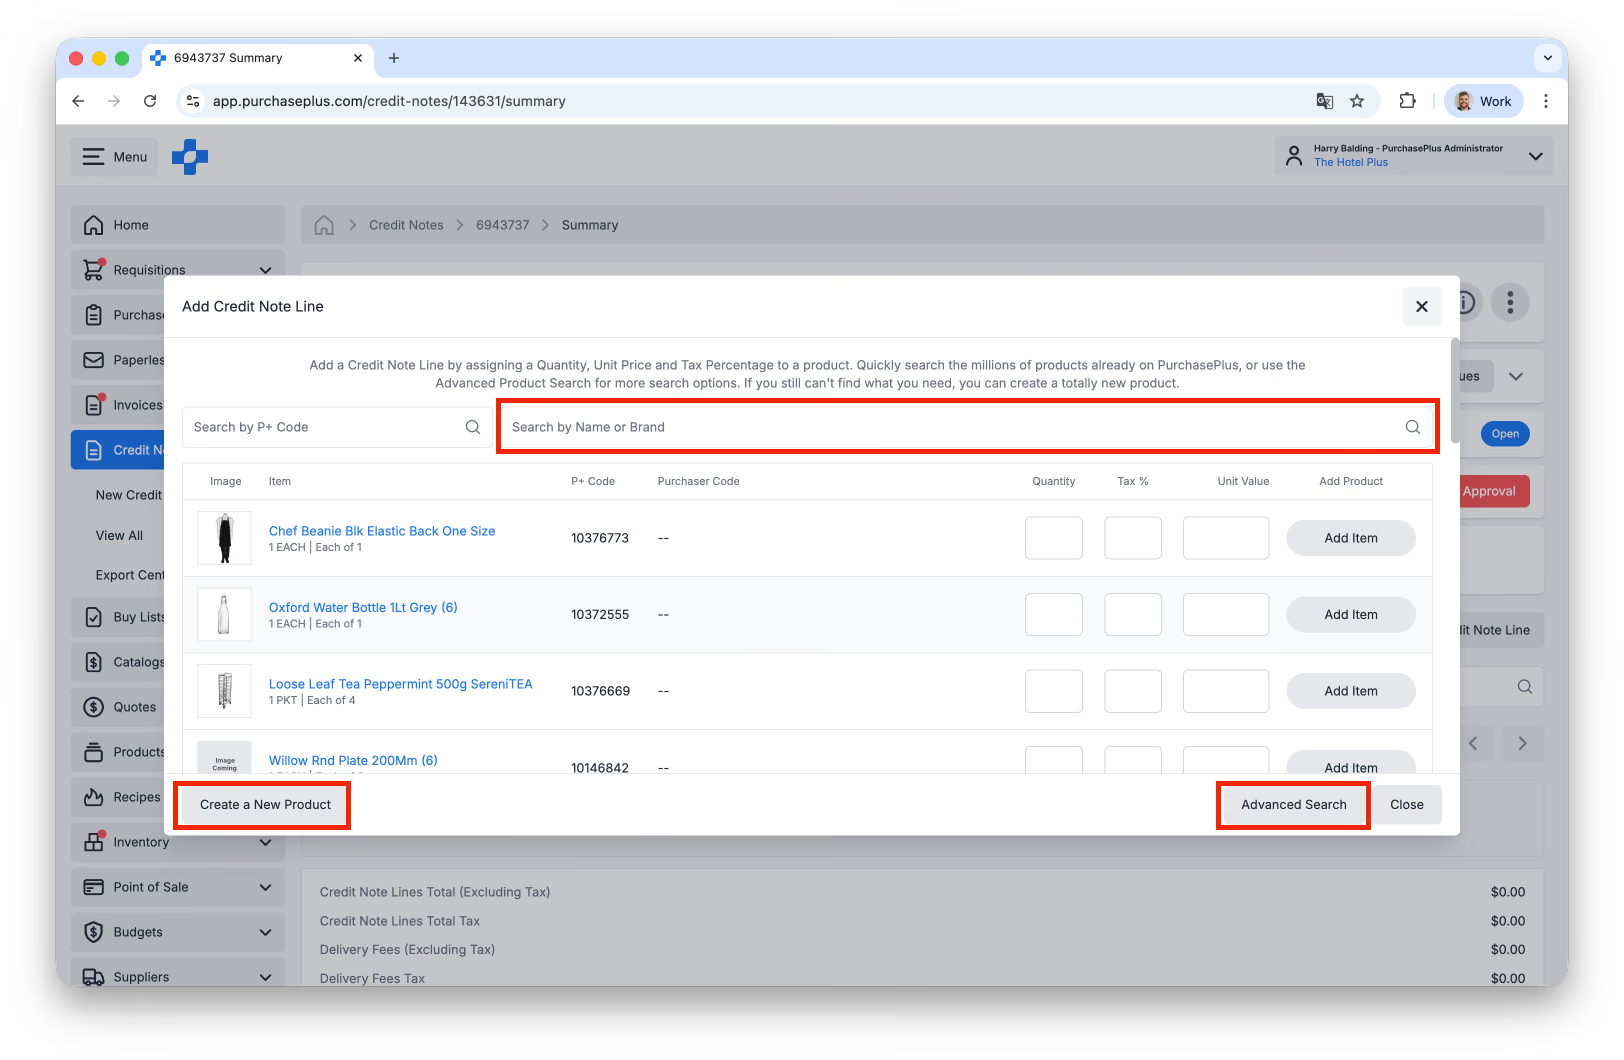
 When creating a Credit Note Line, you can:
- [Search by Name or Brand],
- Use [Advanced Product Search], or
- [Create a New Product] if needed:
Once you have found (or created) the correct Product, you must specify the Quantity, Tax % and Unit Value to be added to the Credit Note Line:
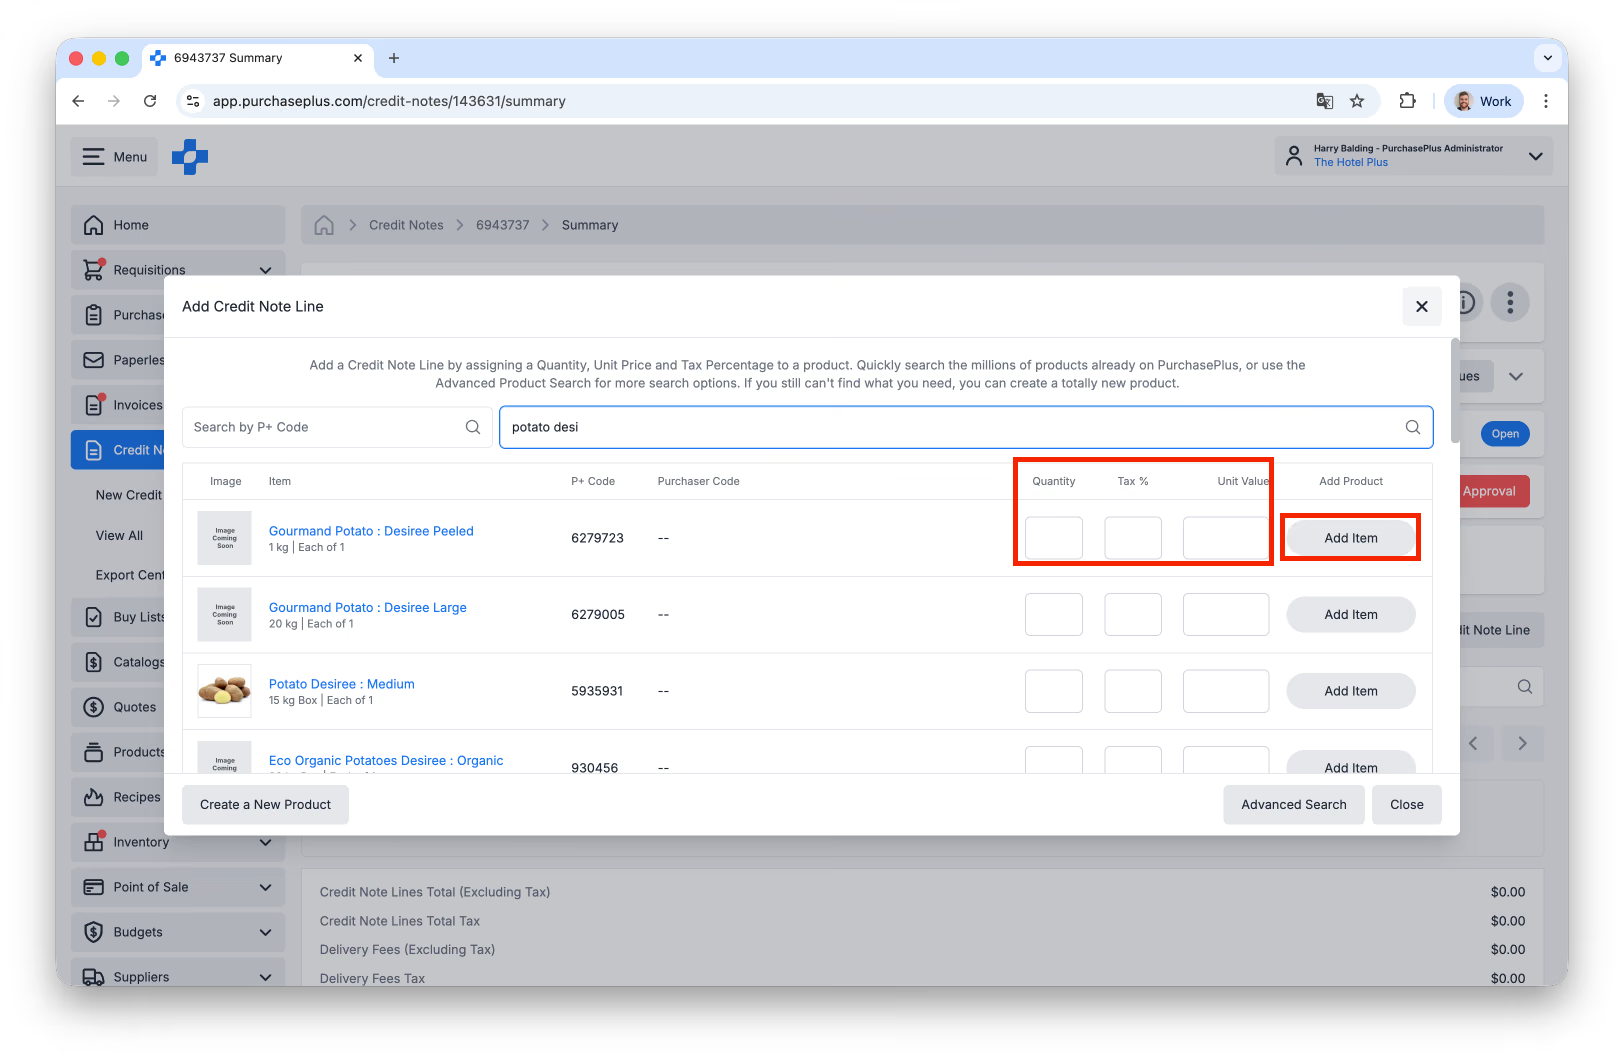 Click [Add Item] to add the Line to the Credit Note. You can repeat this action as many times as necessary, and each Line will be added to the Credit Note.
(Advanced) Adding Sub-Lines to a Credit Note Line
Any Credit Note Line can have Sub-Lines, which are a way of enriching a Credit Note Line with additional information that accompany that Line’s data in your AP Exports. For example, your Organisation may require each Line on a Credit Note to have a unique Reference, or a Custom Code that makes accounting more accurate for your Finance Team.
You can also use Sub-Lines to split the Line and attribute the cost to multiple Departments or Account Codes, identify the Line as Credit or Debit, and more.
To View and Manage Sub-Lines, [Advanced View] must be enabled:
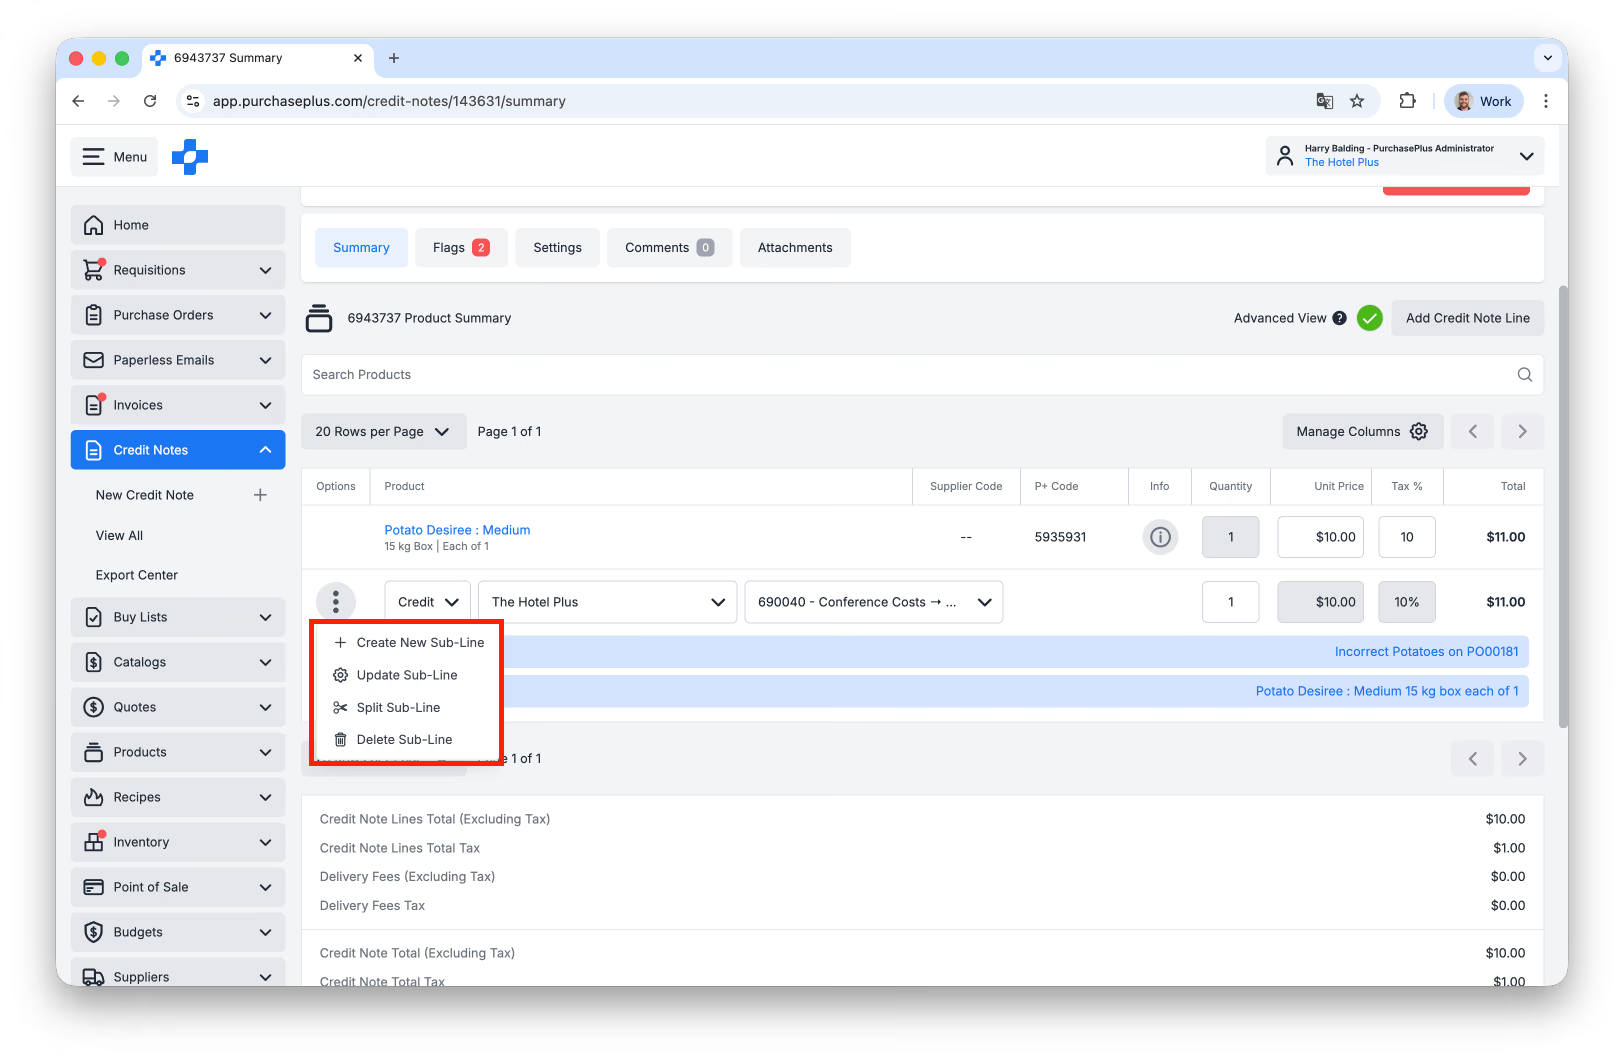
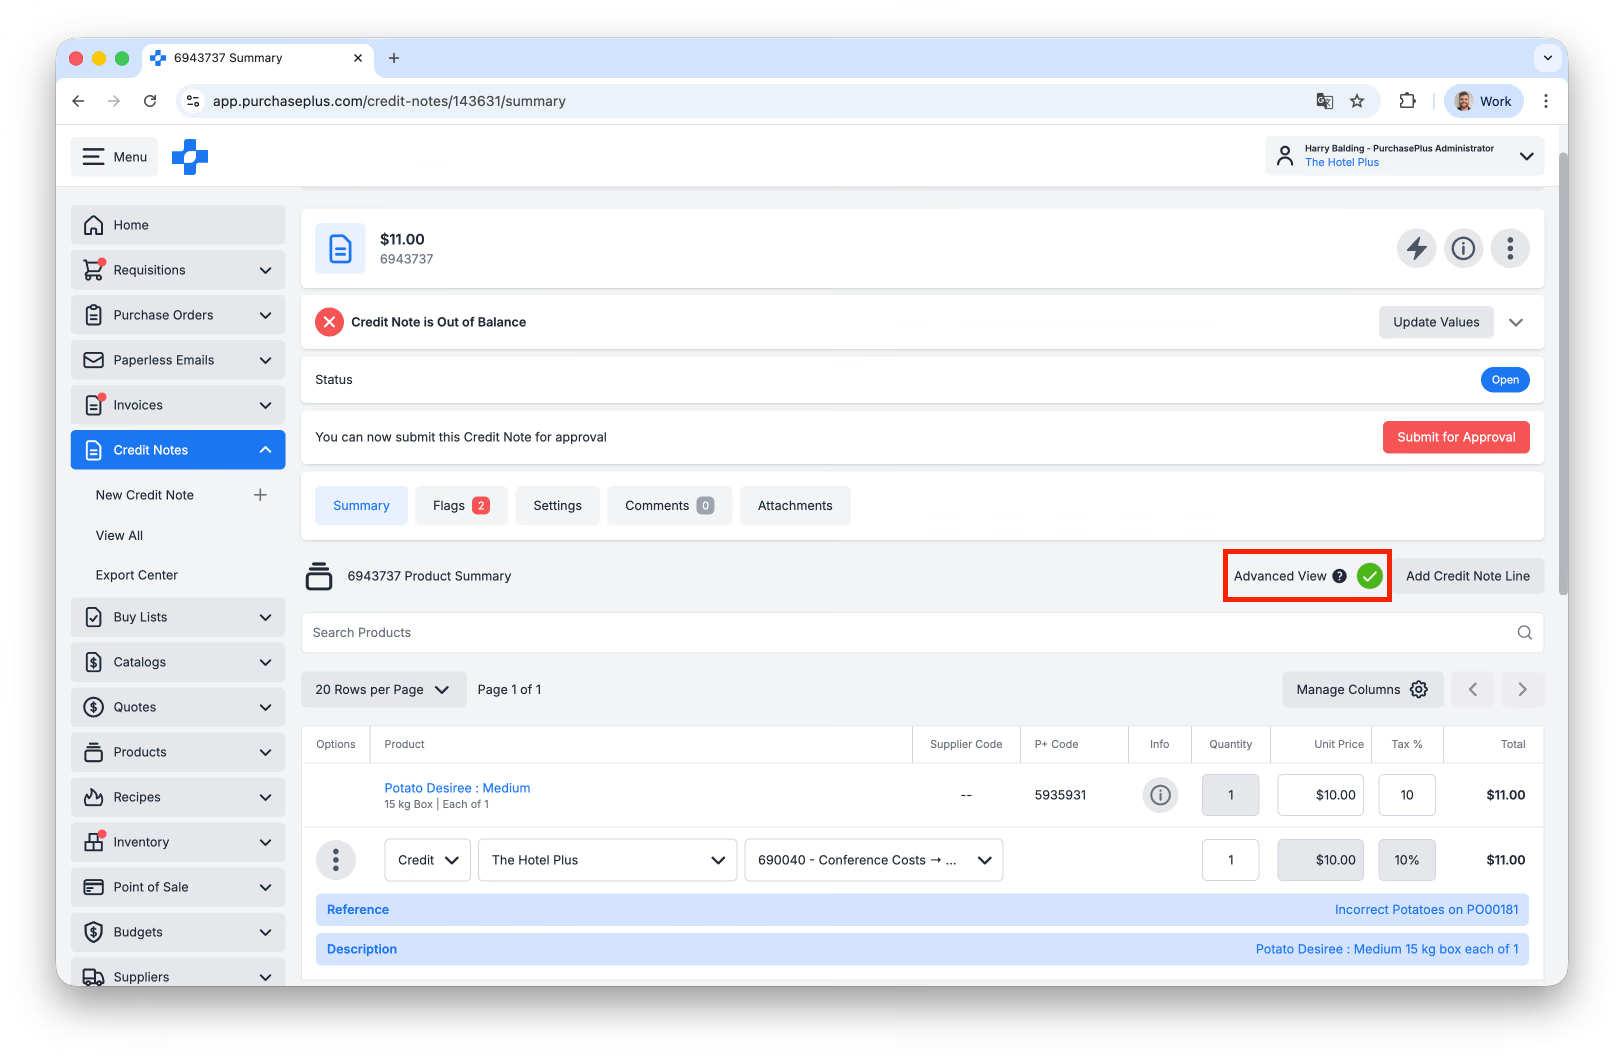 Once you have Advanced View enabled, click on any Sub-Line Menu to reveal the actions you can take on that Sub-Line:
Credit Note Sub-Lines work in the same way as Invoice Sub-Lines. Please view our article Update Invoice Lines Using Advanced Mode for more information.
Balancing Credit Notes and their Lines
To further assist with the creation and validation of Credit Notes, there is an [Out Of Balance] panel in the header section of a Credit Note (including the [Update Values] button, just like an Invoice):
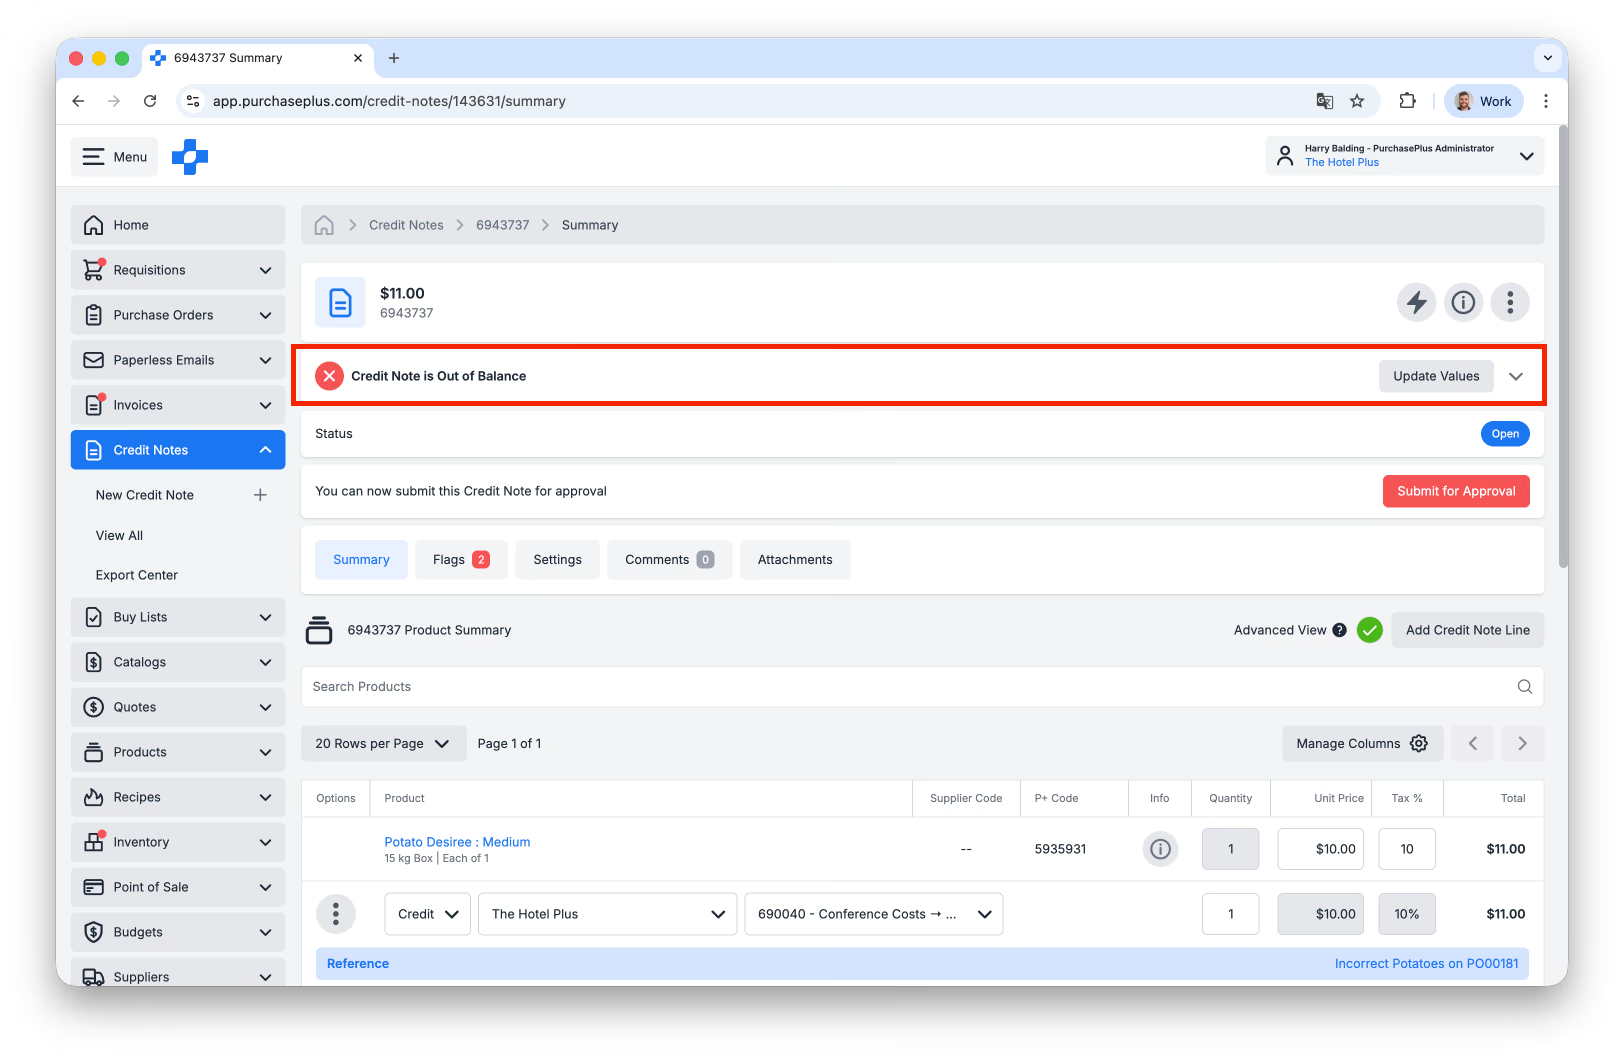
This panel is helpful in the event that the Total Amount of the Credit Note (specified upon creation of the Credit Note) does not exactly match the sum of the Lines (added after the creation of the Credit Note).
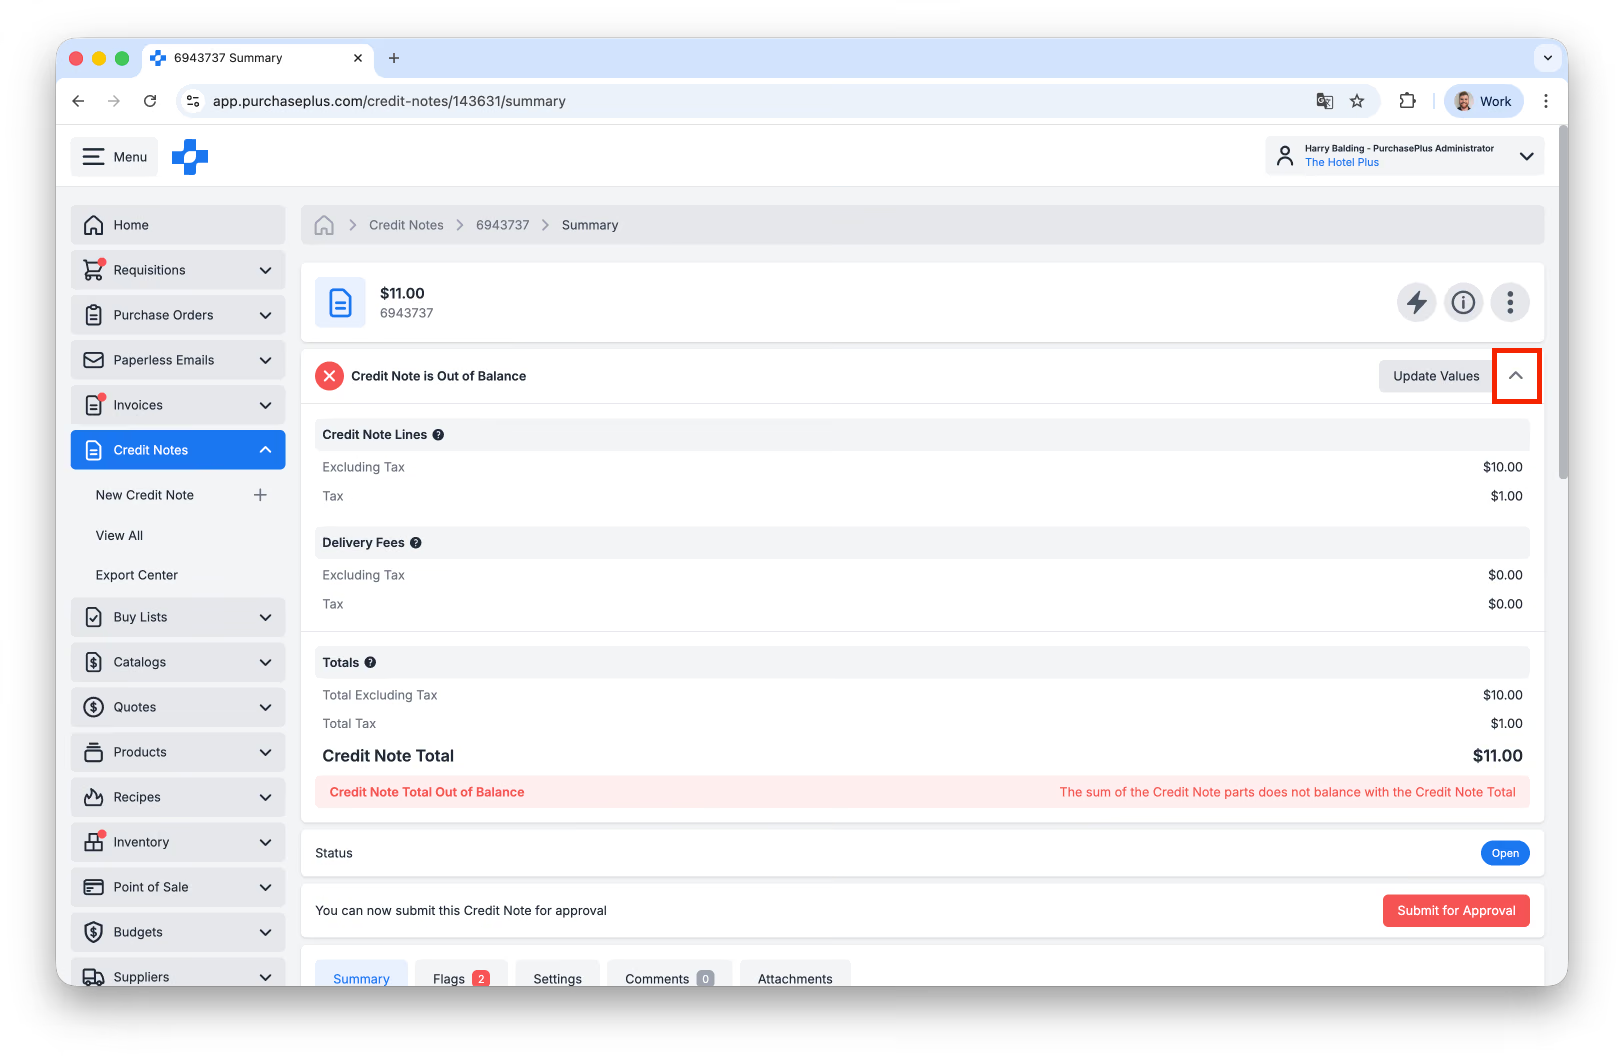
You can click on the arrow in the [Out Of Balance] panel to expand it for more detail (and click it again to hide the extra detail):
If required, you can click on [Update Values] to adjust and balance the Credit Note by adding Delivery Fees or Adjustments:
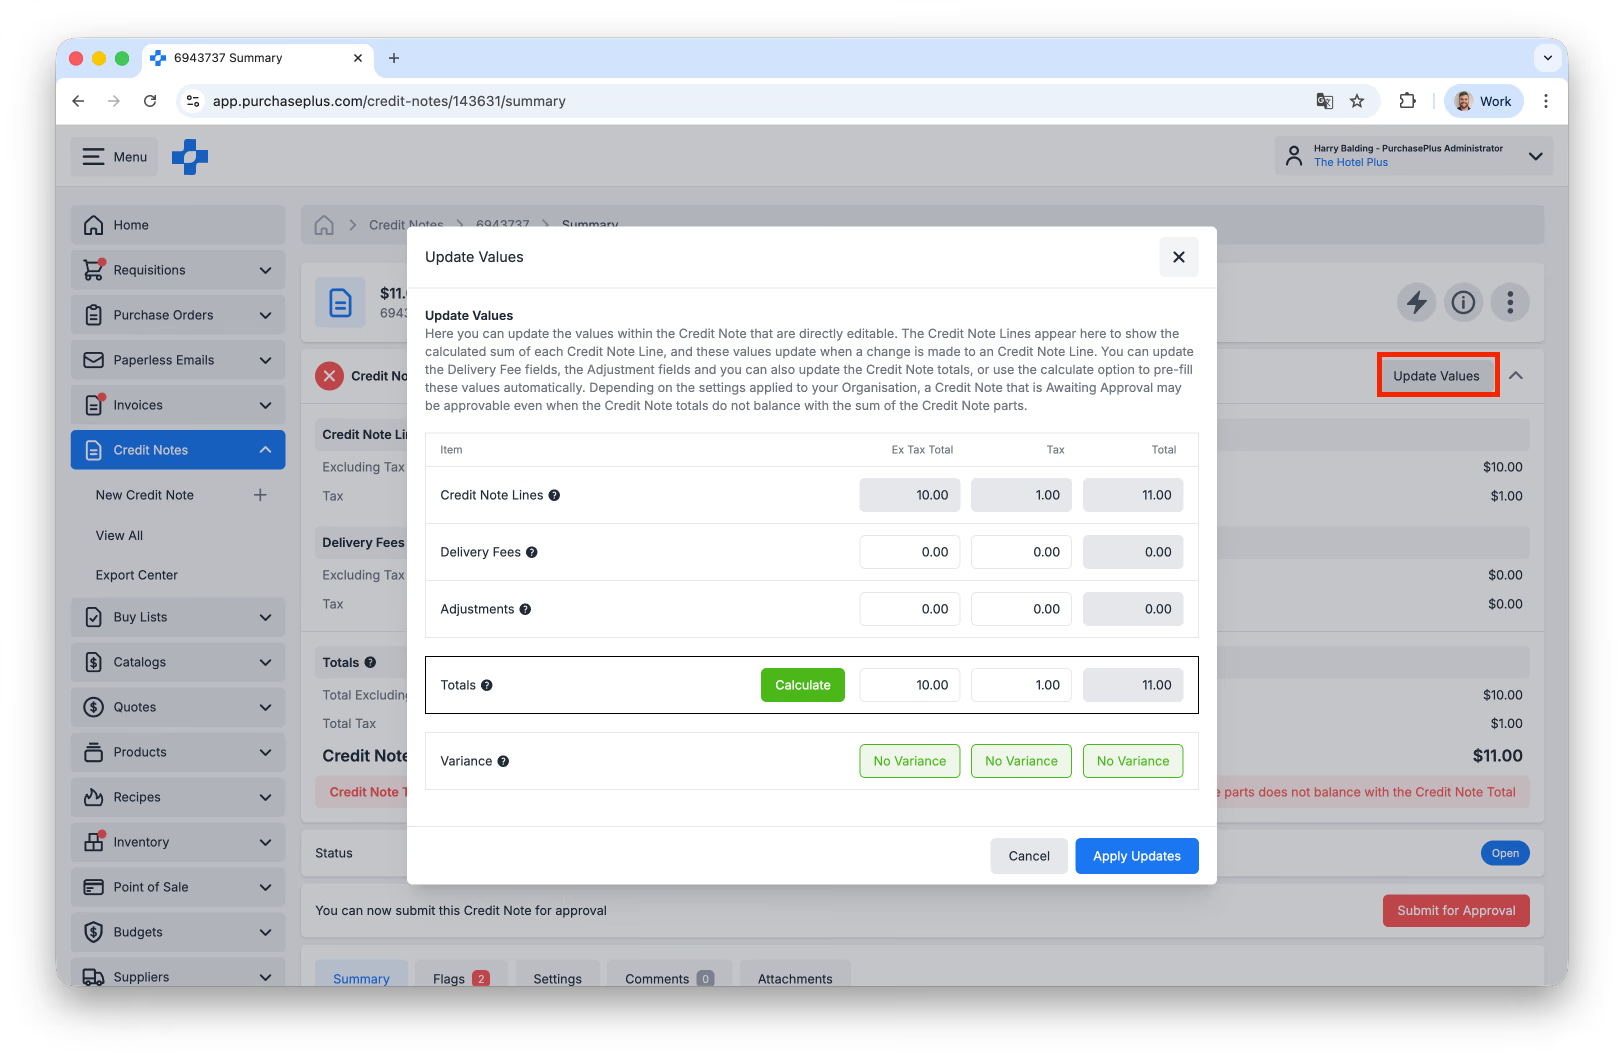
Here you can update the values within the Credit Note that are directly editable. The Credit Note Lines appear here to show the calculated sum of each Credit Note Line, and these values update when a change is made to a Credit Note Line.
You can update the Delivery Fee fields, the Adjustment fields, and you can also update the Credit Note totals (or use the calculate option to pre-fill these values automatically).
Depending on the settings applied to your Organisation, a Flagged Credit Note may be approvable even when the Credit Note totals do not balance with the sum of the Credit Note parts.
Method 2: Uploading a PDF into our AI Scanning Tool
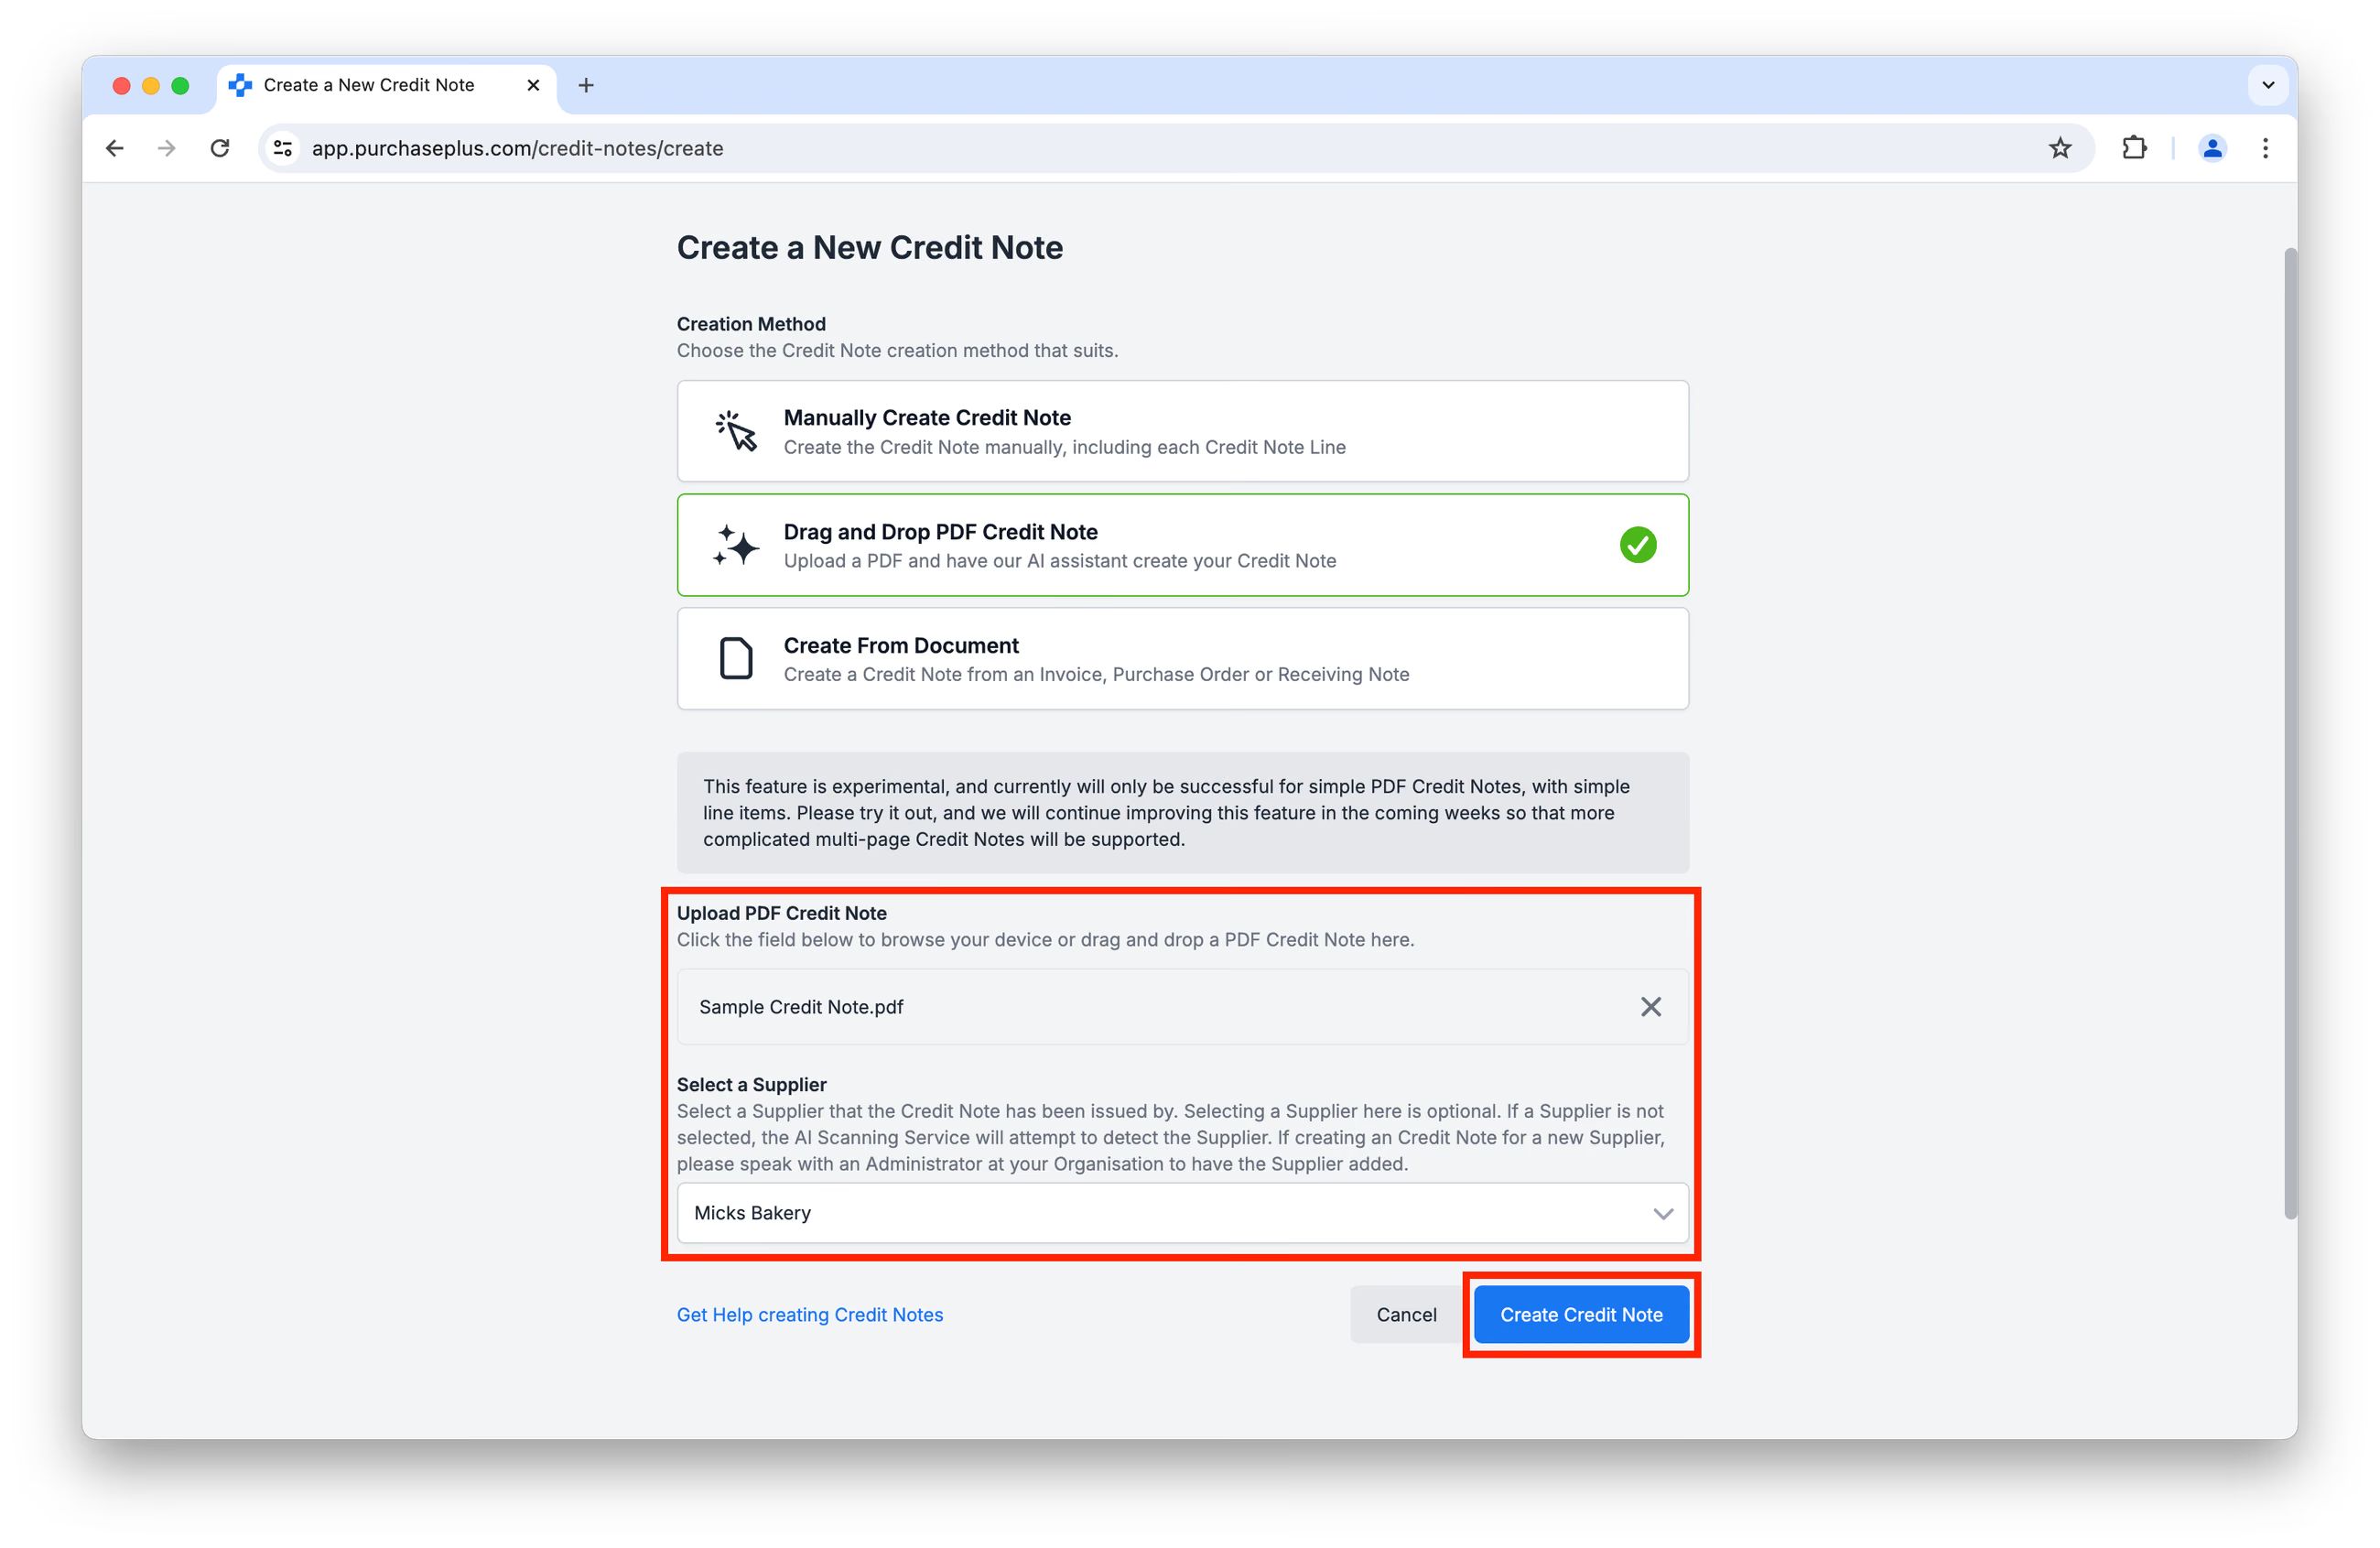
From the [Create Credit Note] screen, select [Drag and Drop PDF Credit Note]. On a phone, creating a Credit Note from a scan uses the same guided capture as [Create New Scanning Tasks]. Click [Open Camera] to photograph each page, then [Use Scan], or upload a PDF from your device. Desktop upload is unchanged.
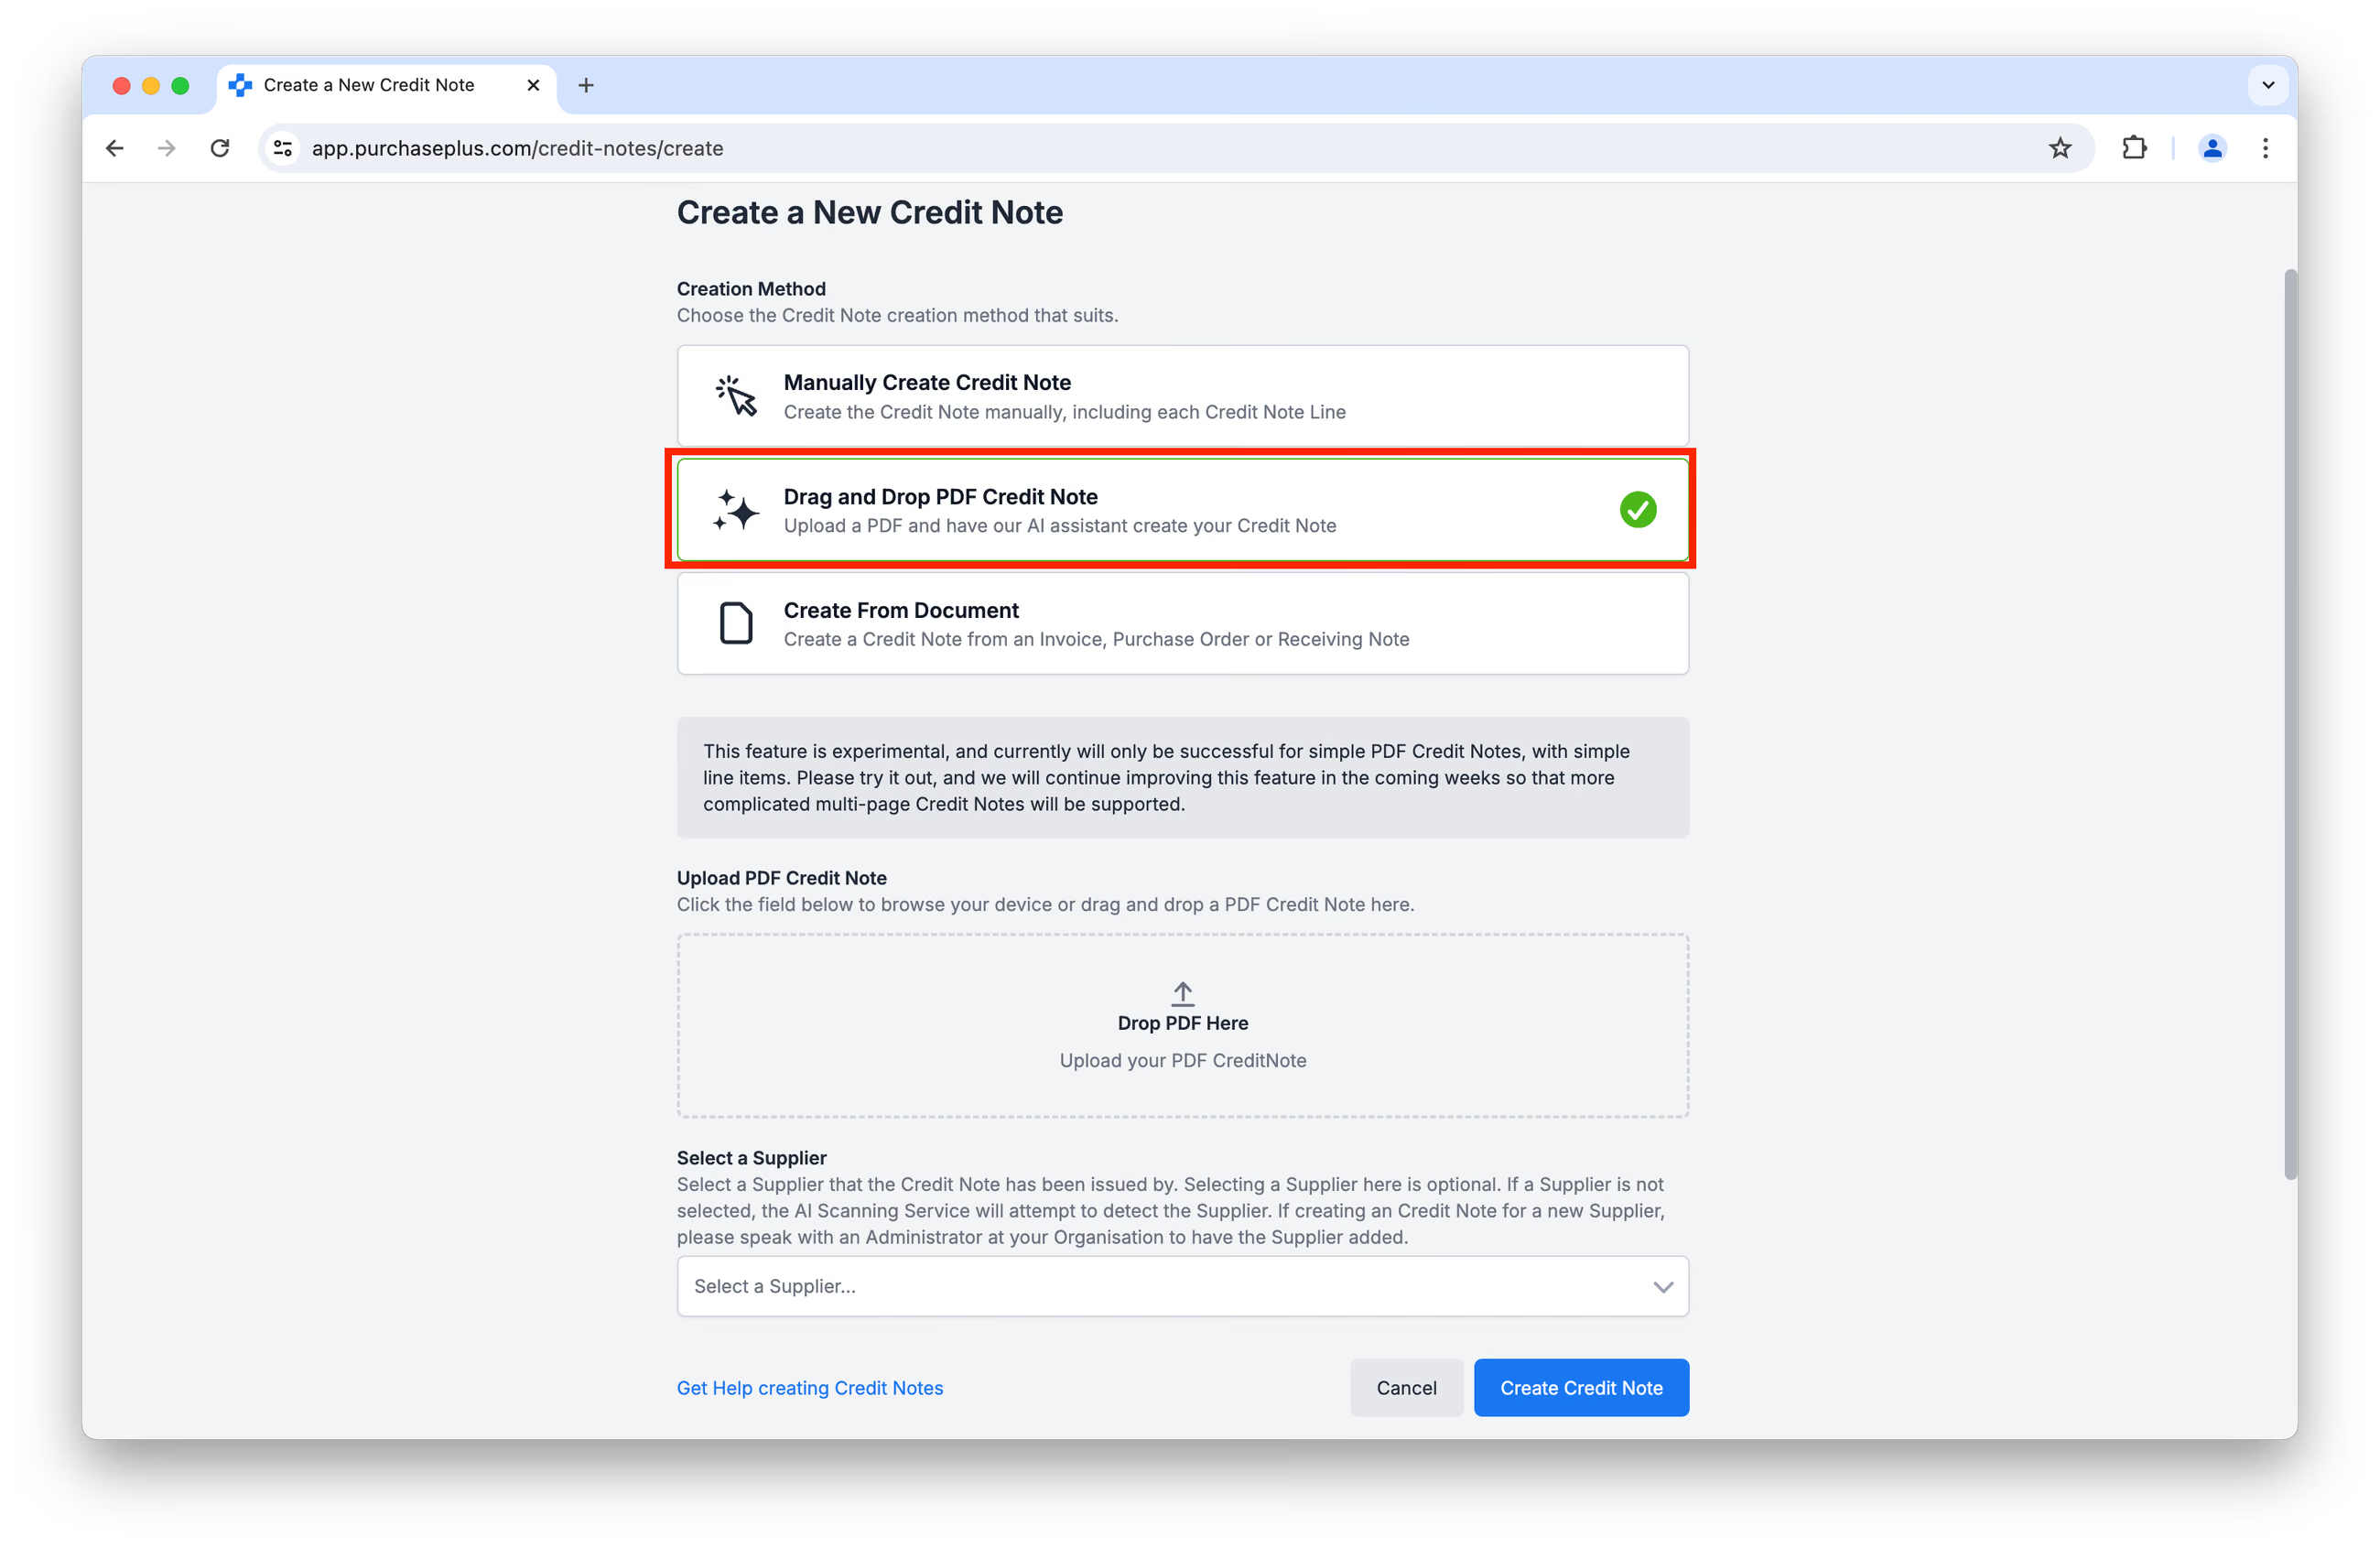 Simply drag and drop the Credit Note PDF into the upload area and (optionally) select the Supplier, before clicking [Create Credit Note]:
Our AI will then read supplied file and create the Credit Note from the Header and Line information that is available. You will have the opportunity to review and update the Credit Note details (on the left hand side) against the original file (on the right hand side) before clicking [Create Credit Note]:
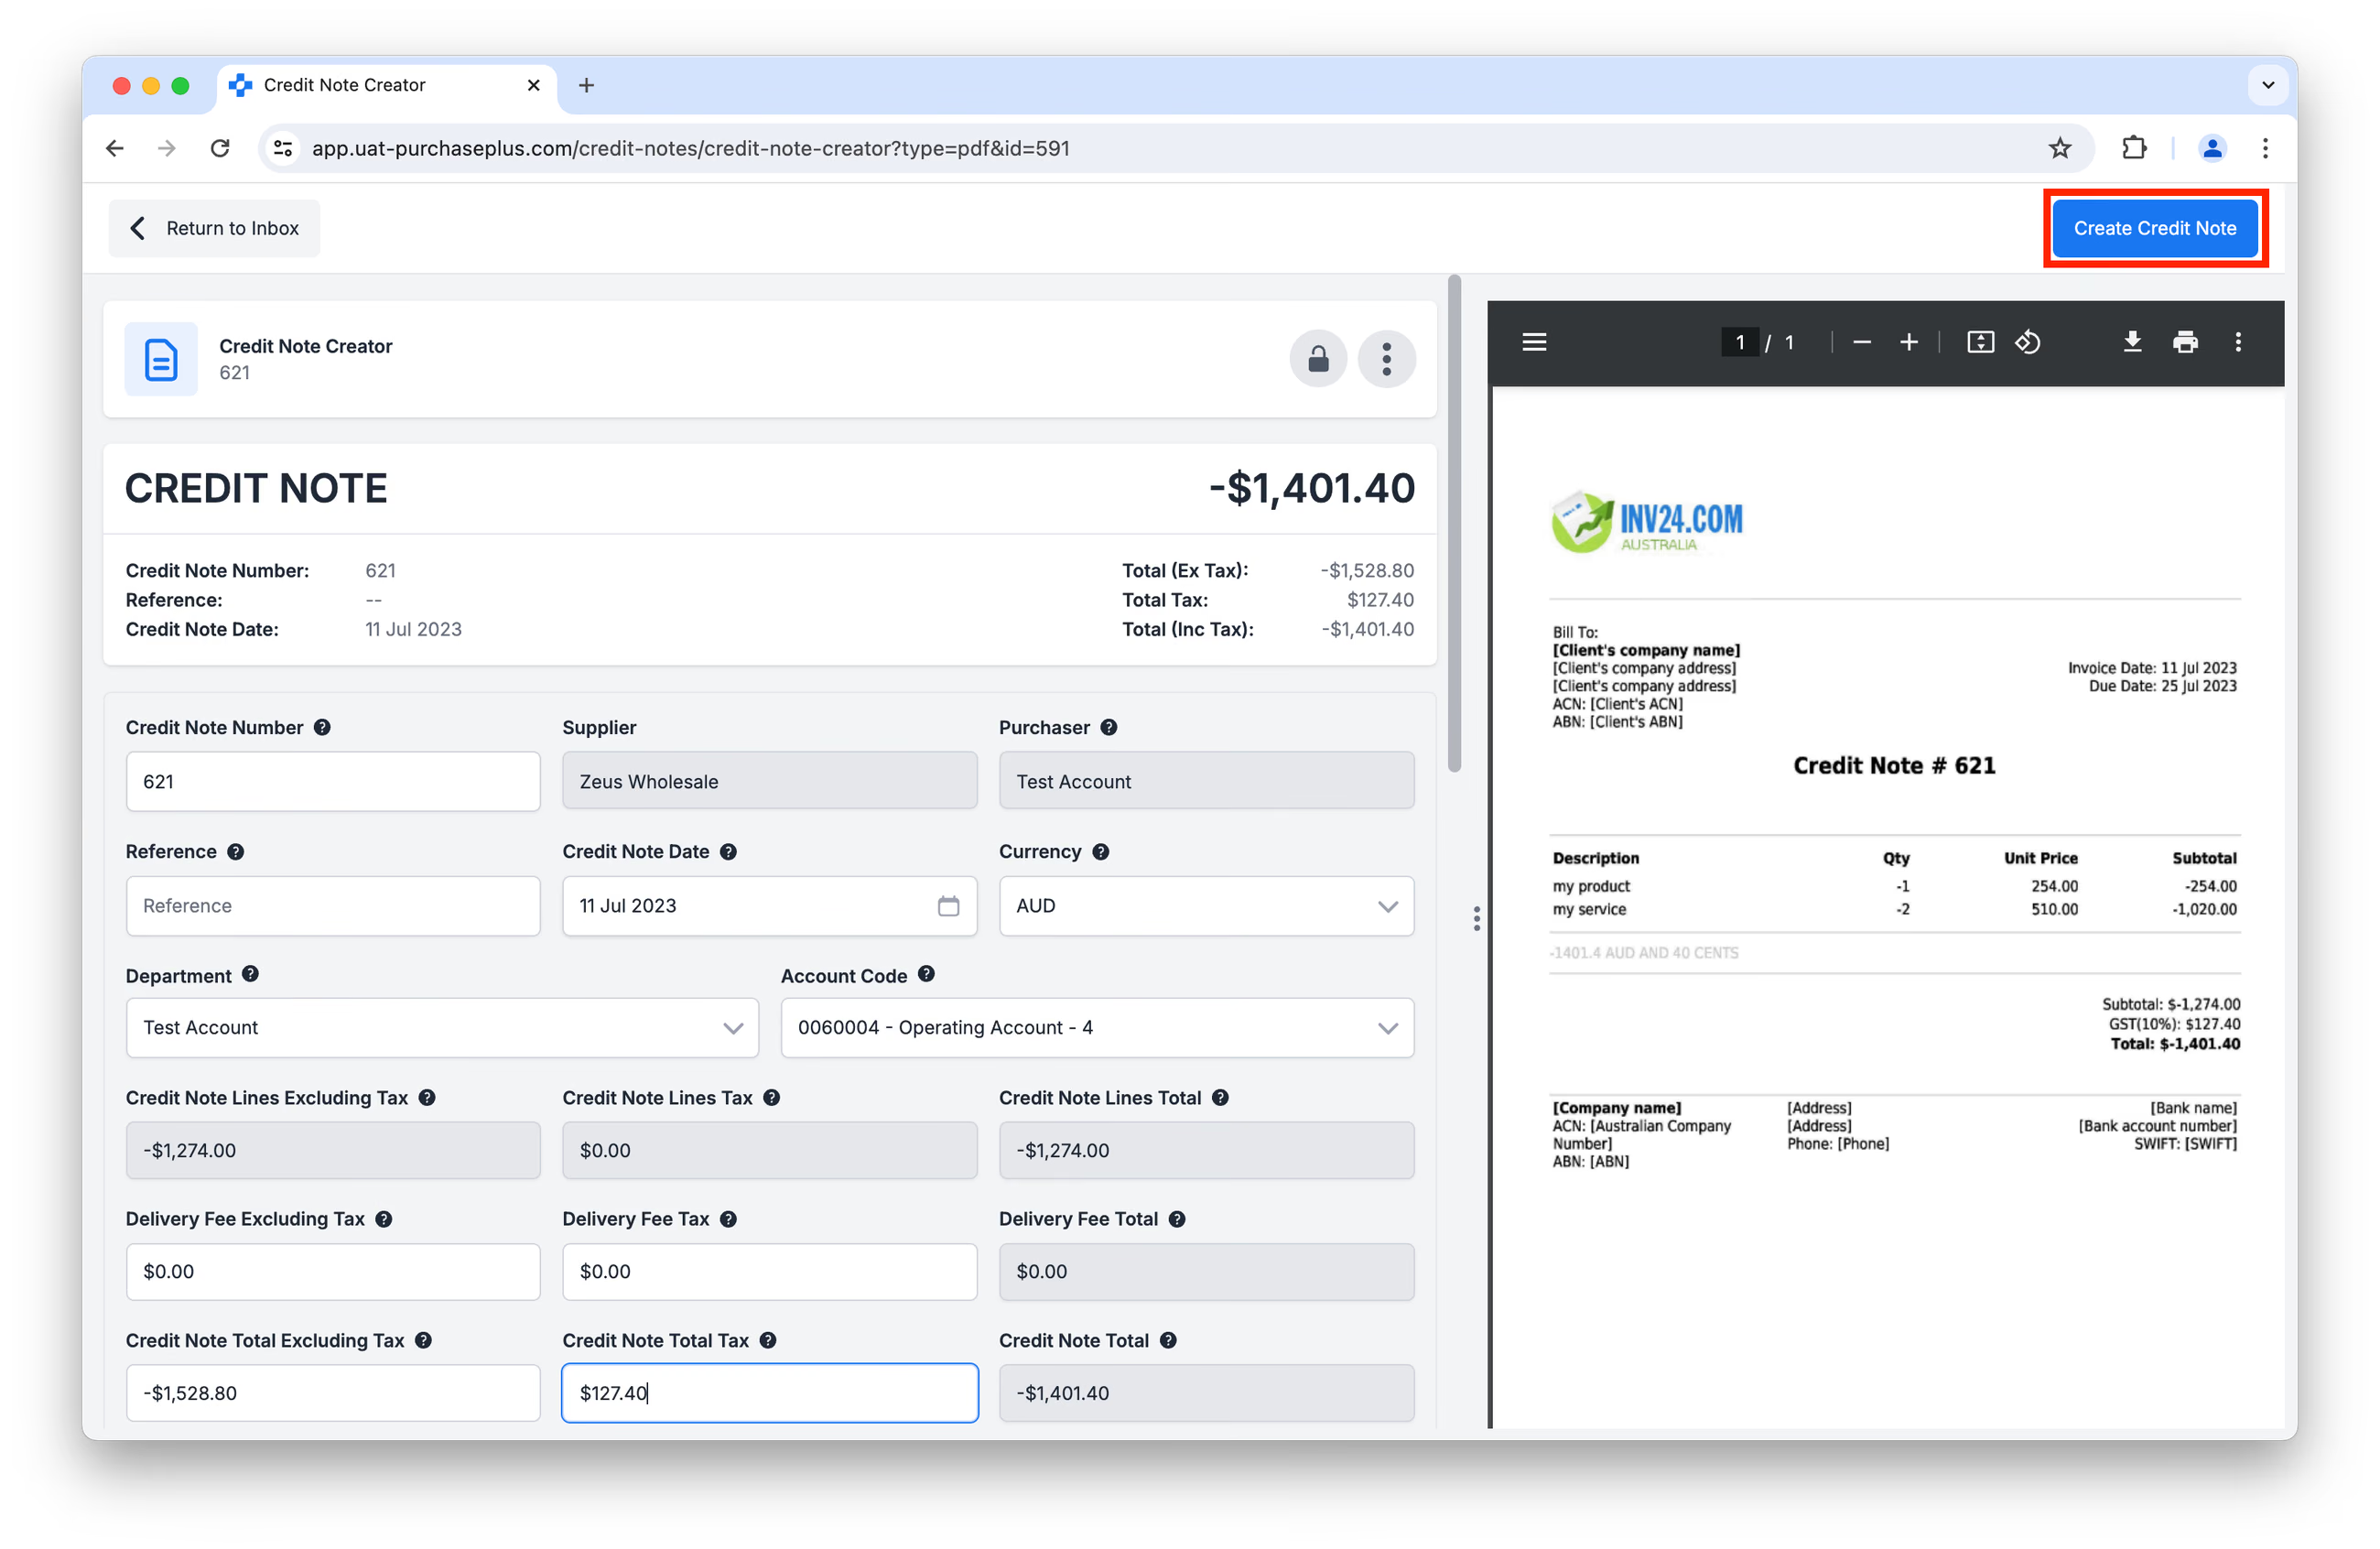 Depending on your Organisation's configuration, clicking [Create Credit Note] in the image above may automatically process the Credit Note against your Flag Settings and Thresholds, so that it initially appears in an Awaiting Approval or Reconciled state (instead of an Open State).
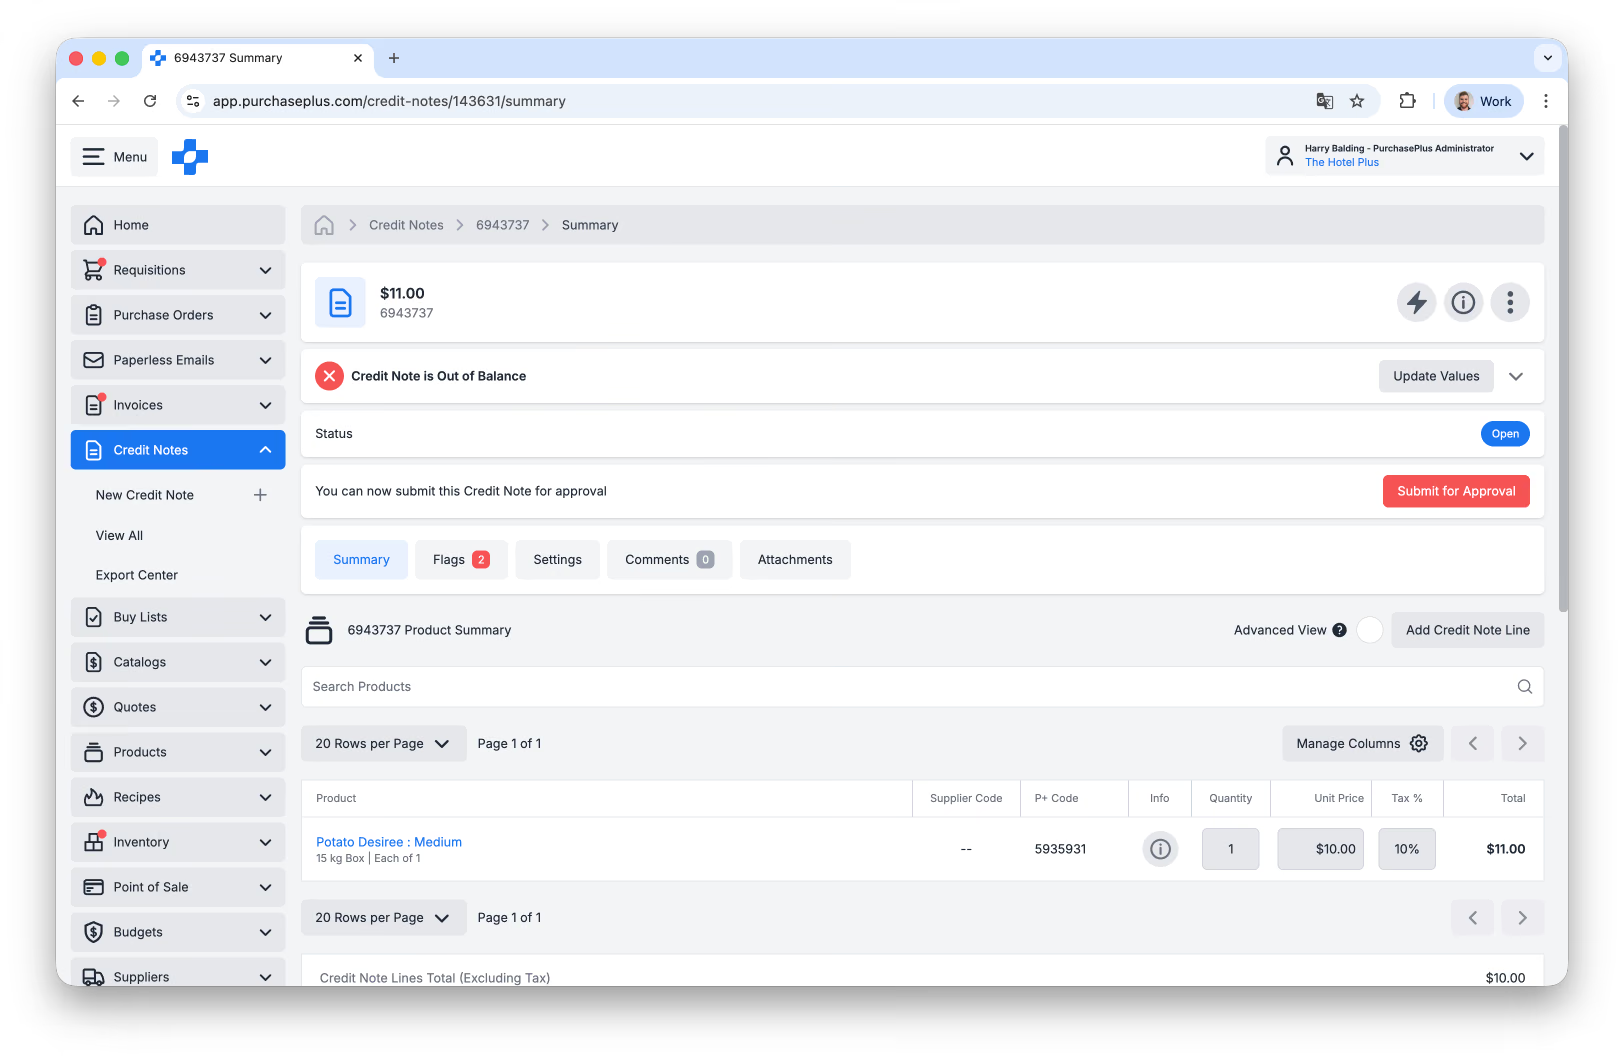
If this setting is not enabled, the Credit Note will be appear in an Open State, ready for manual review:
Method 3: Selecting an Invoice, Purchase Order or Goods Receiving Note as the basis for the Credit Note.
From the [Create Credit Note] screen, select [Create From Document]:
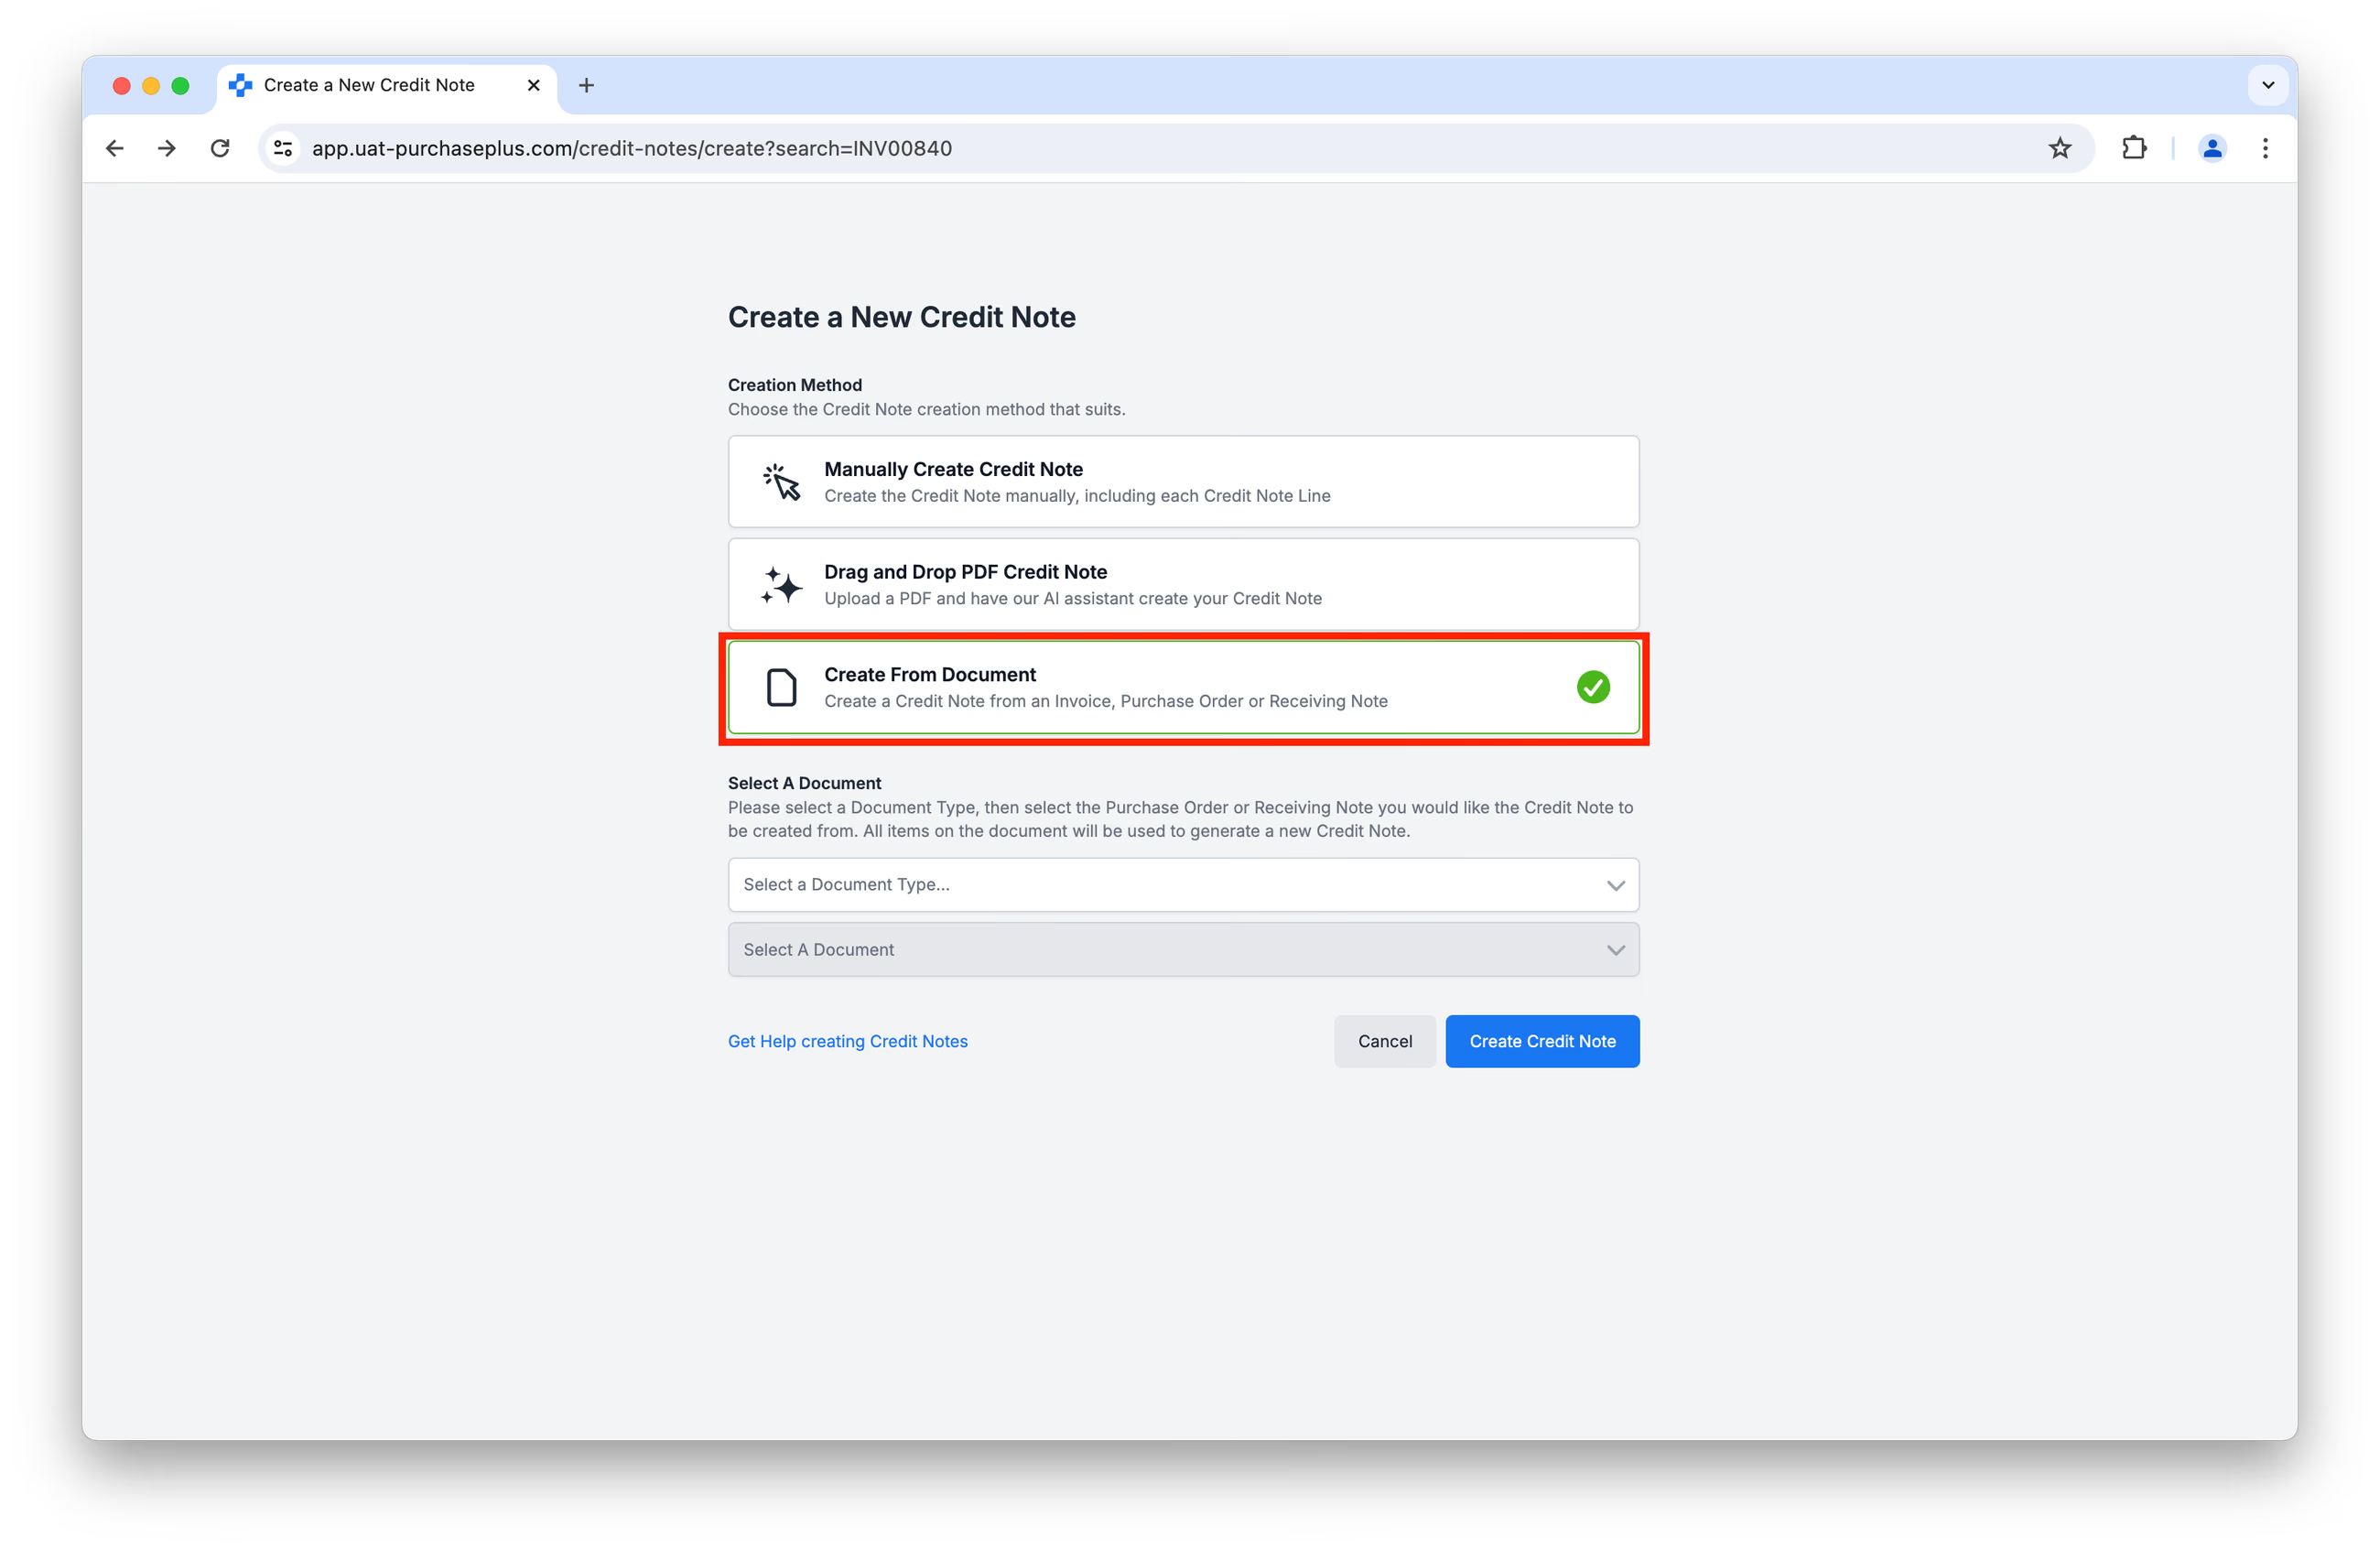
Use the drop down menus to select the Document from which you would like to generate a Credit Note, and click [Create Credit Note]:
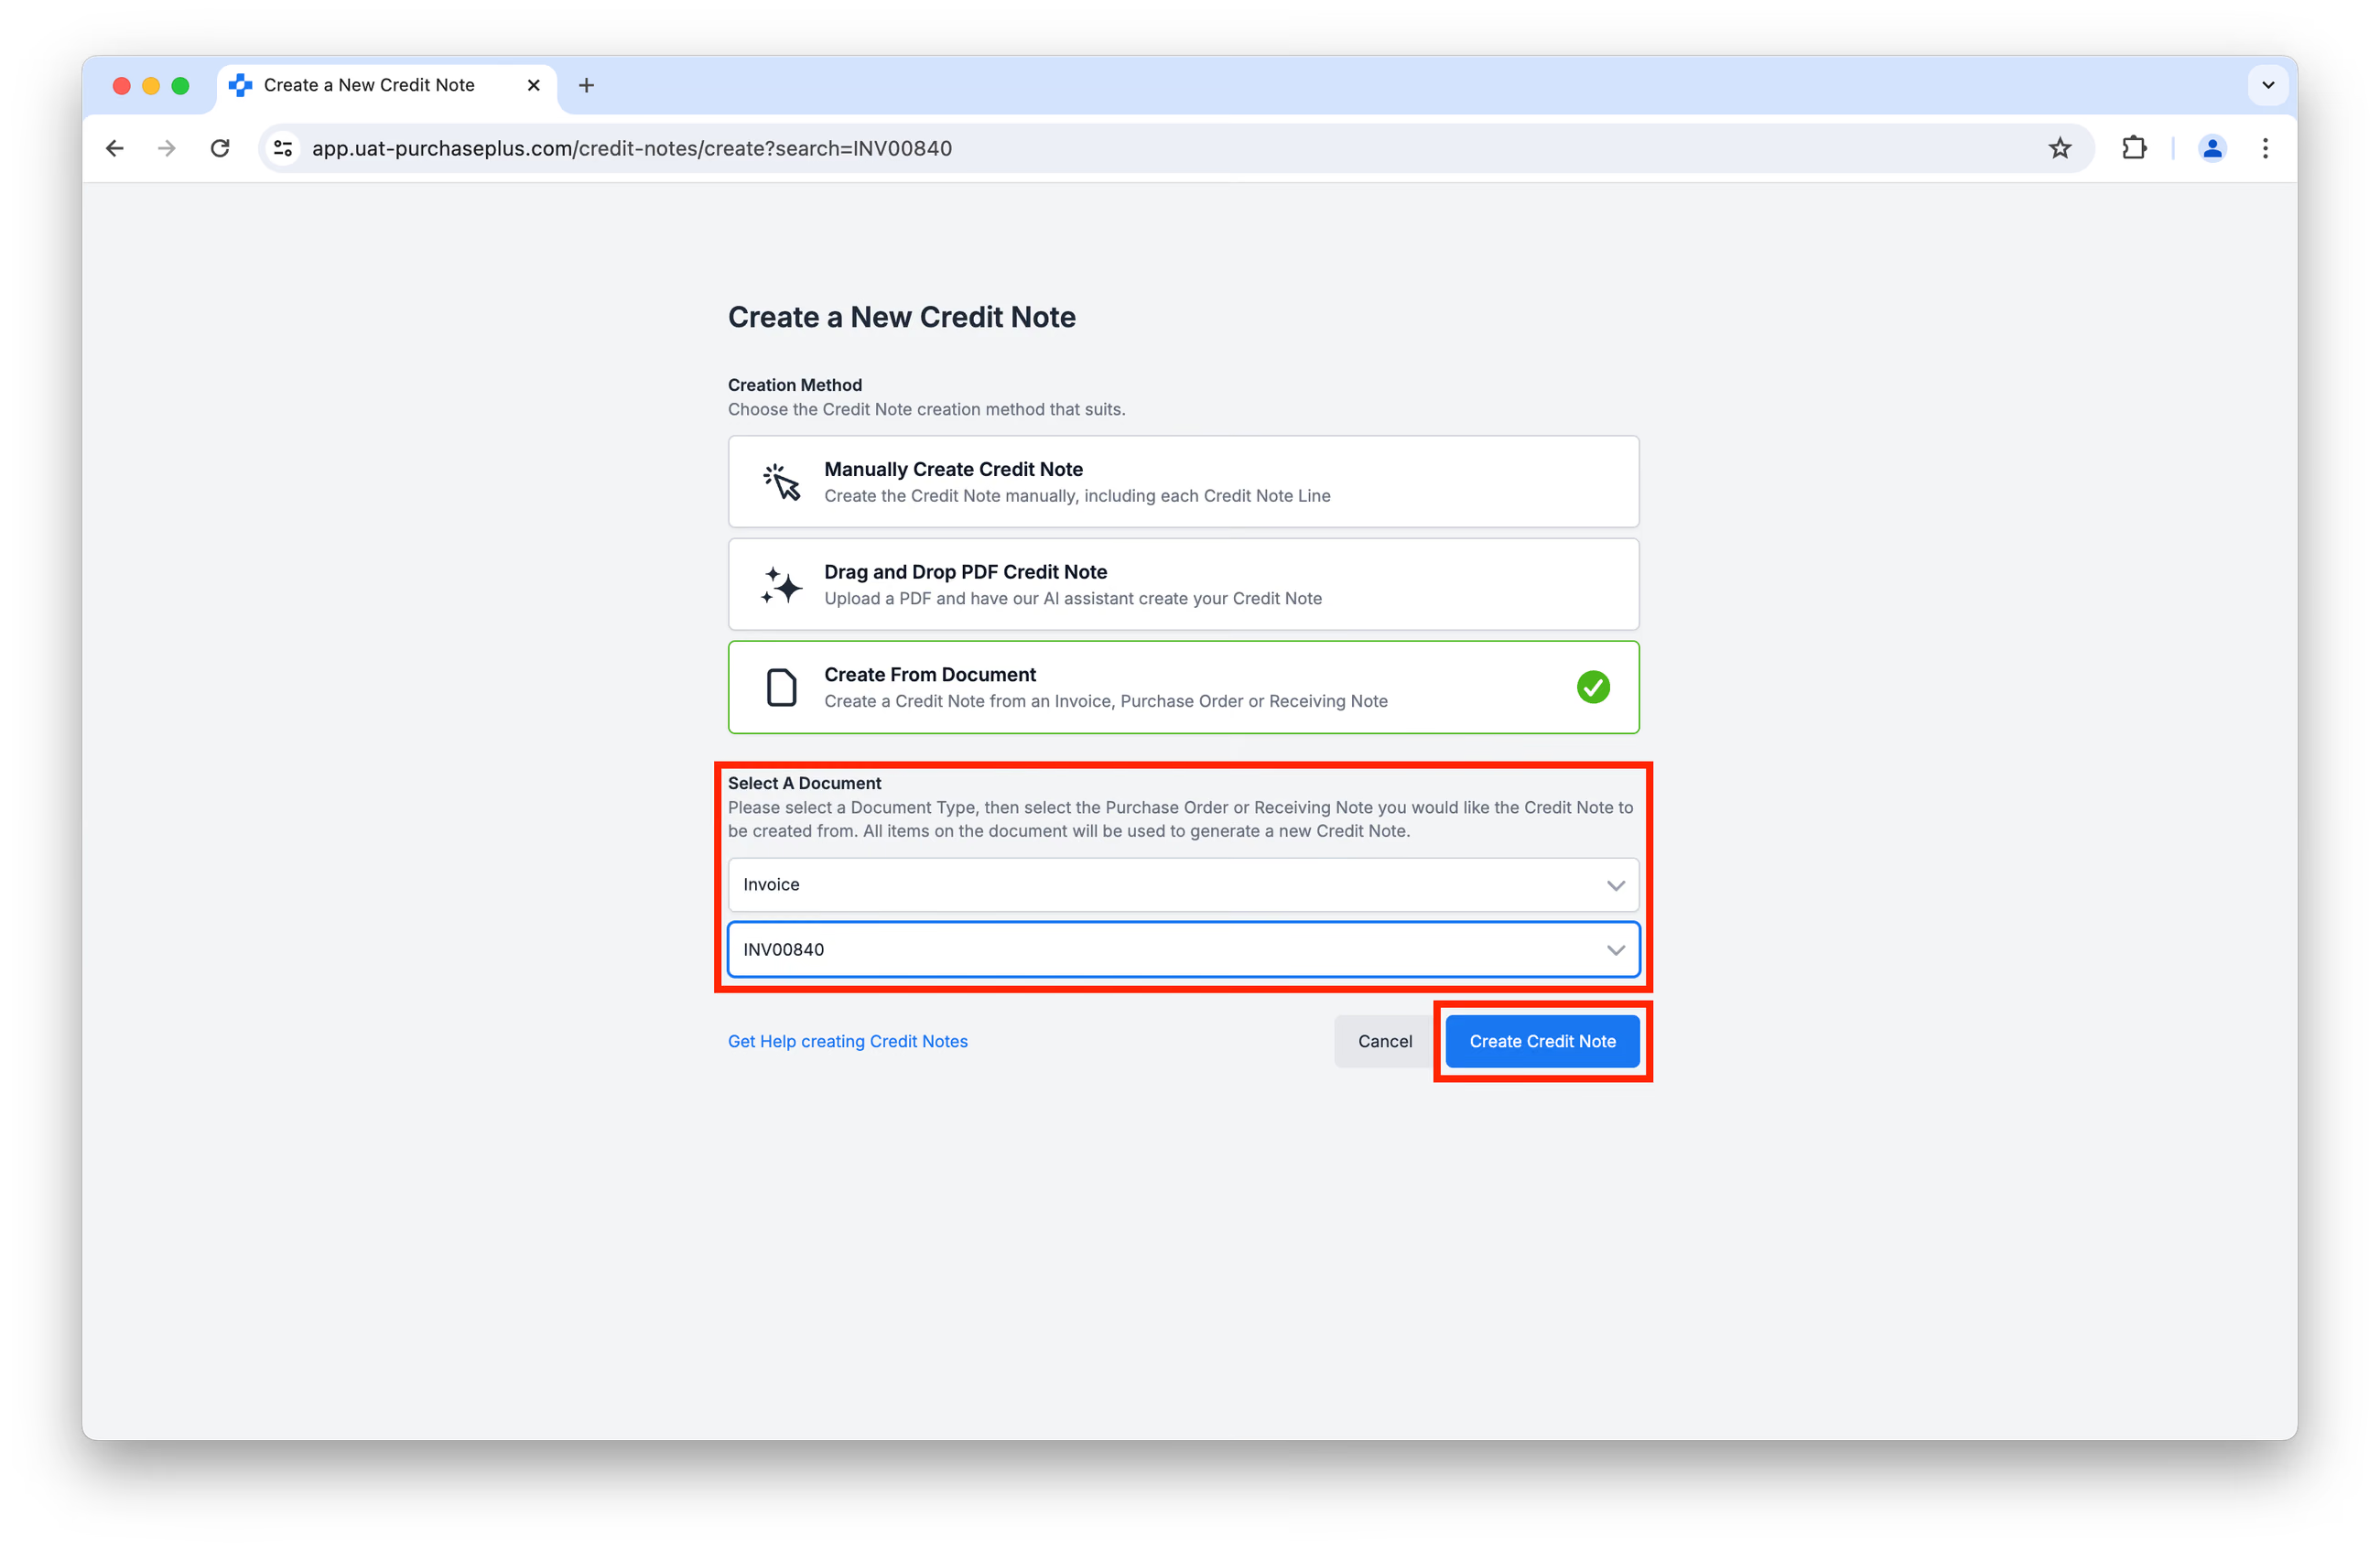
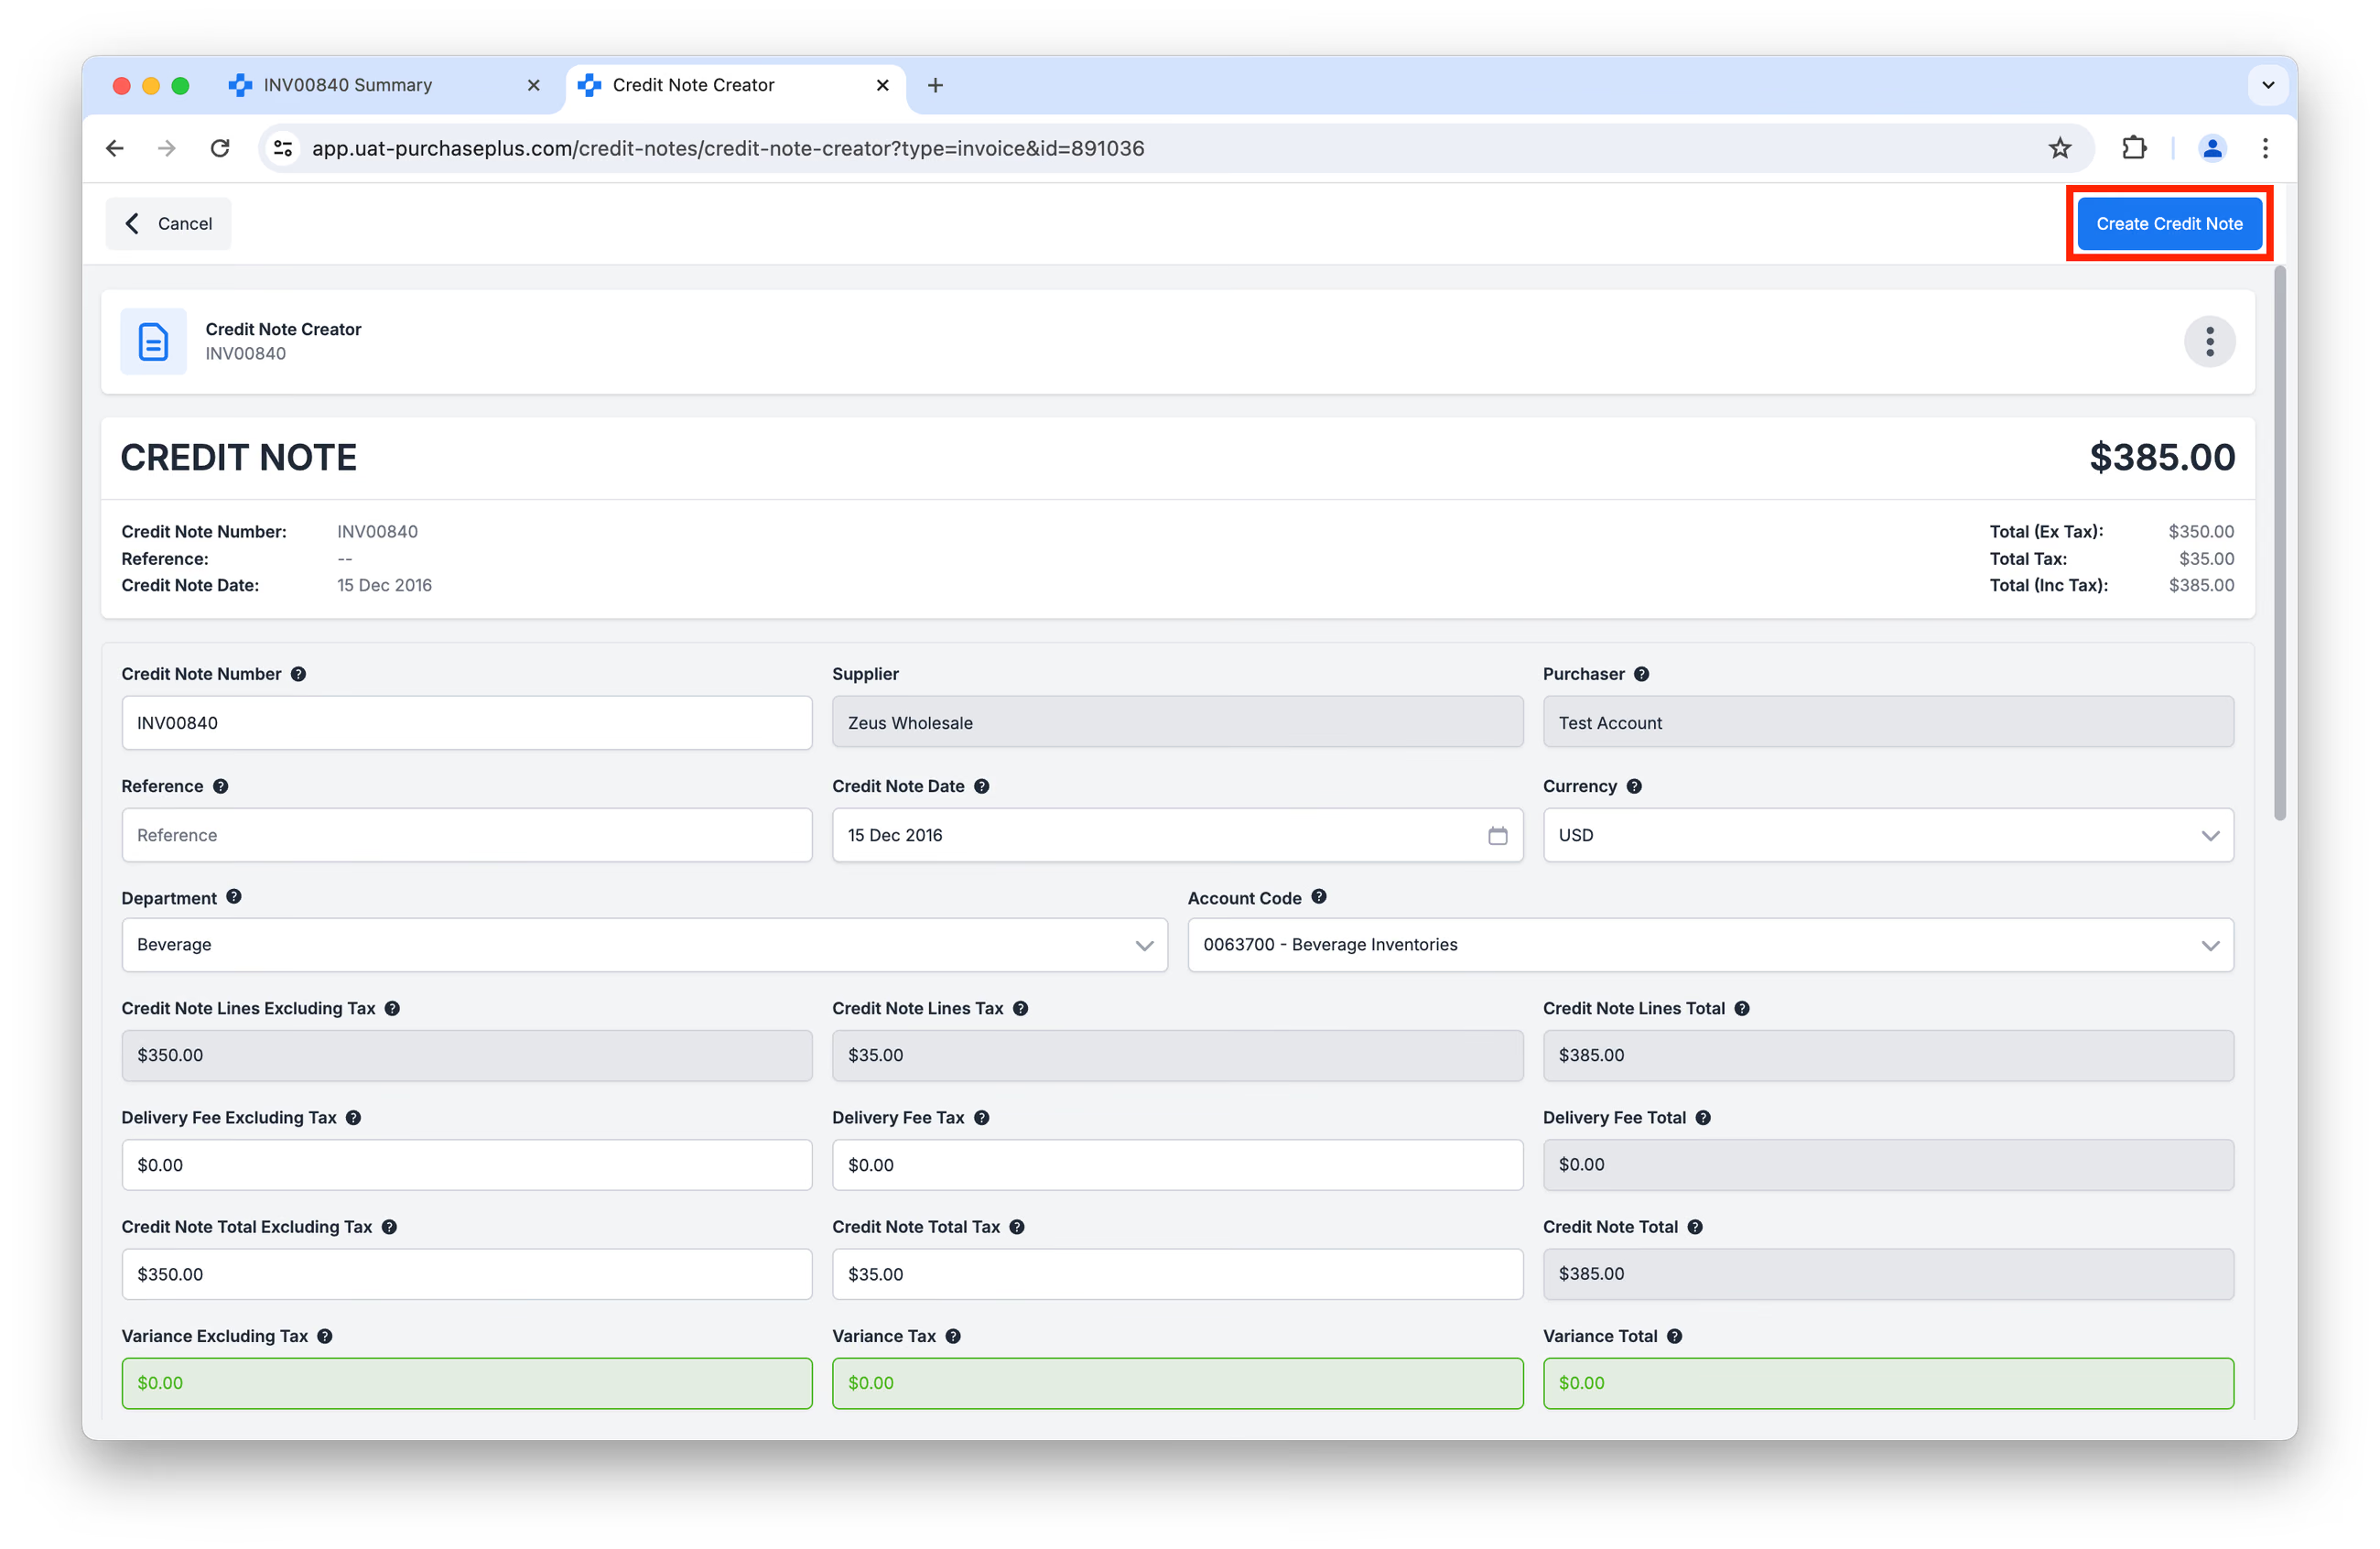
All items on the selected Document will be used to create Lines on the resulting Credit Note. You will have the opportunity to review the Credit Note, before finally clicking [Create Credit Note].
** **
**
Similarly to Method 2, depending on your Organisation's configuration, clicking [Create Credit Note] in the image above may automatically process the Credit Note against your Flag Settings and Thresholds, so that it initially appears in an Awaiting Approval or Reconciled state (instead of an Open State):
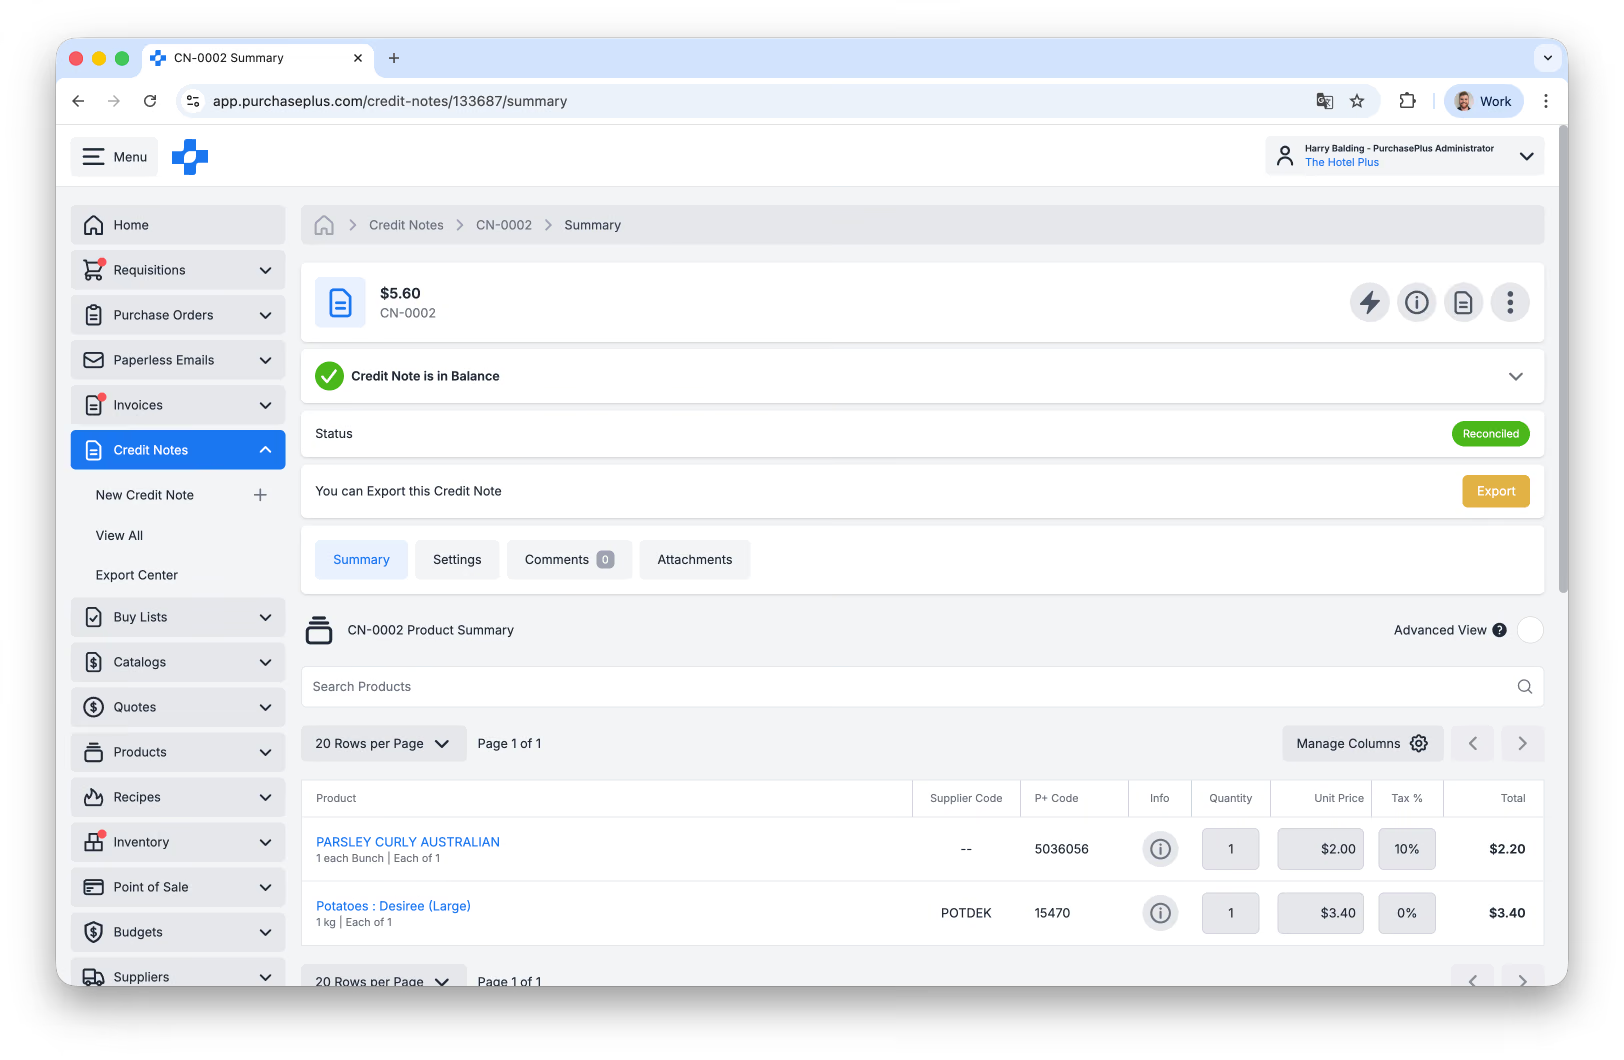
If this setting is not enabled, the Credit Note will be appear in an Open State, ready for manual review.