

Point of Sale
Point of Sale
What POS is
Point of Sale (POS) is an optional module that allows you to deduct Stock Items from a Stock Location when you make a sale in your restaurant, bar or cafe. Additionally, you can keep a record of the Sale Data in PurchasePlus, allowing you to cross-reference Stock movements, sale prices, and more.
Sale data from your (external) POS system is ingested by PurchasePlus as a 'Batch Sale', which can be entered into PurchasePlus in one of three ways:
- Manually,
- Uploaded as a CSV,
- via API Integration.
To implement the POS Module, your Organisation first needs to implement our Inventory and Recipes modules.
POS Items
A POS Item is a 'container' that combines:
- A Name,
- A POS Code (the unique identifier that is used by your external POS System), and
- A reference to a Stock Item OR Recipe.
When the POS Item is 'sold', the referenced Stock Item(s) will be deducted from your Stock Locations, by the quantity that is denoted in the Batch Sale.
Creating POS Items
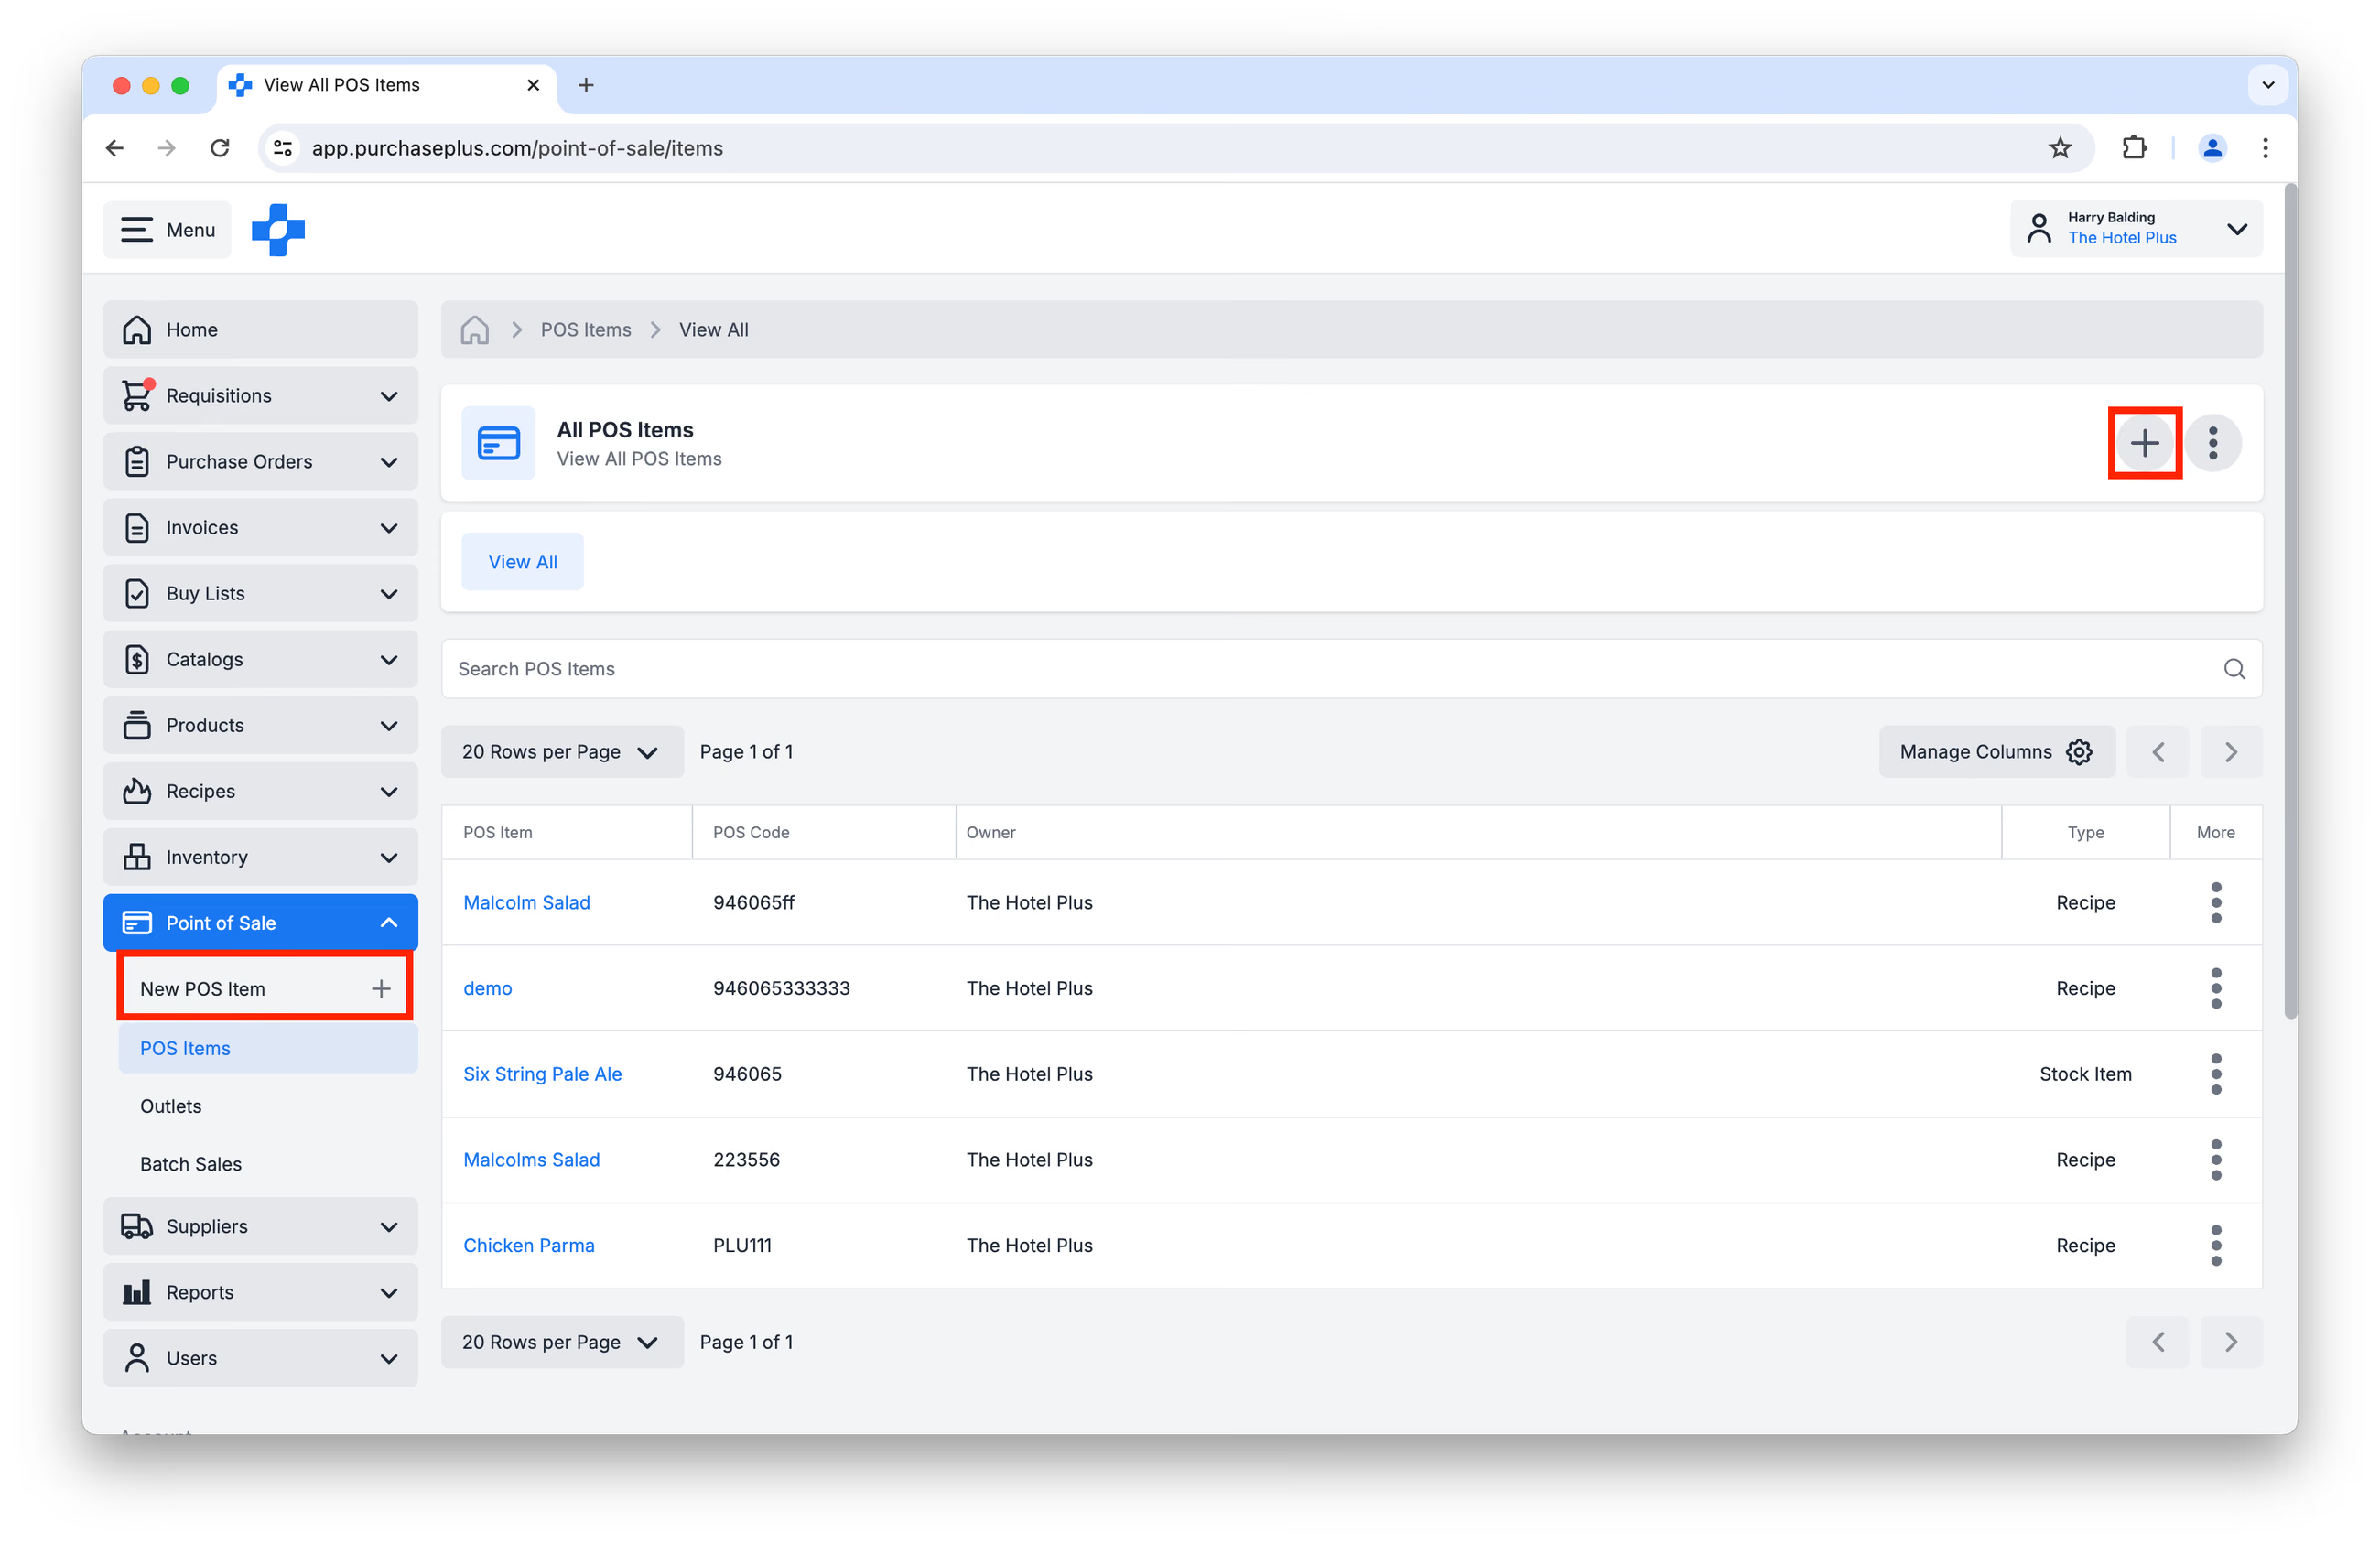
Users with the 'Manage POS Items' permission can Create a New POS Item at any time by clicking [Point of Sale] → [New POS Item] in the left side navigation bar, or clicking [Create New POS Item] on the [Point of Sale] → [POS Items] page:
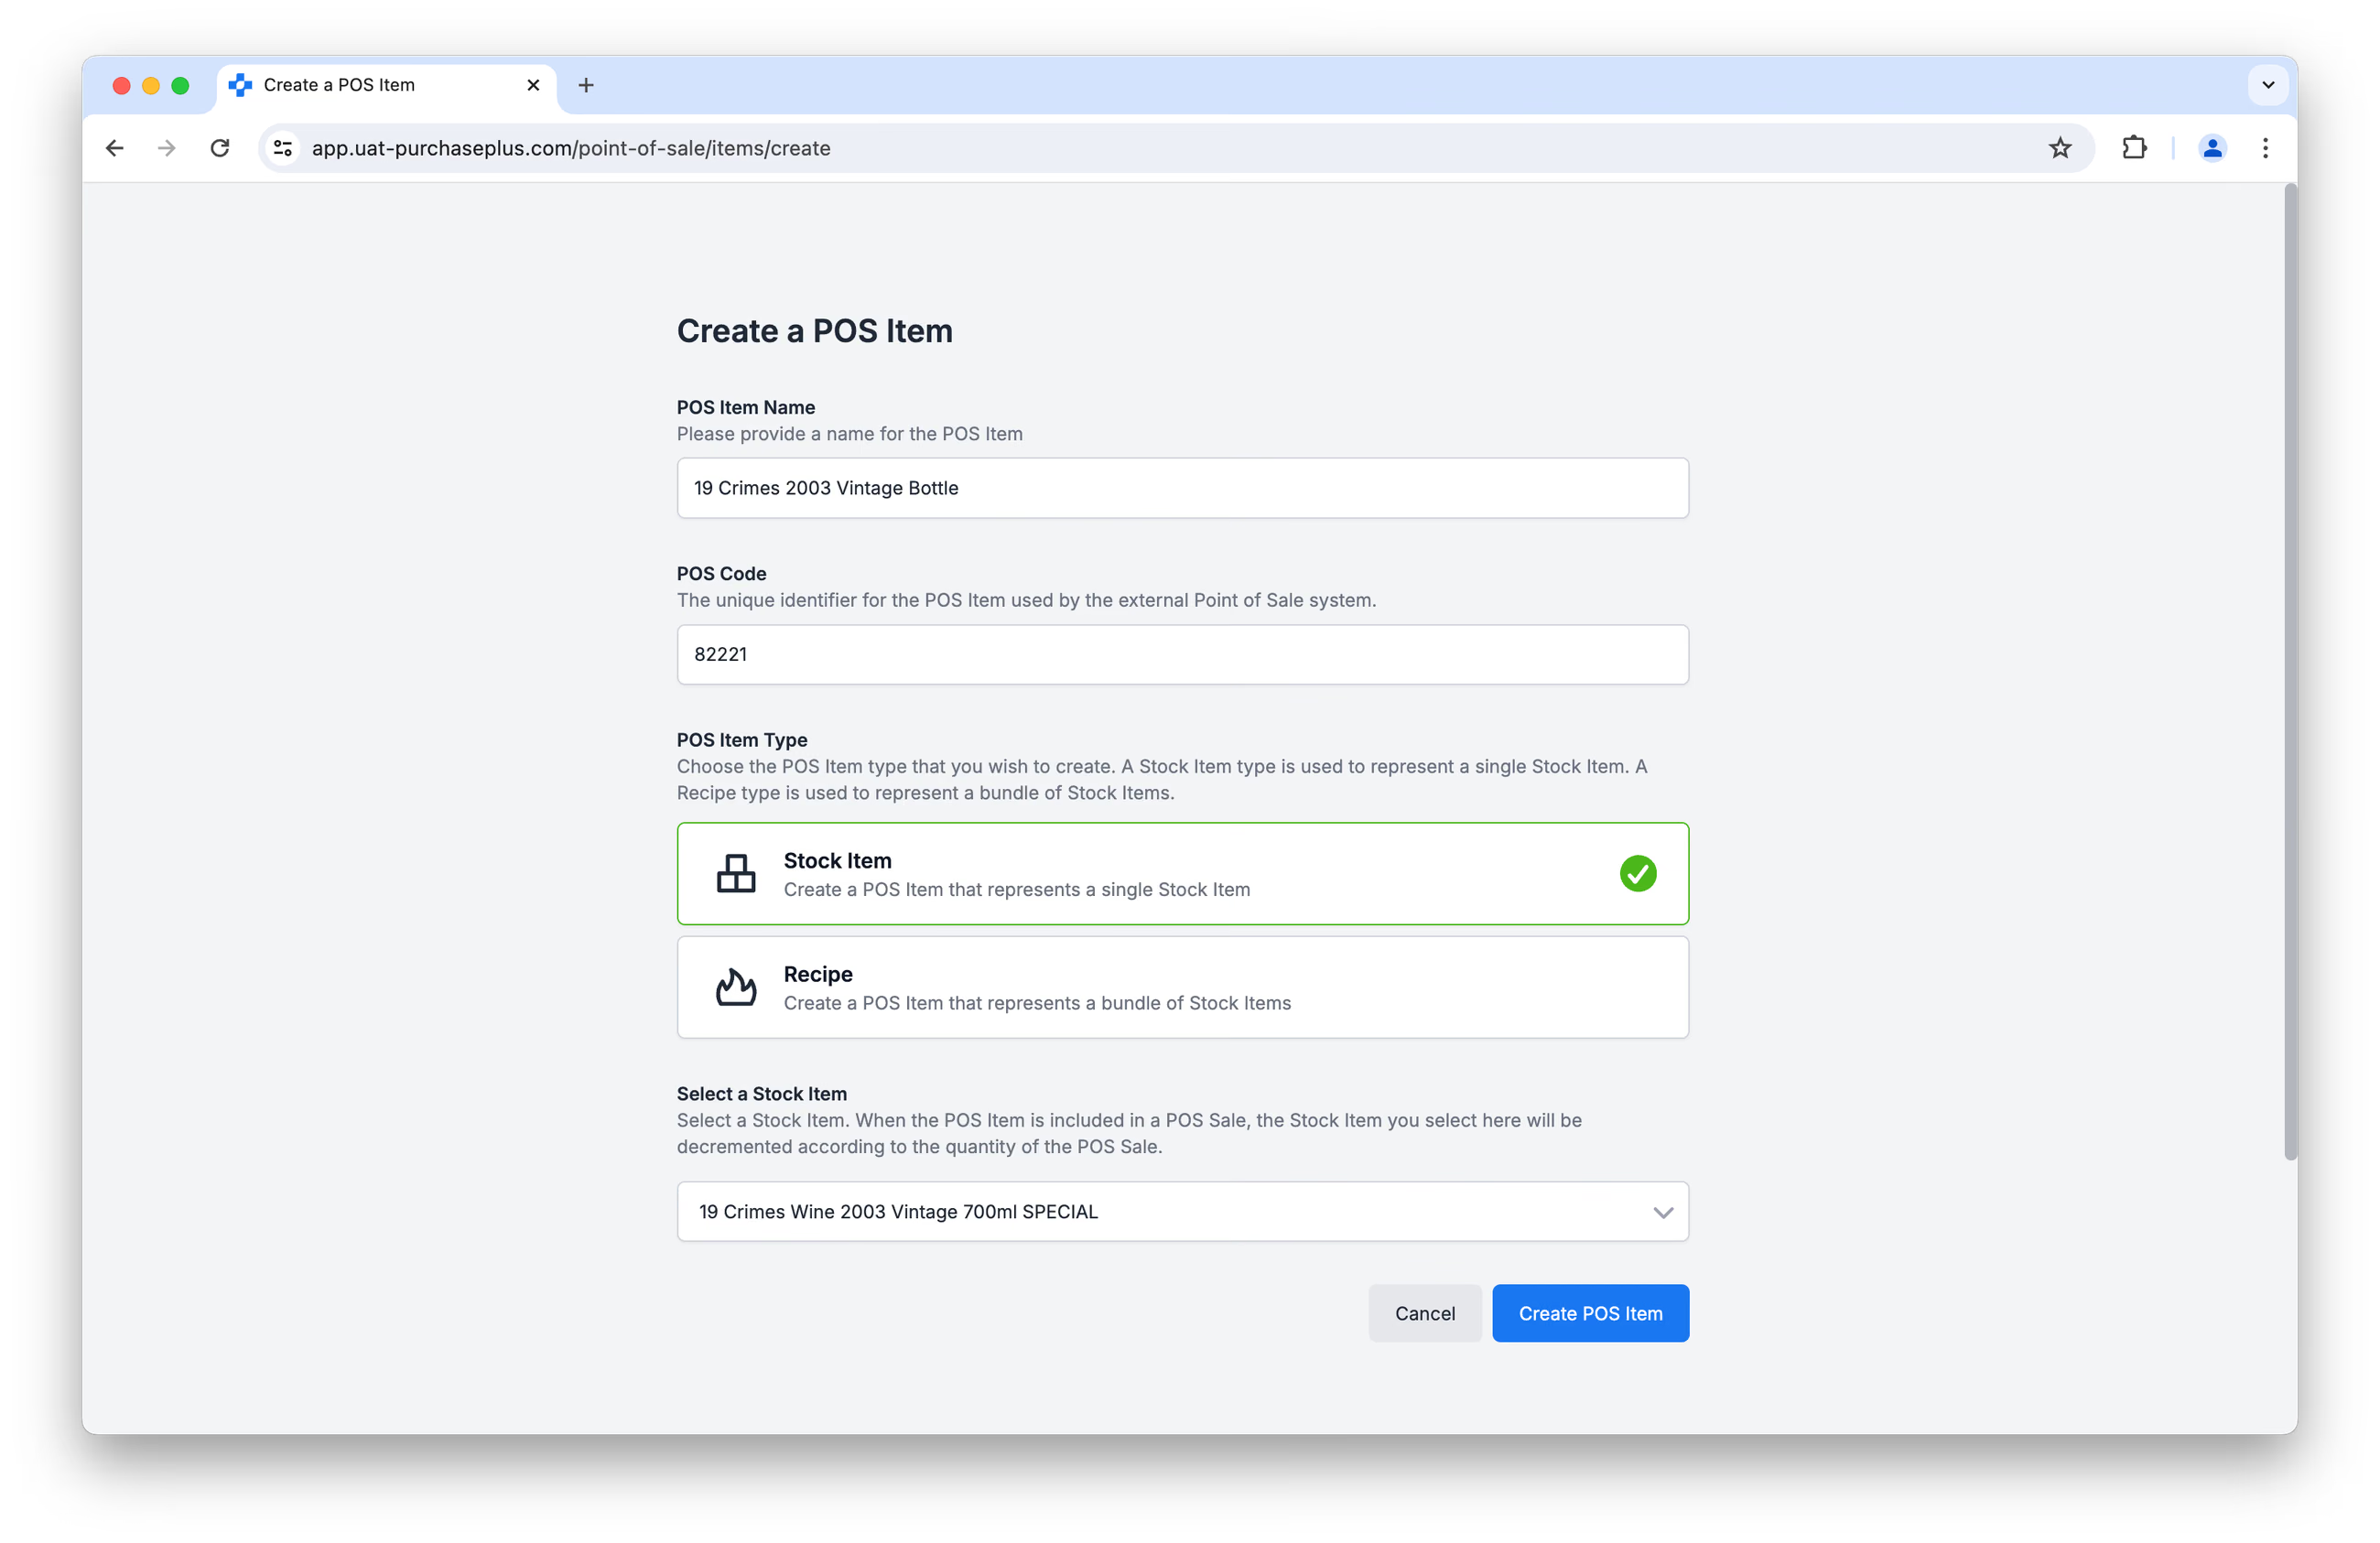
Fill out the form carefully, ensuring that the POS Code exactly matches the unique identifier for the product sold in your external POS System. Click [Create POS Item] to complete the process.
Viewing and Updating POS Items
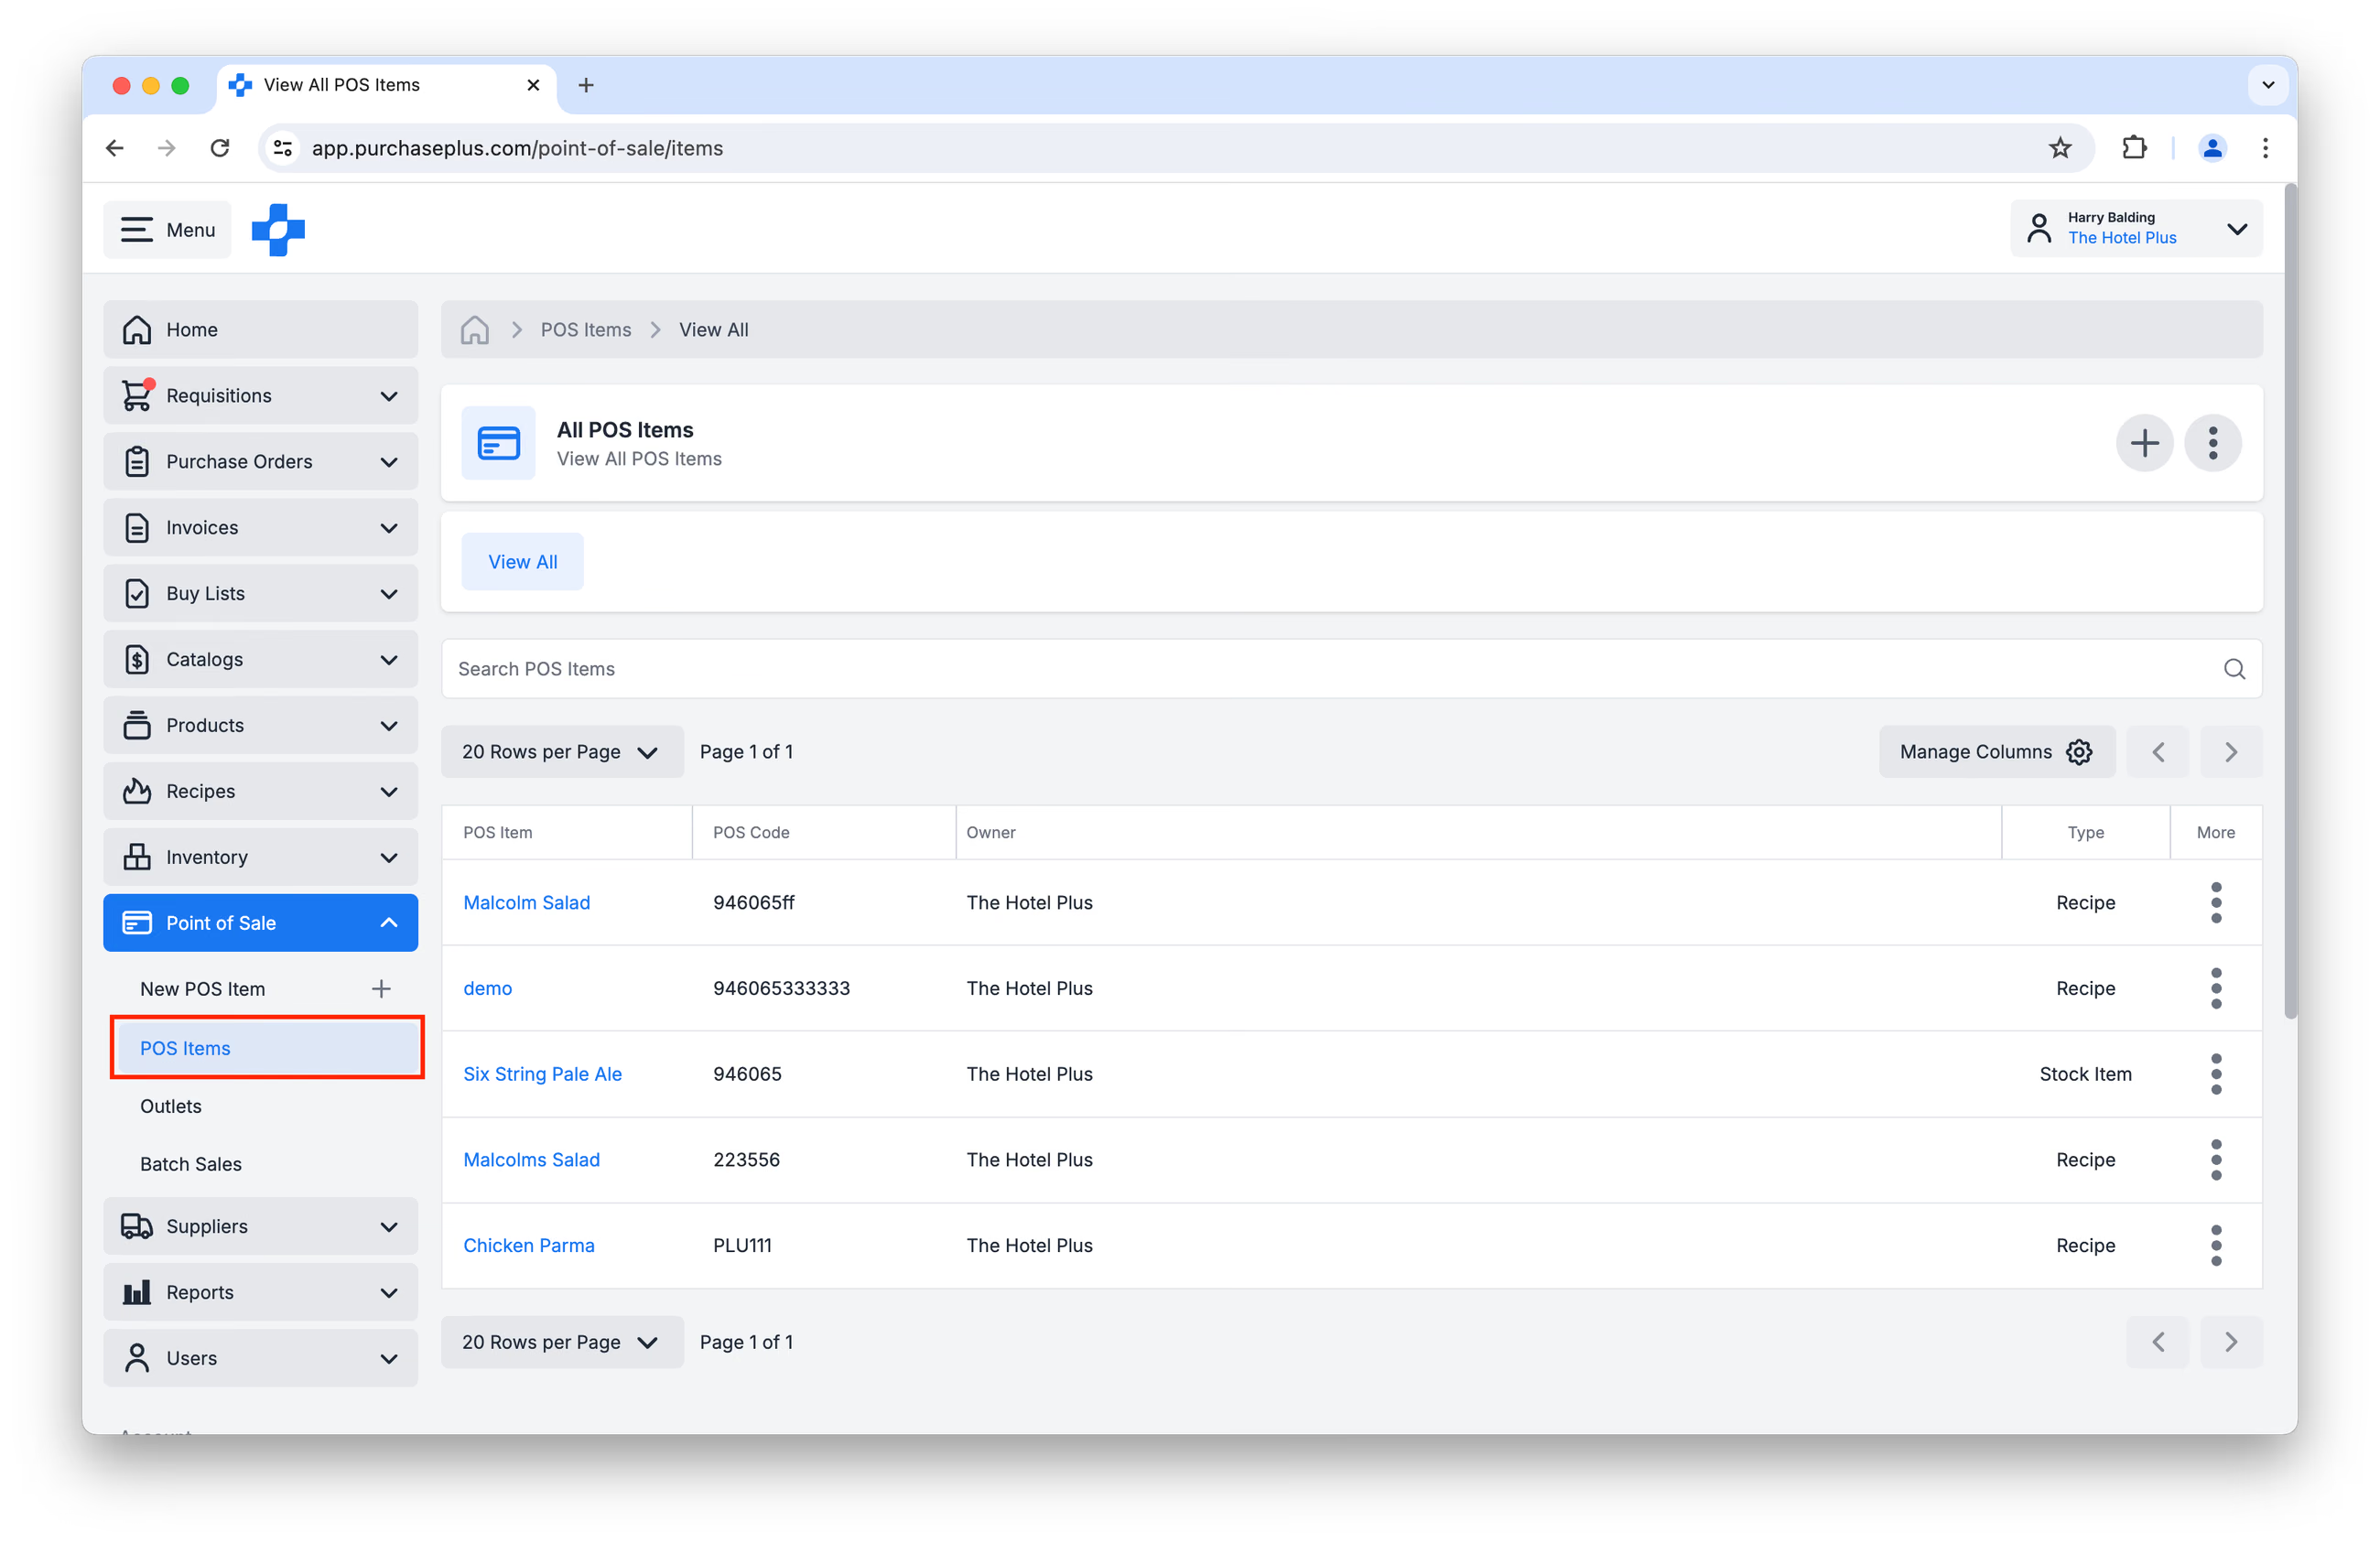
You can view a list of your Organisation's POS Items by clicking [Point of Sale] → [POS Items] in the left side navigation bar:
Clicking on the POS Item name will take you to the POS Item Details page, where users with the 'Manage POS Items' permission can update the POS Item Name and POS Code for the POS Item:
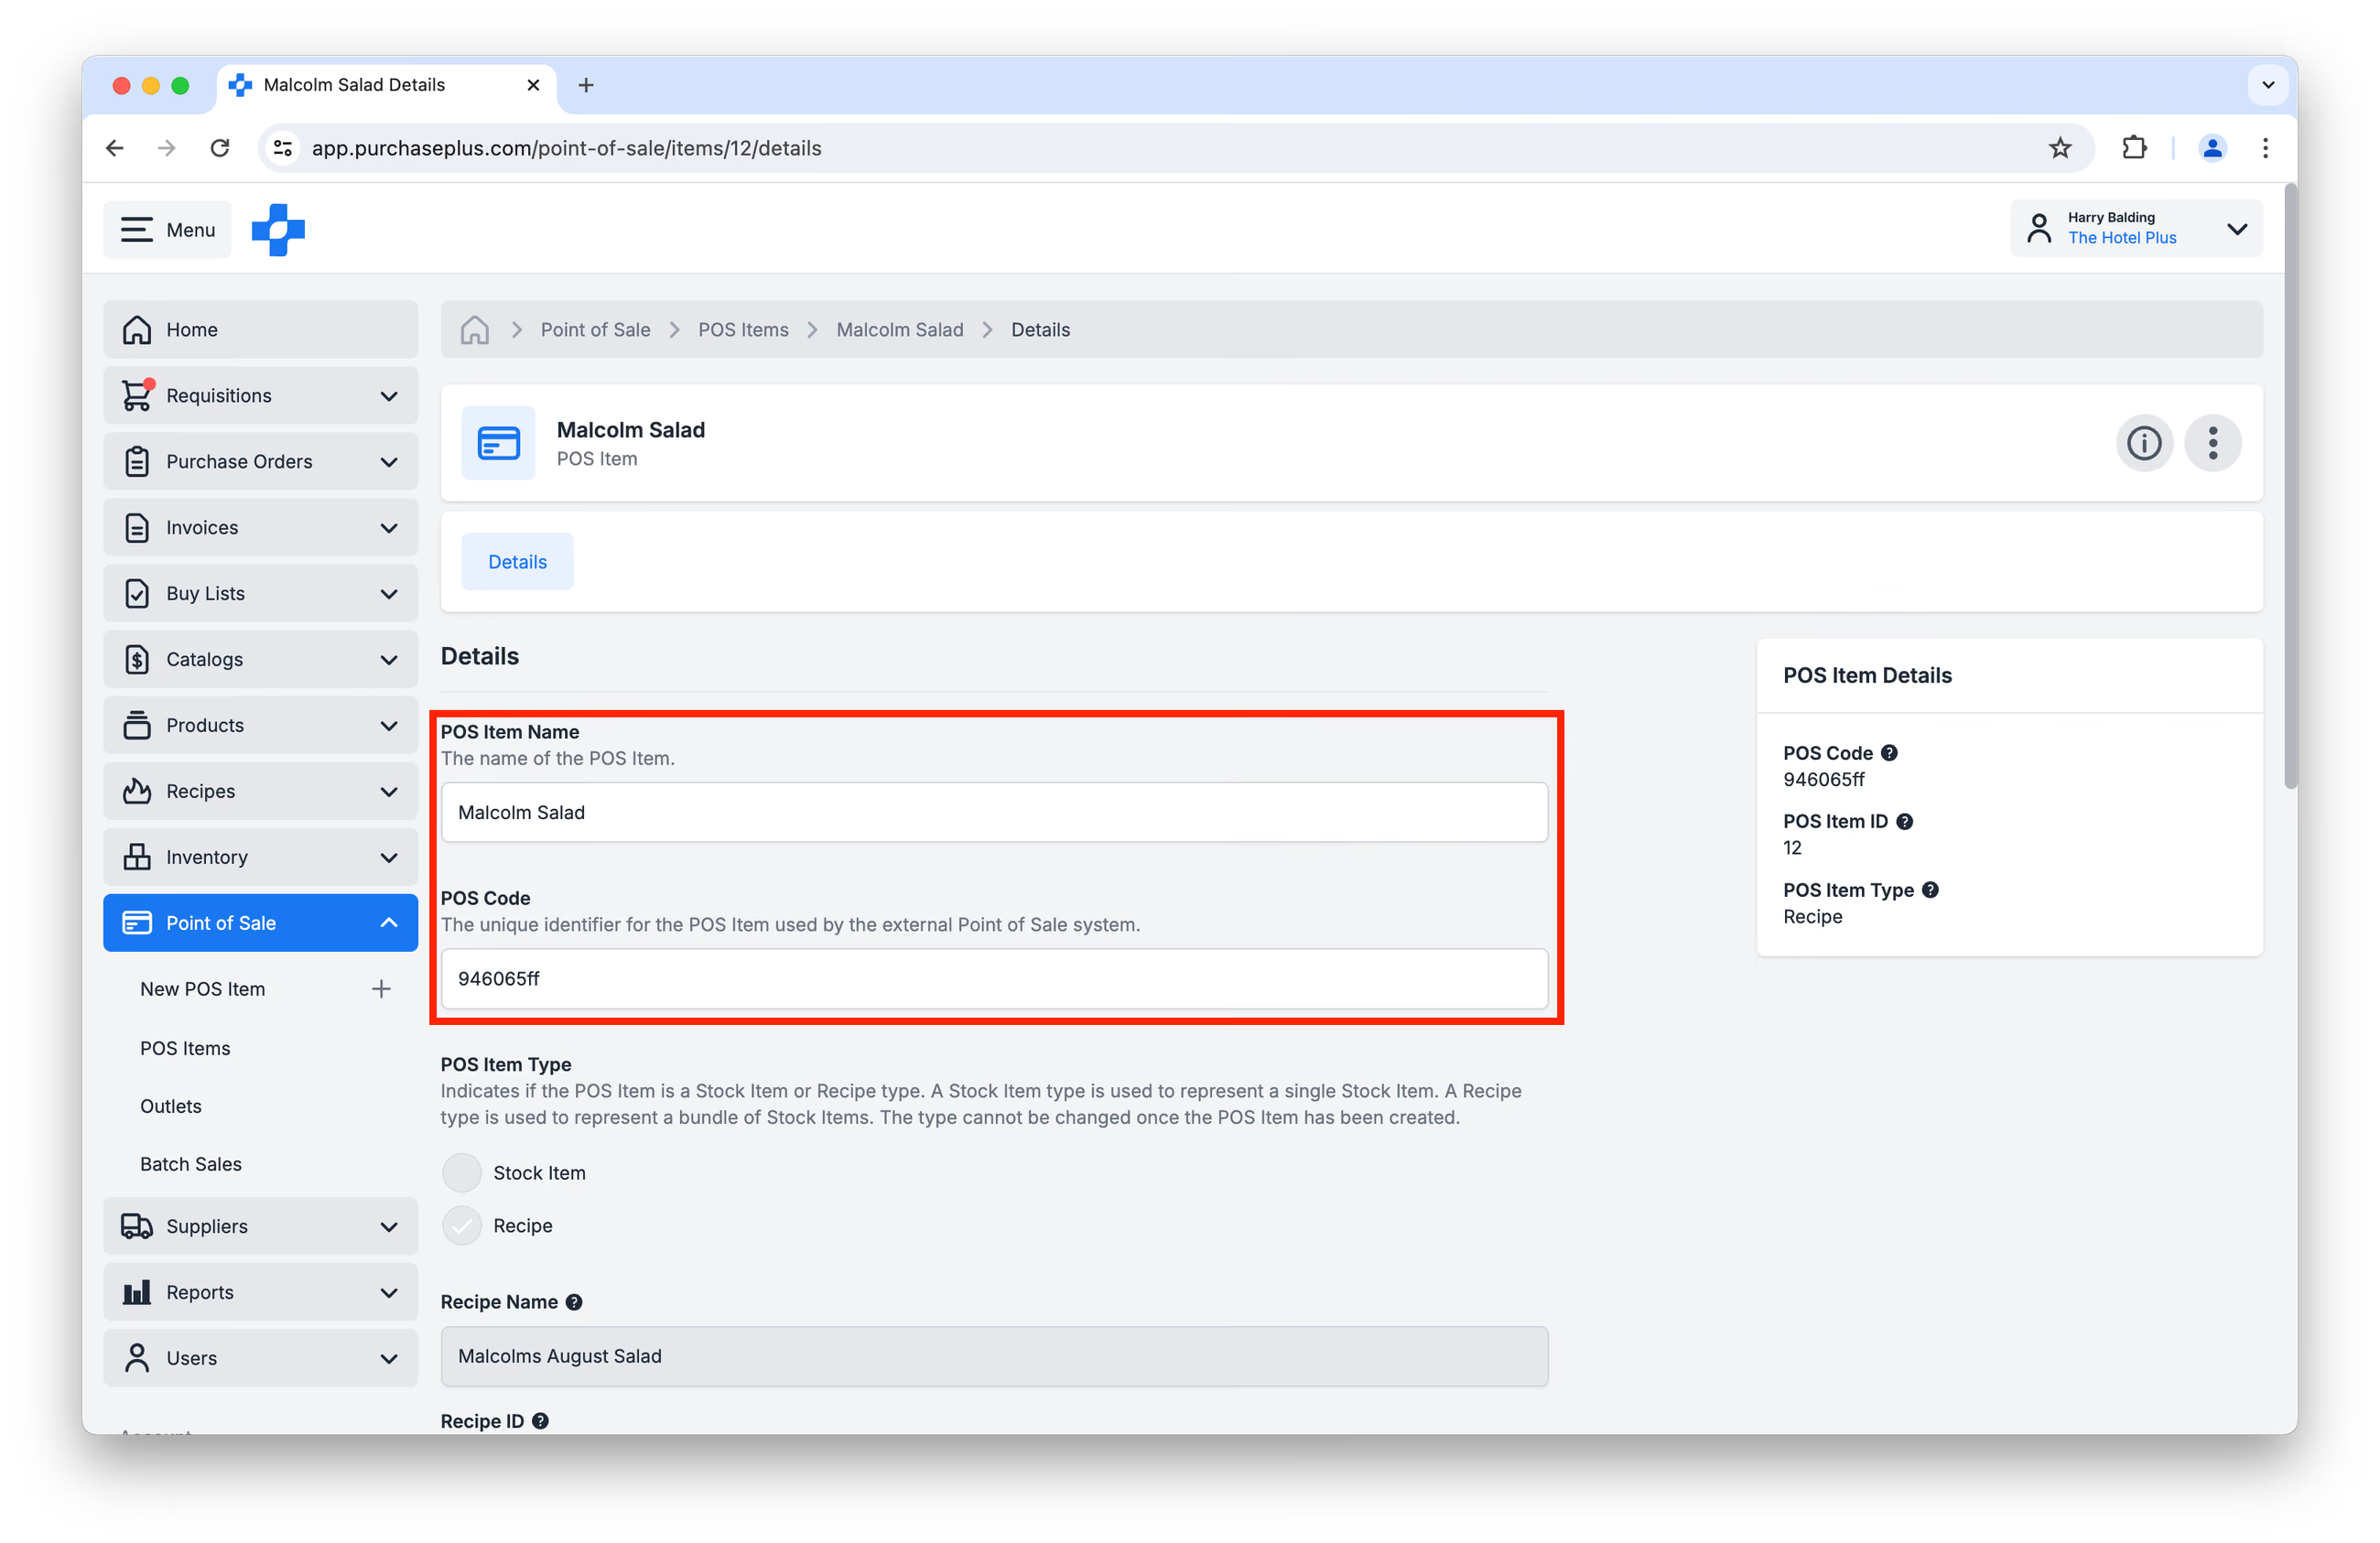
It is currently not possible to Point a POS Item at a different Stock Item or Recipe than the one it was created with. Please create a New POS Item for this purpose.
Deleting POS Items
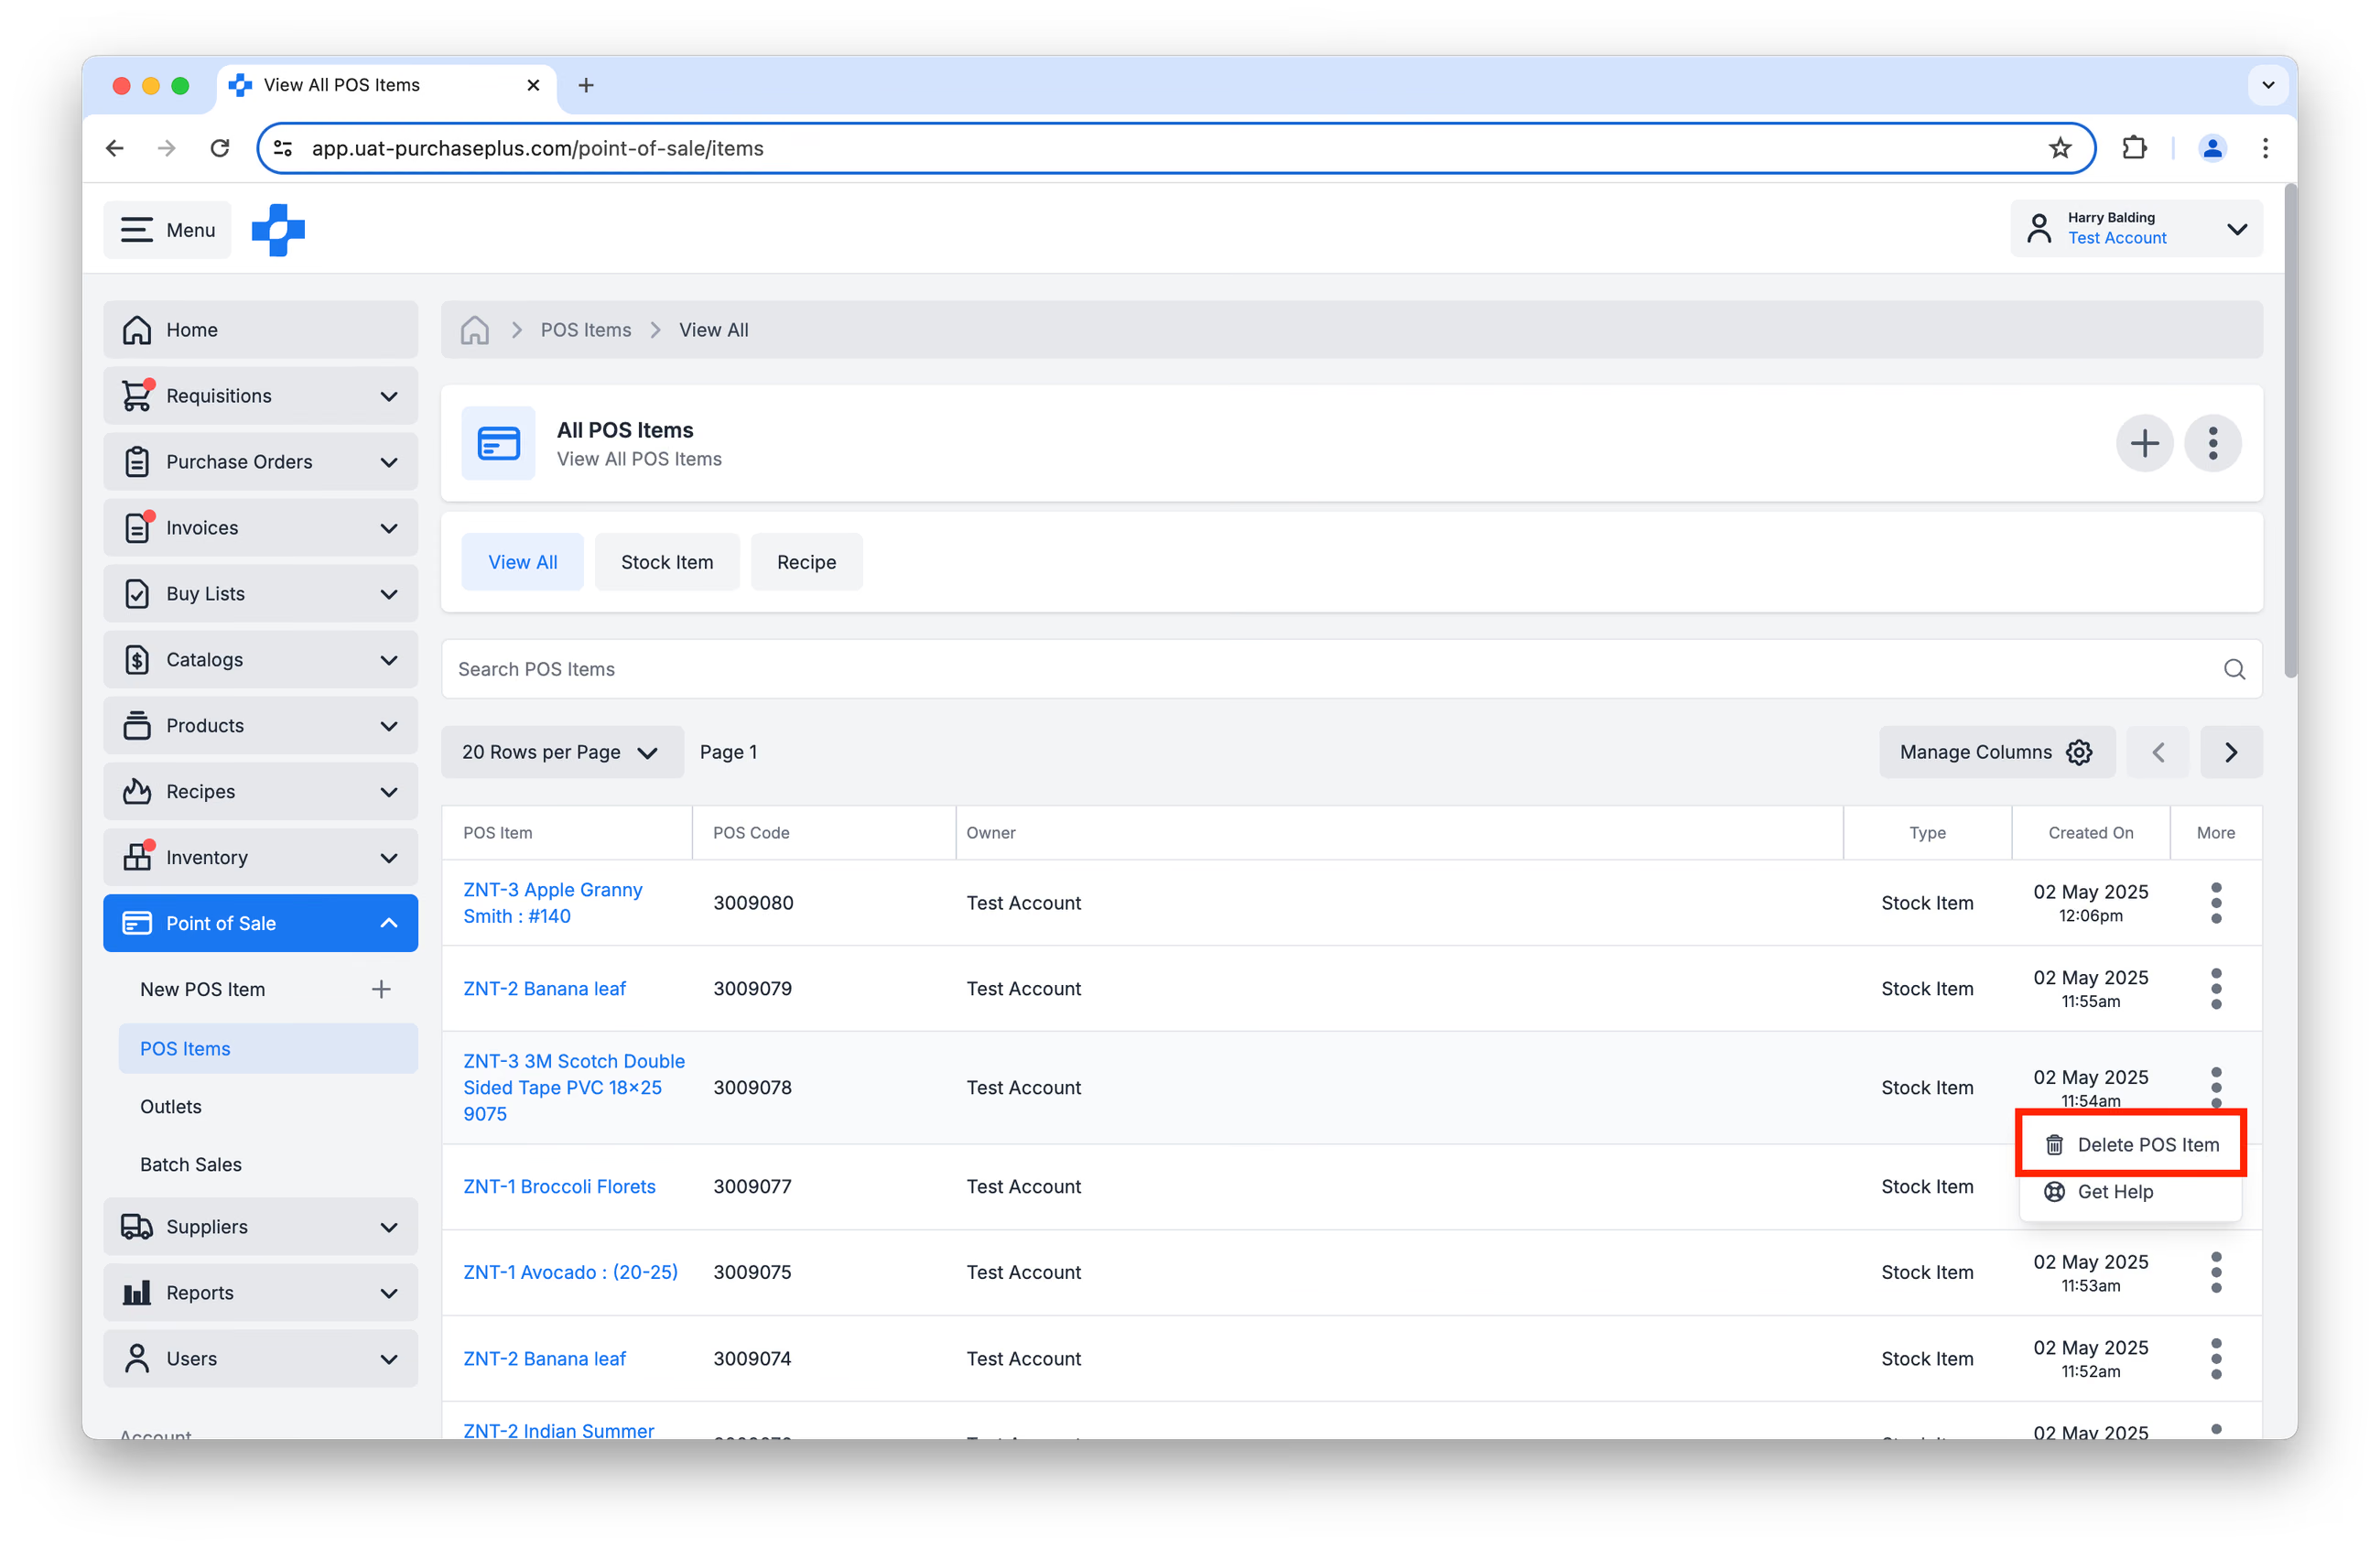
To Delete a POS Item, find the POS Item in the [Point of Sale] → [POS Items] table, and click [Delete POS Item] in the [More] Menu:
POS Outlets
Similar to POS Items, A POS Outlet is a 'container' that combines:
- A Name,
- A POS Outlet Code (the unique identifier that is used by your external POS System), and
- A reference to a Stock Location.
POS Outlets help to identify at which physical POS Terminal a sale was made, and the Stock Location from which to deduct the Stock Items or Recipes.
Creating POS Outlets
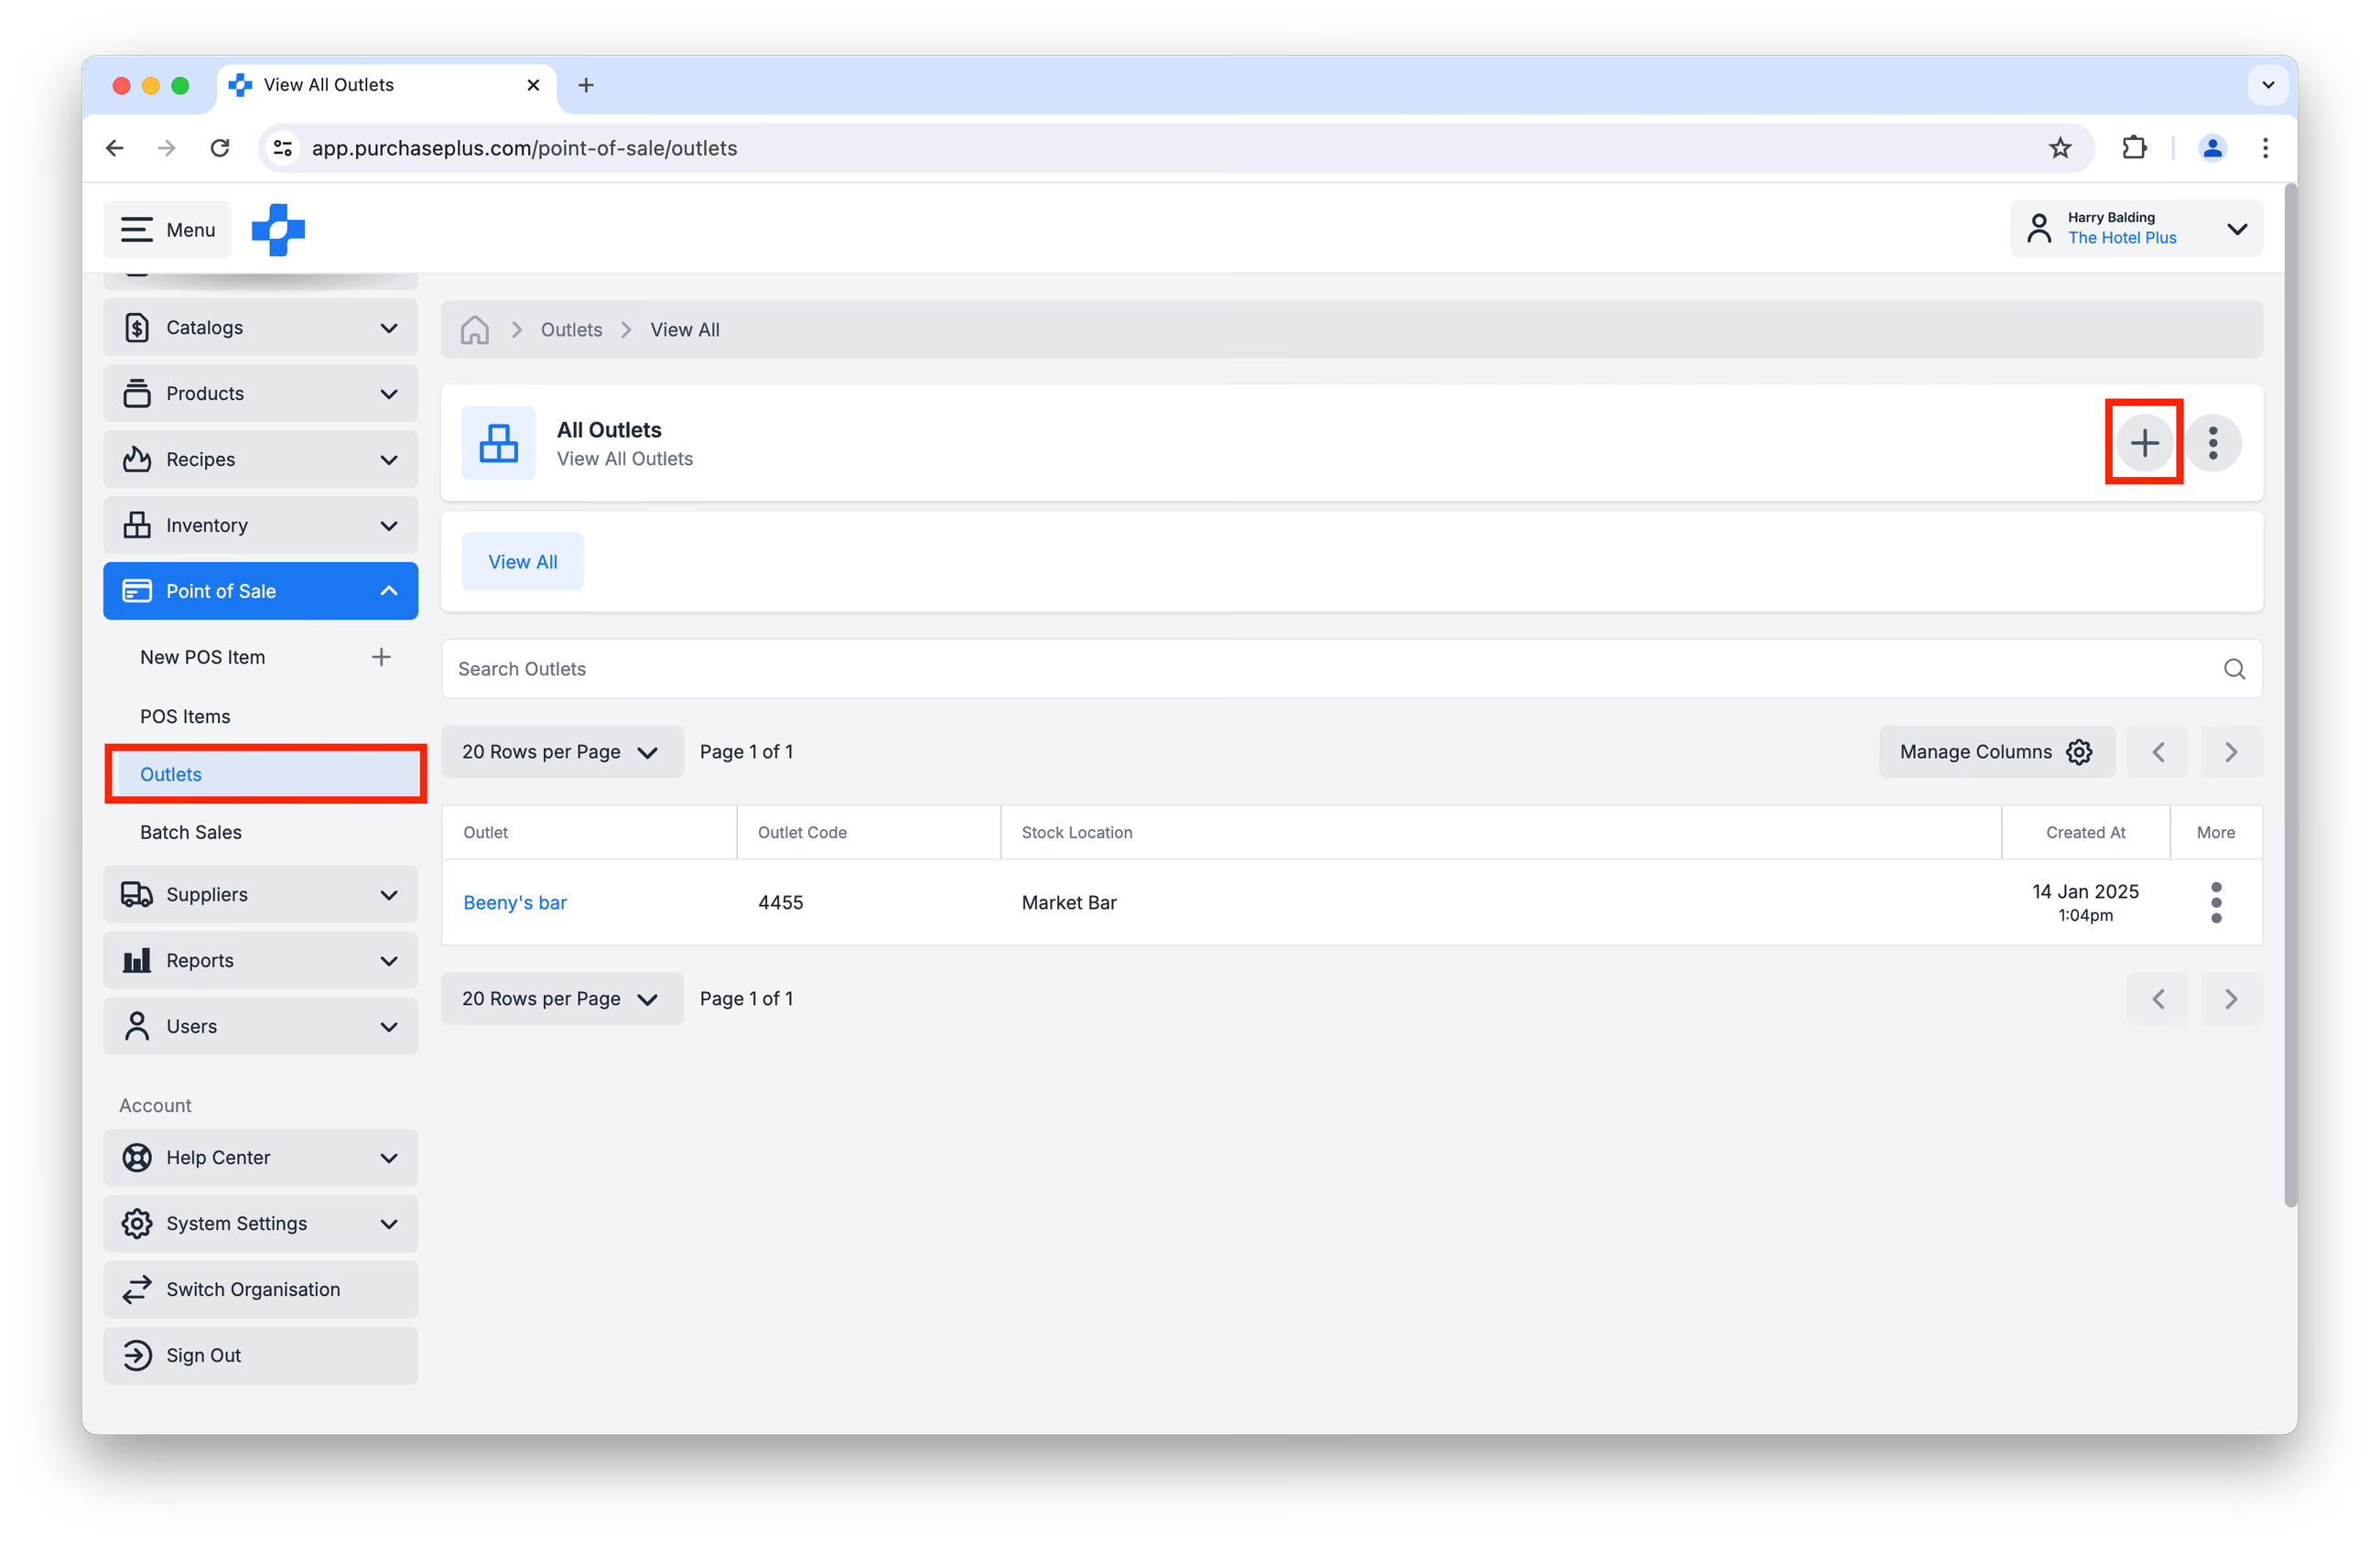
Users with the 'Manage POS Outlets' permission can Create a New POS Outlet at any time by clicking [Point of Sale] → [Outlets] → [Create New Outlet] button:
Fill out the form carefully, ensuring that the POS Outlet Code exactly matches the unique identifier for the physical POS Terminal in your external POS System, and click [Create POS Outlet] to complete the process:
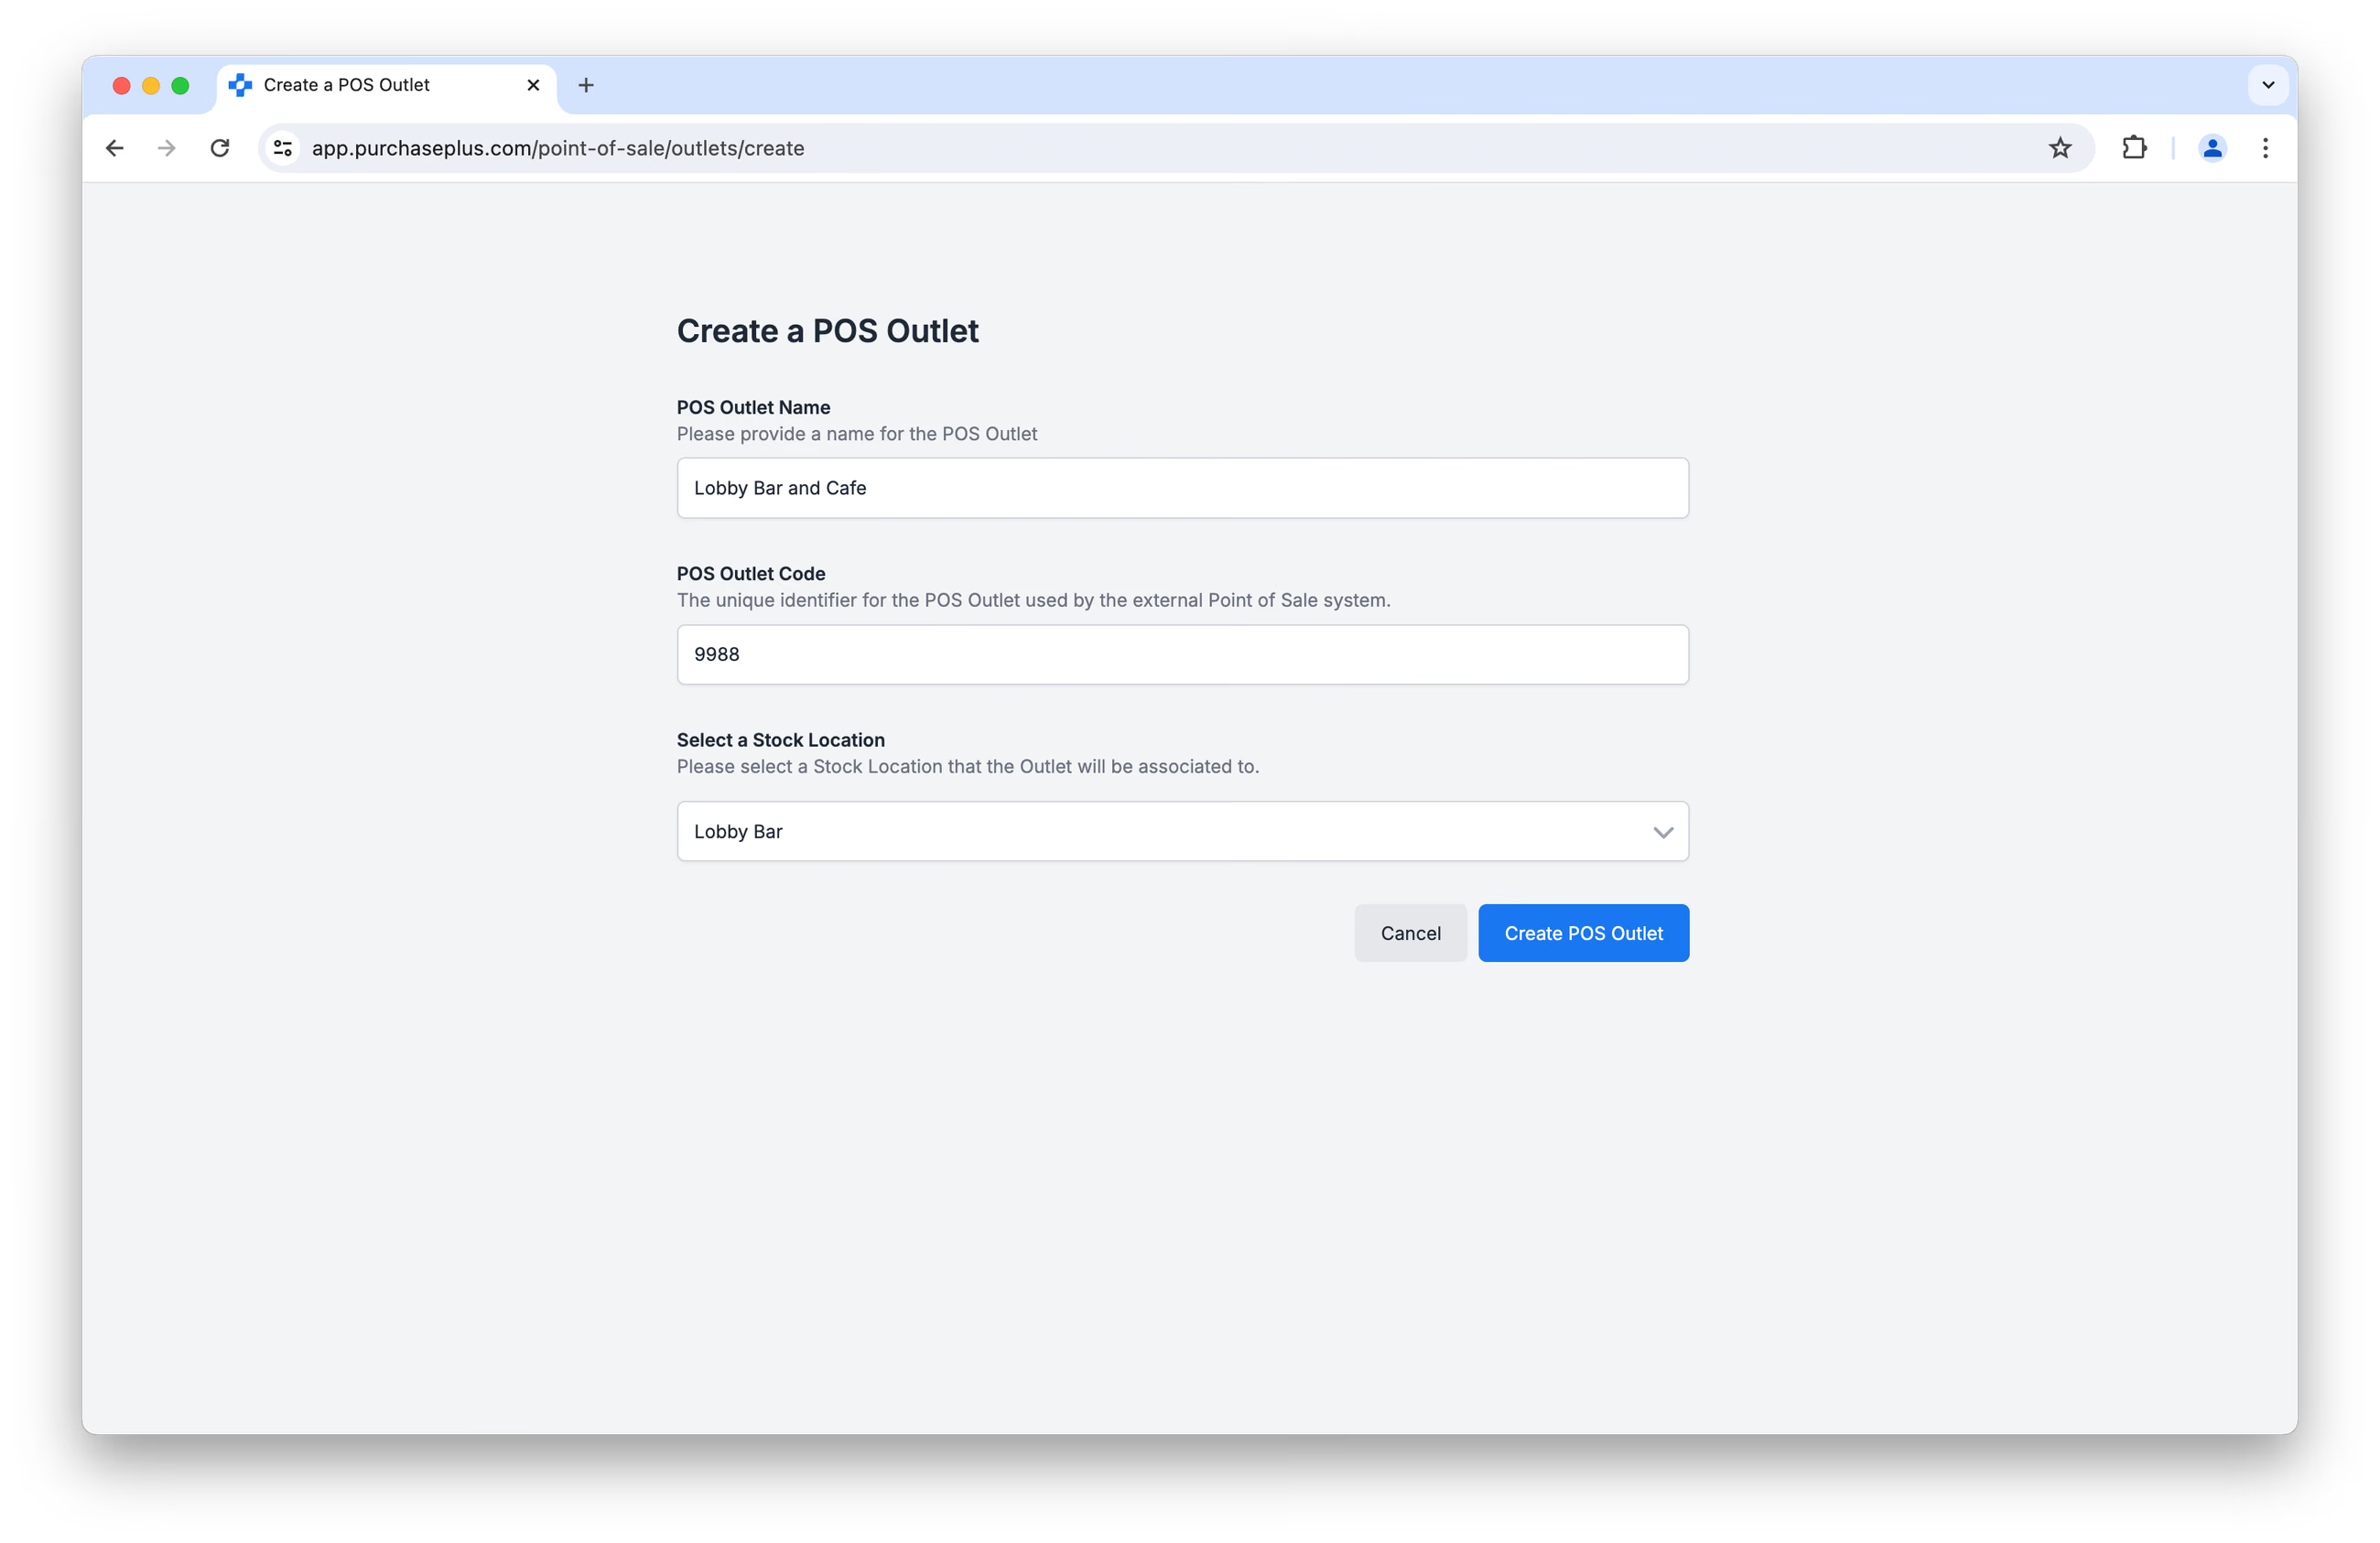
The Stock Location you select for the POS Outlet is the Location from which Stock Items will be decremented upon completion of a Batch Sale.
Viewing and Updating POS Outlets
You can view a list of your Organisation's POS Outlets by clicking [Point of Sale] → [Outlets] in the left side navigation bar:
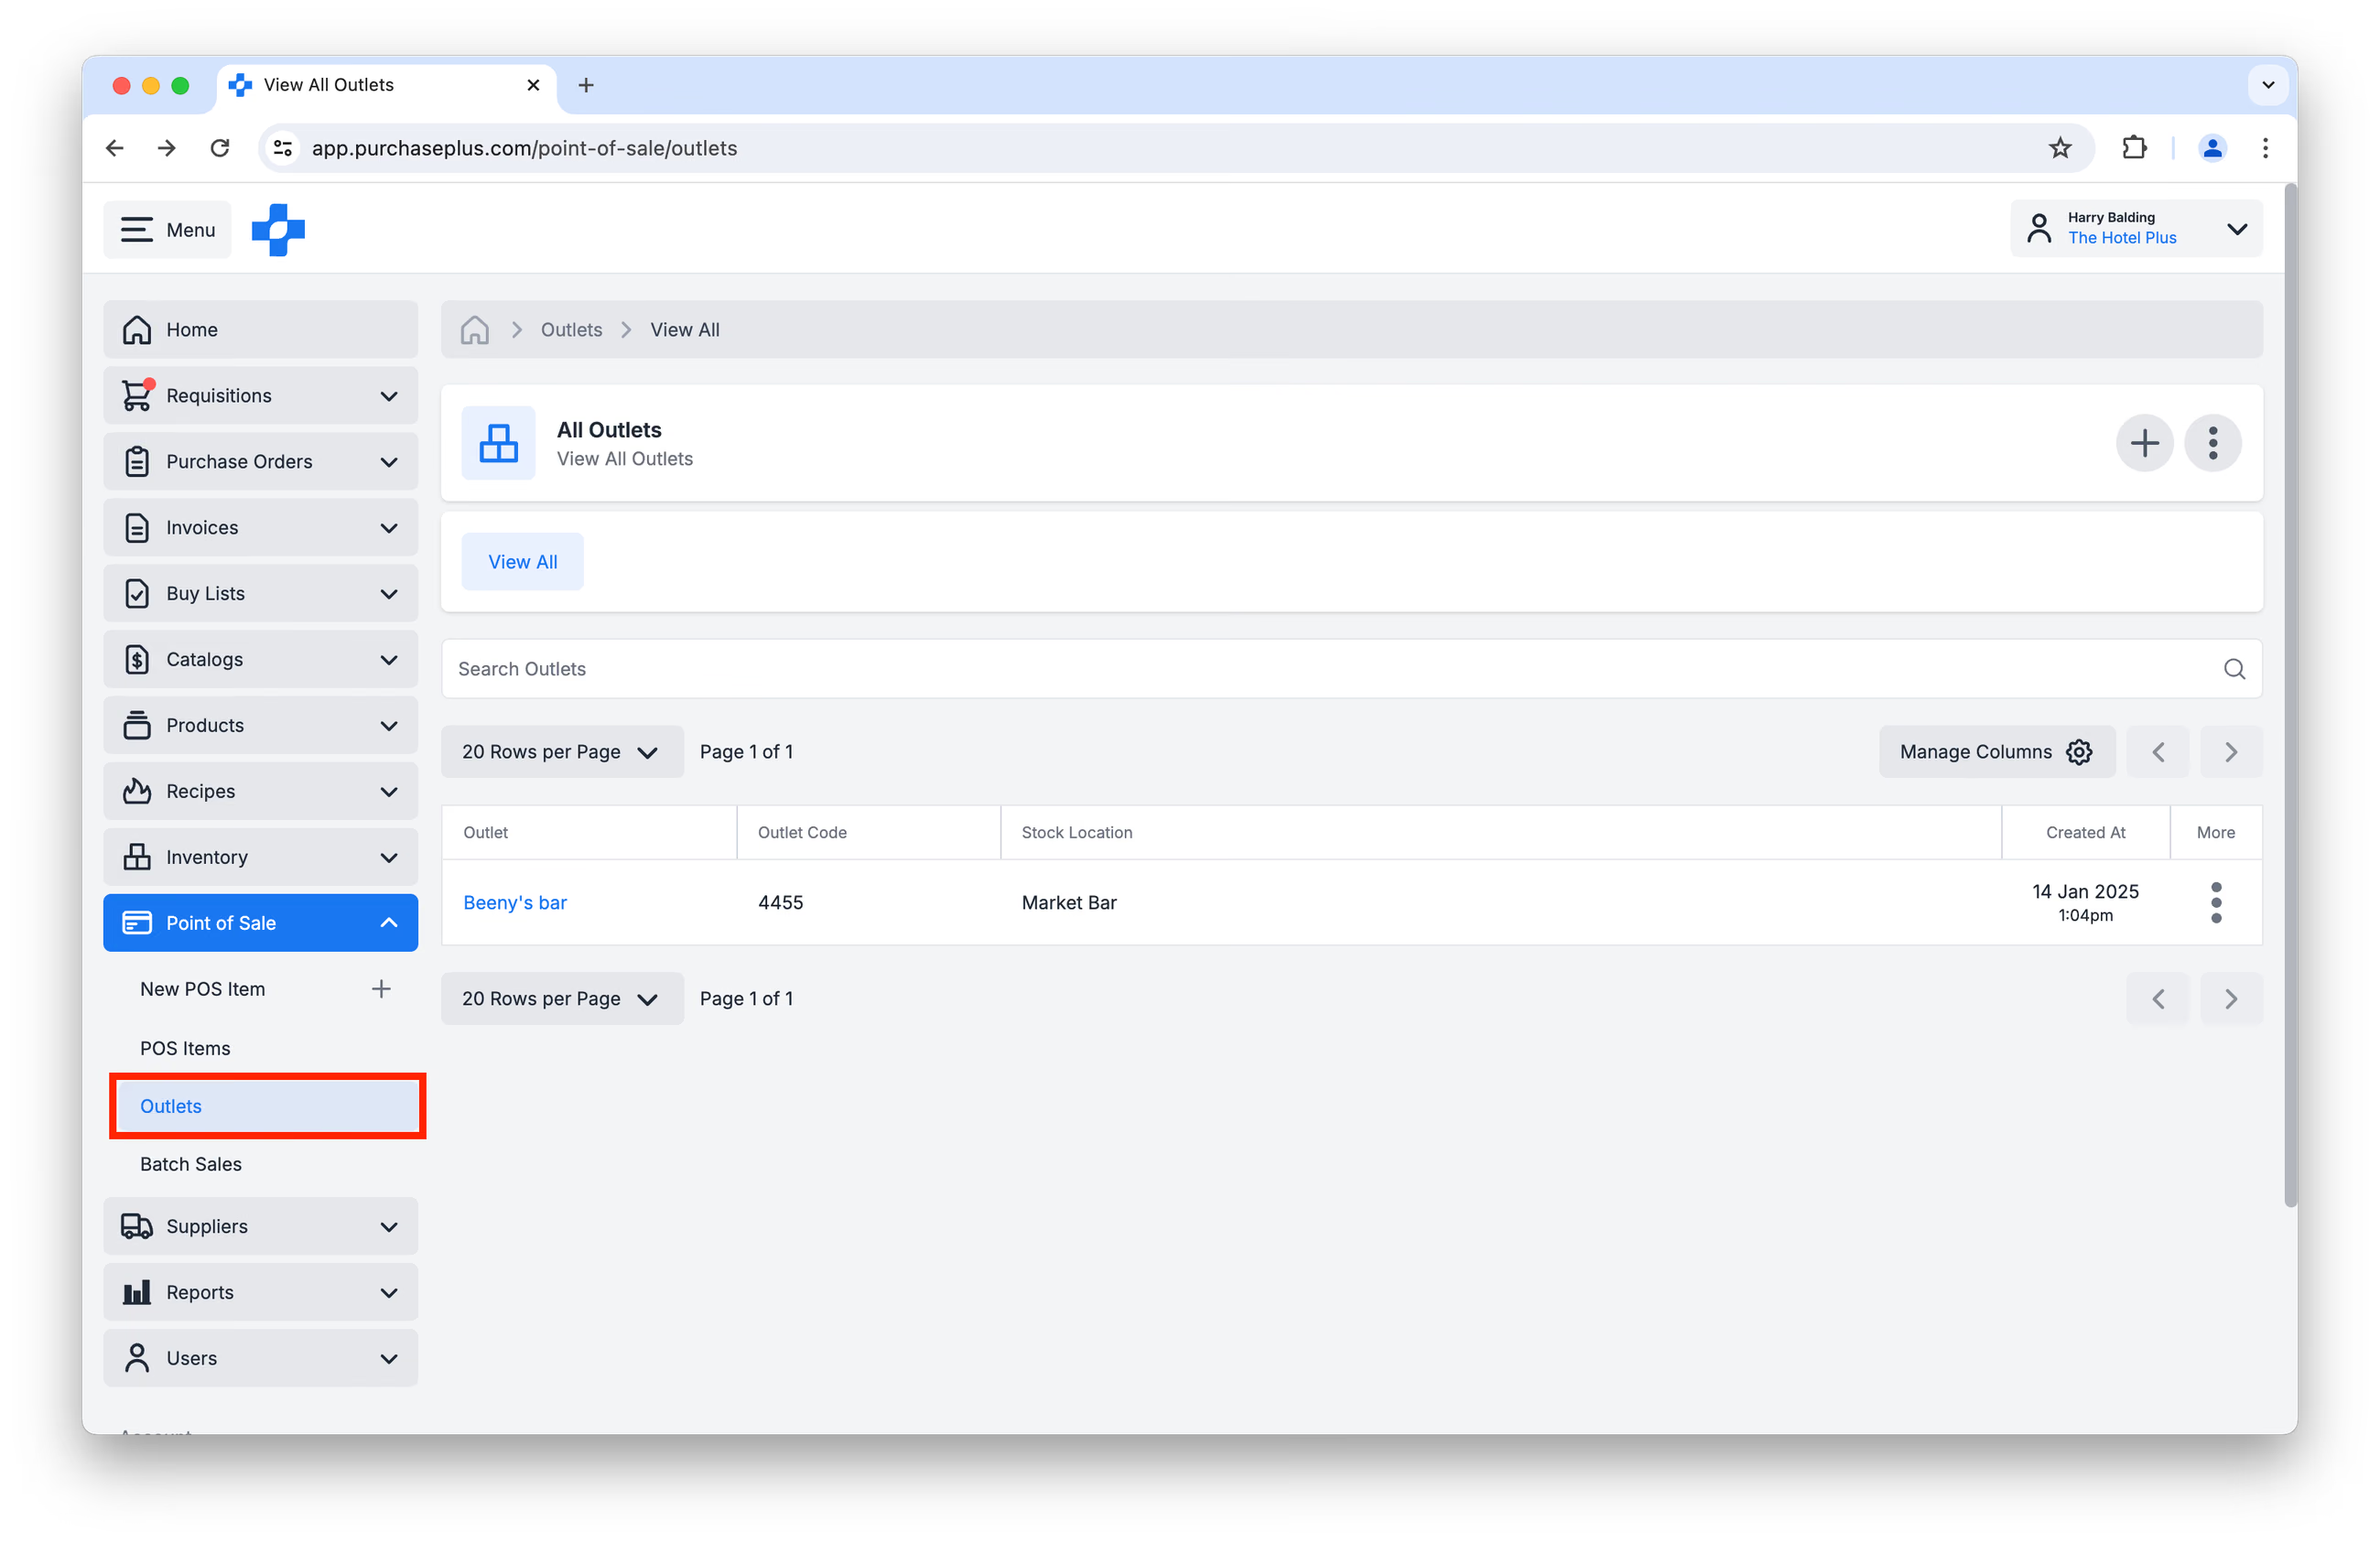
Clicking on the Outlet name will take you to the Outlet Details page, where users with the 'Manage POS Outlets' permission can update the POS Outlet Name and POS Outlet Code for the Outlet:
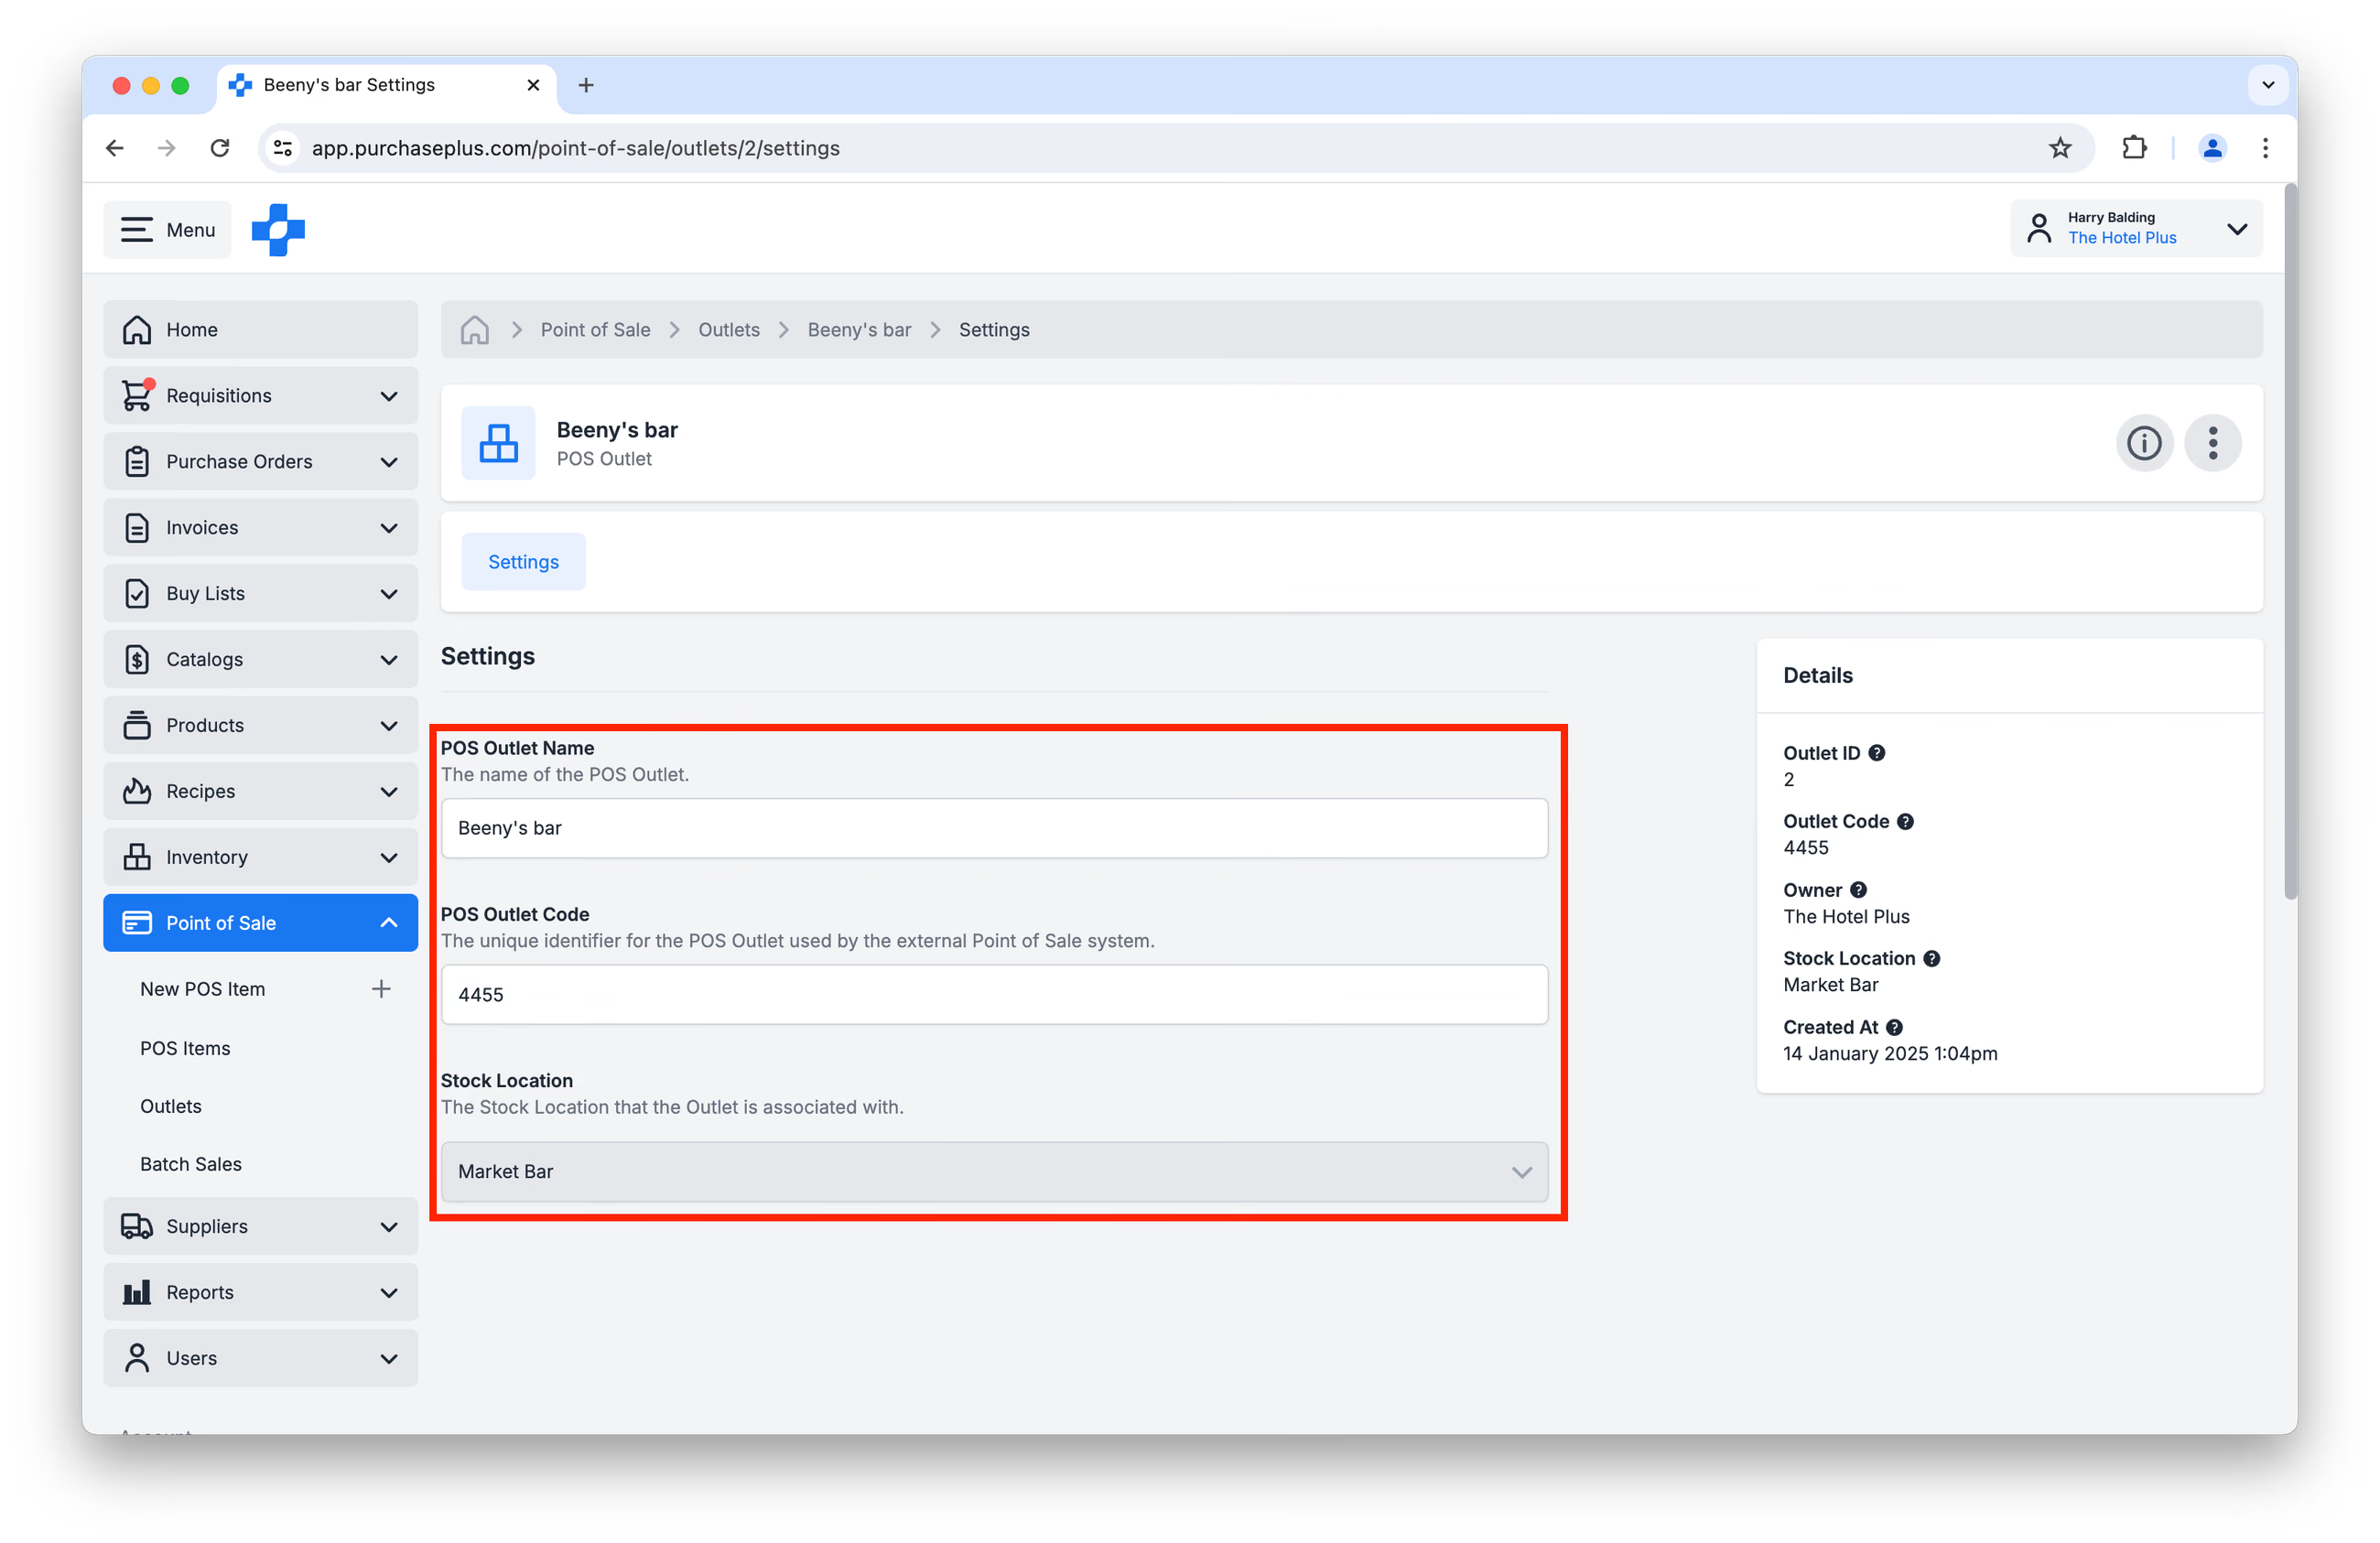
It is currently not possible to point a POS Outlet at a different Stock Location than the one it was created with. Please create a New POS Outlet for this purpose.
Deleting POS Outlets
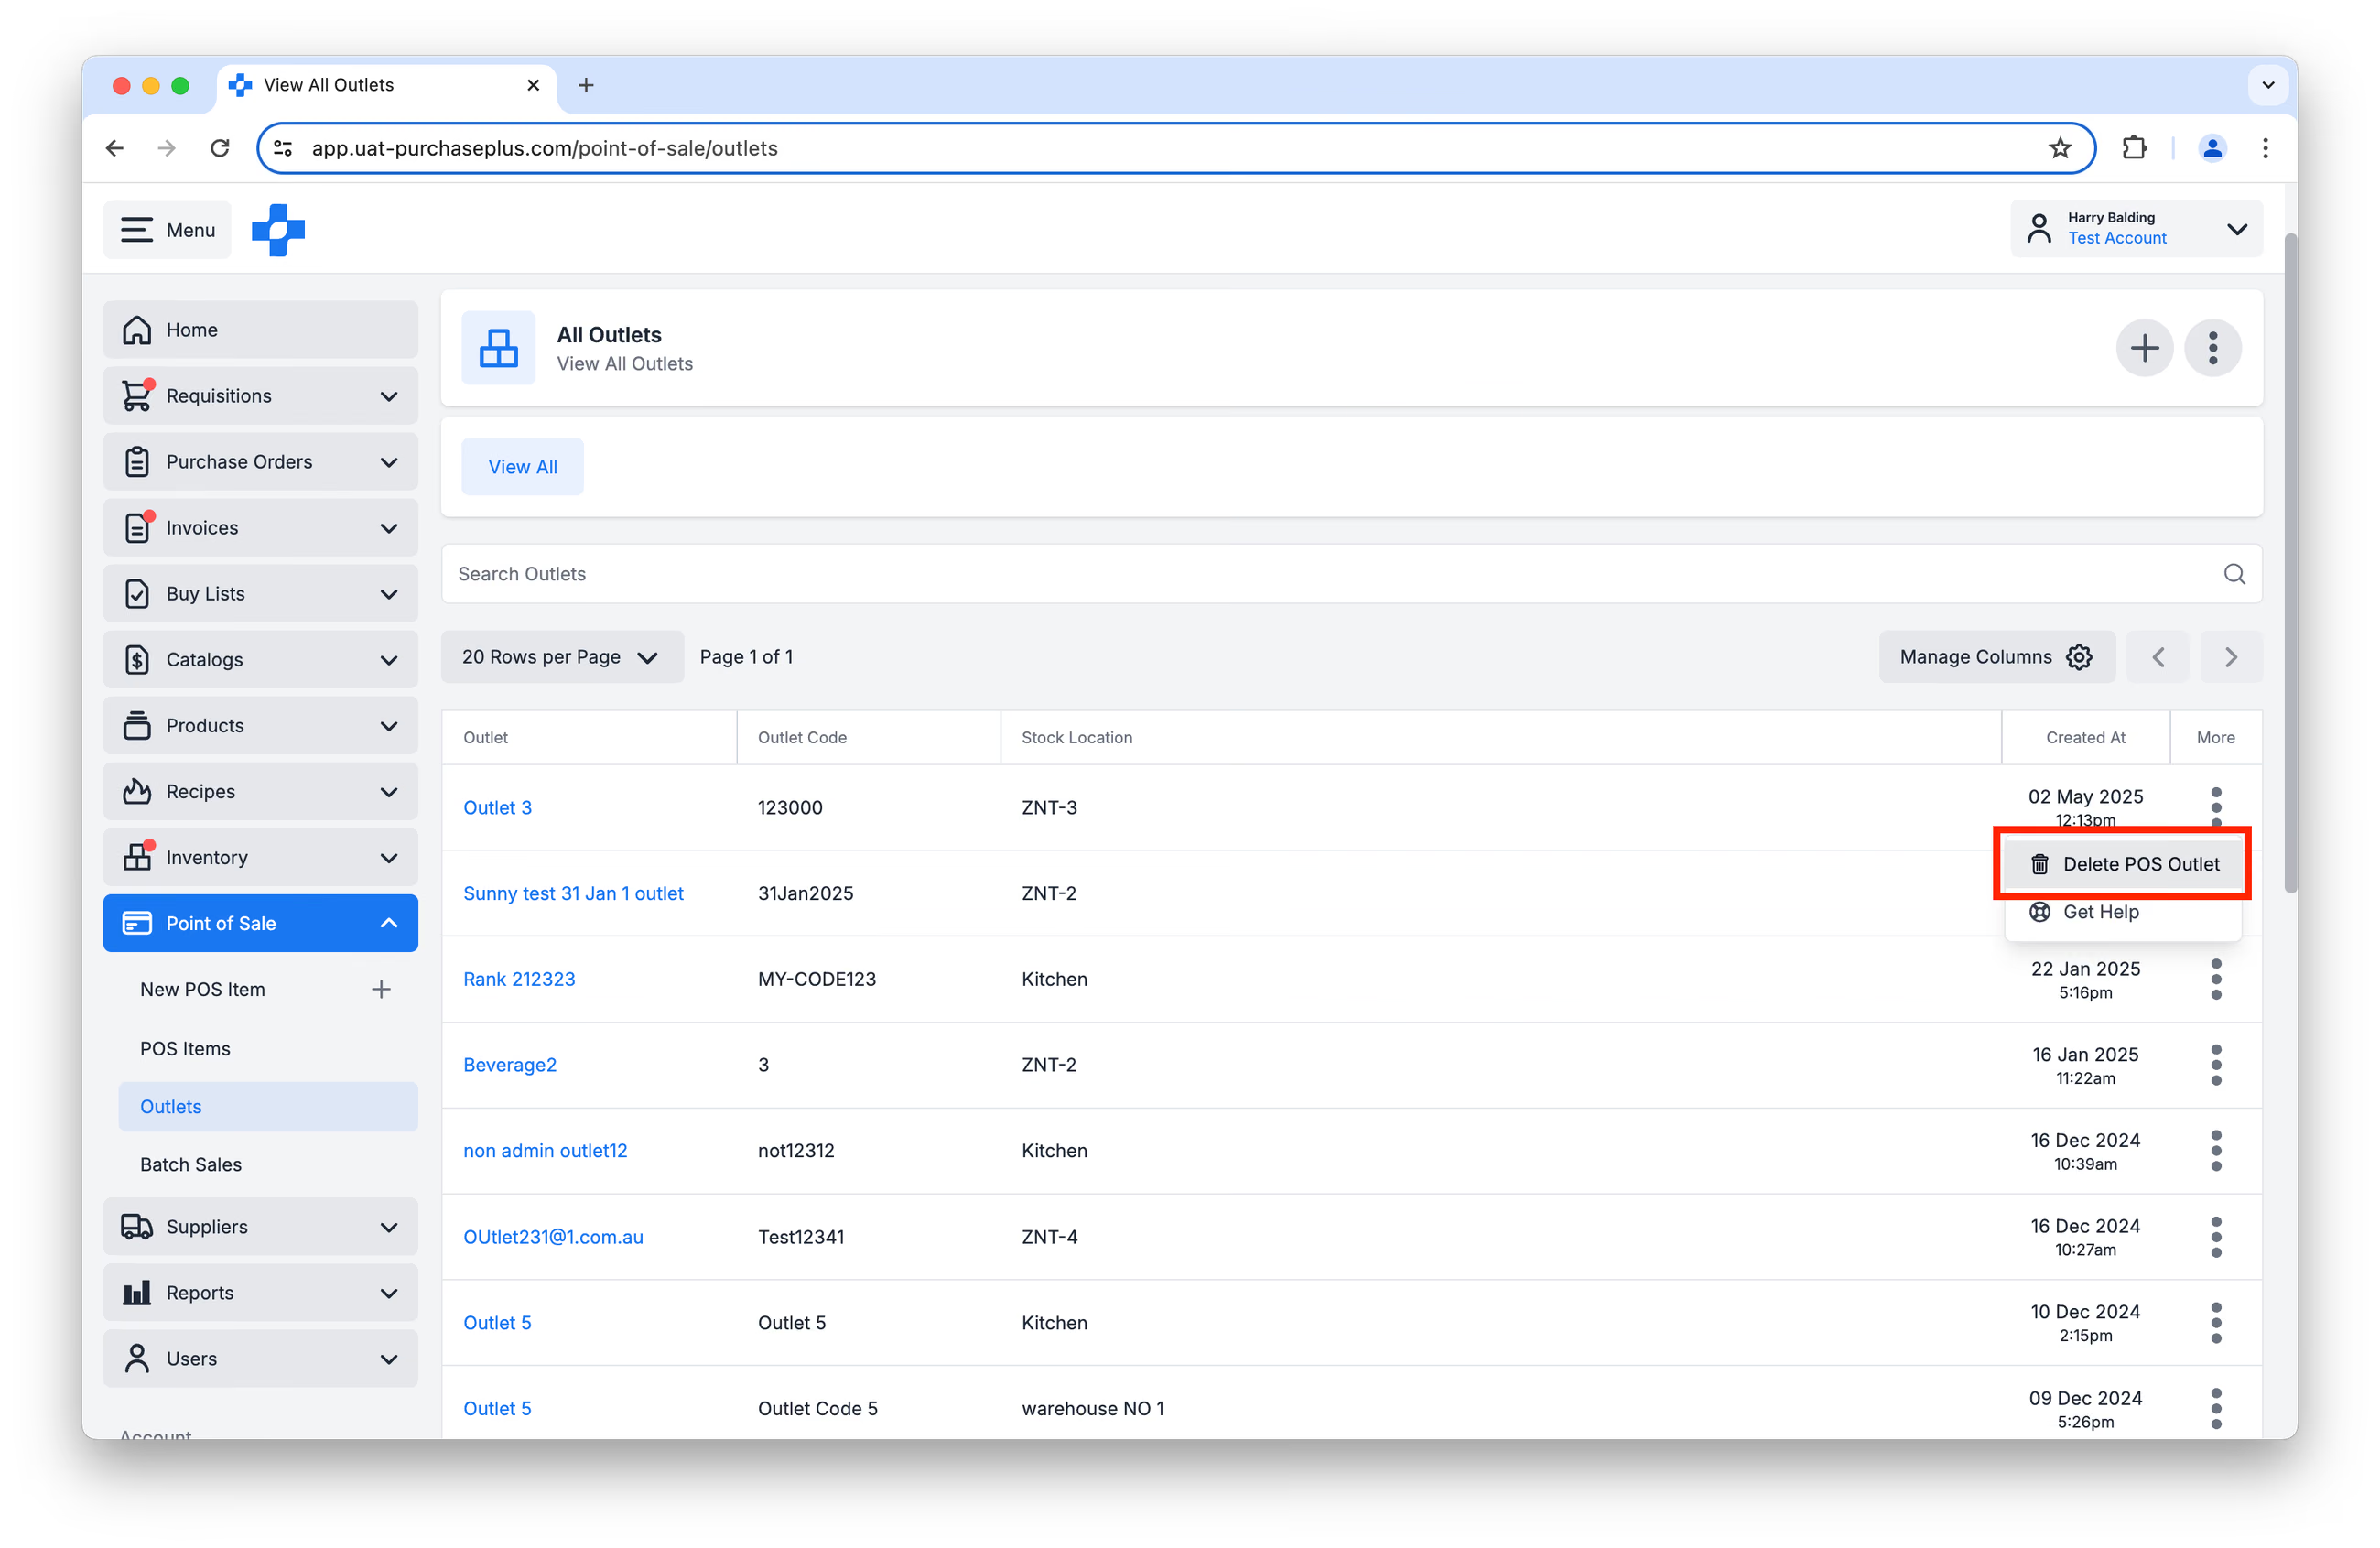
To Delete a POS Item, find the POS Item in the [Point of Sale] → [Outlets] table, and click [Delete POS Outlet] in the [More] Menu:
Batch Sales
A Batch Sale is a collection of Sale Lines (i.e. sales) that were made at your physical POS terminals. Our system processes these Sale Lines in bulk (usually grouped by date), in order to decrement the Stock Items from the correct Stock Locations.
A Sale Line includes:
- A POS Item that was sold (referencing the Stock Item to be decremented),
- An Outlet which identifies the POS terminal where the sale was made (referencing the Stock Location from which the Stock Item will be decremented),
- A Sell Unit Price, which is the price at which the POS Item was sold (exclusive of tax), and
- The Quantity of POS Items that were sold (i.e. the quantity of the Stock Item to be decremented from the Stock Location).
Batch Sales can be in one of the following statuses:
- Open: The Batch Sale has been Created, and it is currently able to be edited by a permitted user.
- Importing: An Import (from CSV) has been initiated. Once the Import is complete, the Batch Sale's status is reverted to Open. Batch Sales in the 'Importing' State cannot be edited.
- Processing: The POS Items (Stock Items) are currently being decremented from the target POS Outlet (Stock Location) via Transfers. Batch Sales in the 'Processing' State cannot be edited.
- Complete: All of the POS Items (Stock Items) have been successfully decremented from the target POS Outlet (Stock Location), and the Batch Sale can no longer be edited.
- Failed: An error has occurred during the Importing or Processing stage.
You can manually populate a Batch Sale, upload a CSV that conforms with the upload requirements, or create Batch Sales by API integration.
Creating Batch Sales Manually
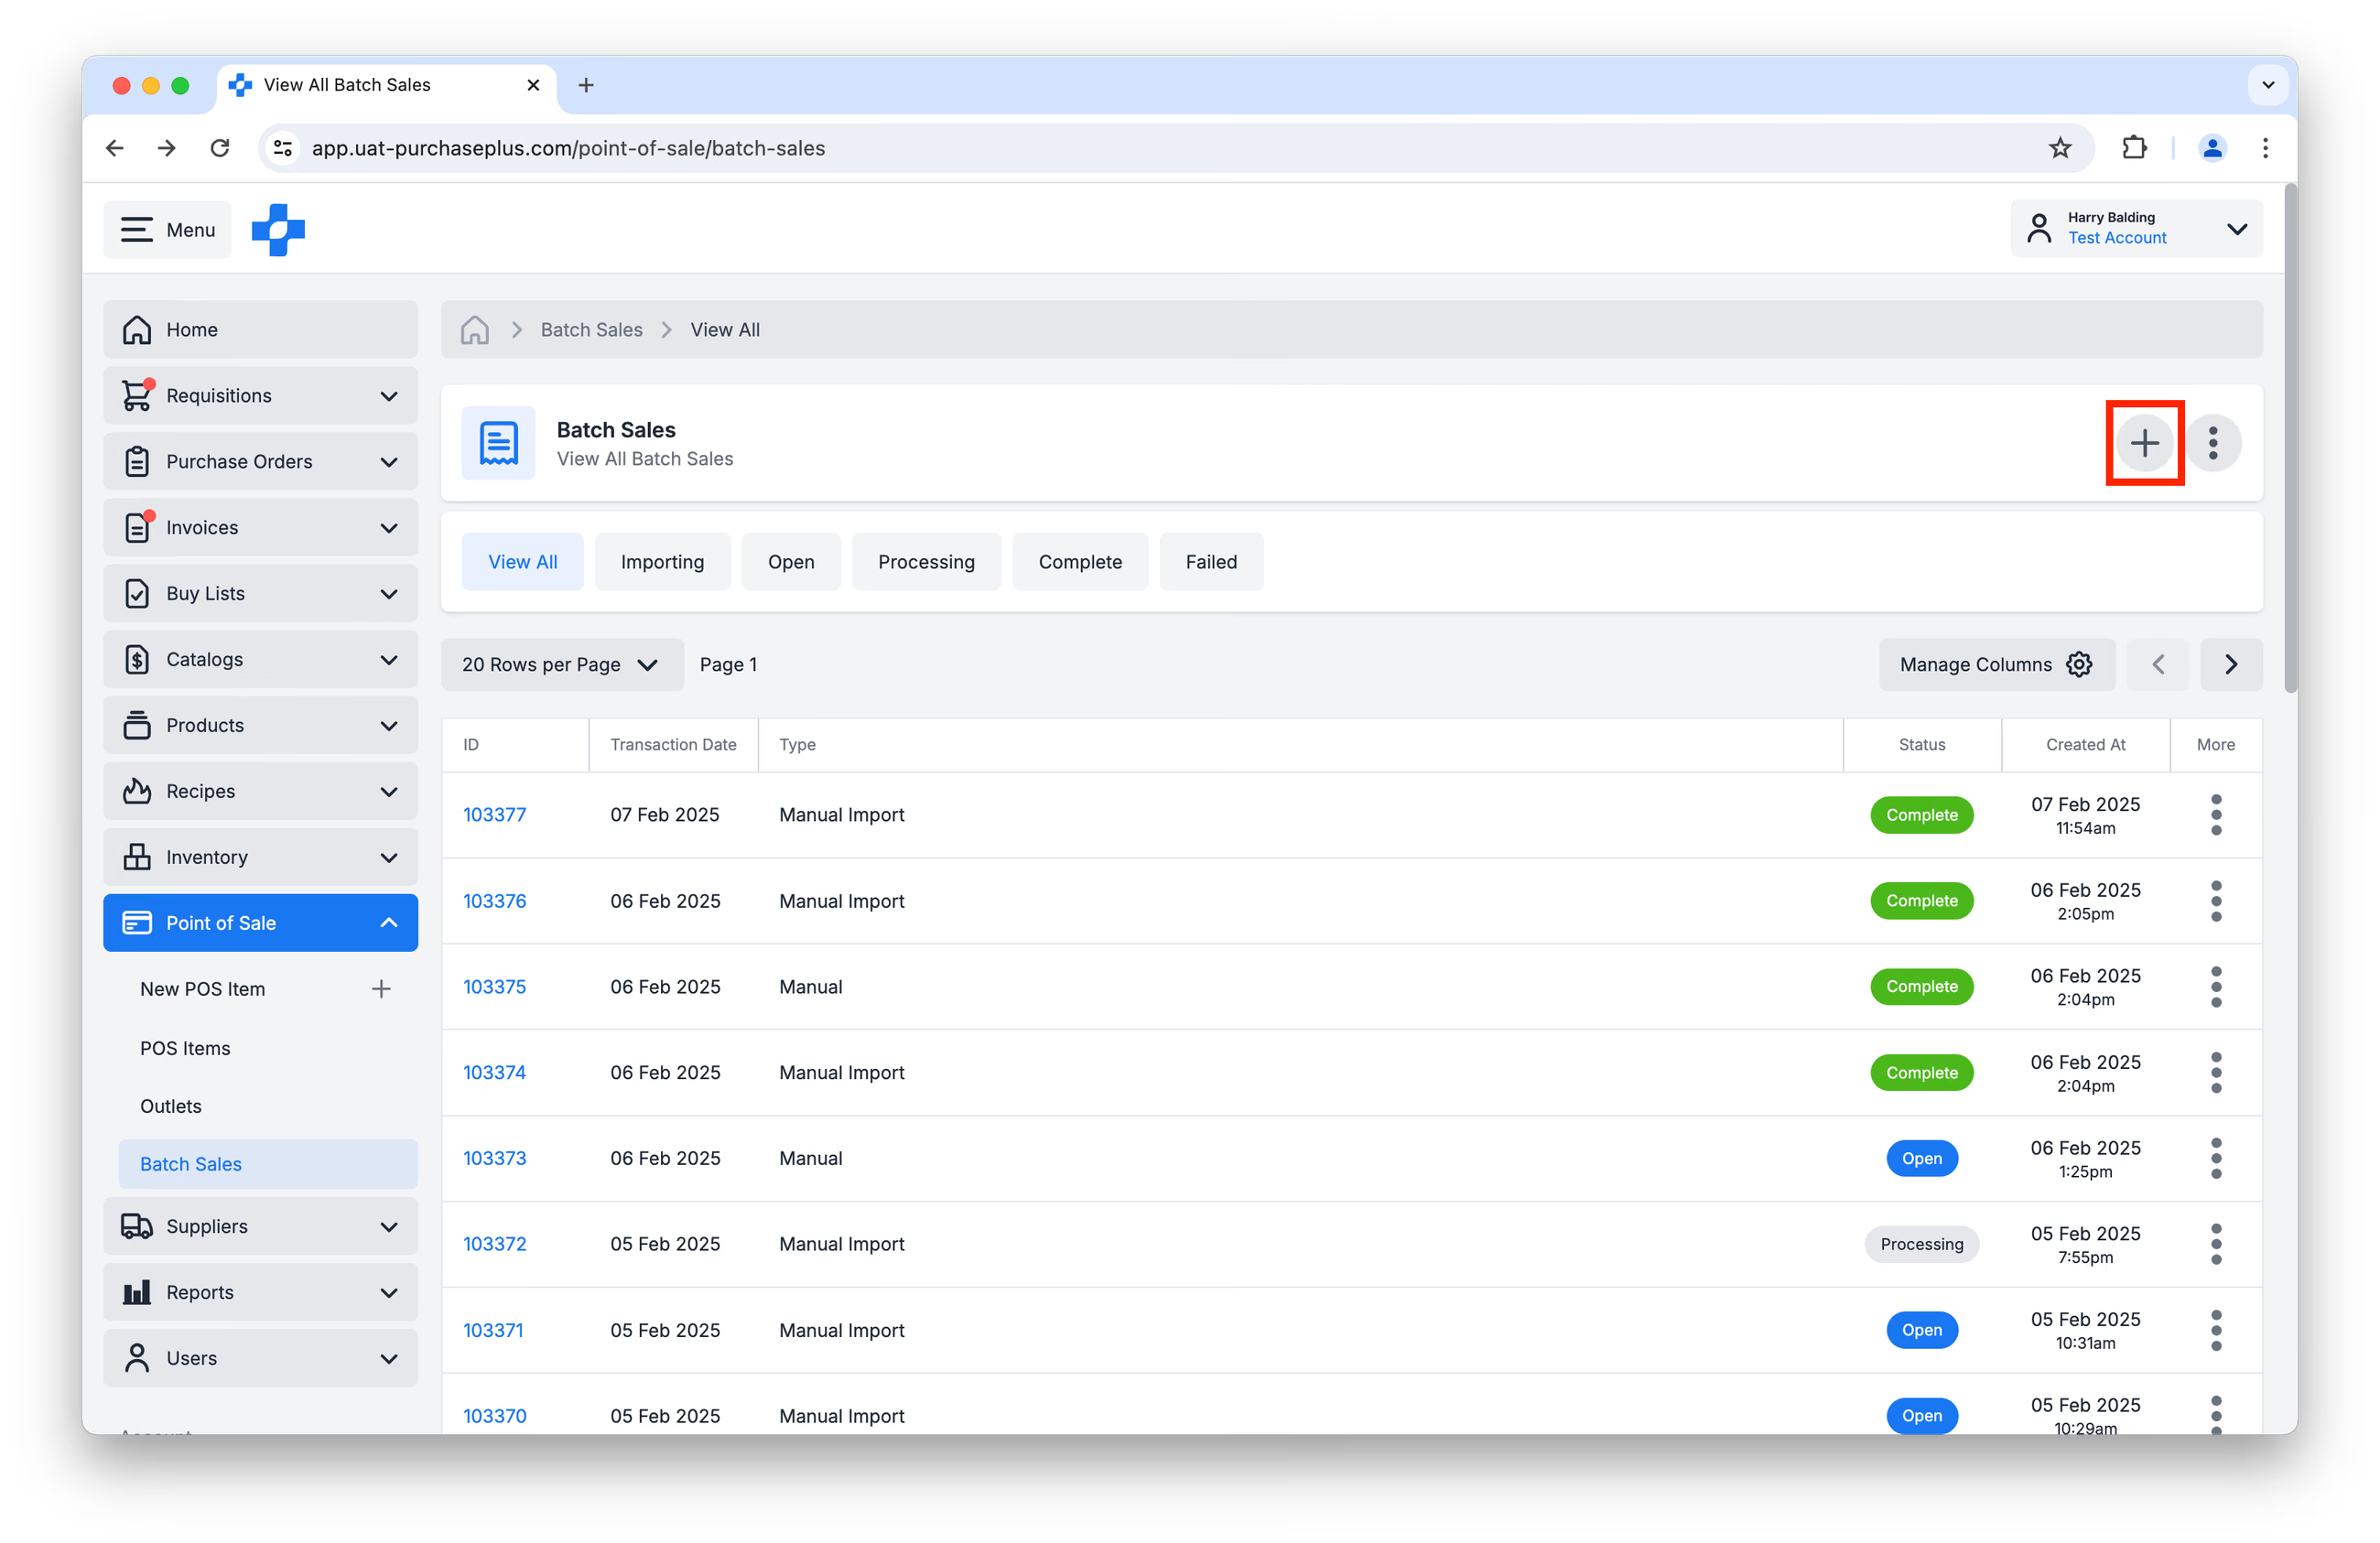
To create a New Batch Sale manually, navigate to [Point of Sale] → [Batch Sales] and click [Create a New Batch Sale]:
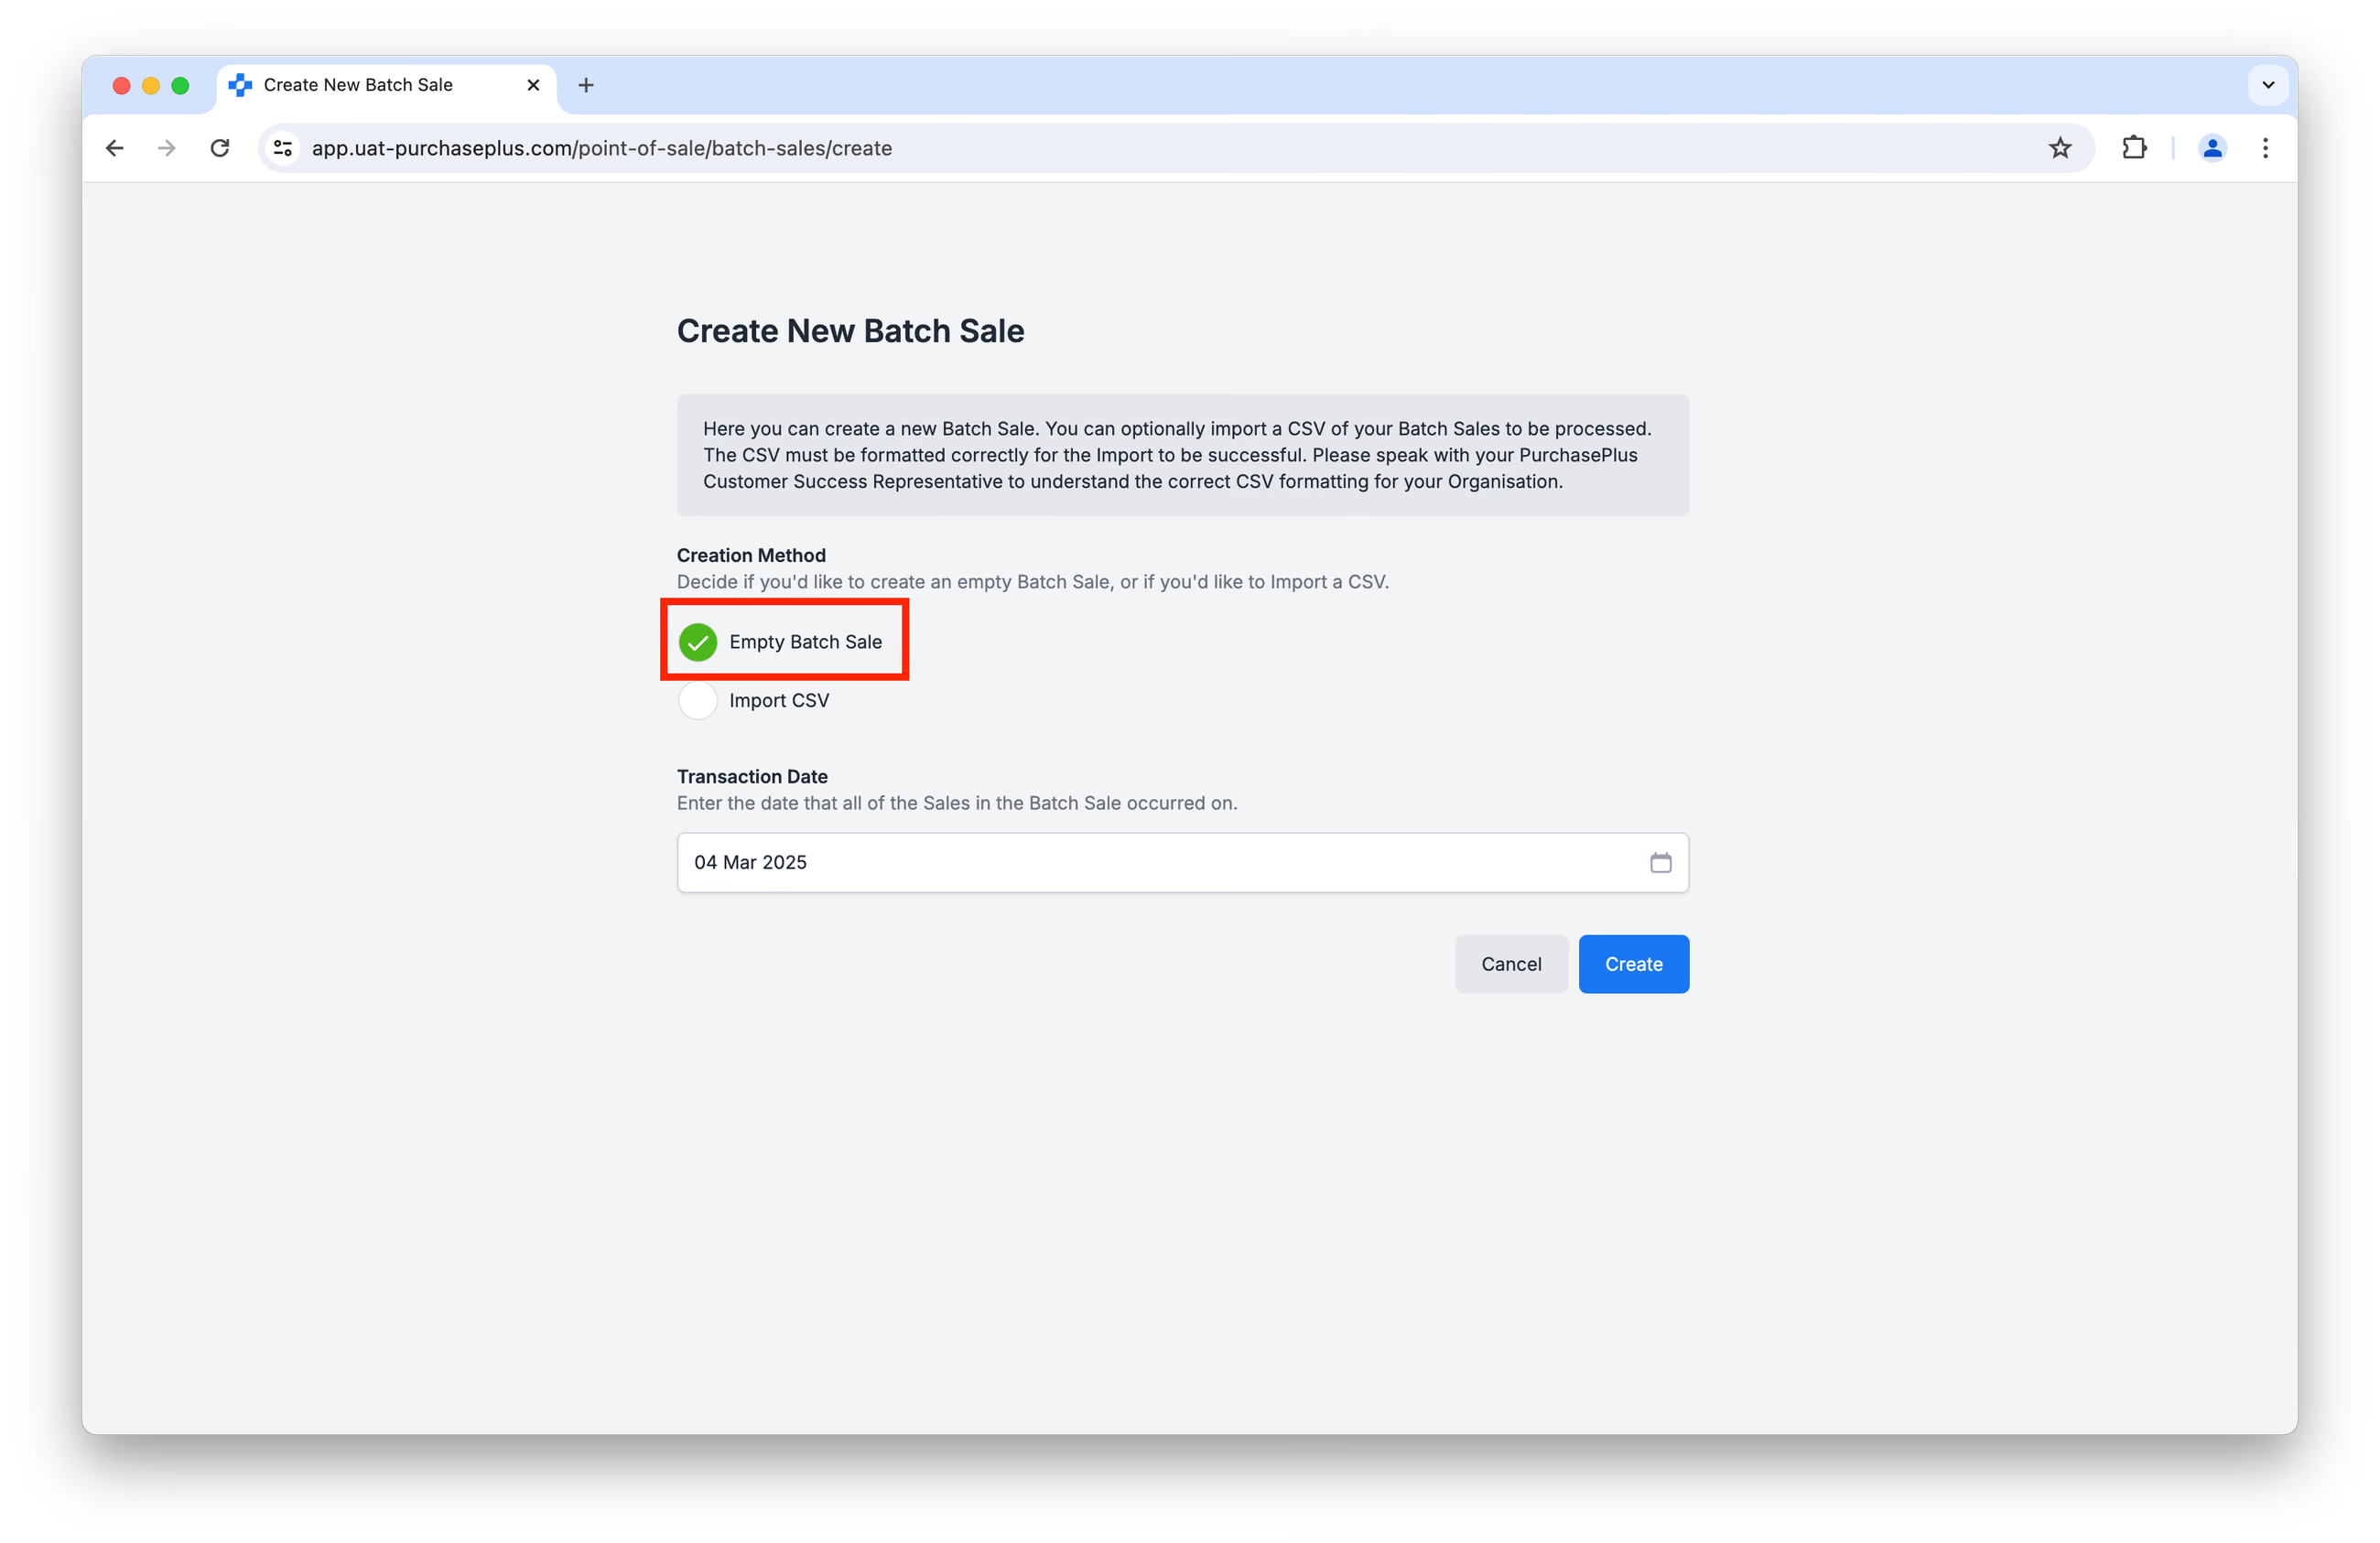
Ensure [Empty Batch Sale] is selected as the Creation Method, and that the Transaction Date is the date upon which the Sales were made. Click [Create] to progress:
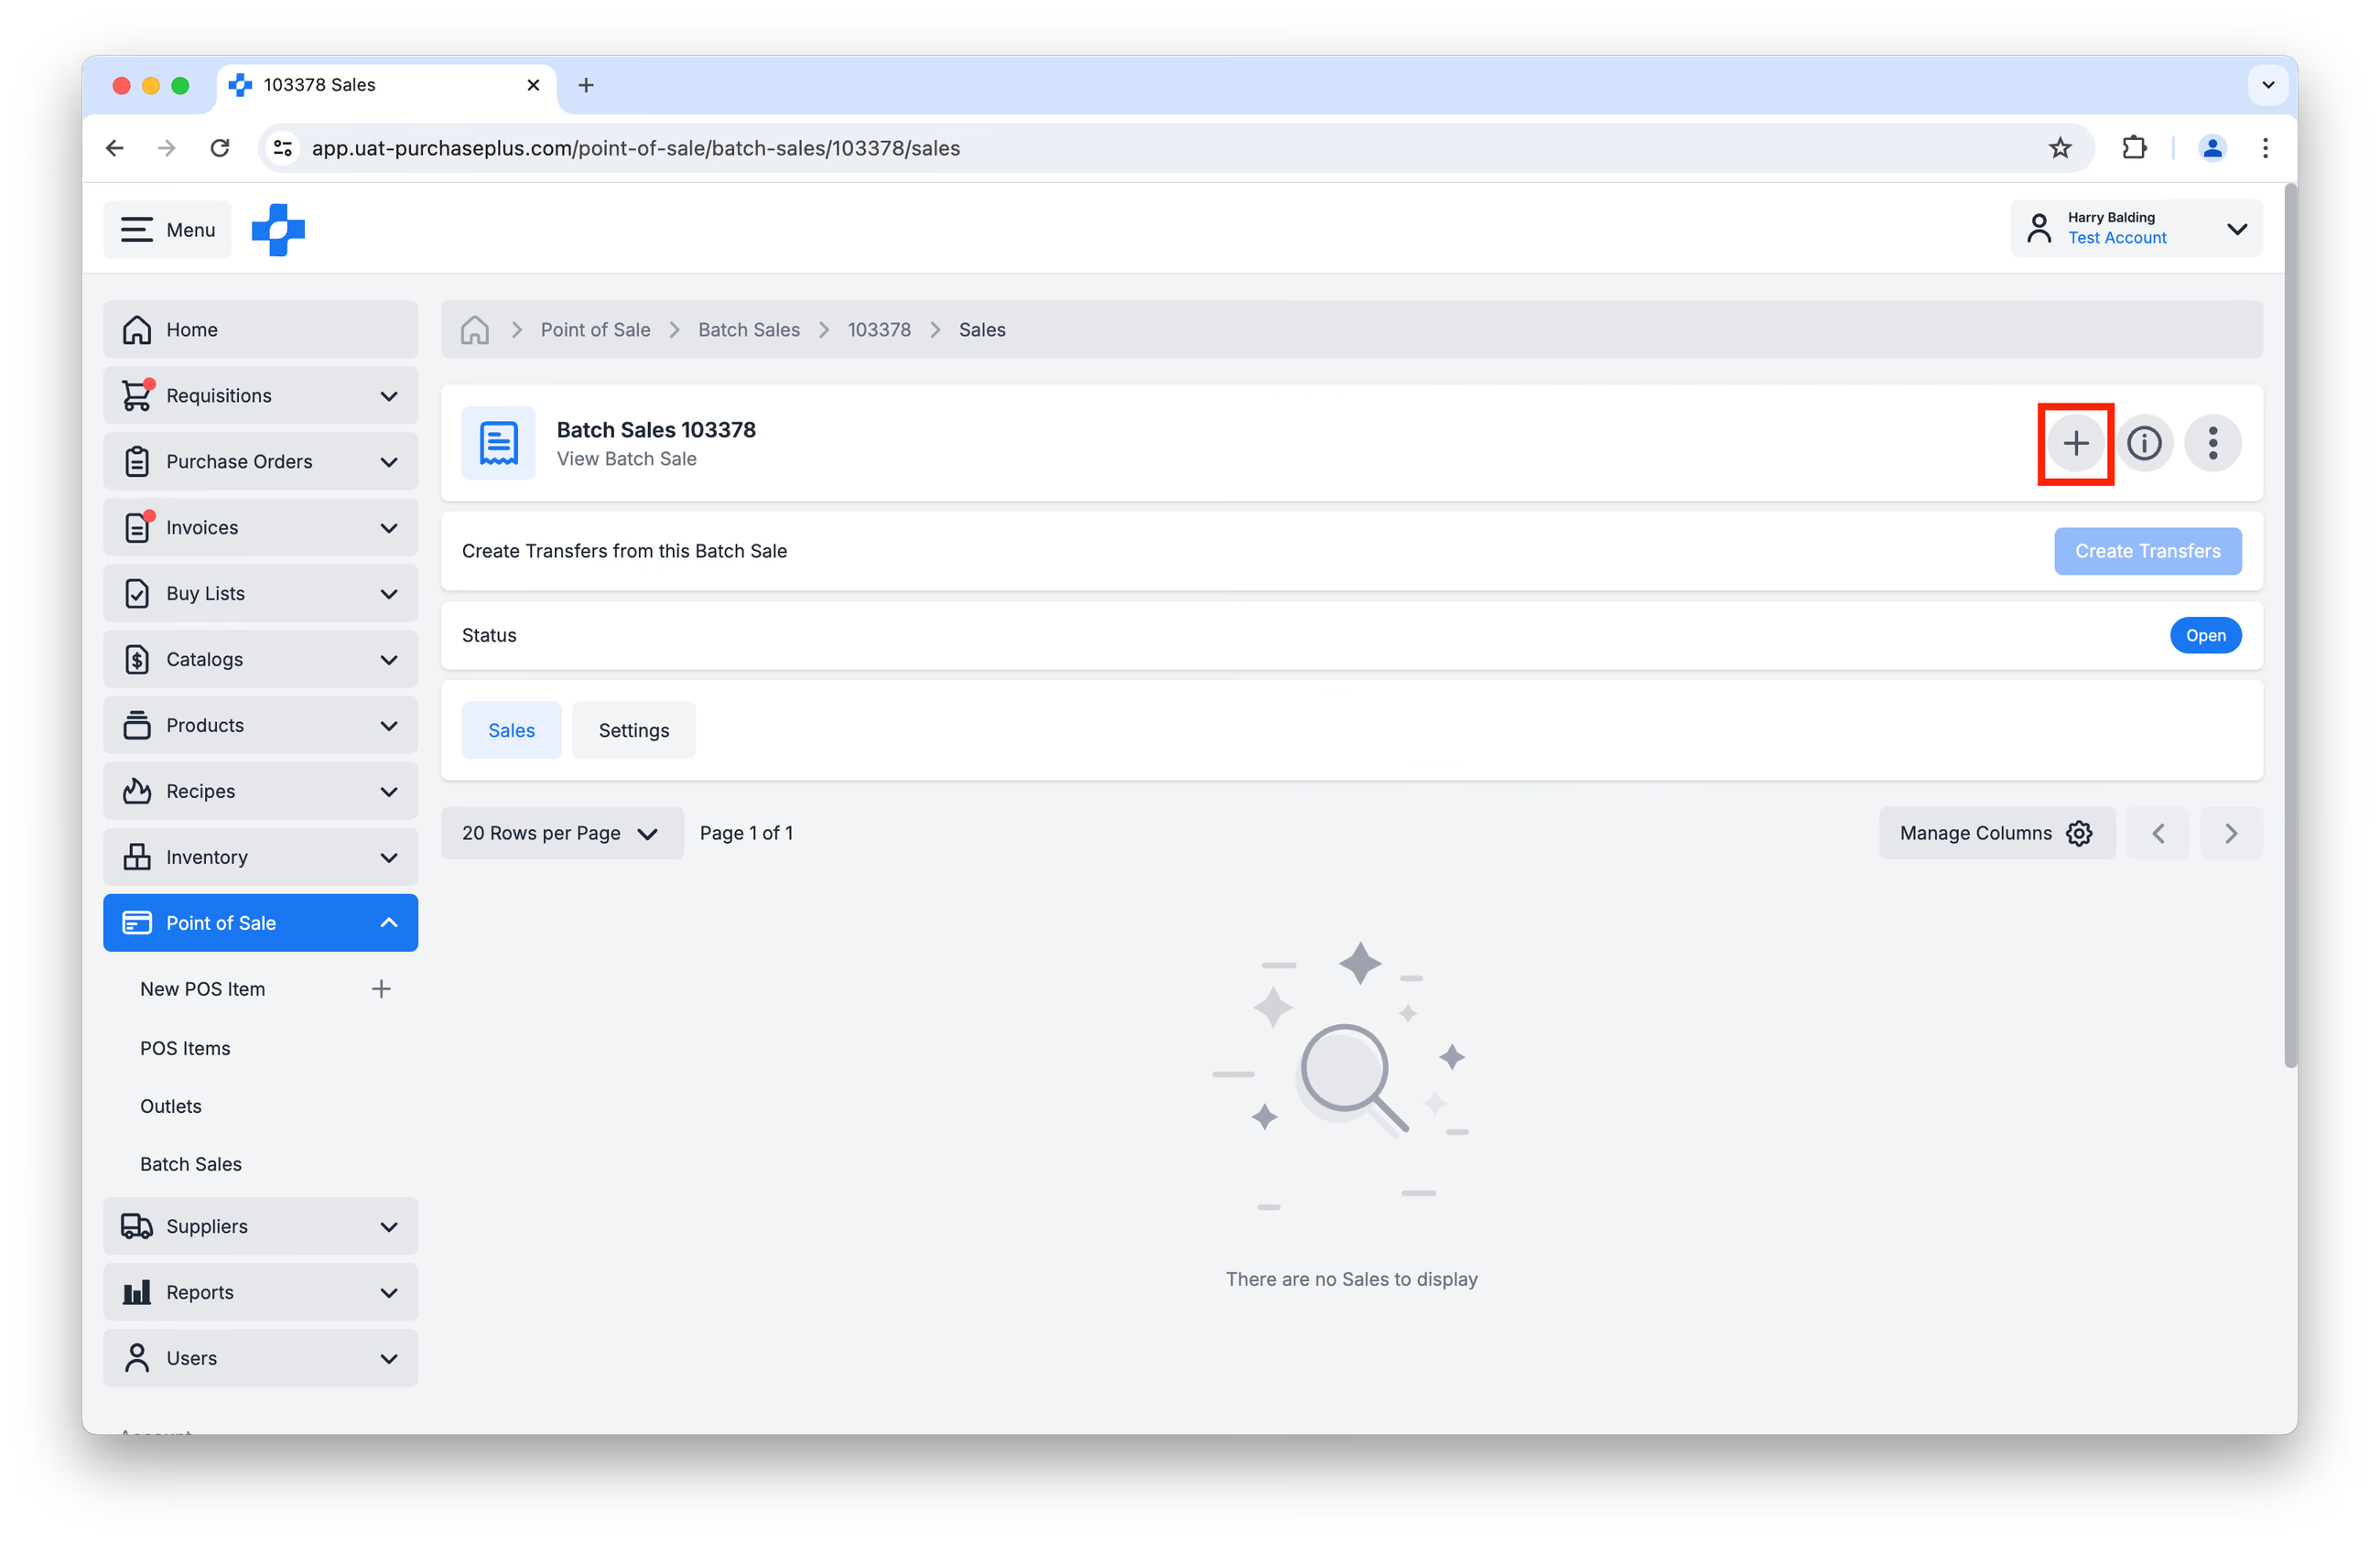
Using this method, each Sale Line must be added individually. Click [Create New Sale] to add a new Sale Line:
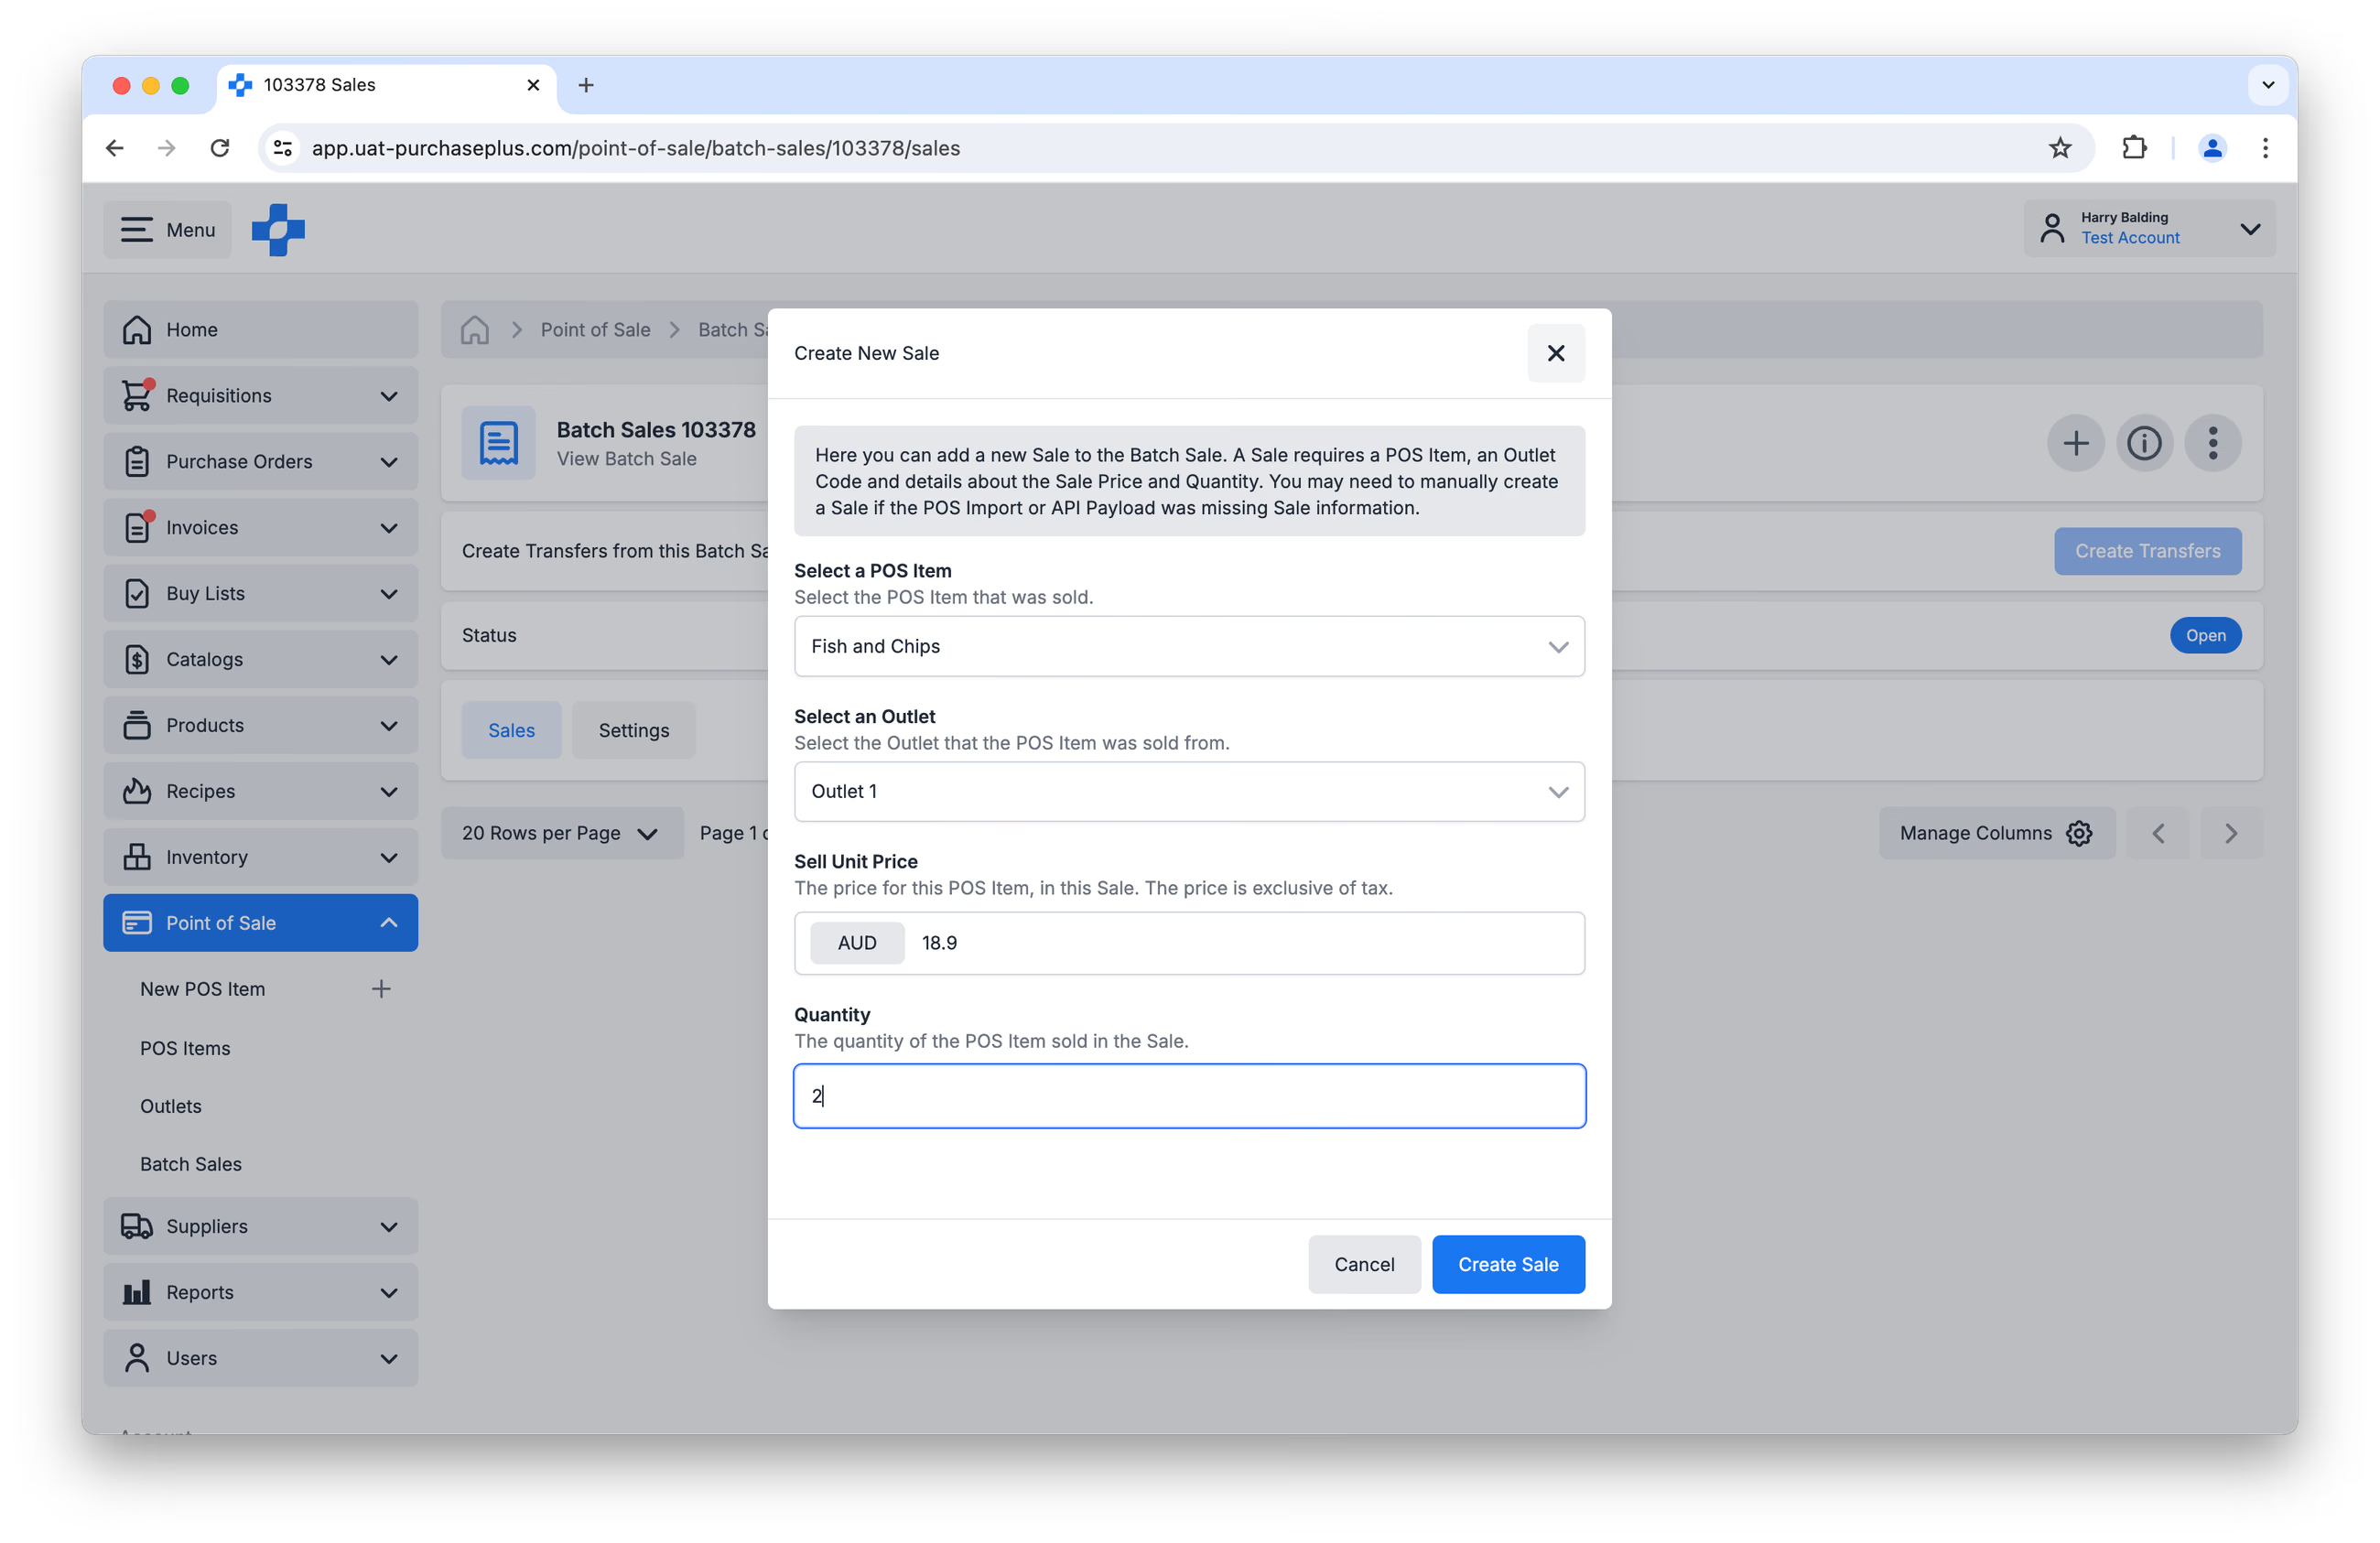
You will be prompted to provide:
- The POS Item that was sold (and thus, the Stock Item to be decremented),
- The Outlet which identifies the POS terminal where the sale was made (and thus, the Stock Location from which the Stock Item will be decremented),
- The Sell Unit Price, which is the price at which the POS Item was sold (exclusive of tax), and
- The Quantity of POS Items that were sold (i.e. the quantity of the Stock Item to be decremented from the Stock Location).
Click [Create Sale] to progress:
Continue adding Sale Lines as required. Once you have added all of the Sale Lines you wish to process, click [Create Transfers] in the header of the Batch Sale:
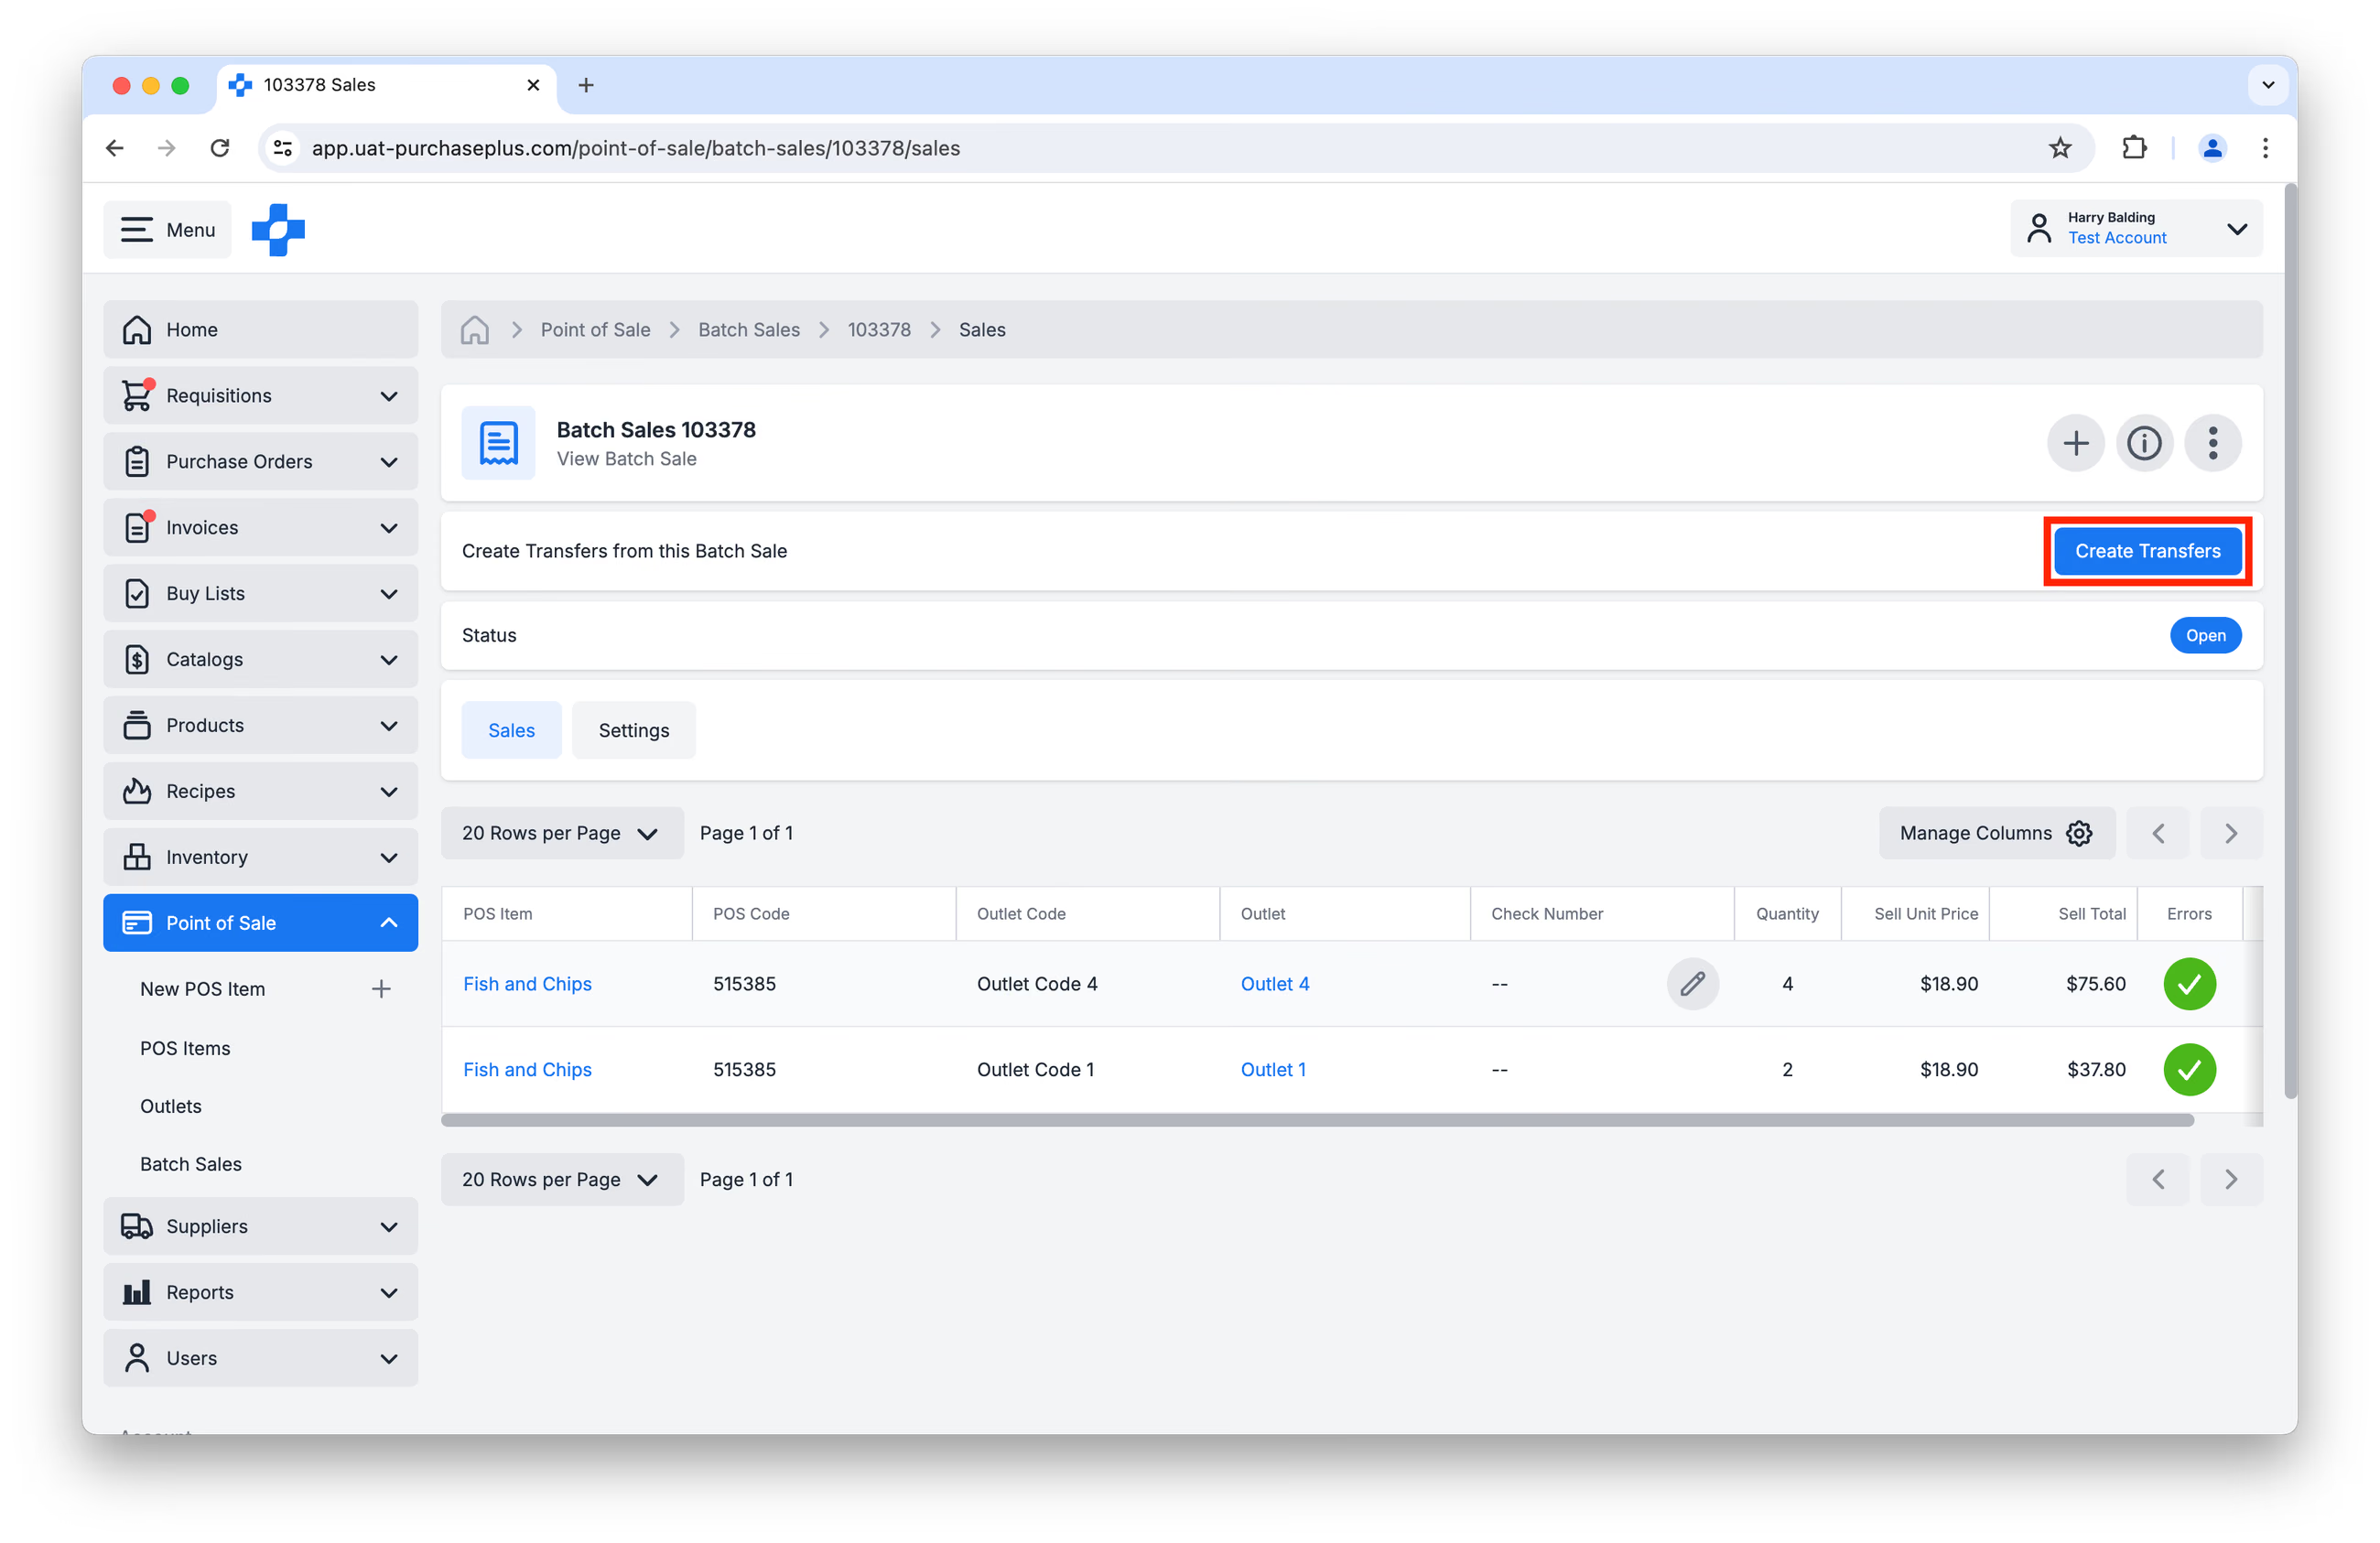
This will transfer the POS Items (i.e., the Stock Items that the POS Items reference) from the specified Outlet's Stock Location and into a Sale Location, thus decrementing the Stock Items from the Outlet's Stock Location.
Creating Batch Sales via CSV Import
To create a New Batch Sale via CSV Import, navigate to [Point of Sale] → [Batch Sales] and click [Create a New Batch Sale]:
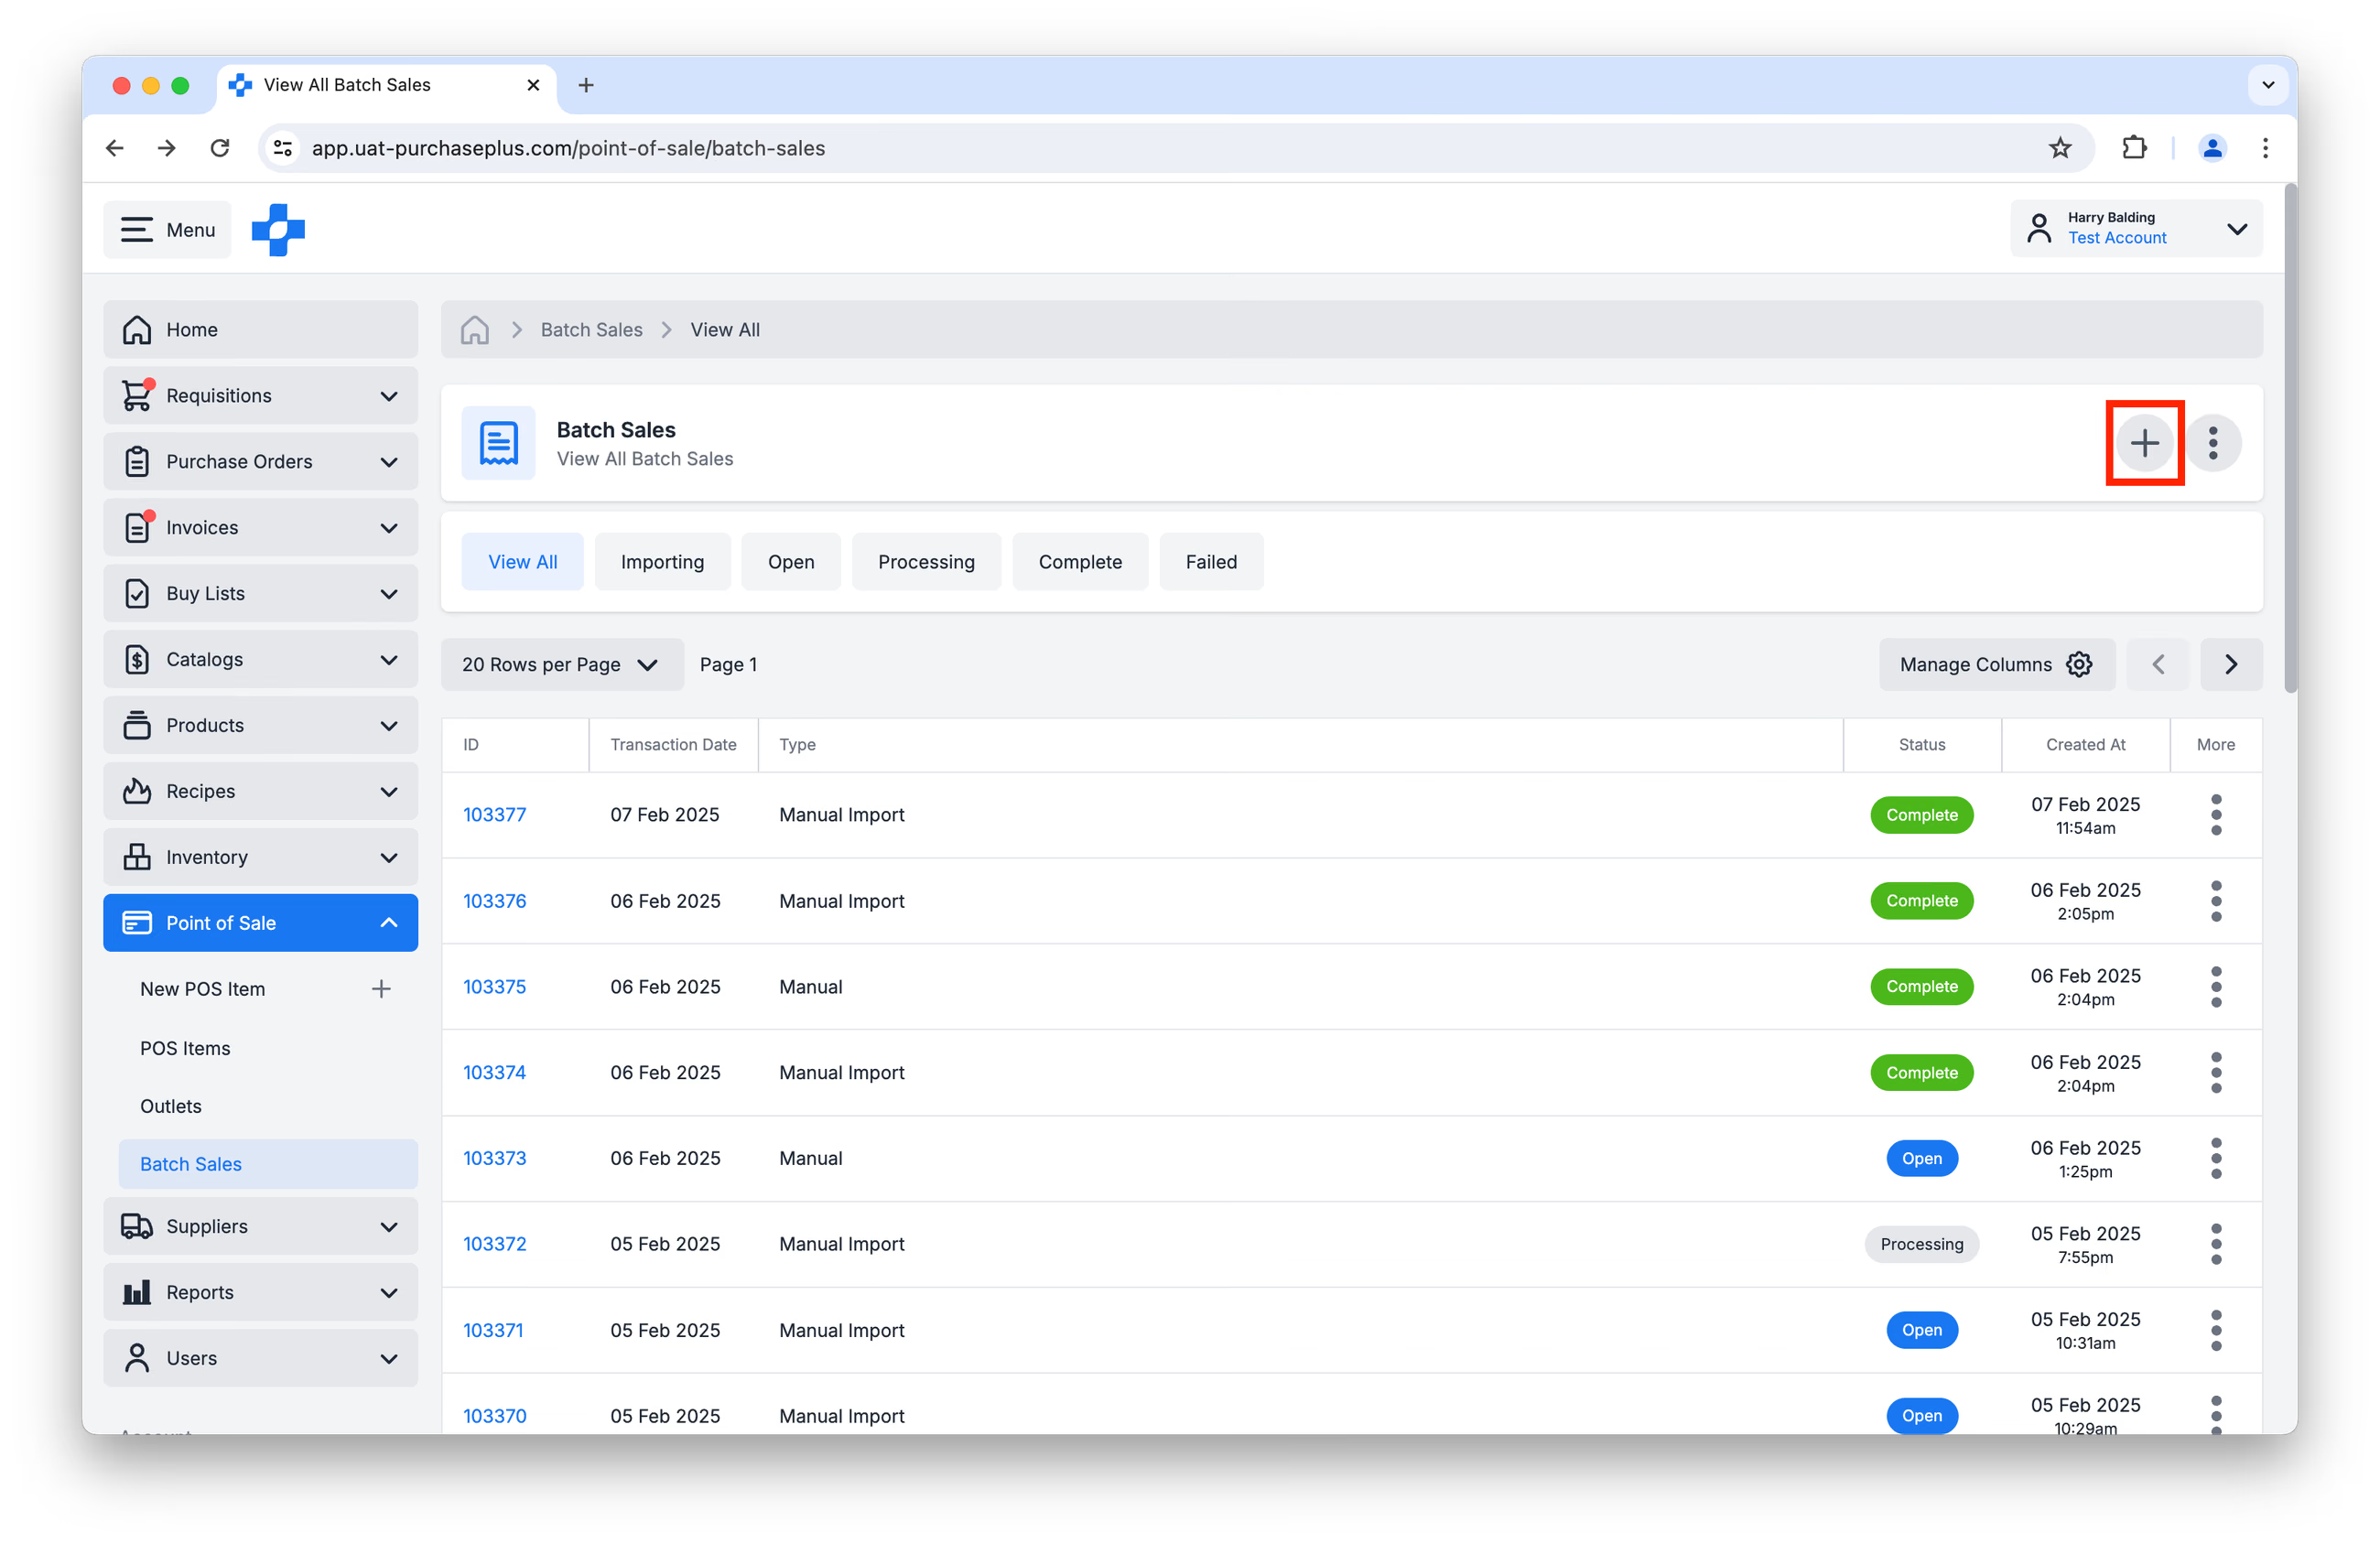
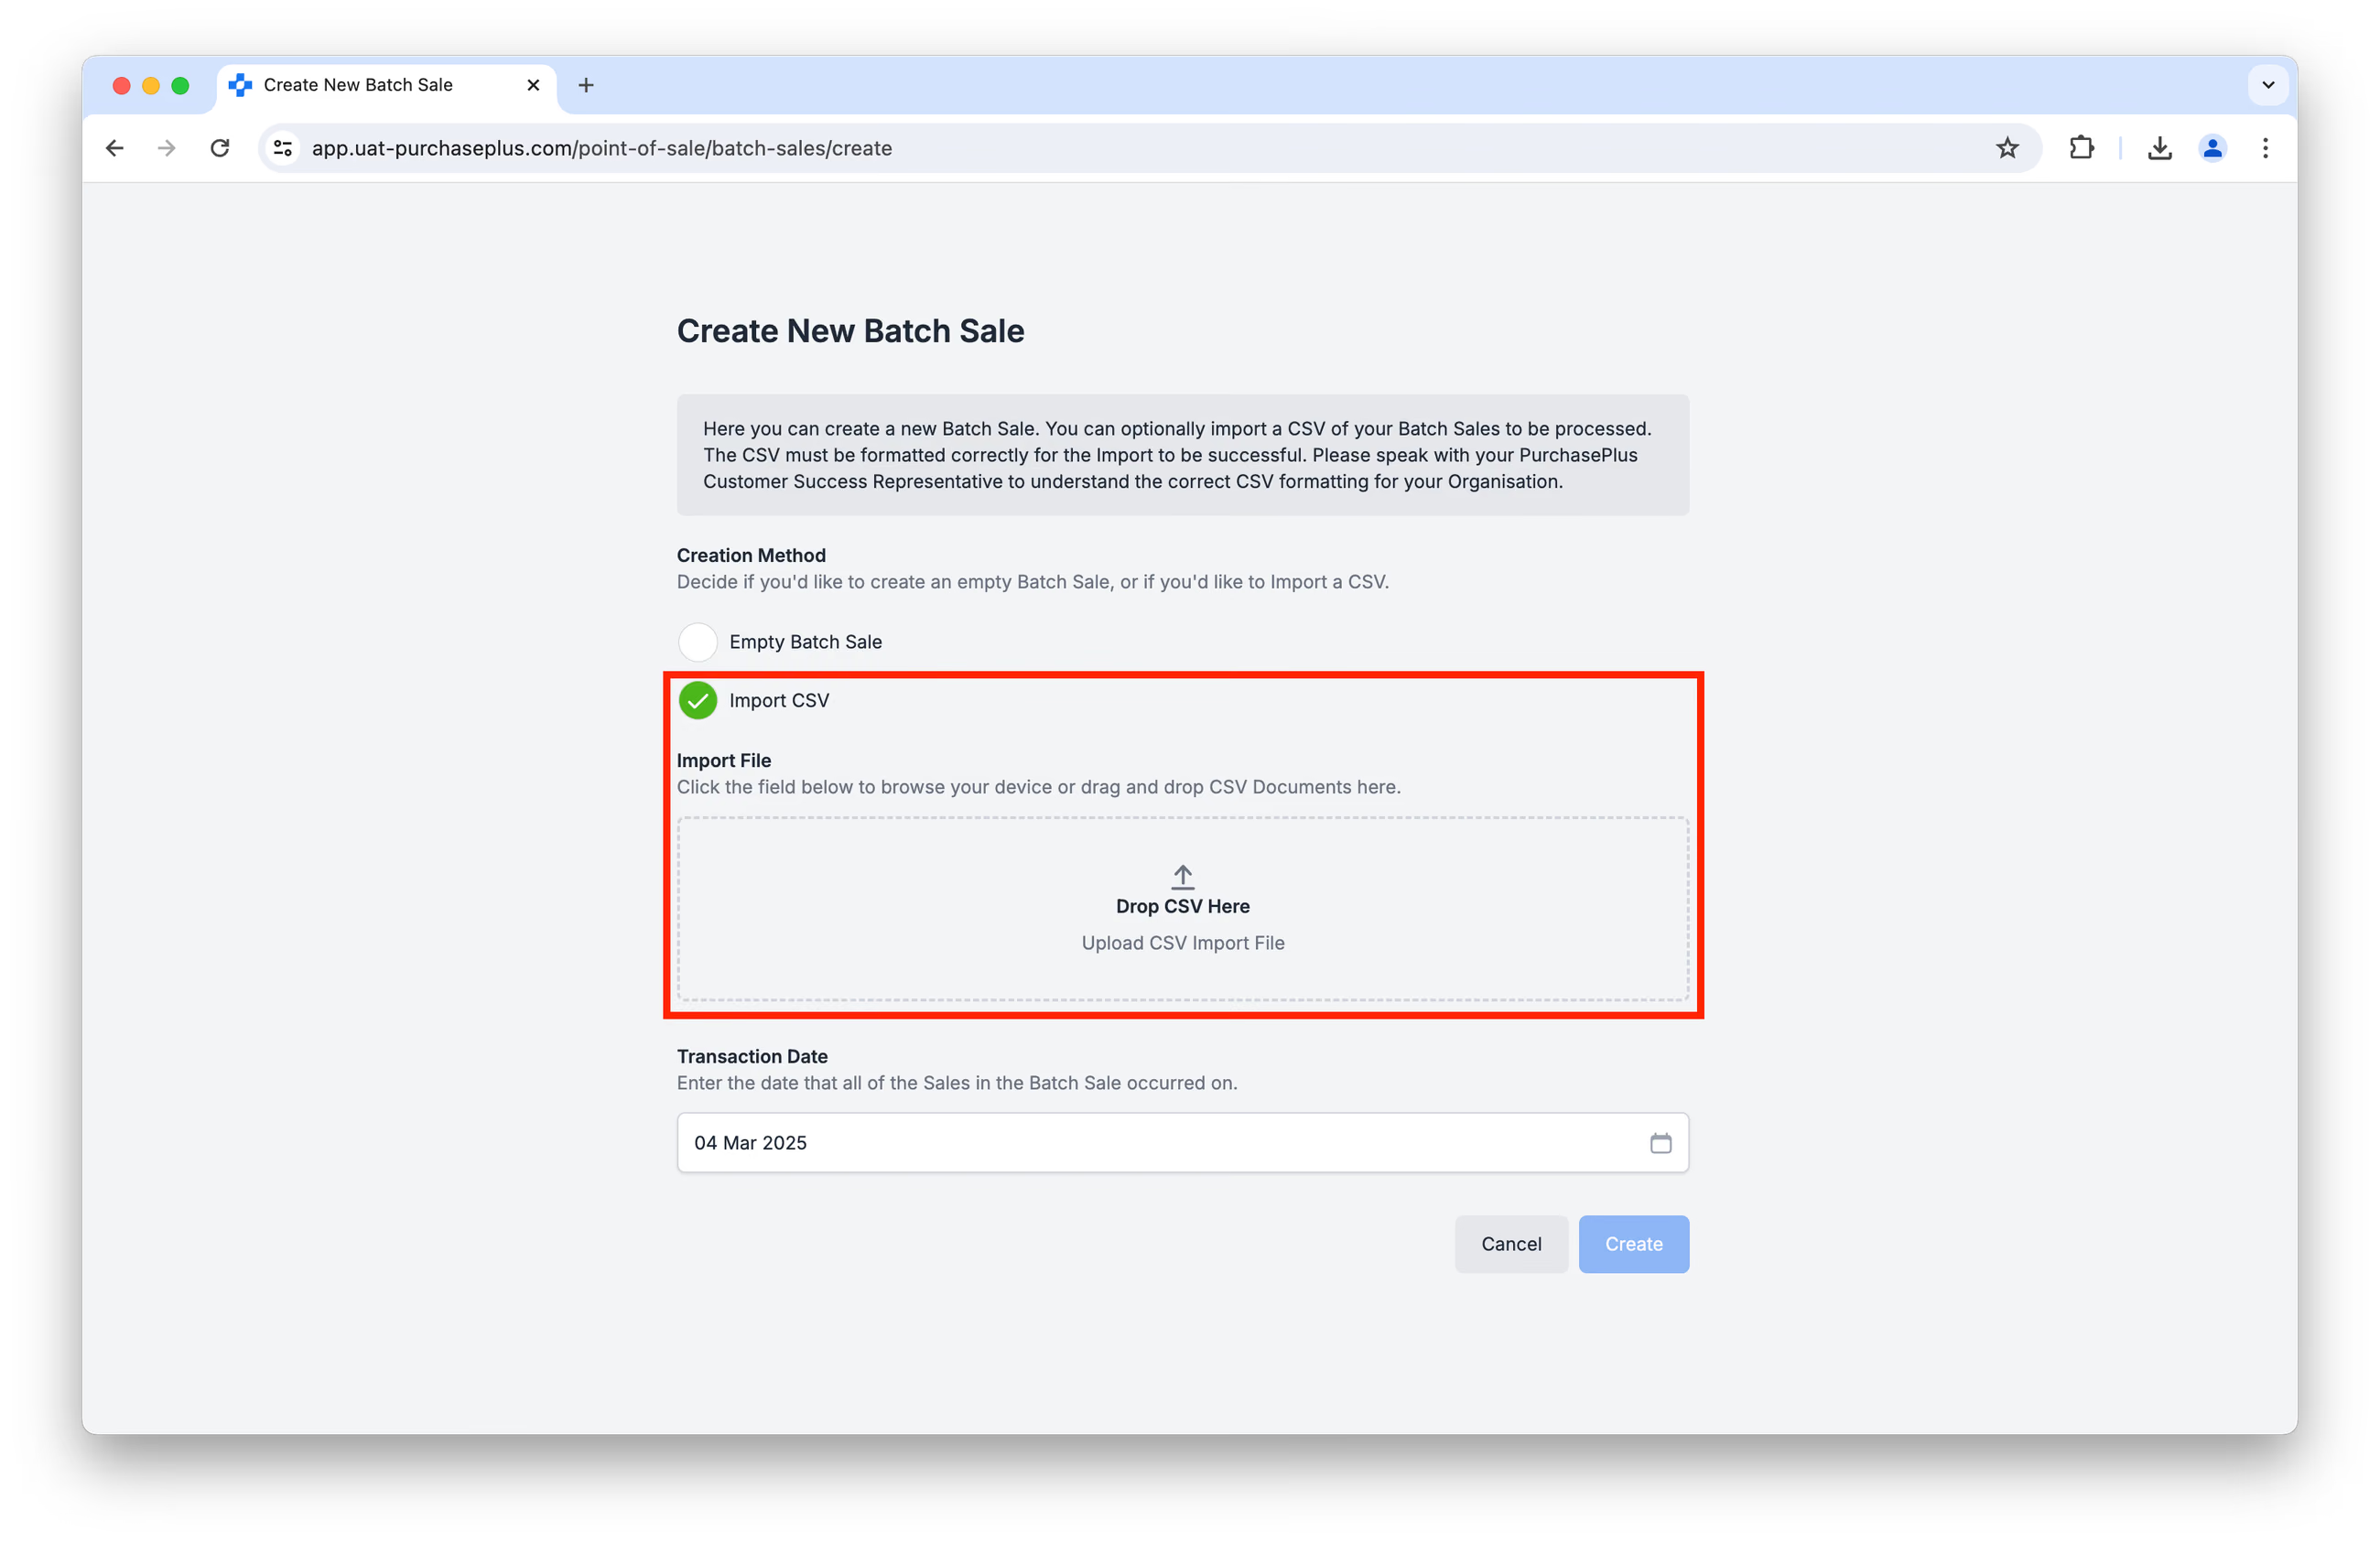
Ensure [Import CSV] is selected as the Creation Method, and that the Transaction Date is the date upon which the Sales were made.
IMPORTANT: The CSV must be formatted correctly for the Import to be successful. We recommend using this template and populating it with your data.
Date format should be in YYYY-MM-DD.
Please speak with your PurchasePlus Customer Success Representative for additional support if required.
Upload the completed CSV (or drag and drop it into the Drop Zone), and then click [Create] to progress.
Once the Import has finished, you can review the Sale Lines, and then click [Create
Transfers] in the header of the Batch Sale:
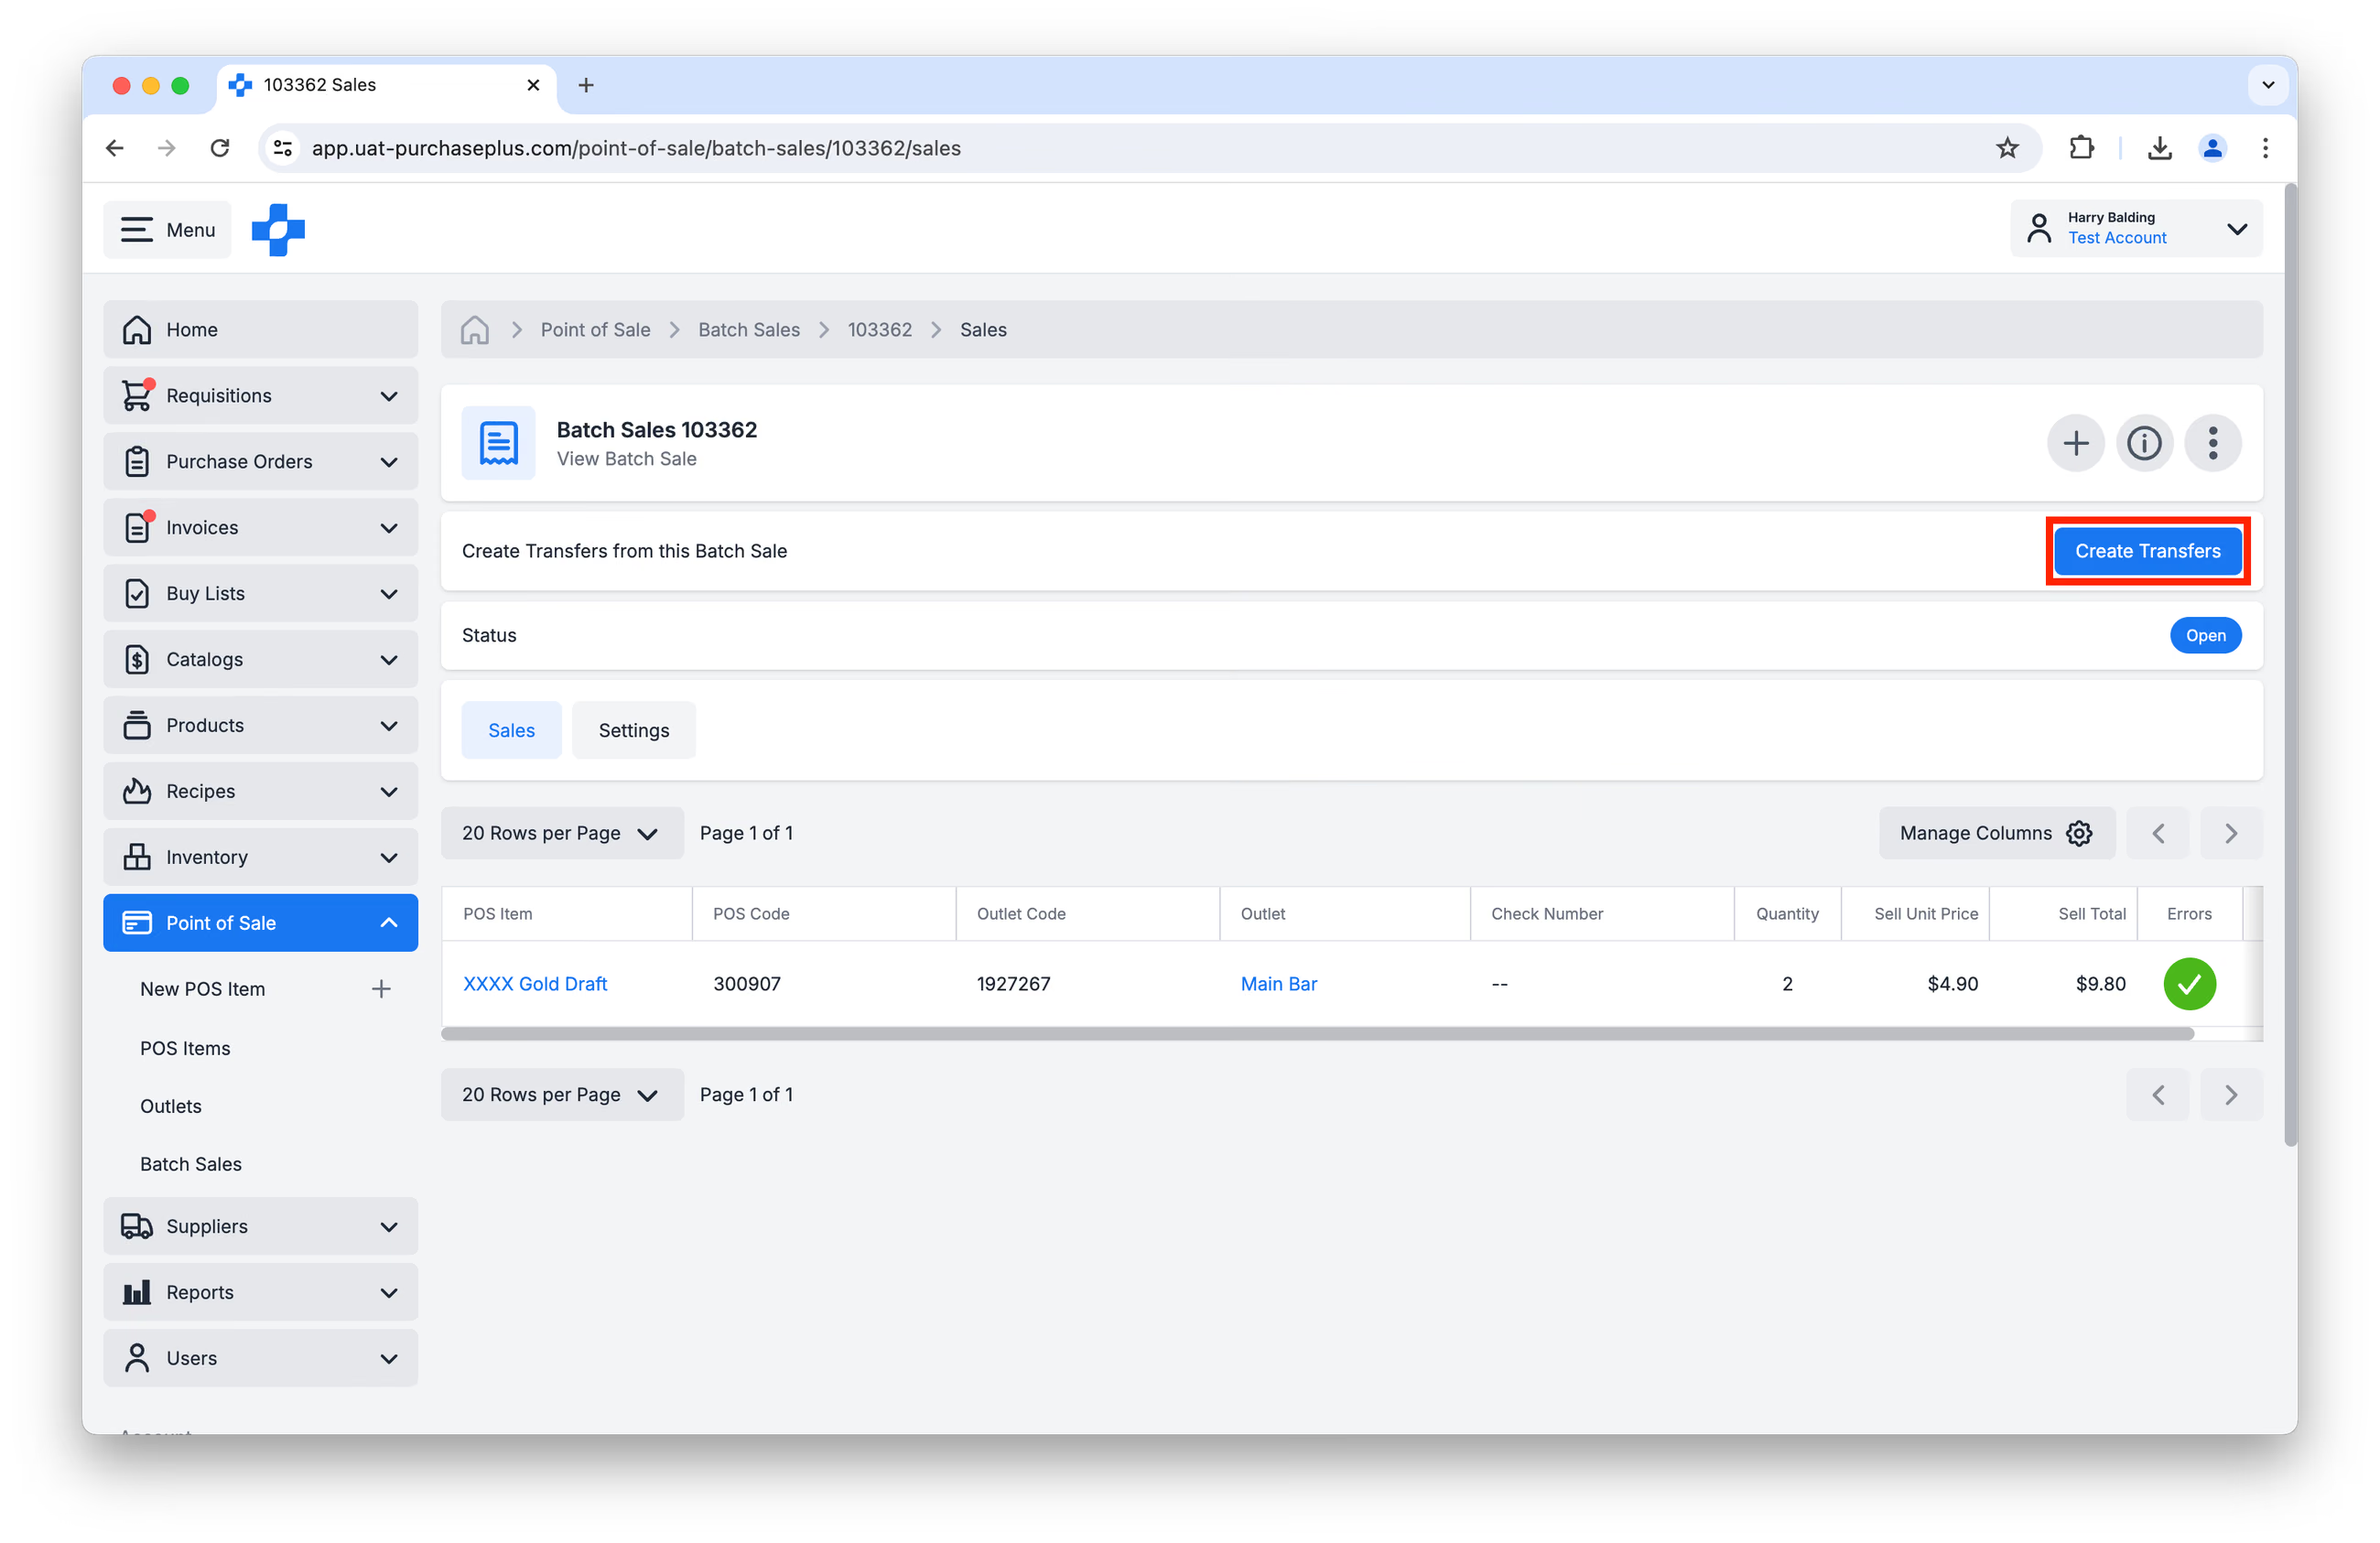
This will transfer the POS Items (i.e., the Stock Items that the POS Items reference) from the specified Outlet's Stock Location, and into a Sale Location, thus decrementing the Stock Items from the Outlet's Stock Location.
Creating Batch Sales via API Integration
On a case-by-case basis, PurchasePlus can integrate with external POS systems to birth new Batch Sales via API.
All integrated POS systems sync with PurchasePlus at 3am Sydney time. Only closed checks result in ingredient decrementation. Open checks are filtered from the report until they move to a closed state.
Please speak with your PurchasePlus Customer Success Representative to discuss and determine the feasibility of this integration.
Exporting a Batch Sale to CSV
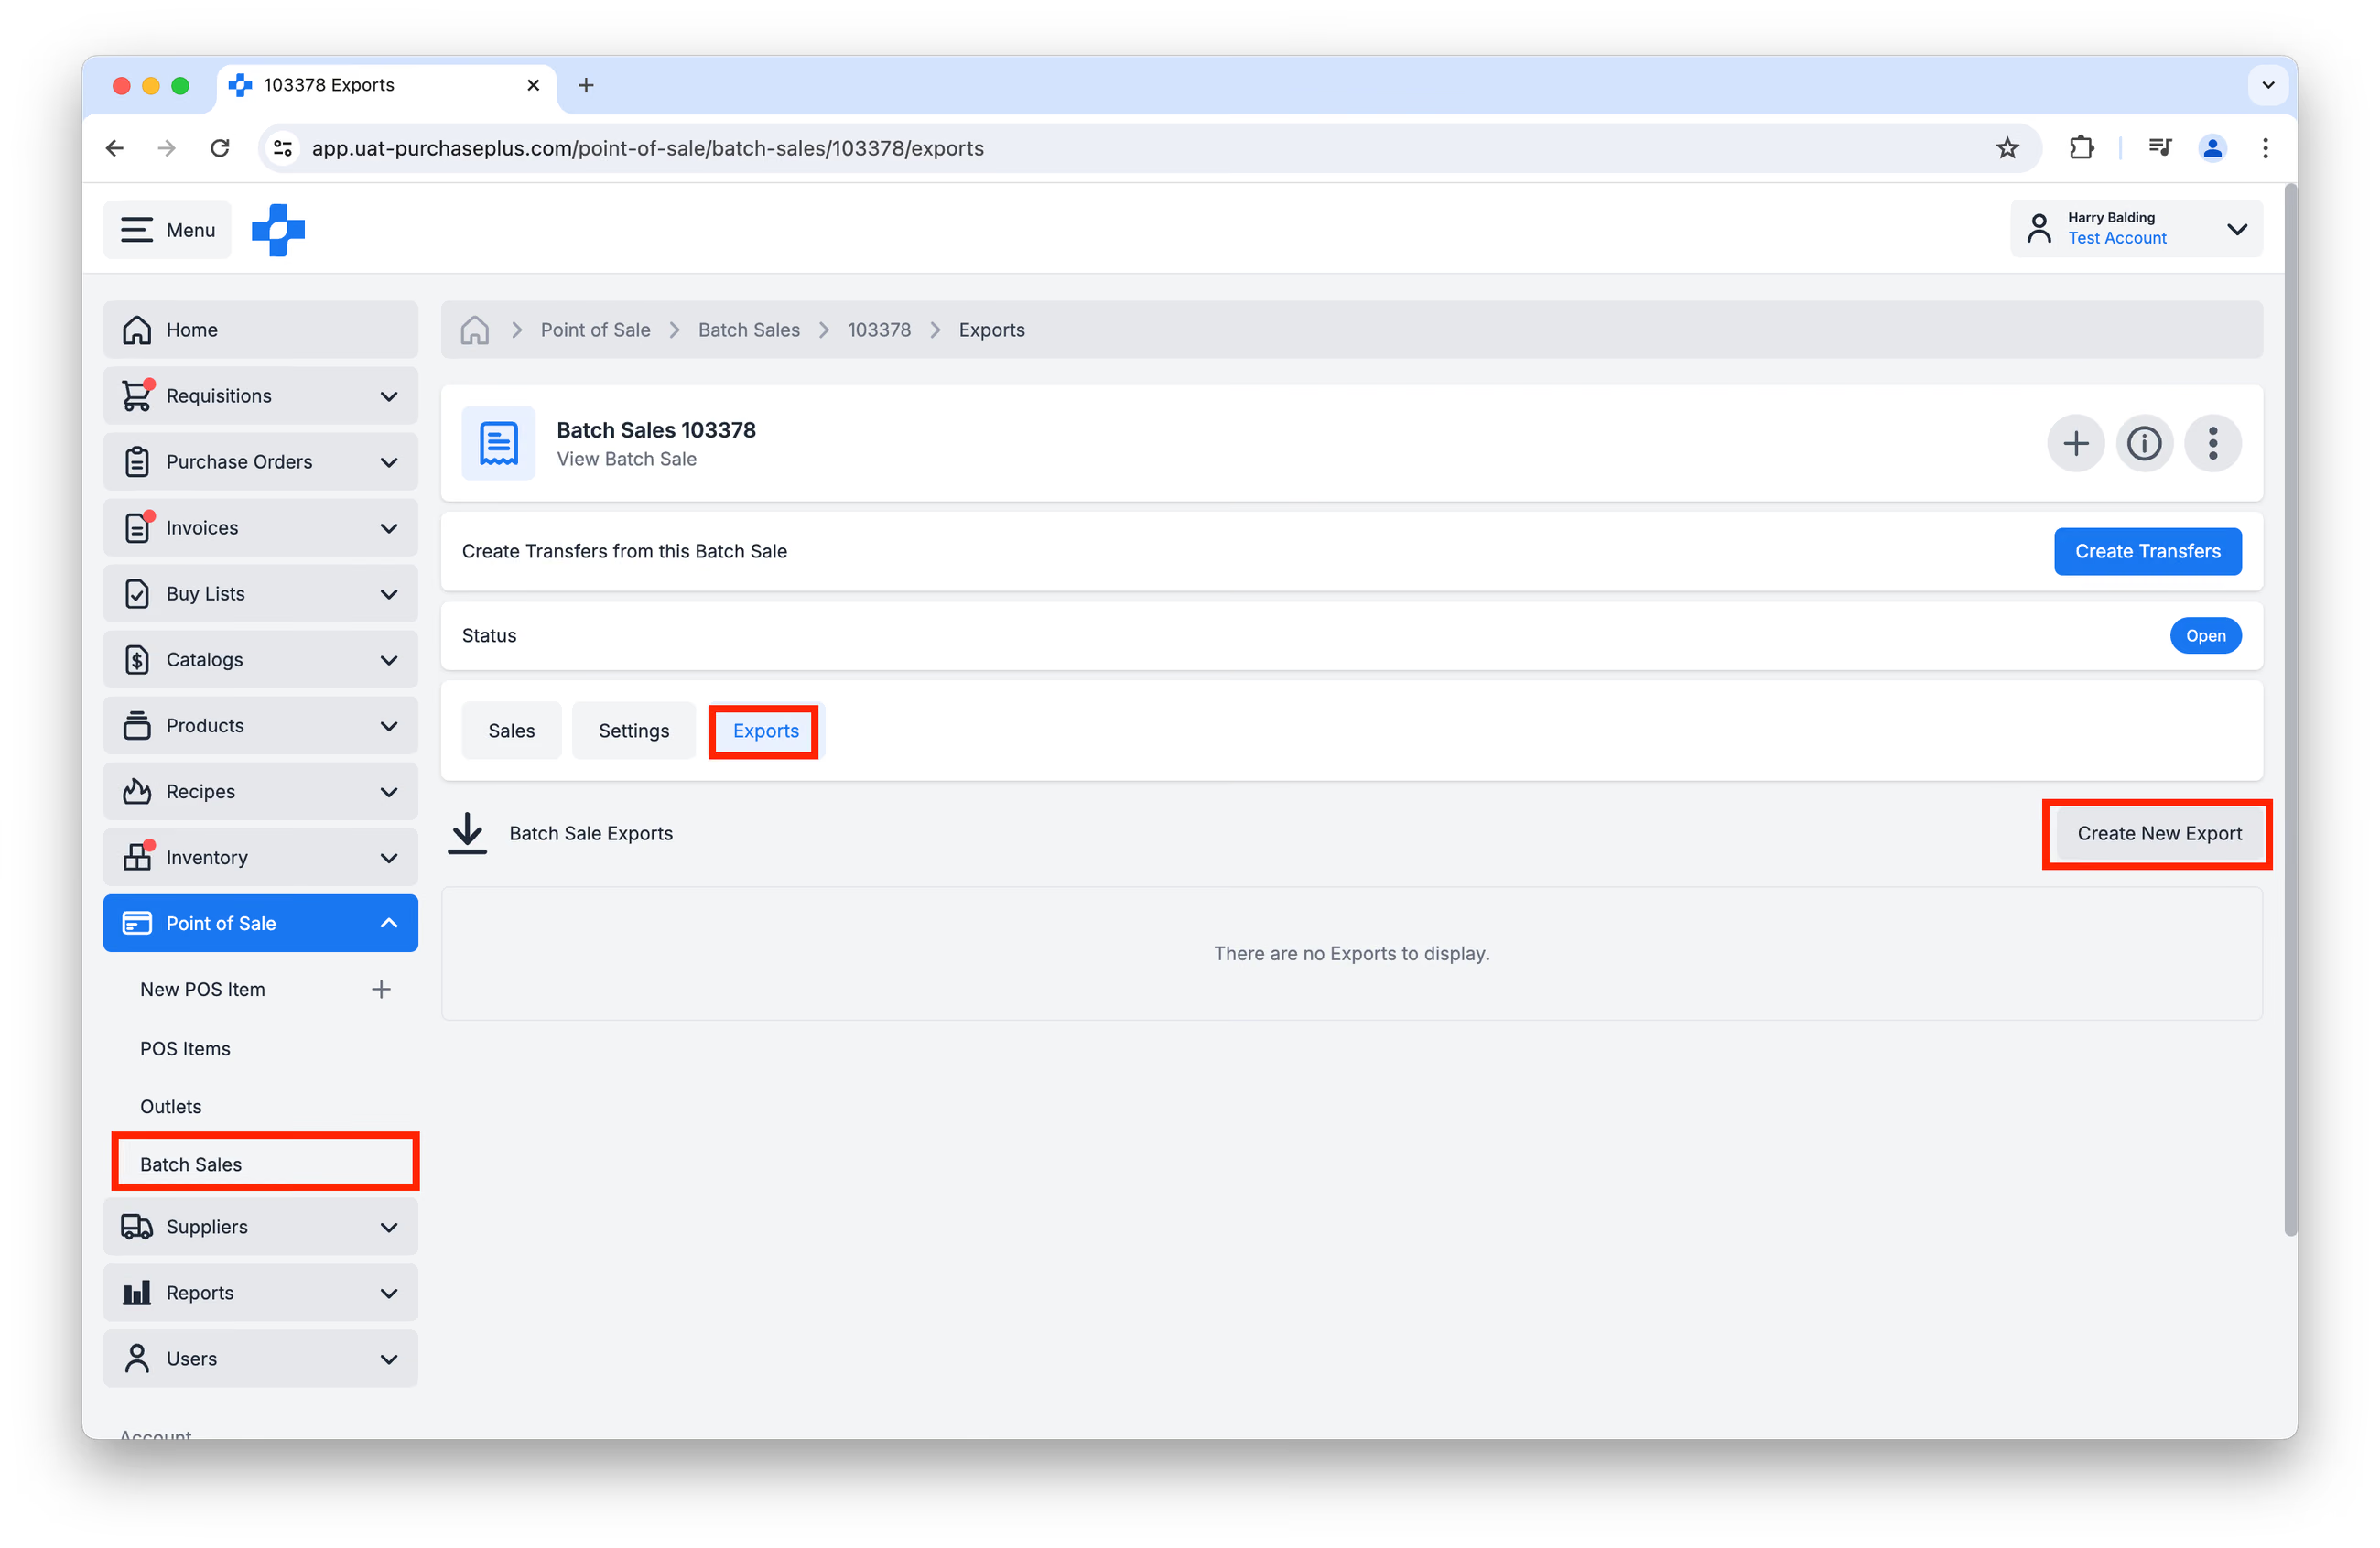
You may choose to Export a selected Batch Sale by navigating to [Point of Sale] → [Batch Sales] in the side navigation bar, selecting the Batch Sale in question, and clicking on its [Exports] tab. Then, click [Create New Export] to begin the CSV creation:
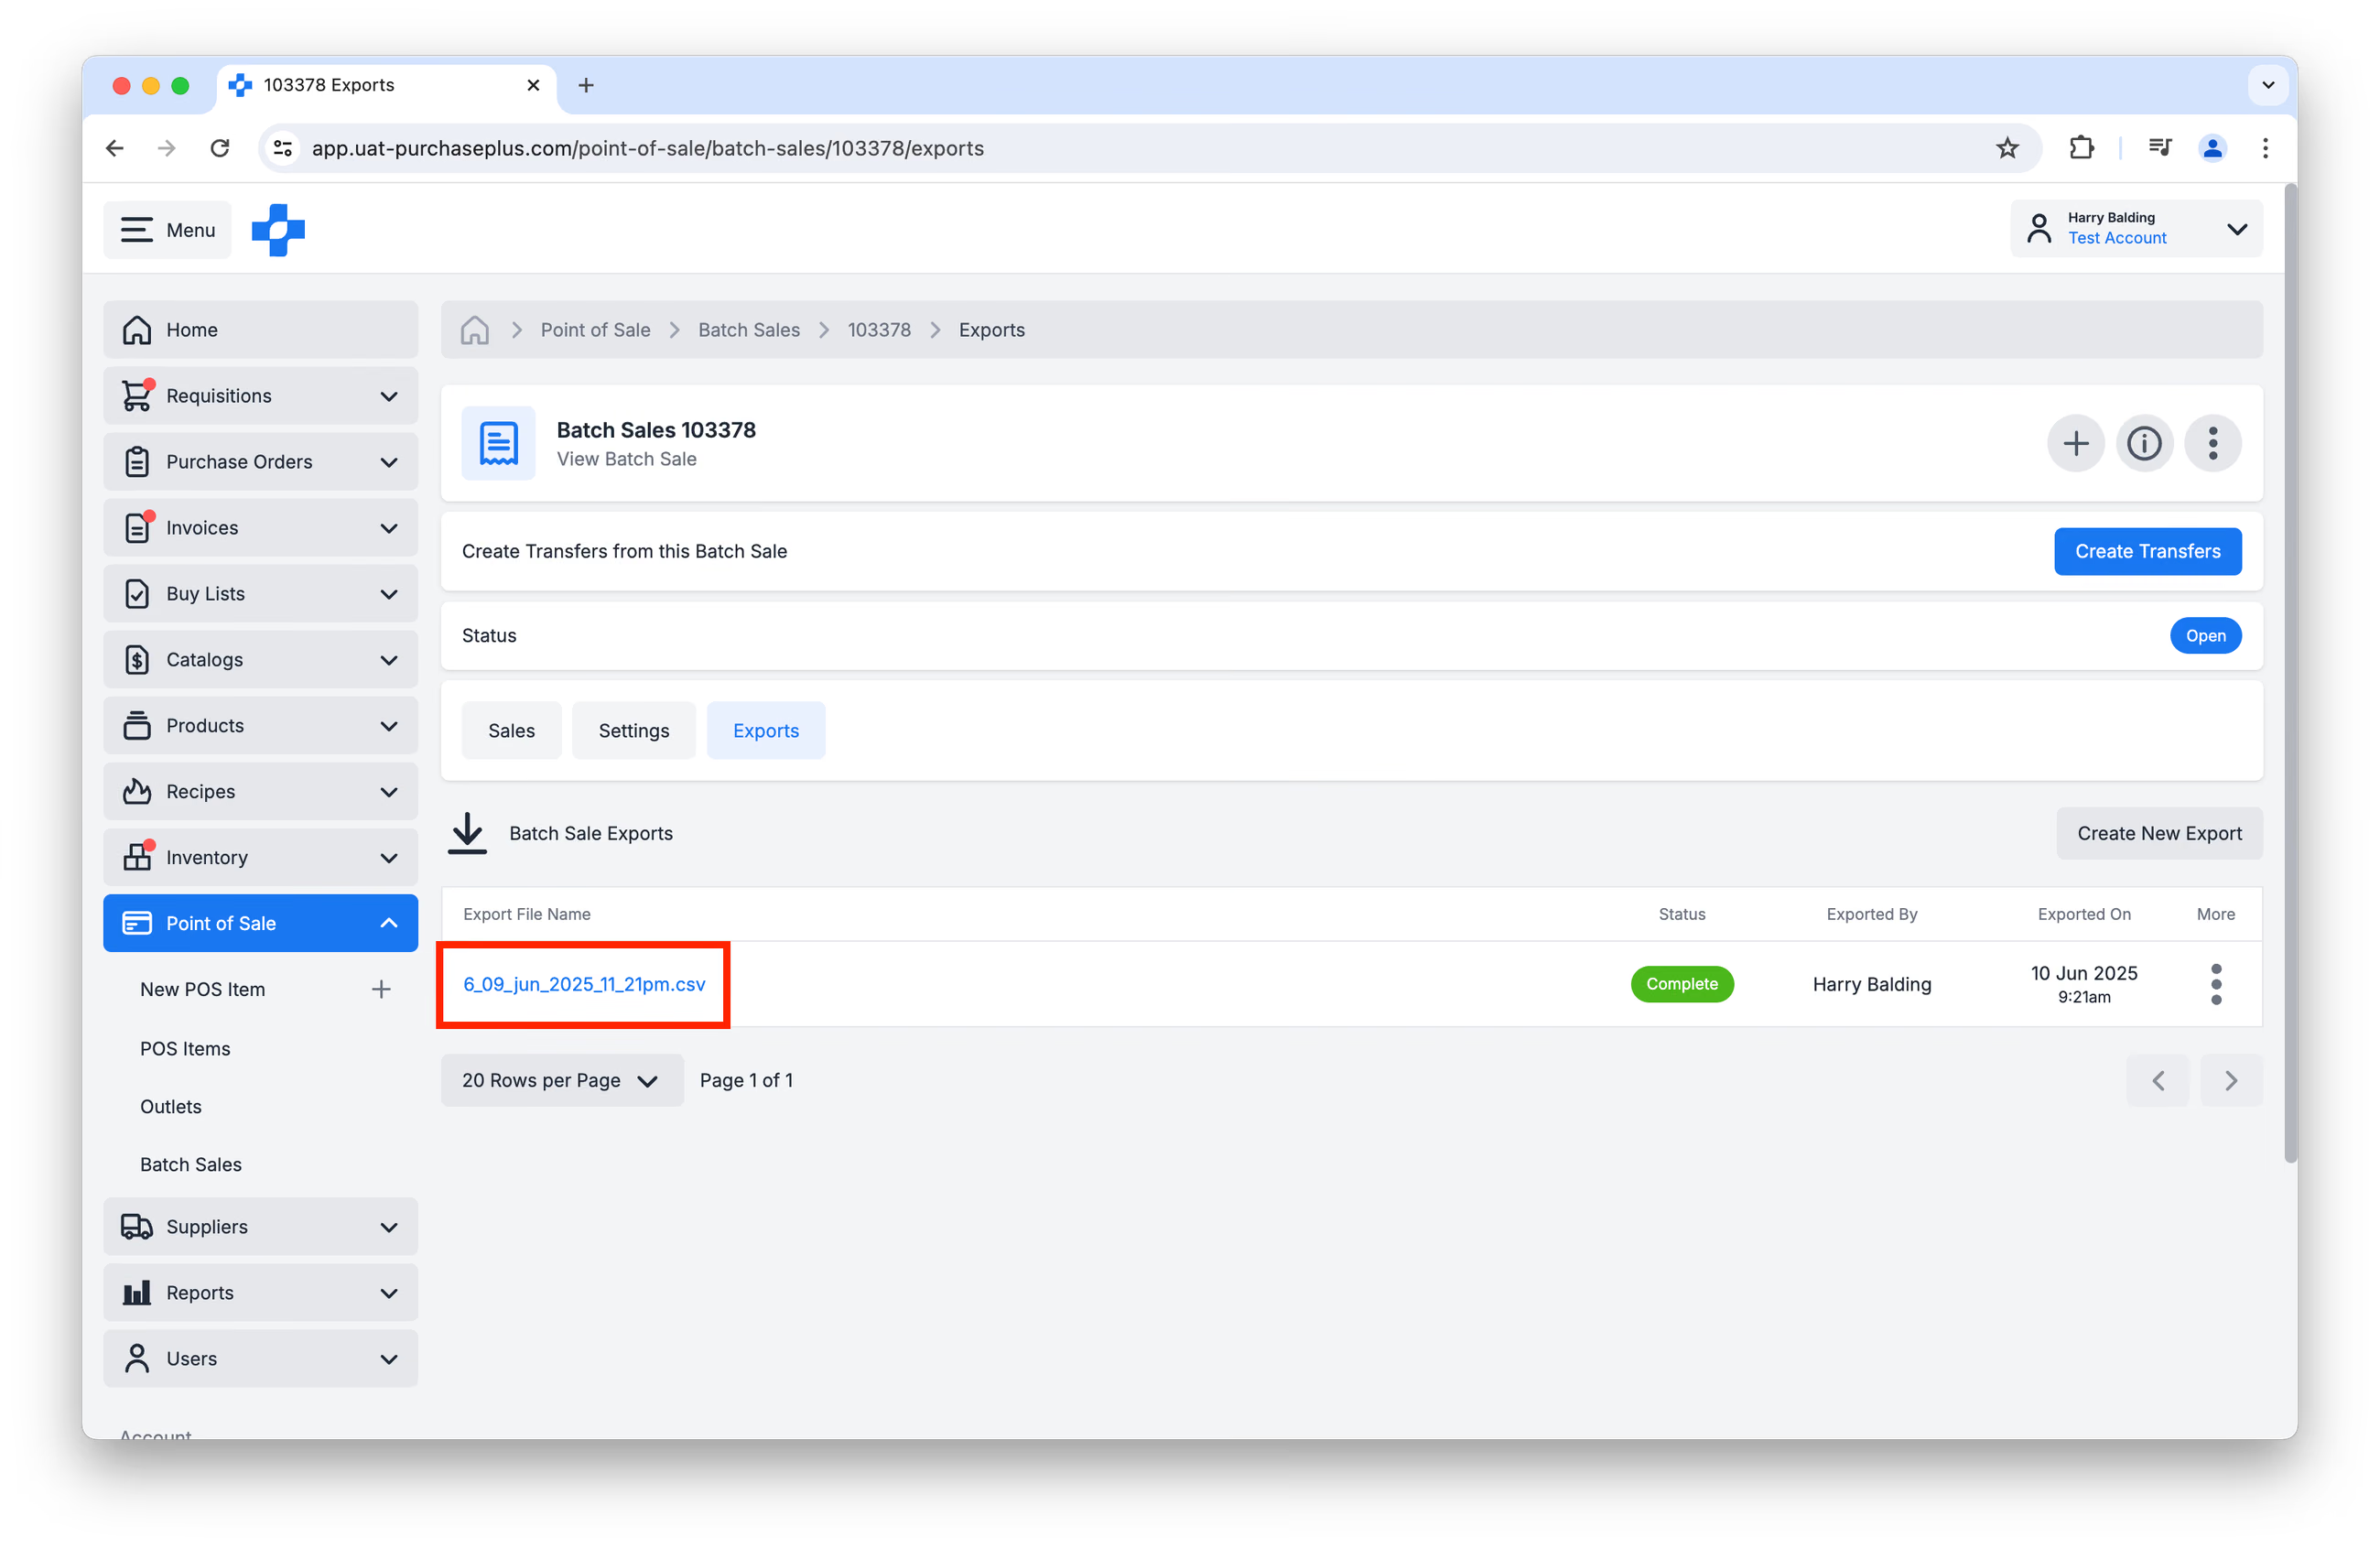
Once the Status of the Export updates from 'Processing' to 'Complete', you can click on the Export File Name to download it as a CSV:
Troubleshooting Batch Sale Errors
If you are experiencing errors with your Batch Sales, please visit our POS Batch Sale Troubleshooting article for assistance.
POS Permissions
There are 3 POS Permissions that determine the actions a user can take within the POS module:
- Manage POS Items - Users with this permission can Create and Update POS Items that are owned by their Organisation.
- Manage POS Outlets - Users with this permission can Create and Update POS Outlets.
- Manage Batch Sales - Users with this permission can Create, Update and Complete Batch Sales on behalf of their Organisation.
If you require one or more of these permissions enabled for your user profile, please speak to the System Administrator at your Organisation, or get in touch with your PurchasePlus Customer Success Representative.
New vs legacy
The following section may be of interest to long-time users of PurchasePlus's POS module.
It is important to note that New POS functionality is completely separate to Legacy POS functionality, and the two modules cannot coexist in the same Organisation.
The differences between the New POS and Legacy POS modules are as follows:
| NEW POS | LEGACY POS |
|---|---|
| Terminology: 'POS Item Codes' / 'POS Codes' | Terminology: 'PLU Codes' |
| Terminology: 'Batch Sales' | Terminology: 'Sales' |
| Terminology: 'Sale Lines' | Terminology: 'Sales' |
| Identify Stock Item or Recipe during creation of the POS Item | Assign a PLU Code in Recipes or Buy Lists |
| Set up Outlets (with Stock Locations) in [POS] → [Outlets] | Set up Outlet Codes in Department Settings |
| Create and Update Open Batch Sales in the User Interface | Not available in Legacy |
| Warnings are now available if the user attempts to create Transfers with errors in the Sale Lines | Not available in Legacy |
| There is a new v3 API endpoint that has been developed to be compatible with New Inventory. | v2 API endpoint for integration between Legacy Inventory and external POS systems. |
If you are migrating from Legacy PurchasePlus, please reach out to our team for additional assistance in setting up POS in PurchasePlus.