
Export Invoices
Export Invoices
Depending on how your Organization has been configured, you may Export Invoices and Credit Notes individually (Type A), or via a Batch Export File (Type B).
In this article, we will be explaining the Type A scenario, where Invoices and Credit Notes are individually Exported, and an Export file containing the single Invoice or Credit Note is automatically created.
If your Organization exports Invoices and Credit Notes via a Batch Export File (Type B), see our Mark an Invoice or Credit Note as Export Ready and Create a Batch Export File articles.
Export an Invoice
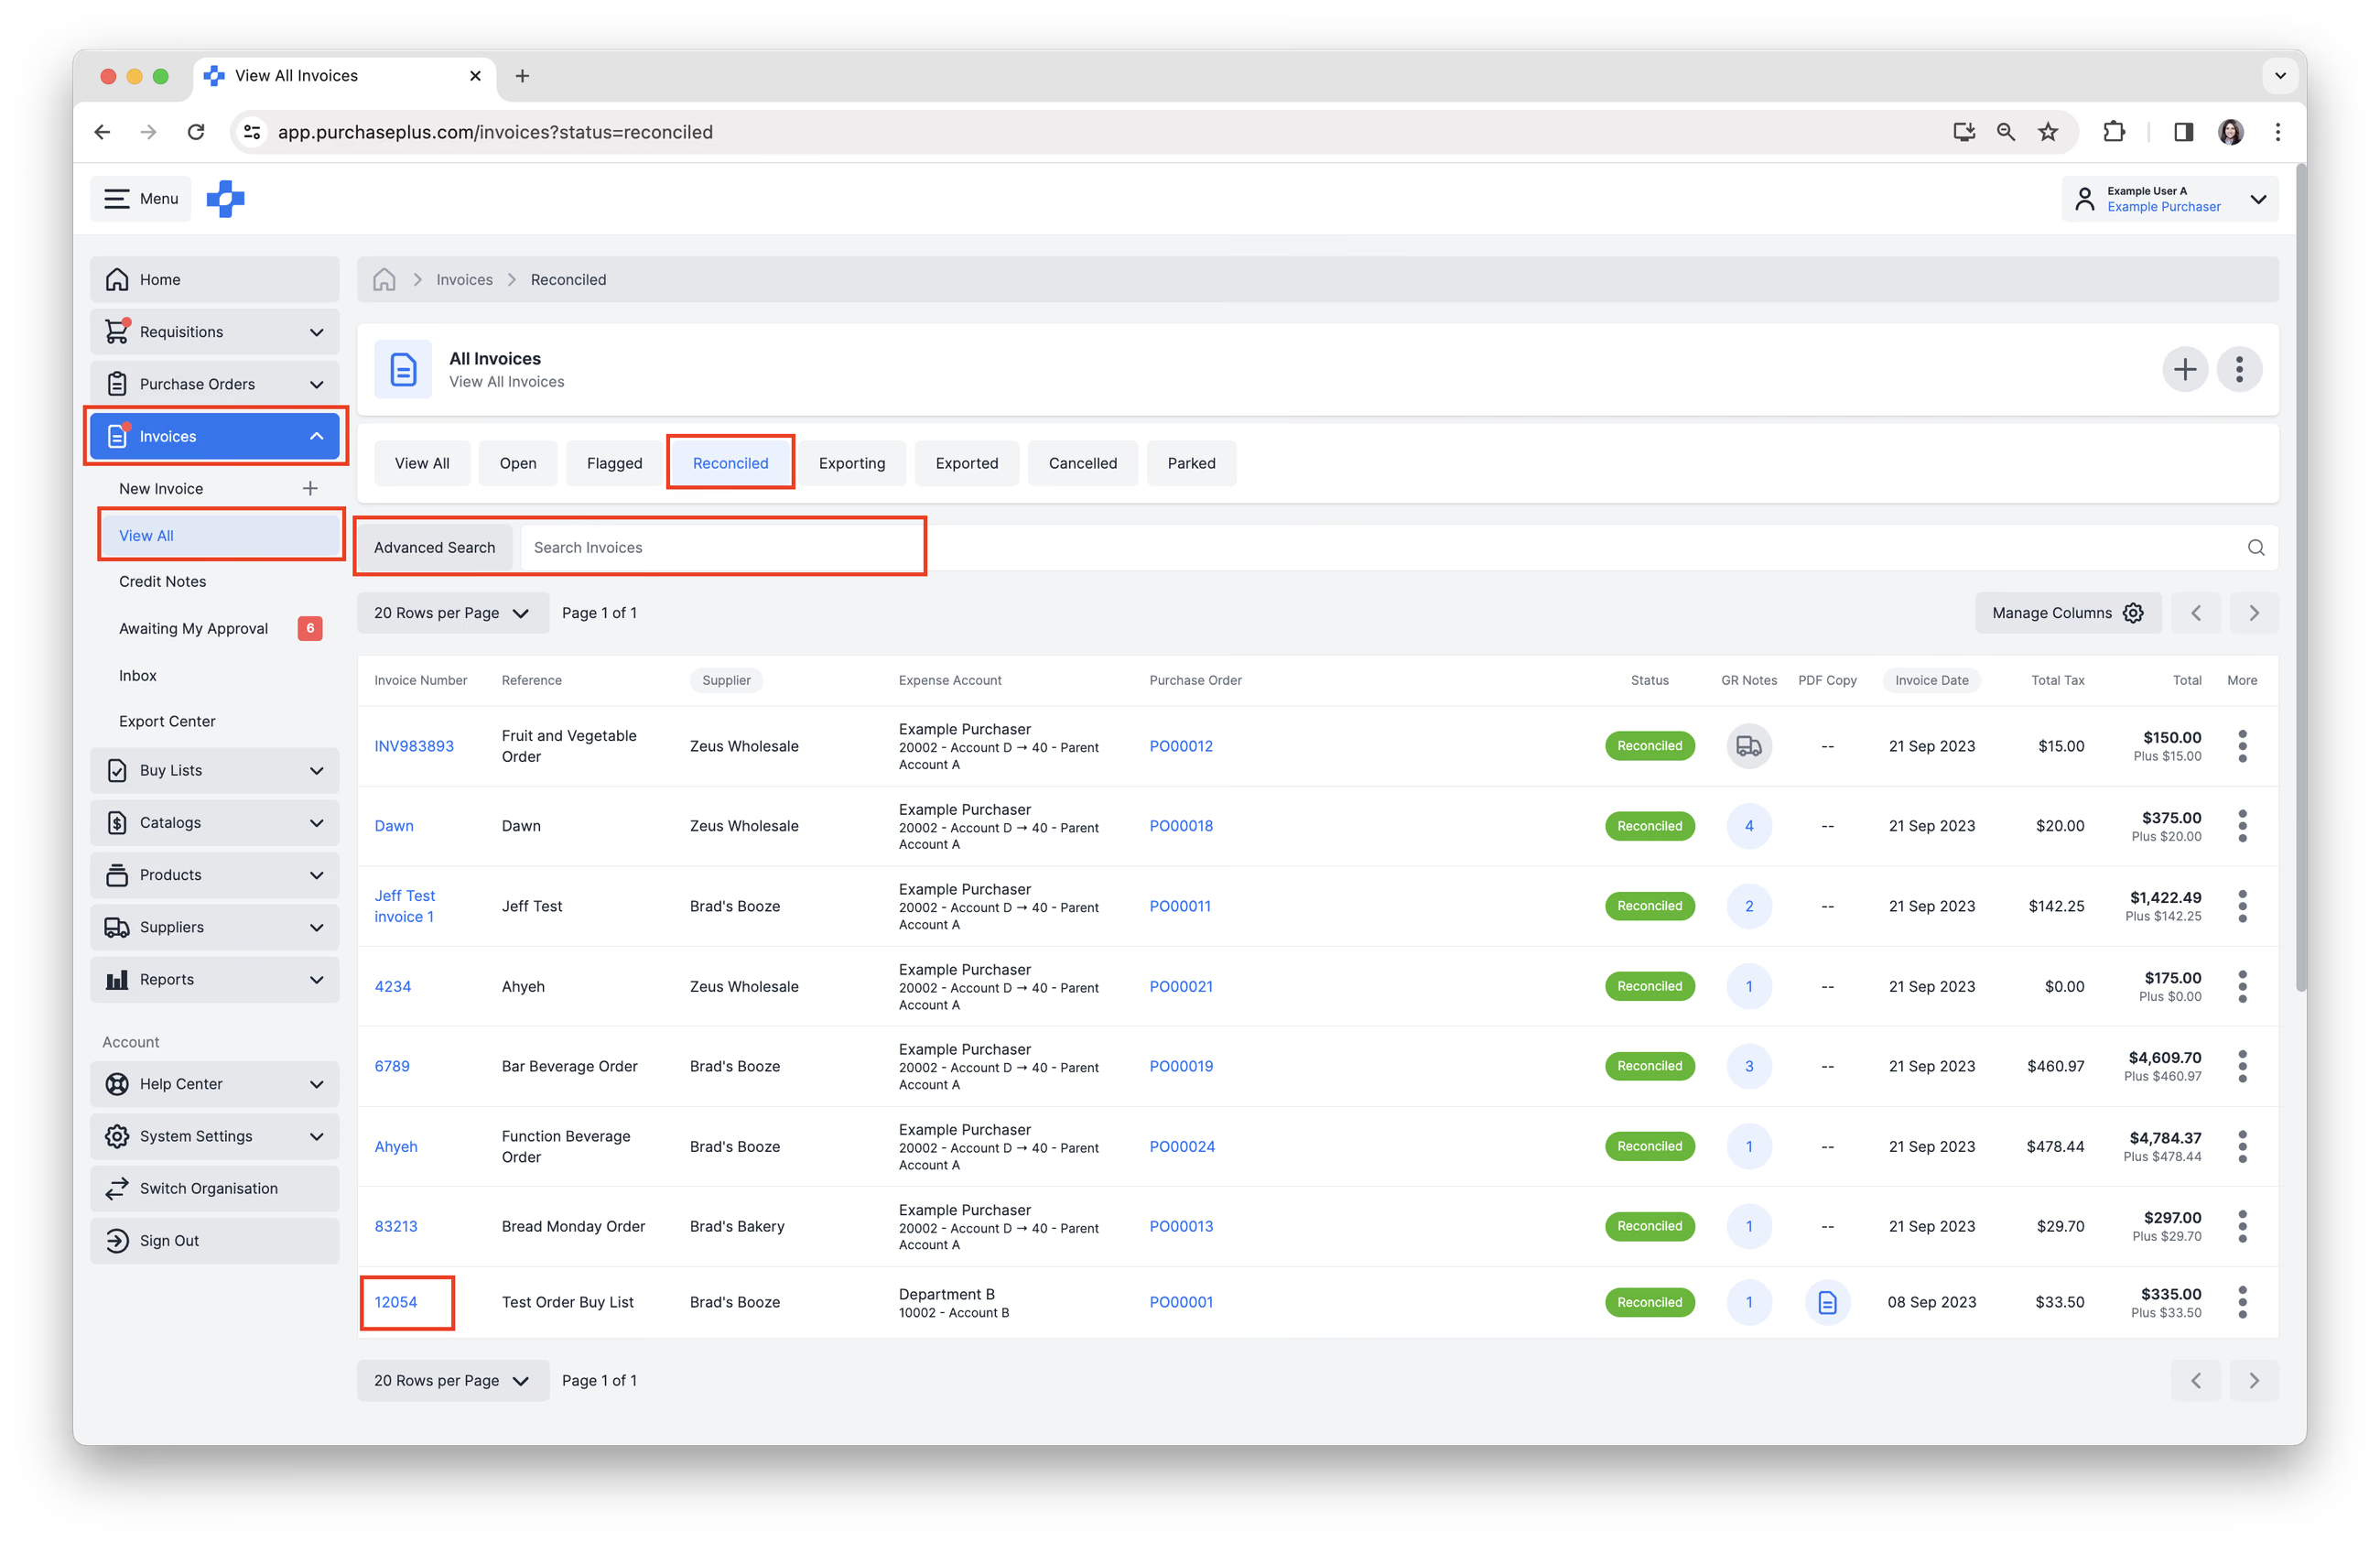
1. Select [Invoices] or [Credit Notes]→ [View All] from the side navigation bar.
2. Select [Reconciled] tab. Only documents in the 'RECONCILED' state can be Exported. A Reconciled Invoice or Credit Note has passed all flag checks, or has been granted Approval despite having flags.
3. Use [Search] to find the Invoice or Credit Note you would like to Export.
4. Click [Invoice/Credit Note Number] to open the Invoice.
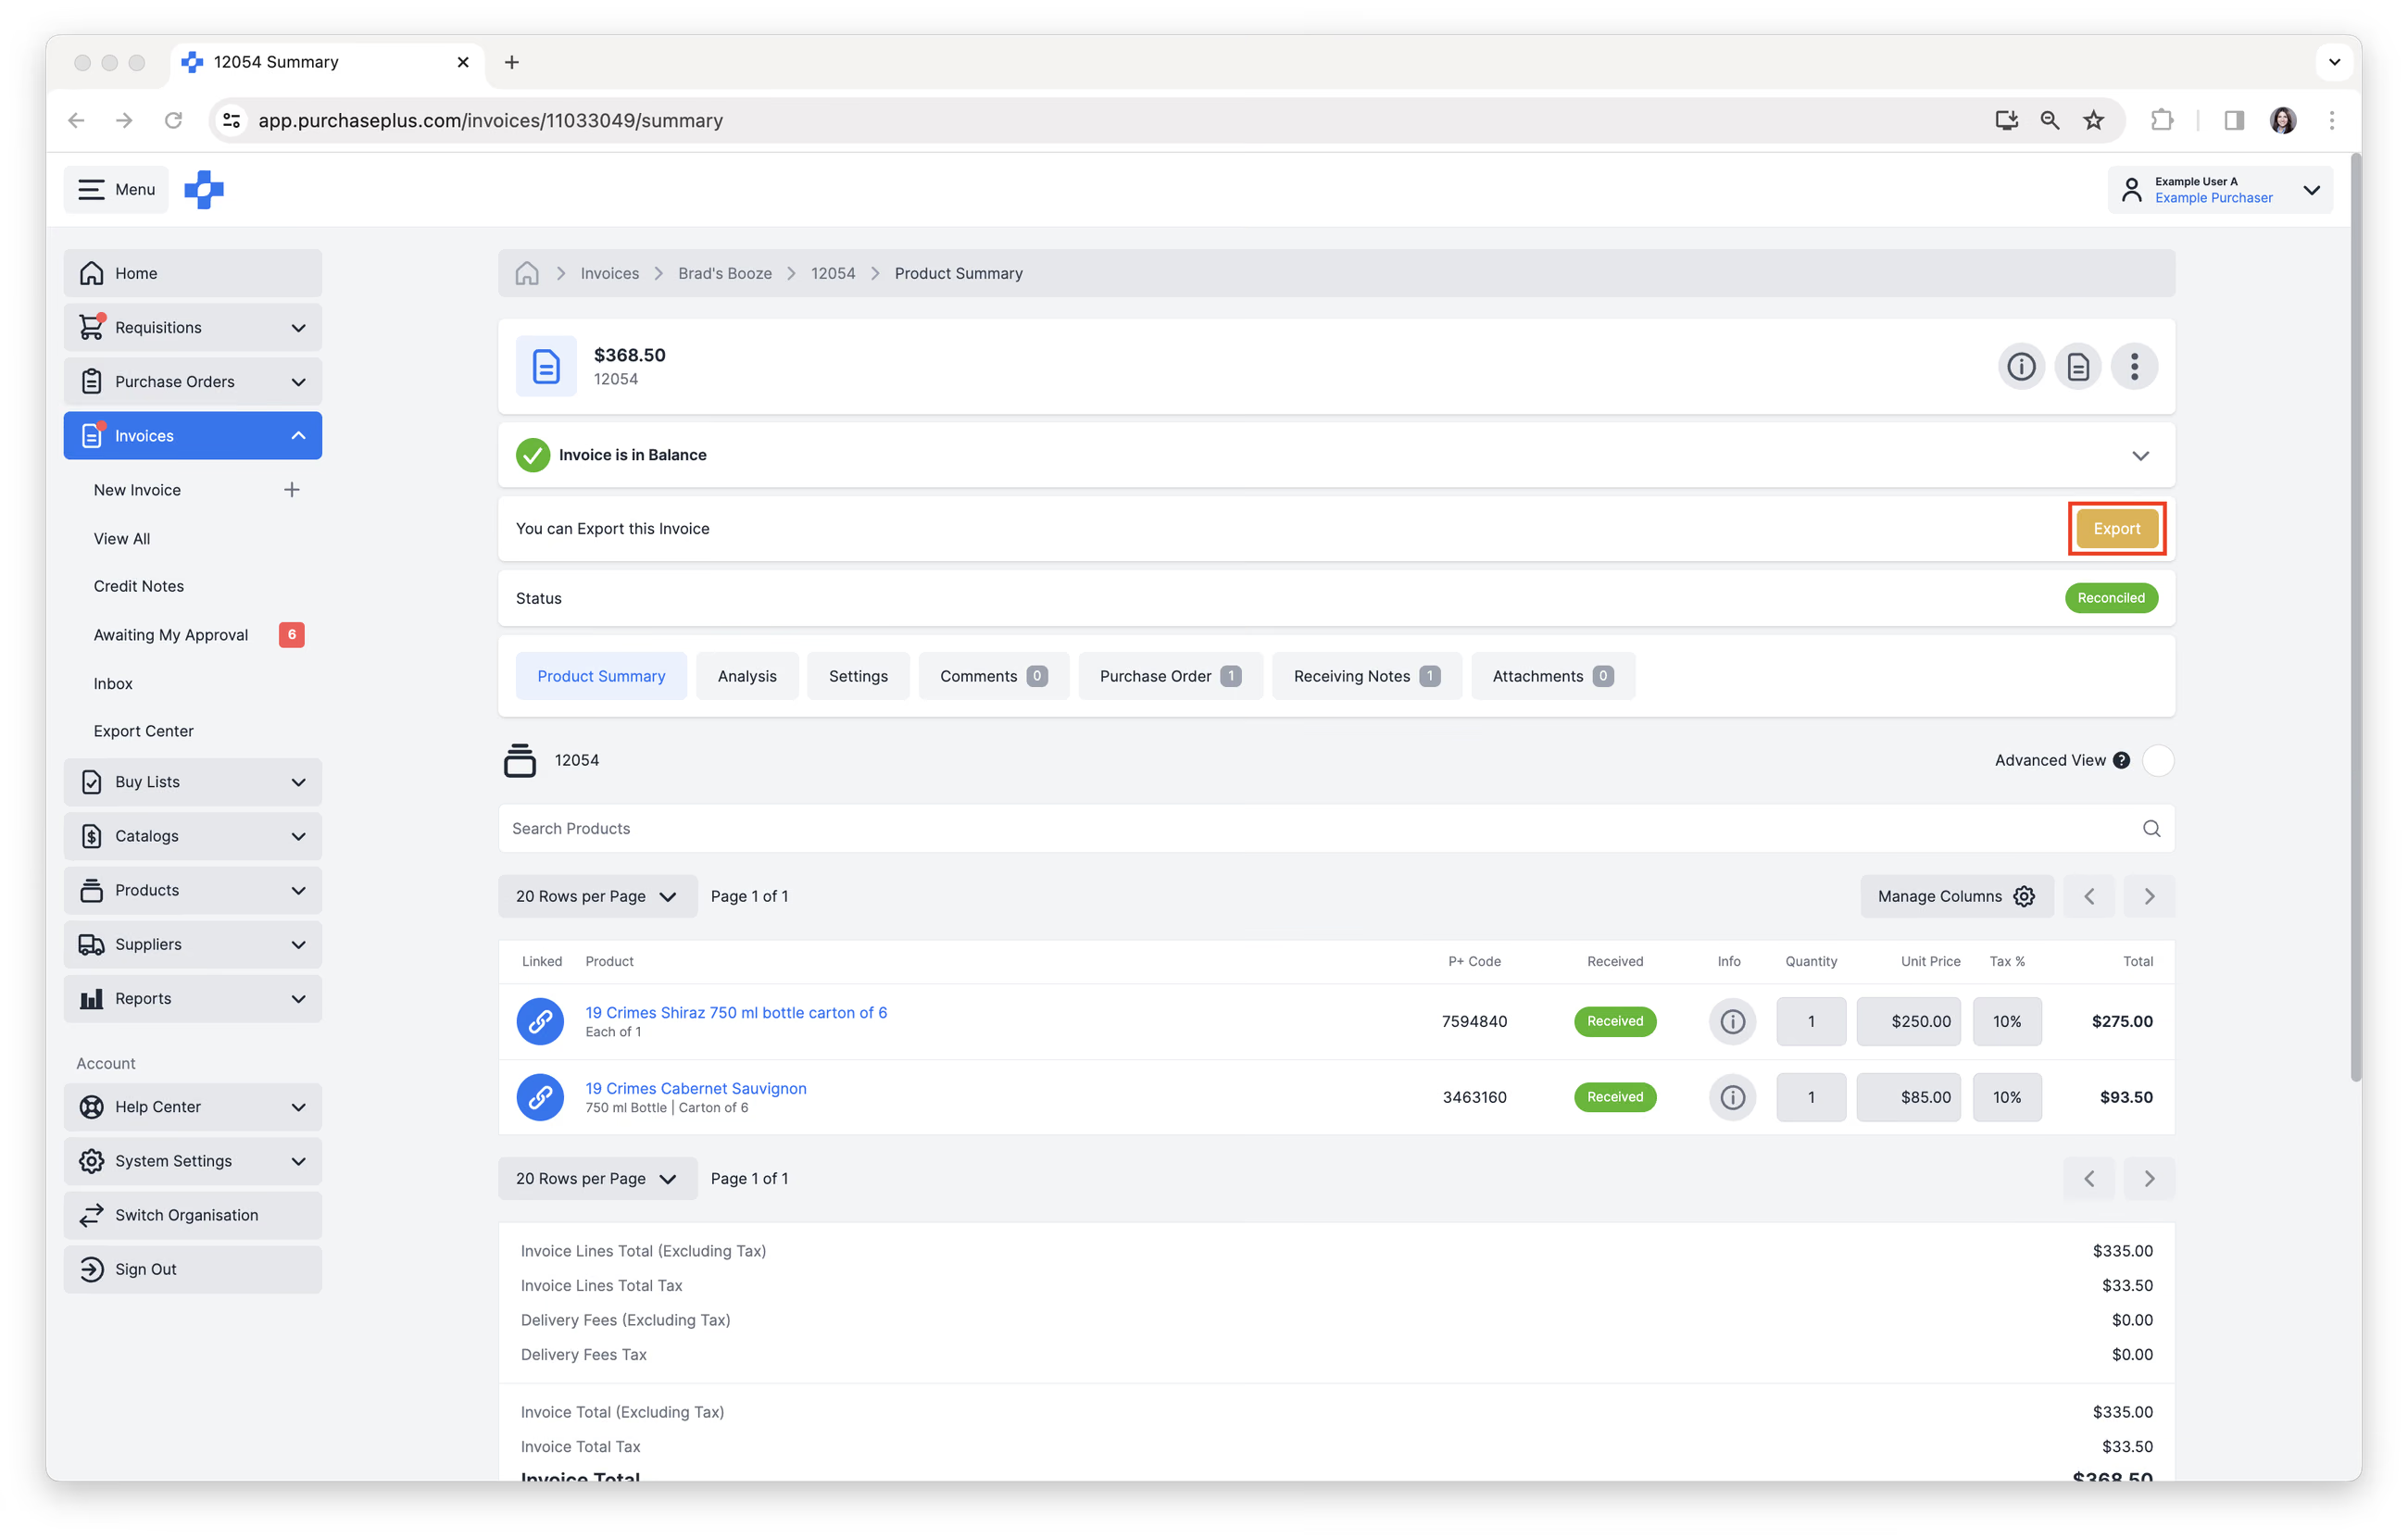
 5. Click the [Export] action button in the header area. Note - You will require a specific permission ('Export Invoices') in order to see this button in the Invoice or Credit Note header. Please speak with an Administrator at your Organisation if you do not have this permission.
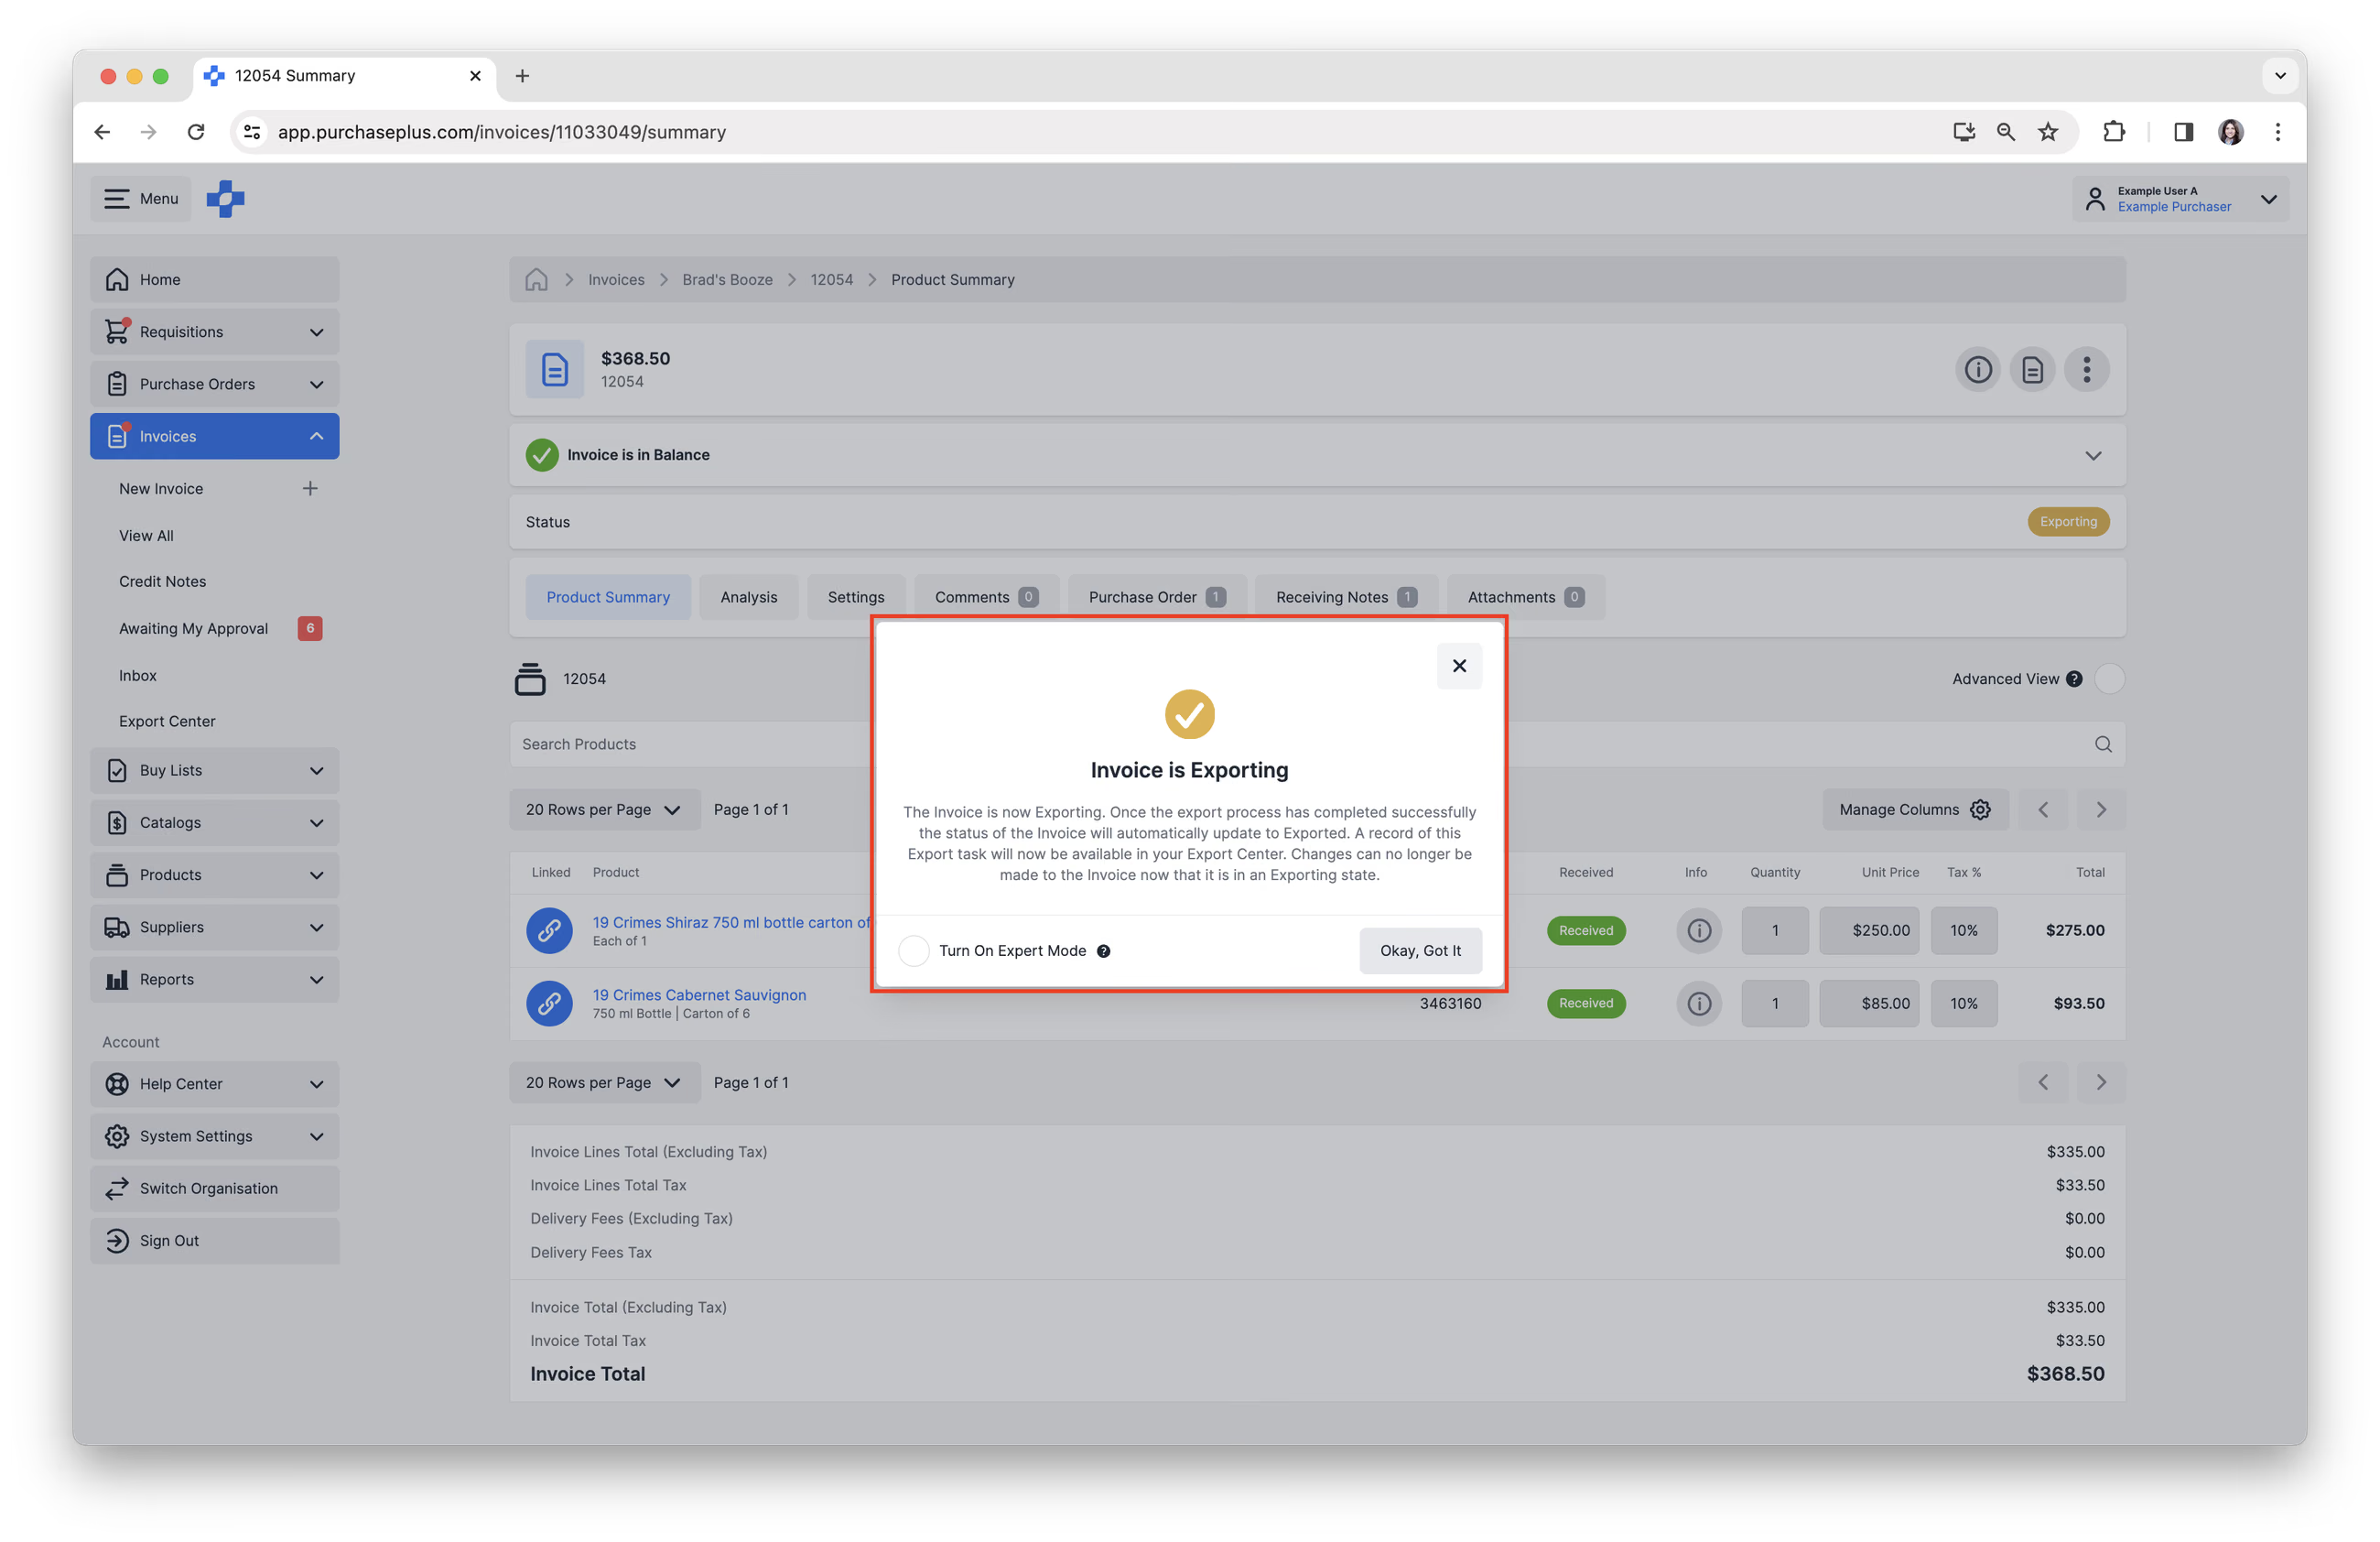
The Invoice is now Exporting. The Export process will usually take less than a minute. Once the Export process has completed successfully, the status of the Invoice will automatically update to Exported. The Invoice should also have arrived in your External Accounting System. A record of this Export task will now be available in your Export Center.
Export Invoices or Credit Notes in Bulk
1. Select [Invoices] or [Credit Notes]→ [View All] from the side navigation bar.
2. Select [Reconciled] tab. Only Invoices and Credit Notes in the 'RECONCILED' state can be Exported. A Reconciled Invoice/Credit Note has passed all flag checks, or has been granted Approval despite having flags. 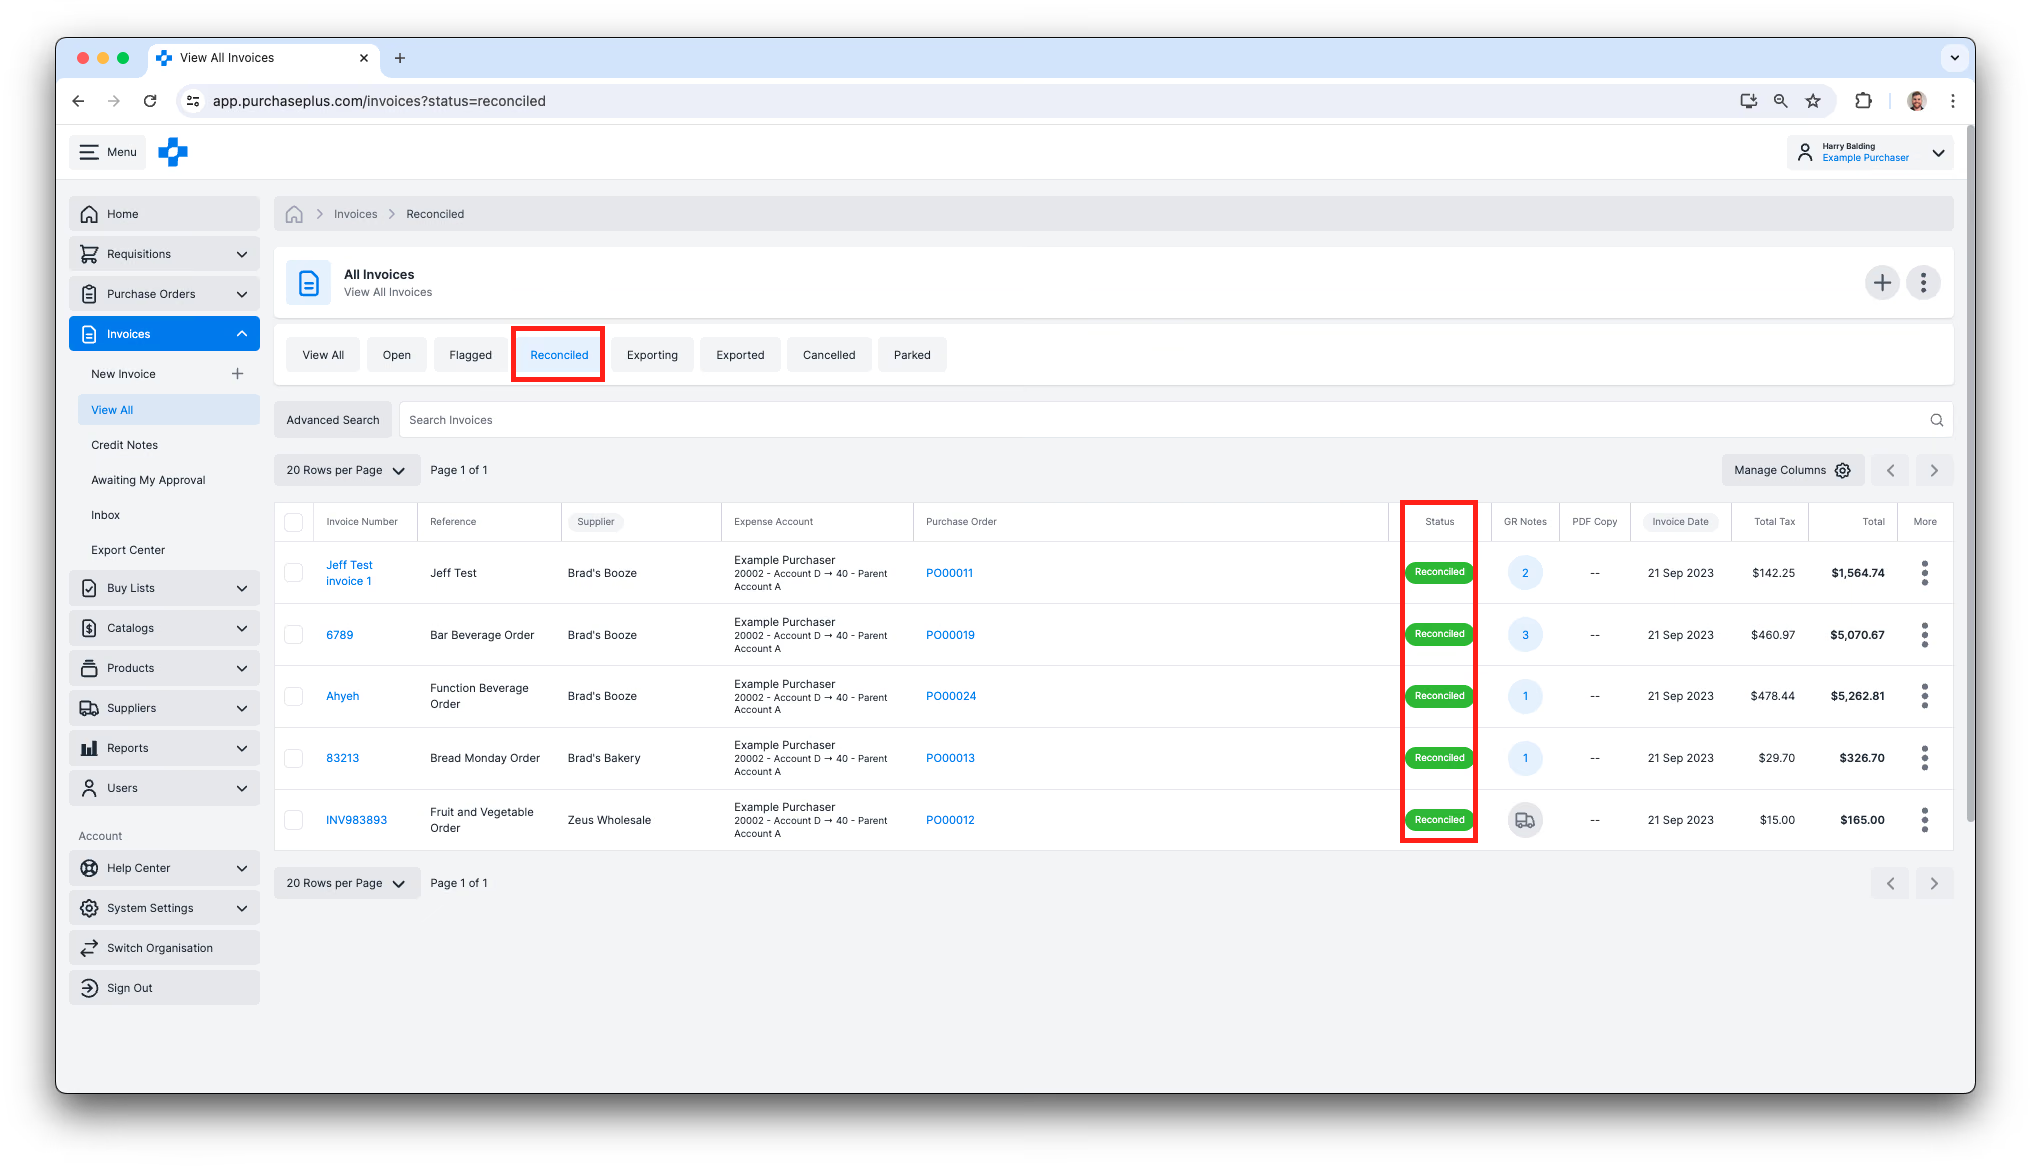
3. Select multiple Invoices or Credit Notes, or Select All by selecting the checkbox at the top of the Selection column. 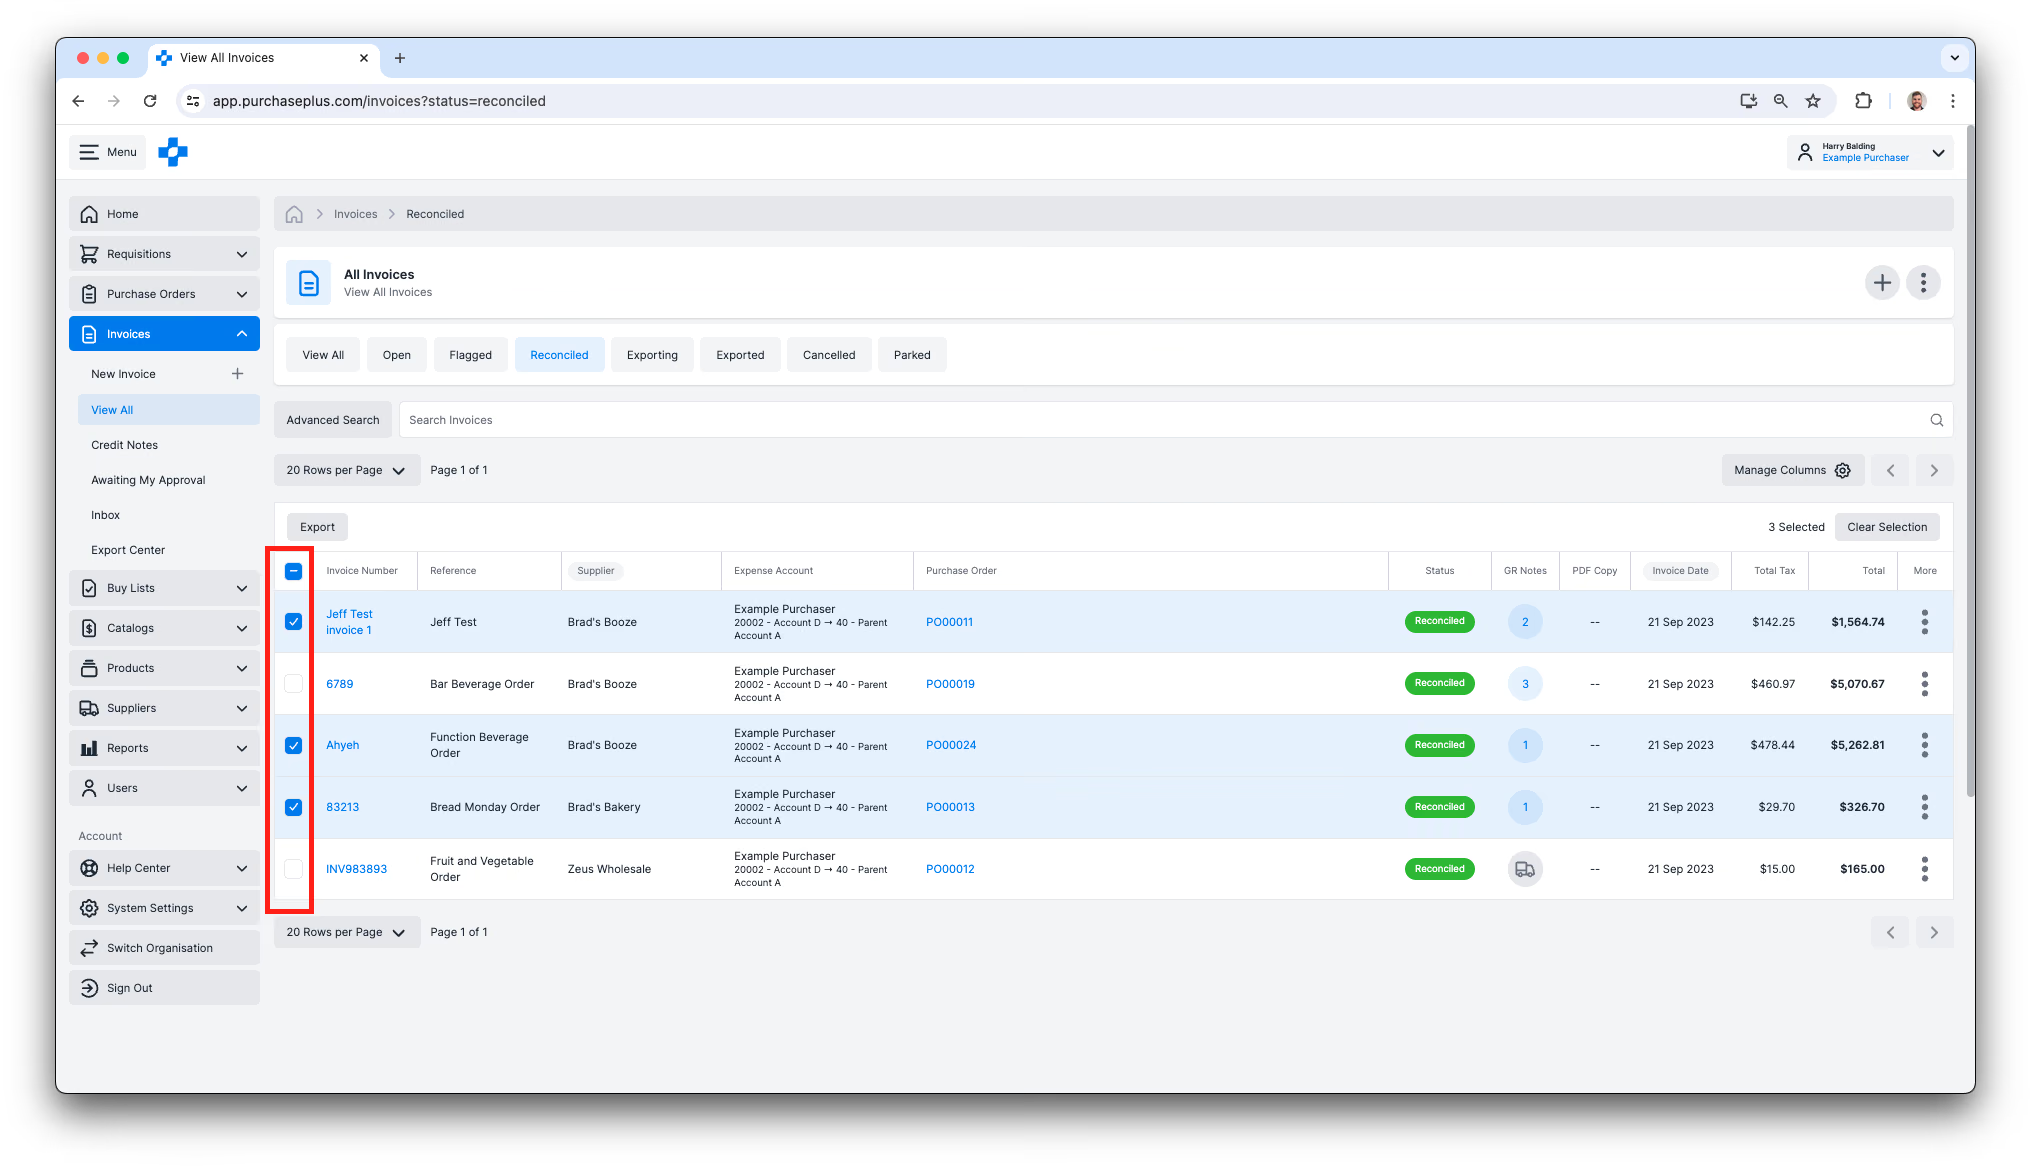 4. With one or more Invoices or Credit Notes selected, click [Export] at the top-left of the table, and then confirm the action in the resulting dialog box.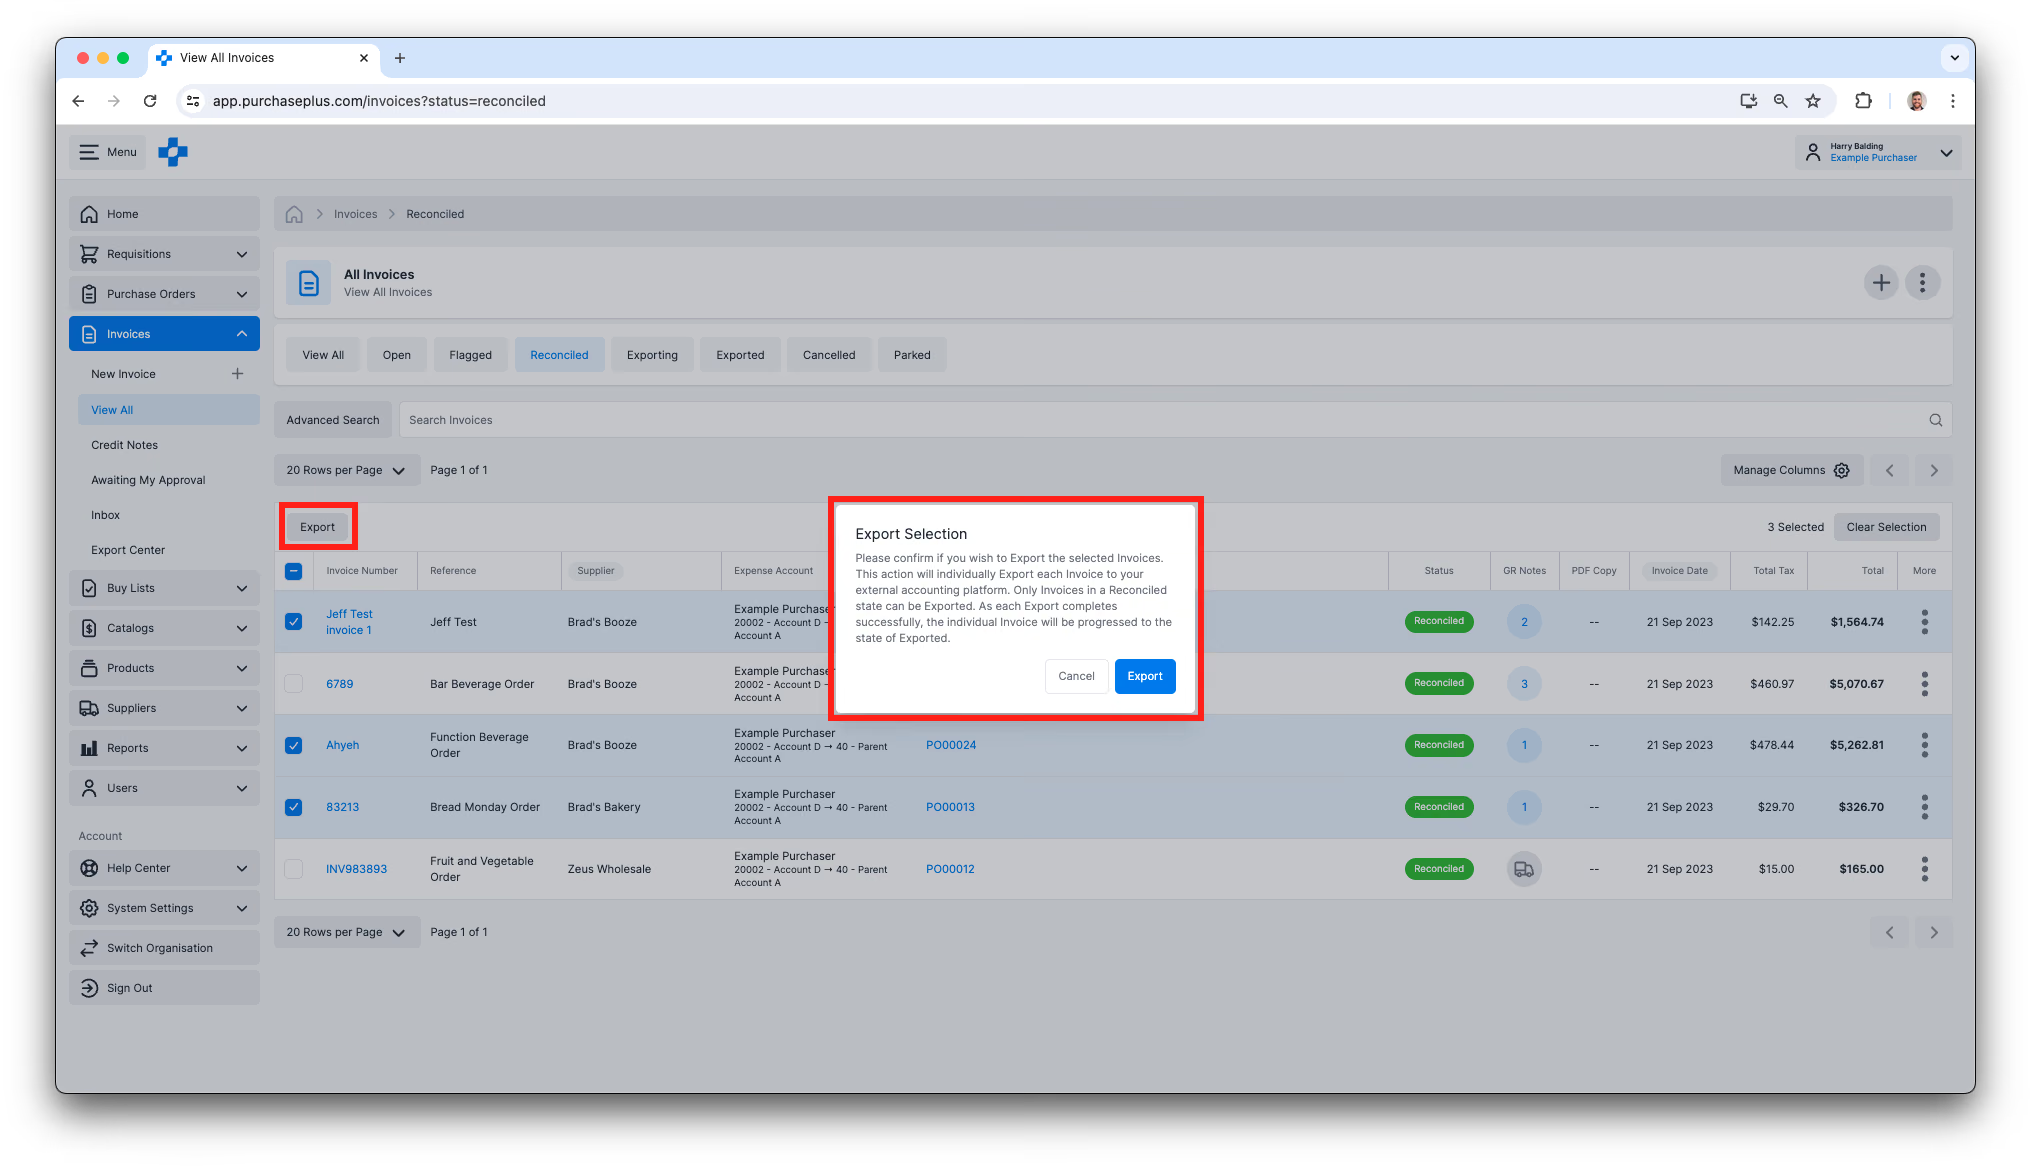
View Export Center
1. Select [Invoices] or [Credit Notes] → [Export Center] from the side navigation bar.
2. In the Export Center, you are able to:
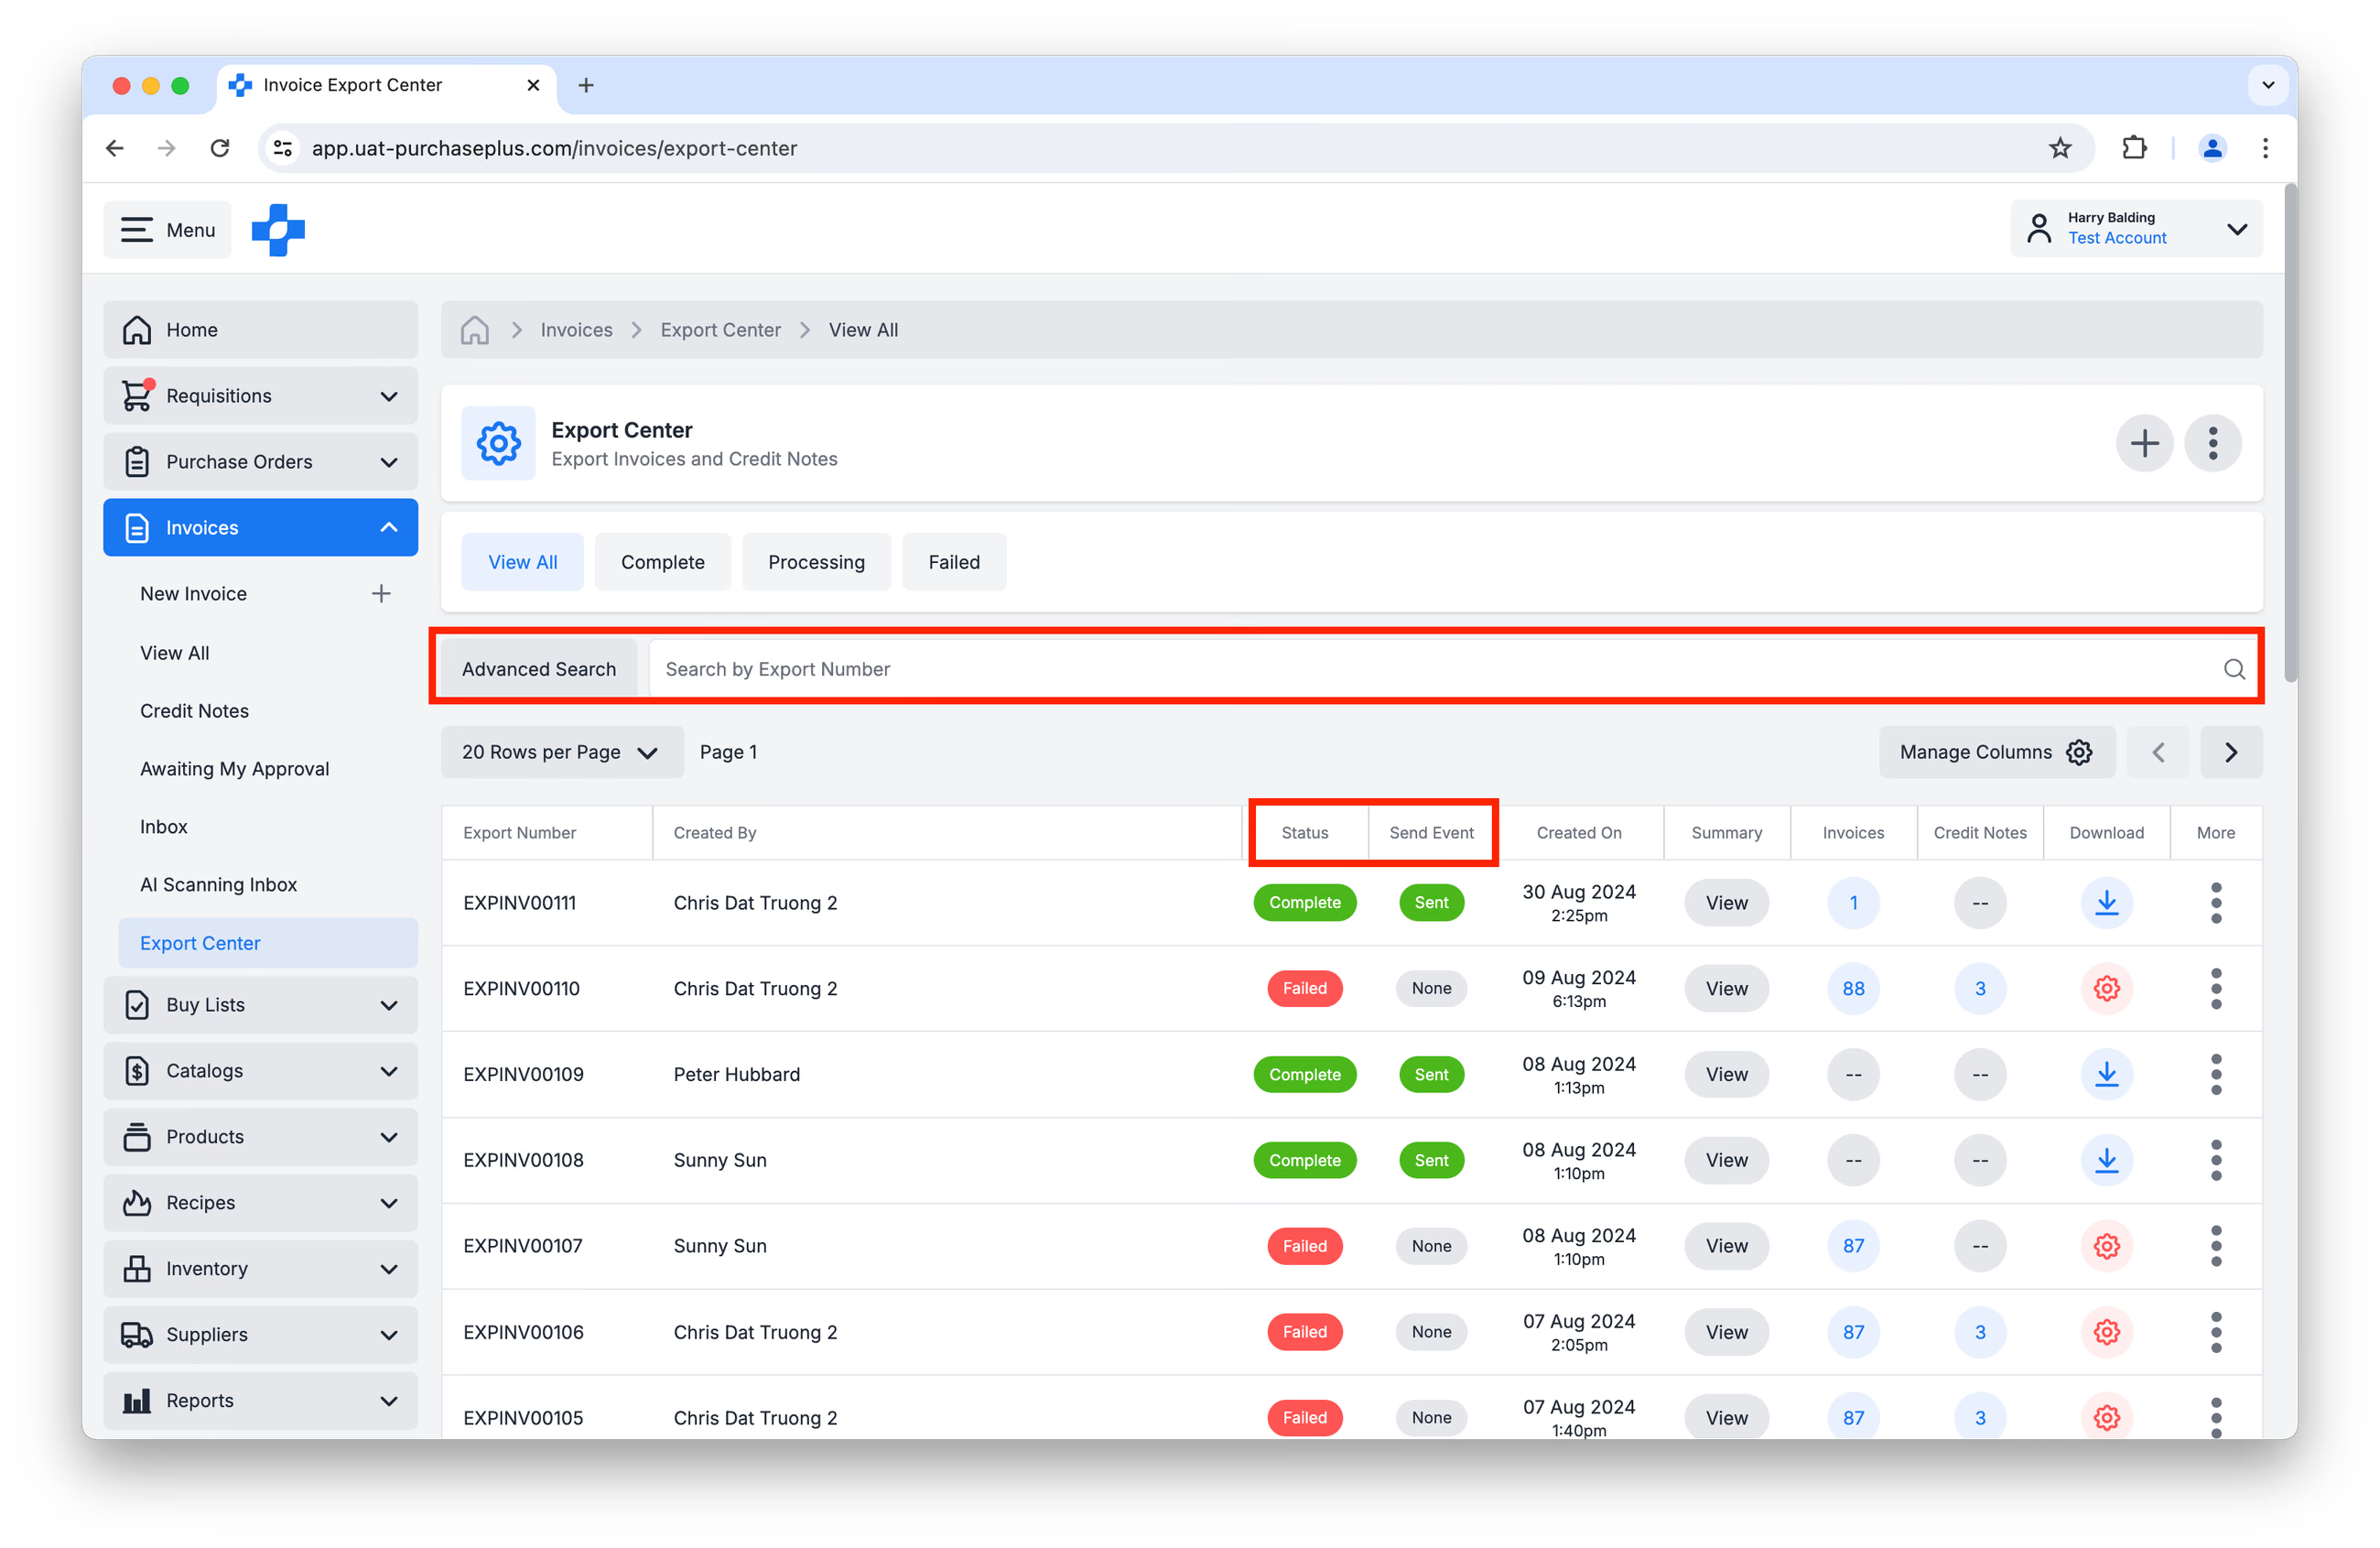
- Search by Export Number, or you can apply an Advanced Search to search by a unique Invoice or Credit Note number.
- View the Status of Export. Note that there are two columns that are relevant here: Status (which is whether the Export package has been compiled correctly) and Send Event, which tells us whether the Export package was successfully sent to the configured electronic destination.
- View Export Summary.
- Download Export file.
- Click on the Export Number to see a table of the Export Data, as well as a list of the Invoice(s) or Credit Note(s) included in the Export File.
Revert Invoice to Reconciled
If you need to, you can Revert the (Exported) Invoice or Credit Note to a Reconciled state, then Re-Open the document to make changes to it.
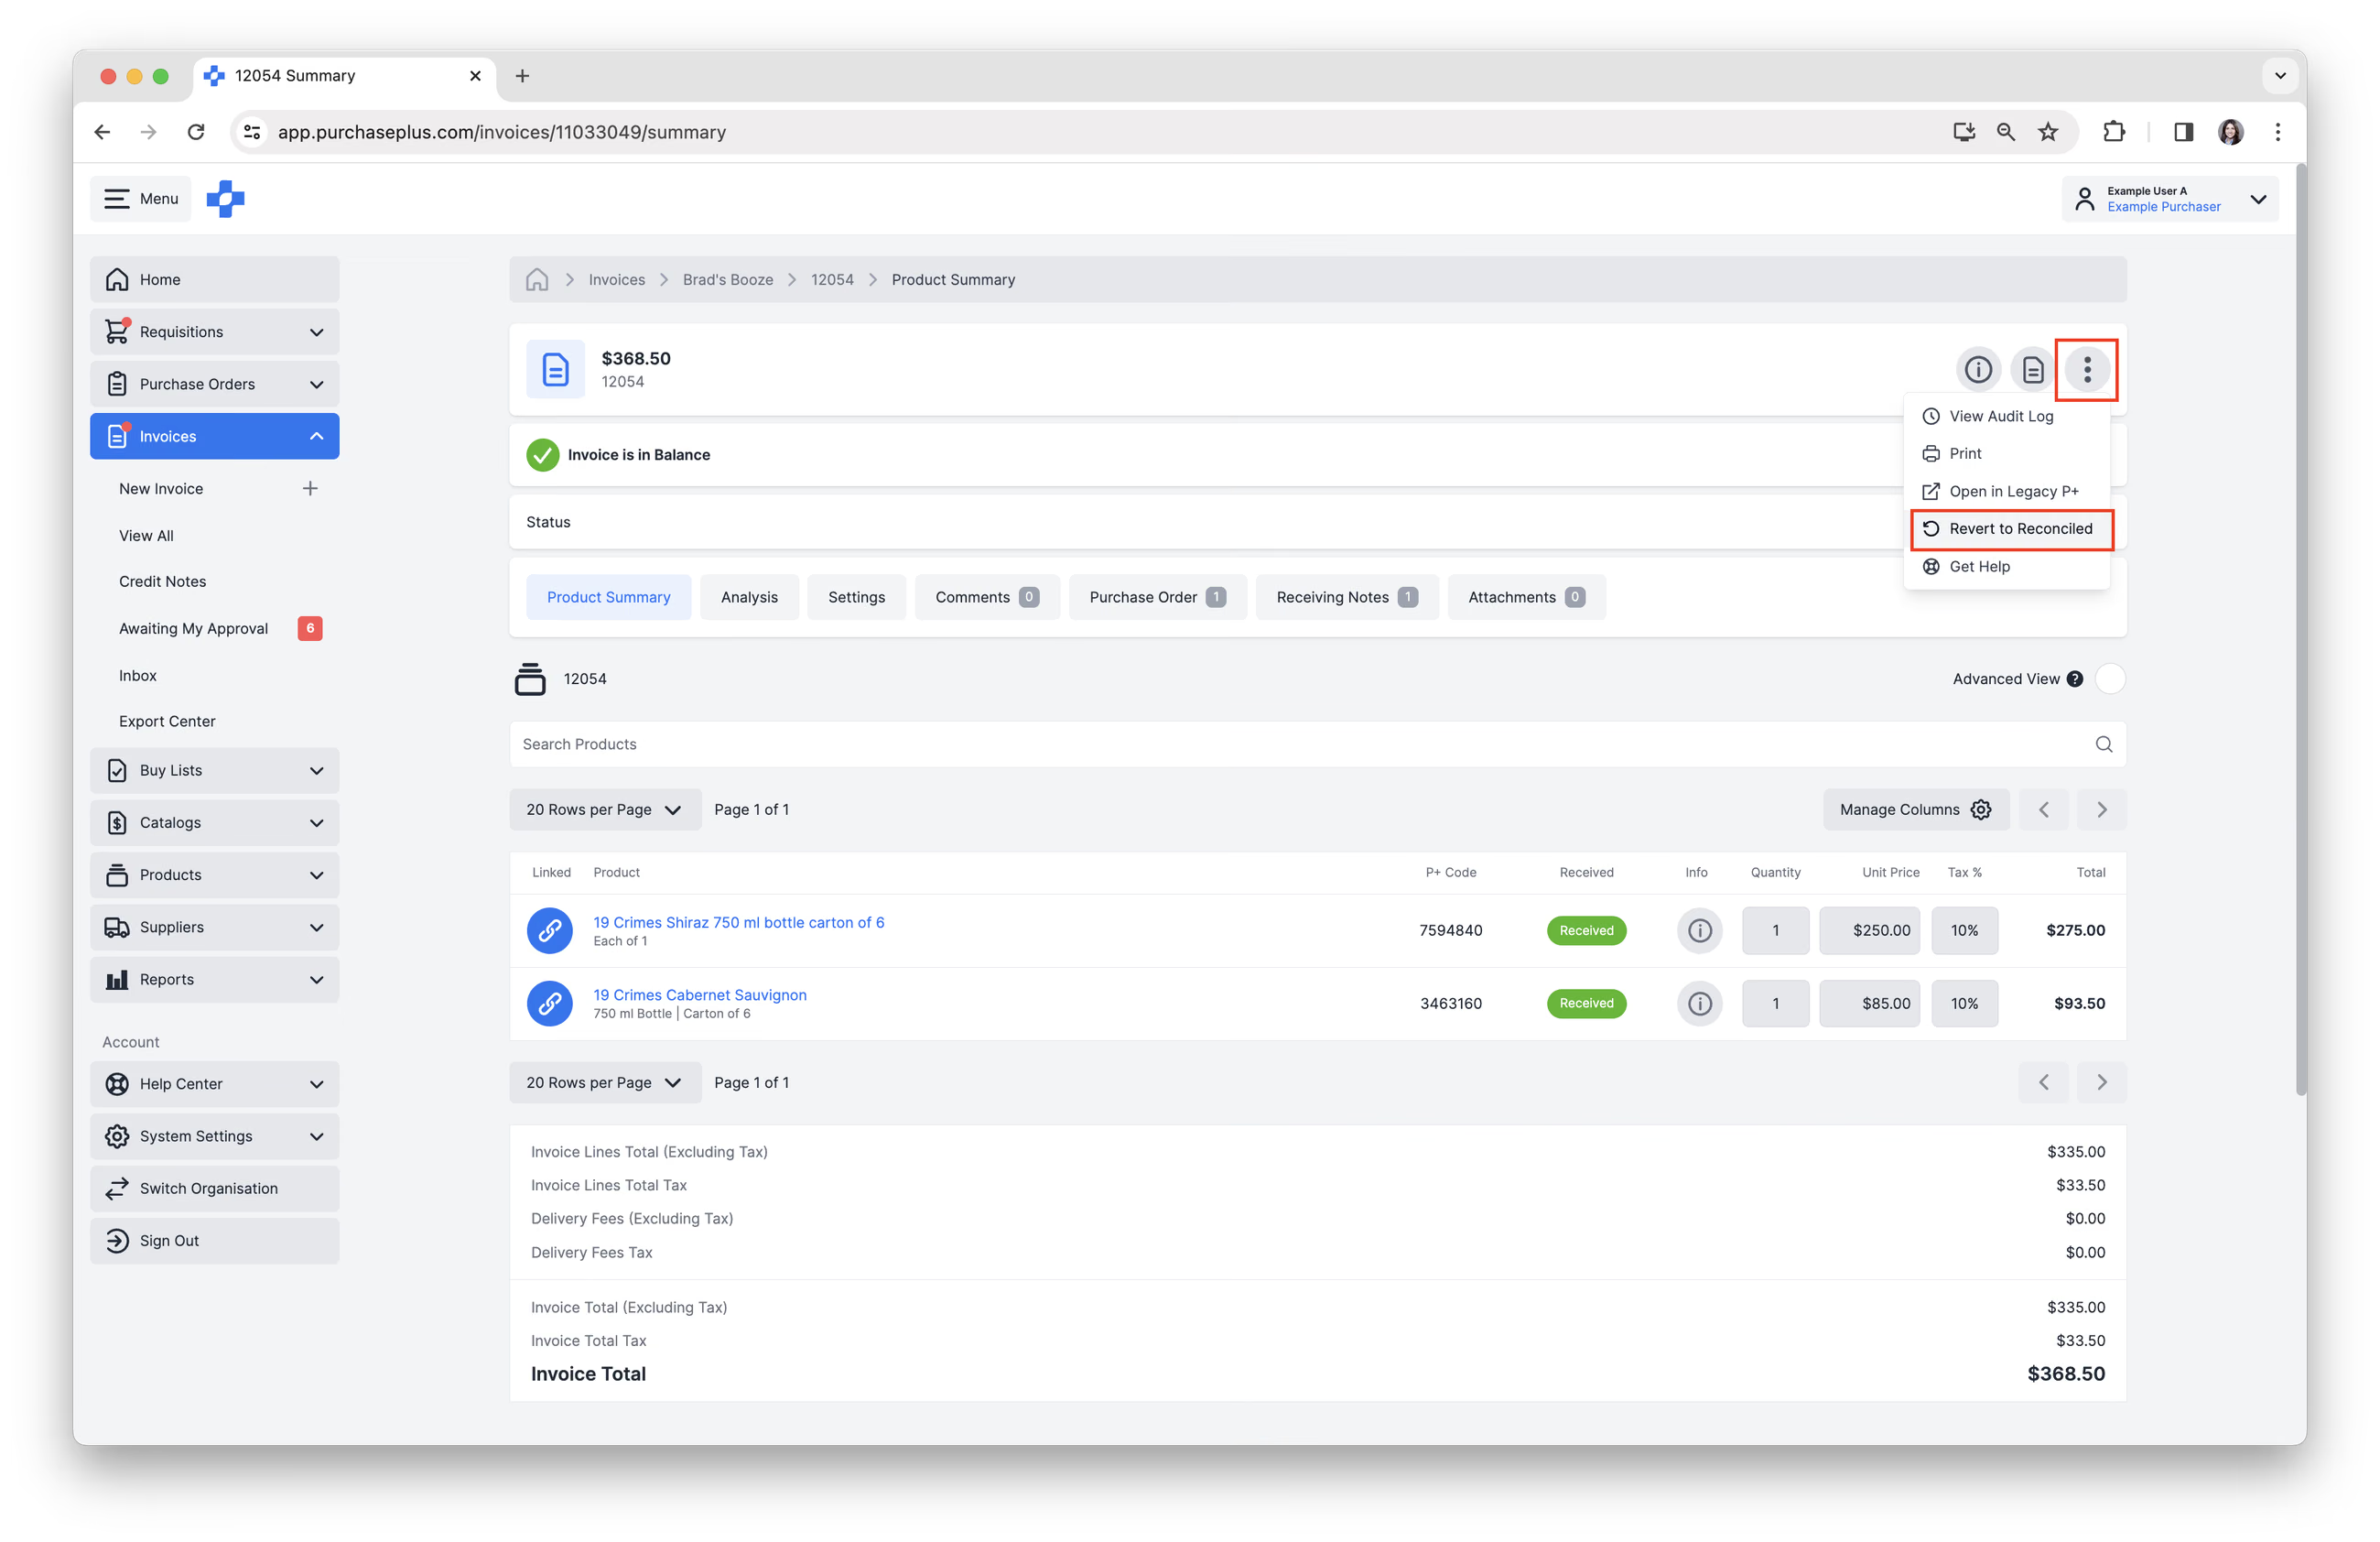
Inside the Invoice or Credit Note, select [More Menu] → [Revert to Reconciled] in the header area.
Troubleshooting
Invoice or Credit Note Stuck in 'Exporting' State
If an Invoice or Credit Note is stuck in the Exporting status, it usually indicates a temporary sync issue with your AP system. To fix this, you must revert the document to a "Reconciled" state to re-trigger the transmission by following these steps:
- Open the Invoice or Credit Note currently stuck in Exporting. In the top-right corner of the Invoice header, click the three vertical dots (⋮) icon.
- Select [Revert to Reconciled]. This stops the current export attempt and brings the Invoice back to a manageable state.
- Click the red [Revert Invoice] button to confirm. The status will change from Yellow (Exporting) to Green (Reconciled).
- Verify Invoice Details. Before attempting the export again, double-check the following to ensure there are no errors:
- Supplier details and Supplier Business Number.
- Departments and Account Codes.
- Invoice Totals and Tax amounts.
- Re-trigger the Export. Once you have confirmed the details are correct:
- Locate the yellow button labeled [Export].
- Click this button to place the Invoice back into the export queue.
- PurchasePlus will now attempt to re-send the Invoice or Credit Note to your AP system. Once the file is successfully transmitted, the status tag will change to Purple (Exported).
Still having issues?
- Contact your internal IT or system administrator to verify that your organisation's API connection to the AP system is active.
- Contact PurchasePlus Customer Support. If your IT department confirms the connection is fine, please reach out to our support team for assistance.
Generating an Export Response Log File
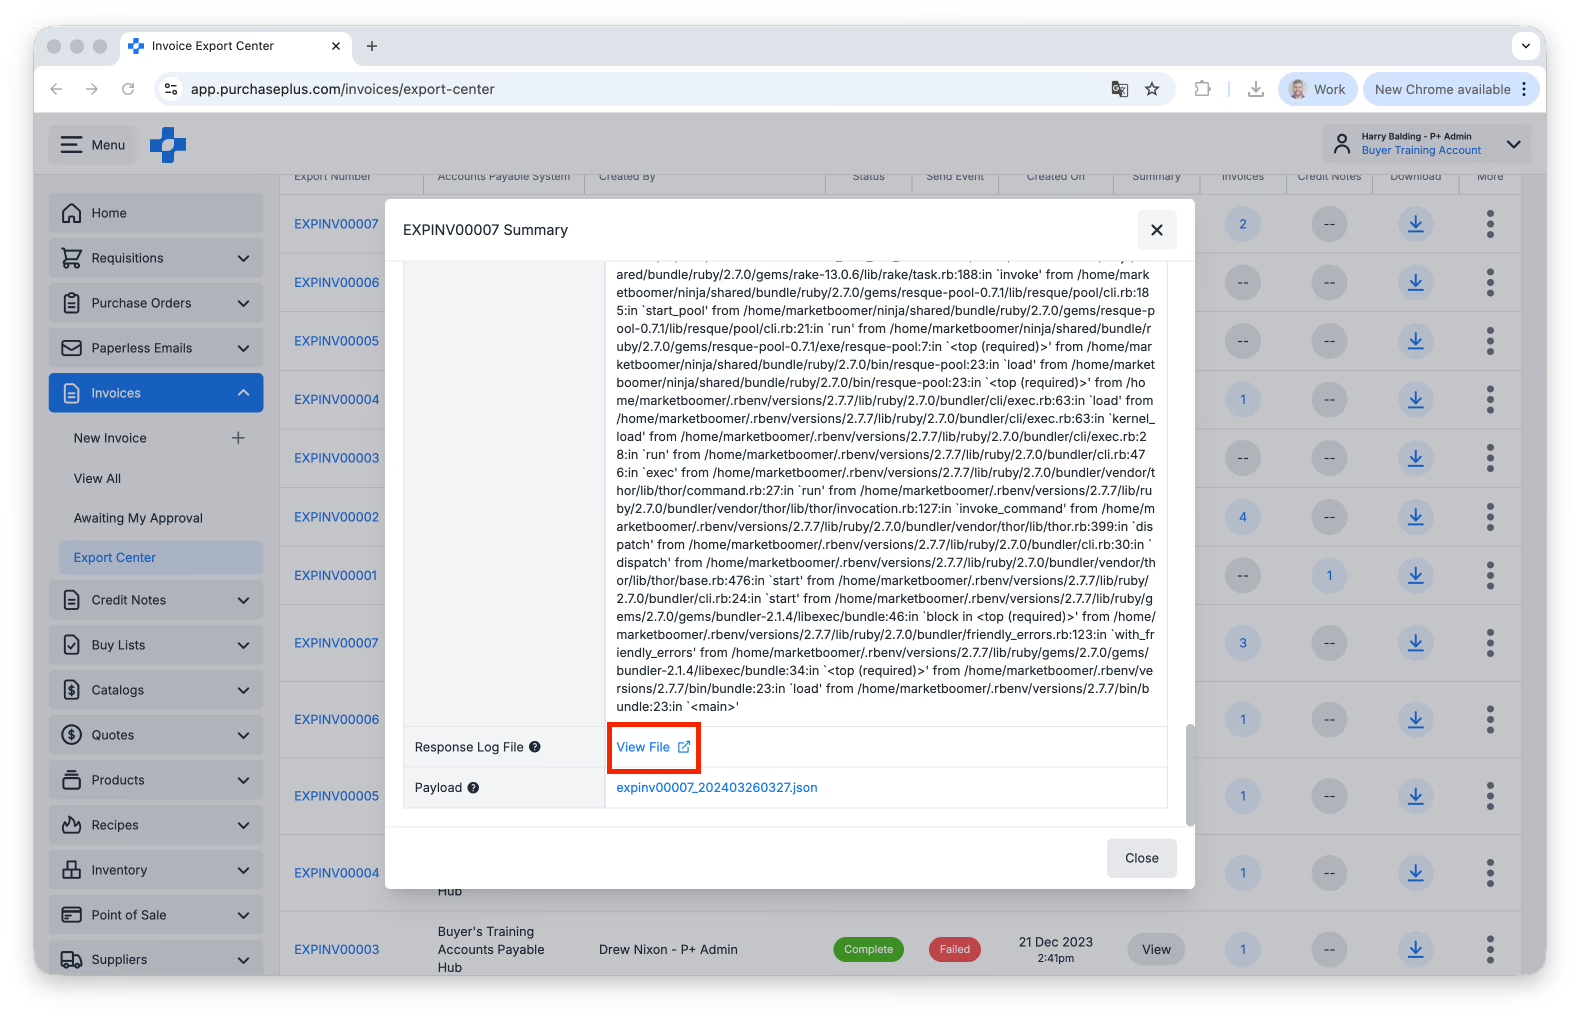
Your internal IT team may wish to review a Response Log File in the event of transmission failures. To generate one of these files, follow these steps:
- Navigate to [Invoices] → [Export Center]
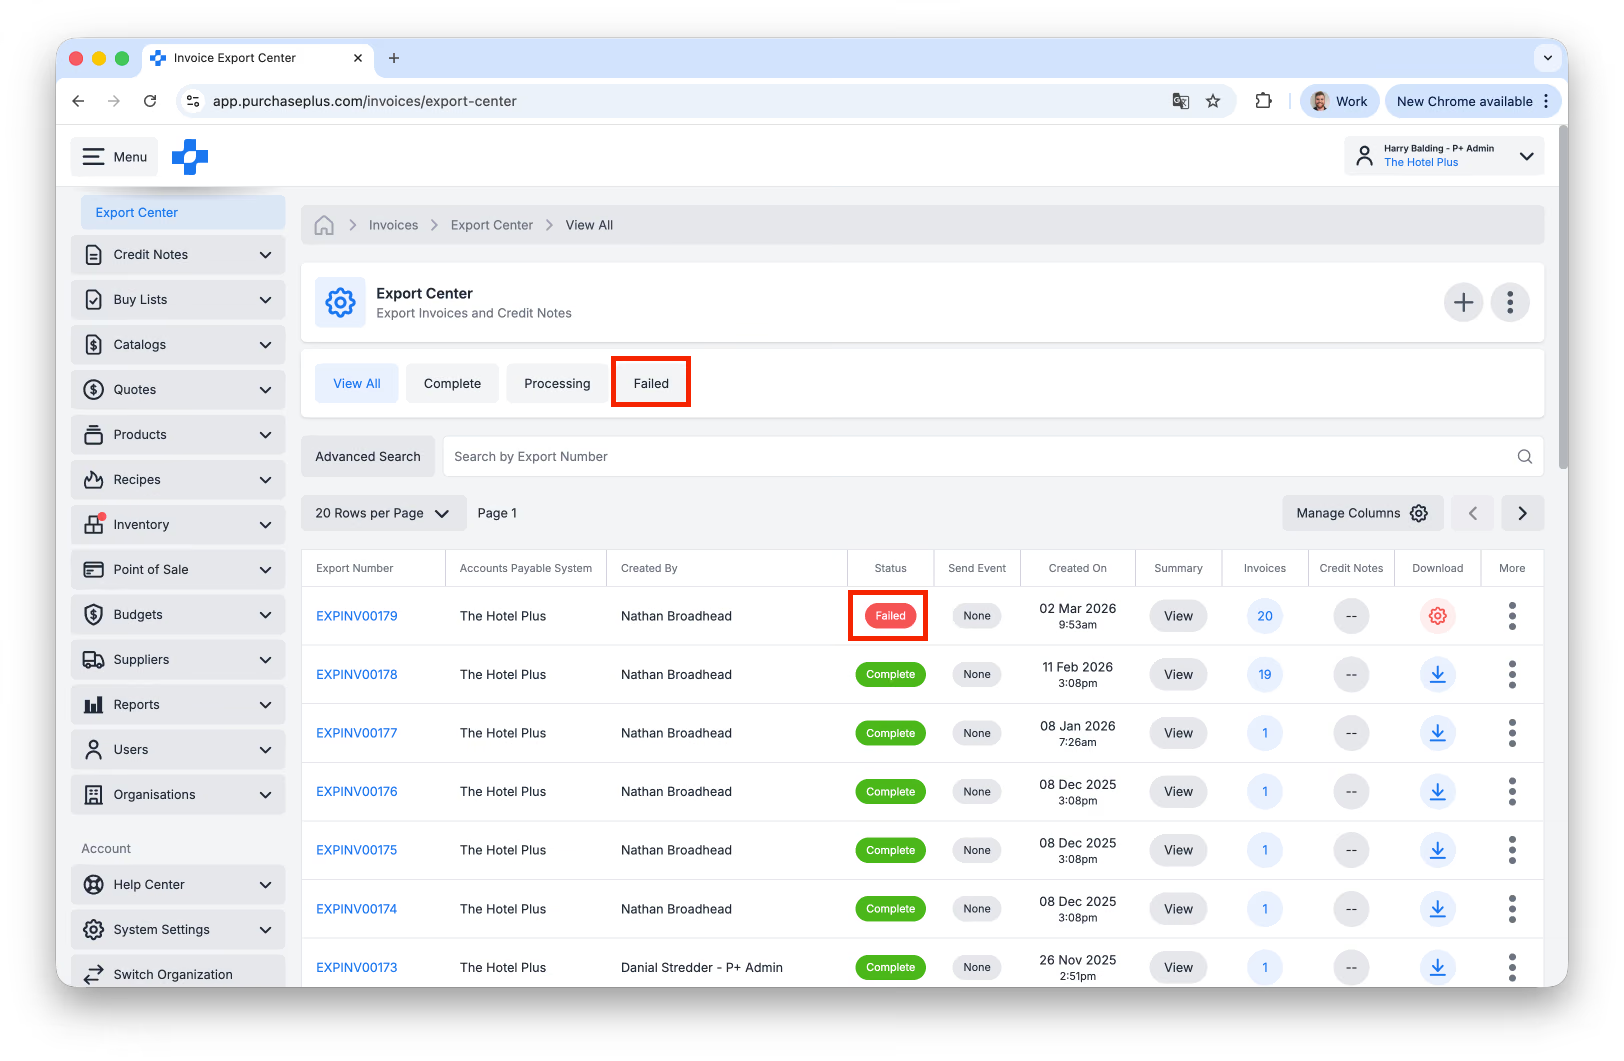
- Locate the Relevant Export. You may Filter by Failed, or look for the Export with a Failed status in the Send Event column:
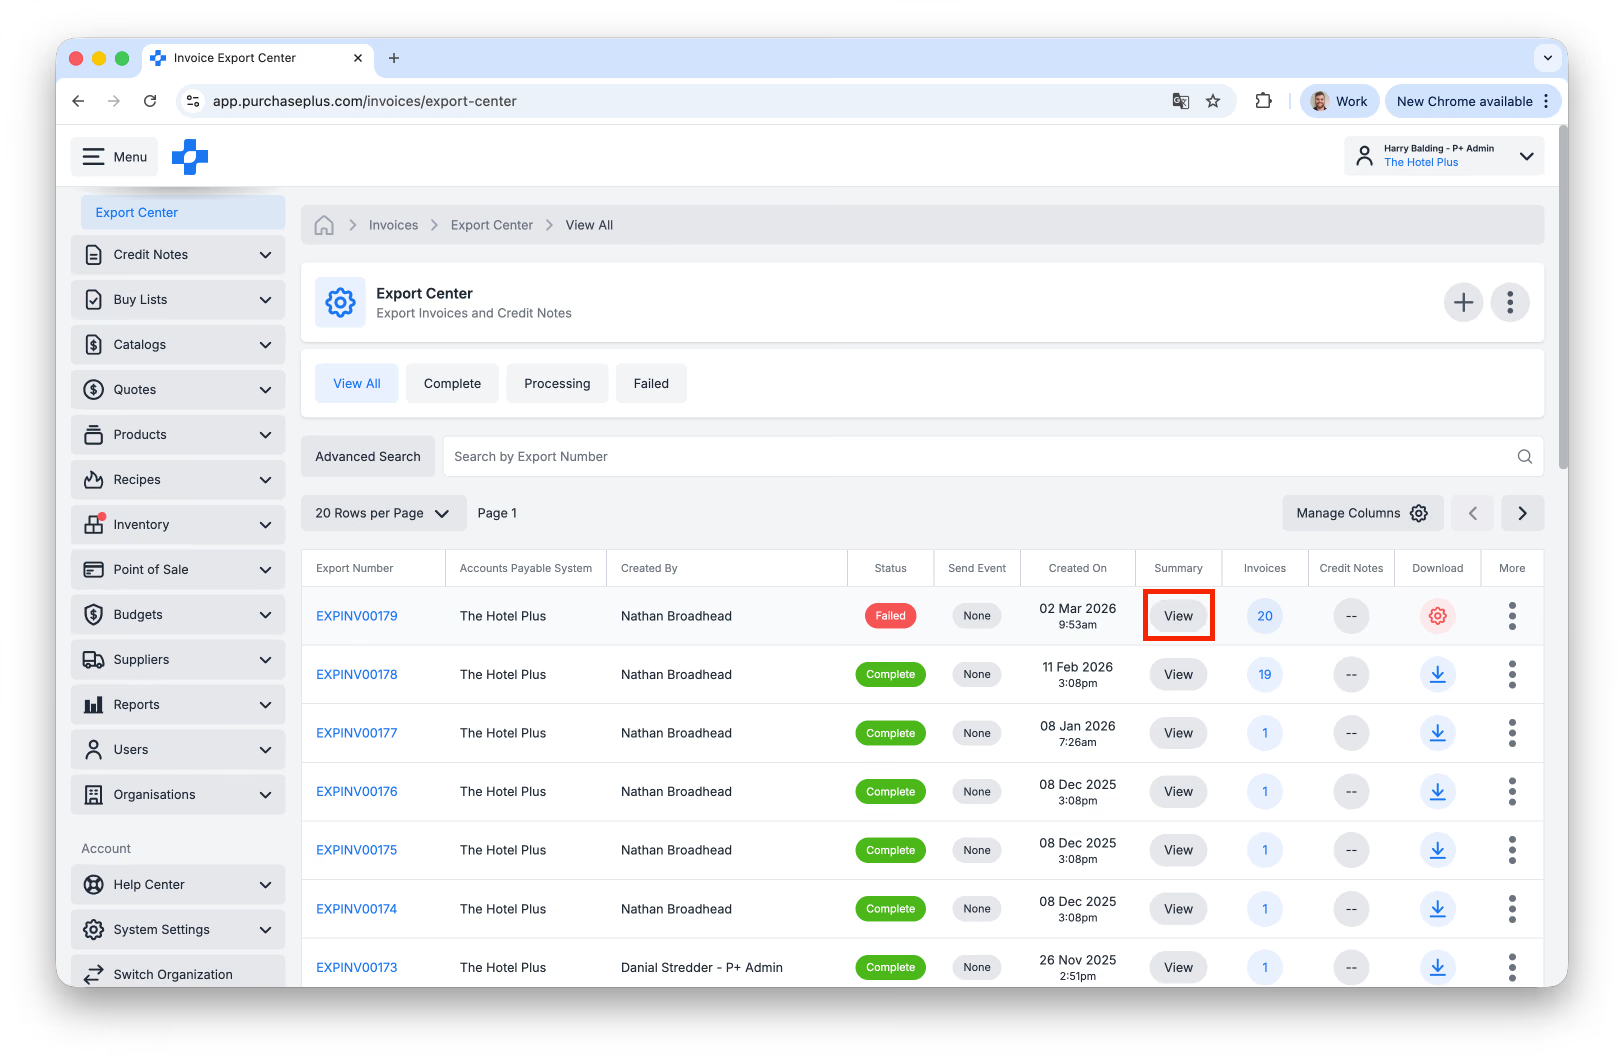
- On the same row, click the [View] button under the Summary column:
- On the resulting export details window, scroll down to the Response and Response Log File section:
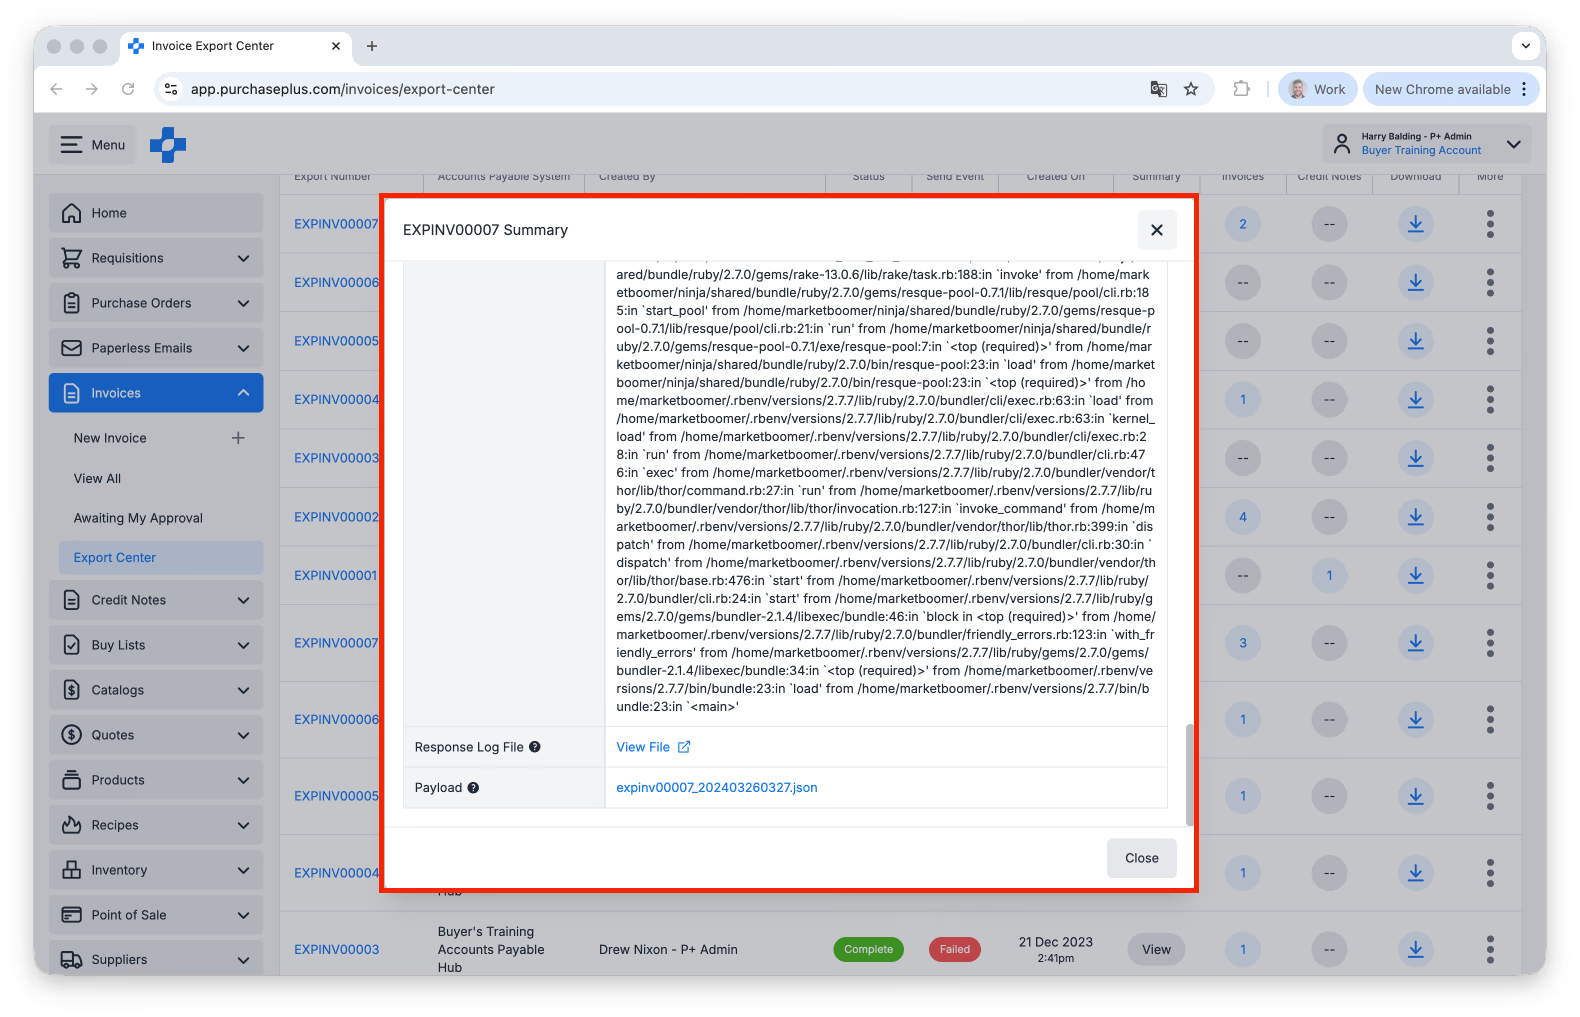
- Download the Log File. You may also copy the Response details if required: