

Filter lists
Filter lists
Most list screens in PurchasePlus use a shared filter bar above the table. Nothing changes the table until you confirm the filters.
Open More Filters
- On a list with quick-filter pills (for example [Invoices] → [View All] or [Products] → [View All]), select a pill, choose values, then select [Apply] on that pill.
- Select [More Filters] on the right of the filter bar. When filters from the panel are already active, a badge on [More Filters] shows how many.
- Add or change filters in the panel.
- Select [Show Results]. The button label includes the match count when it is available (for example Show 9 Invoices).
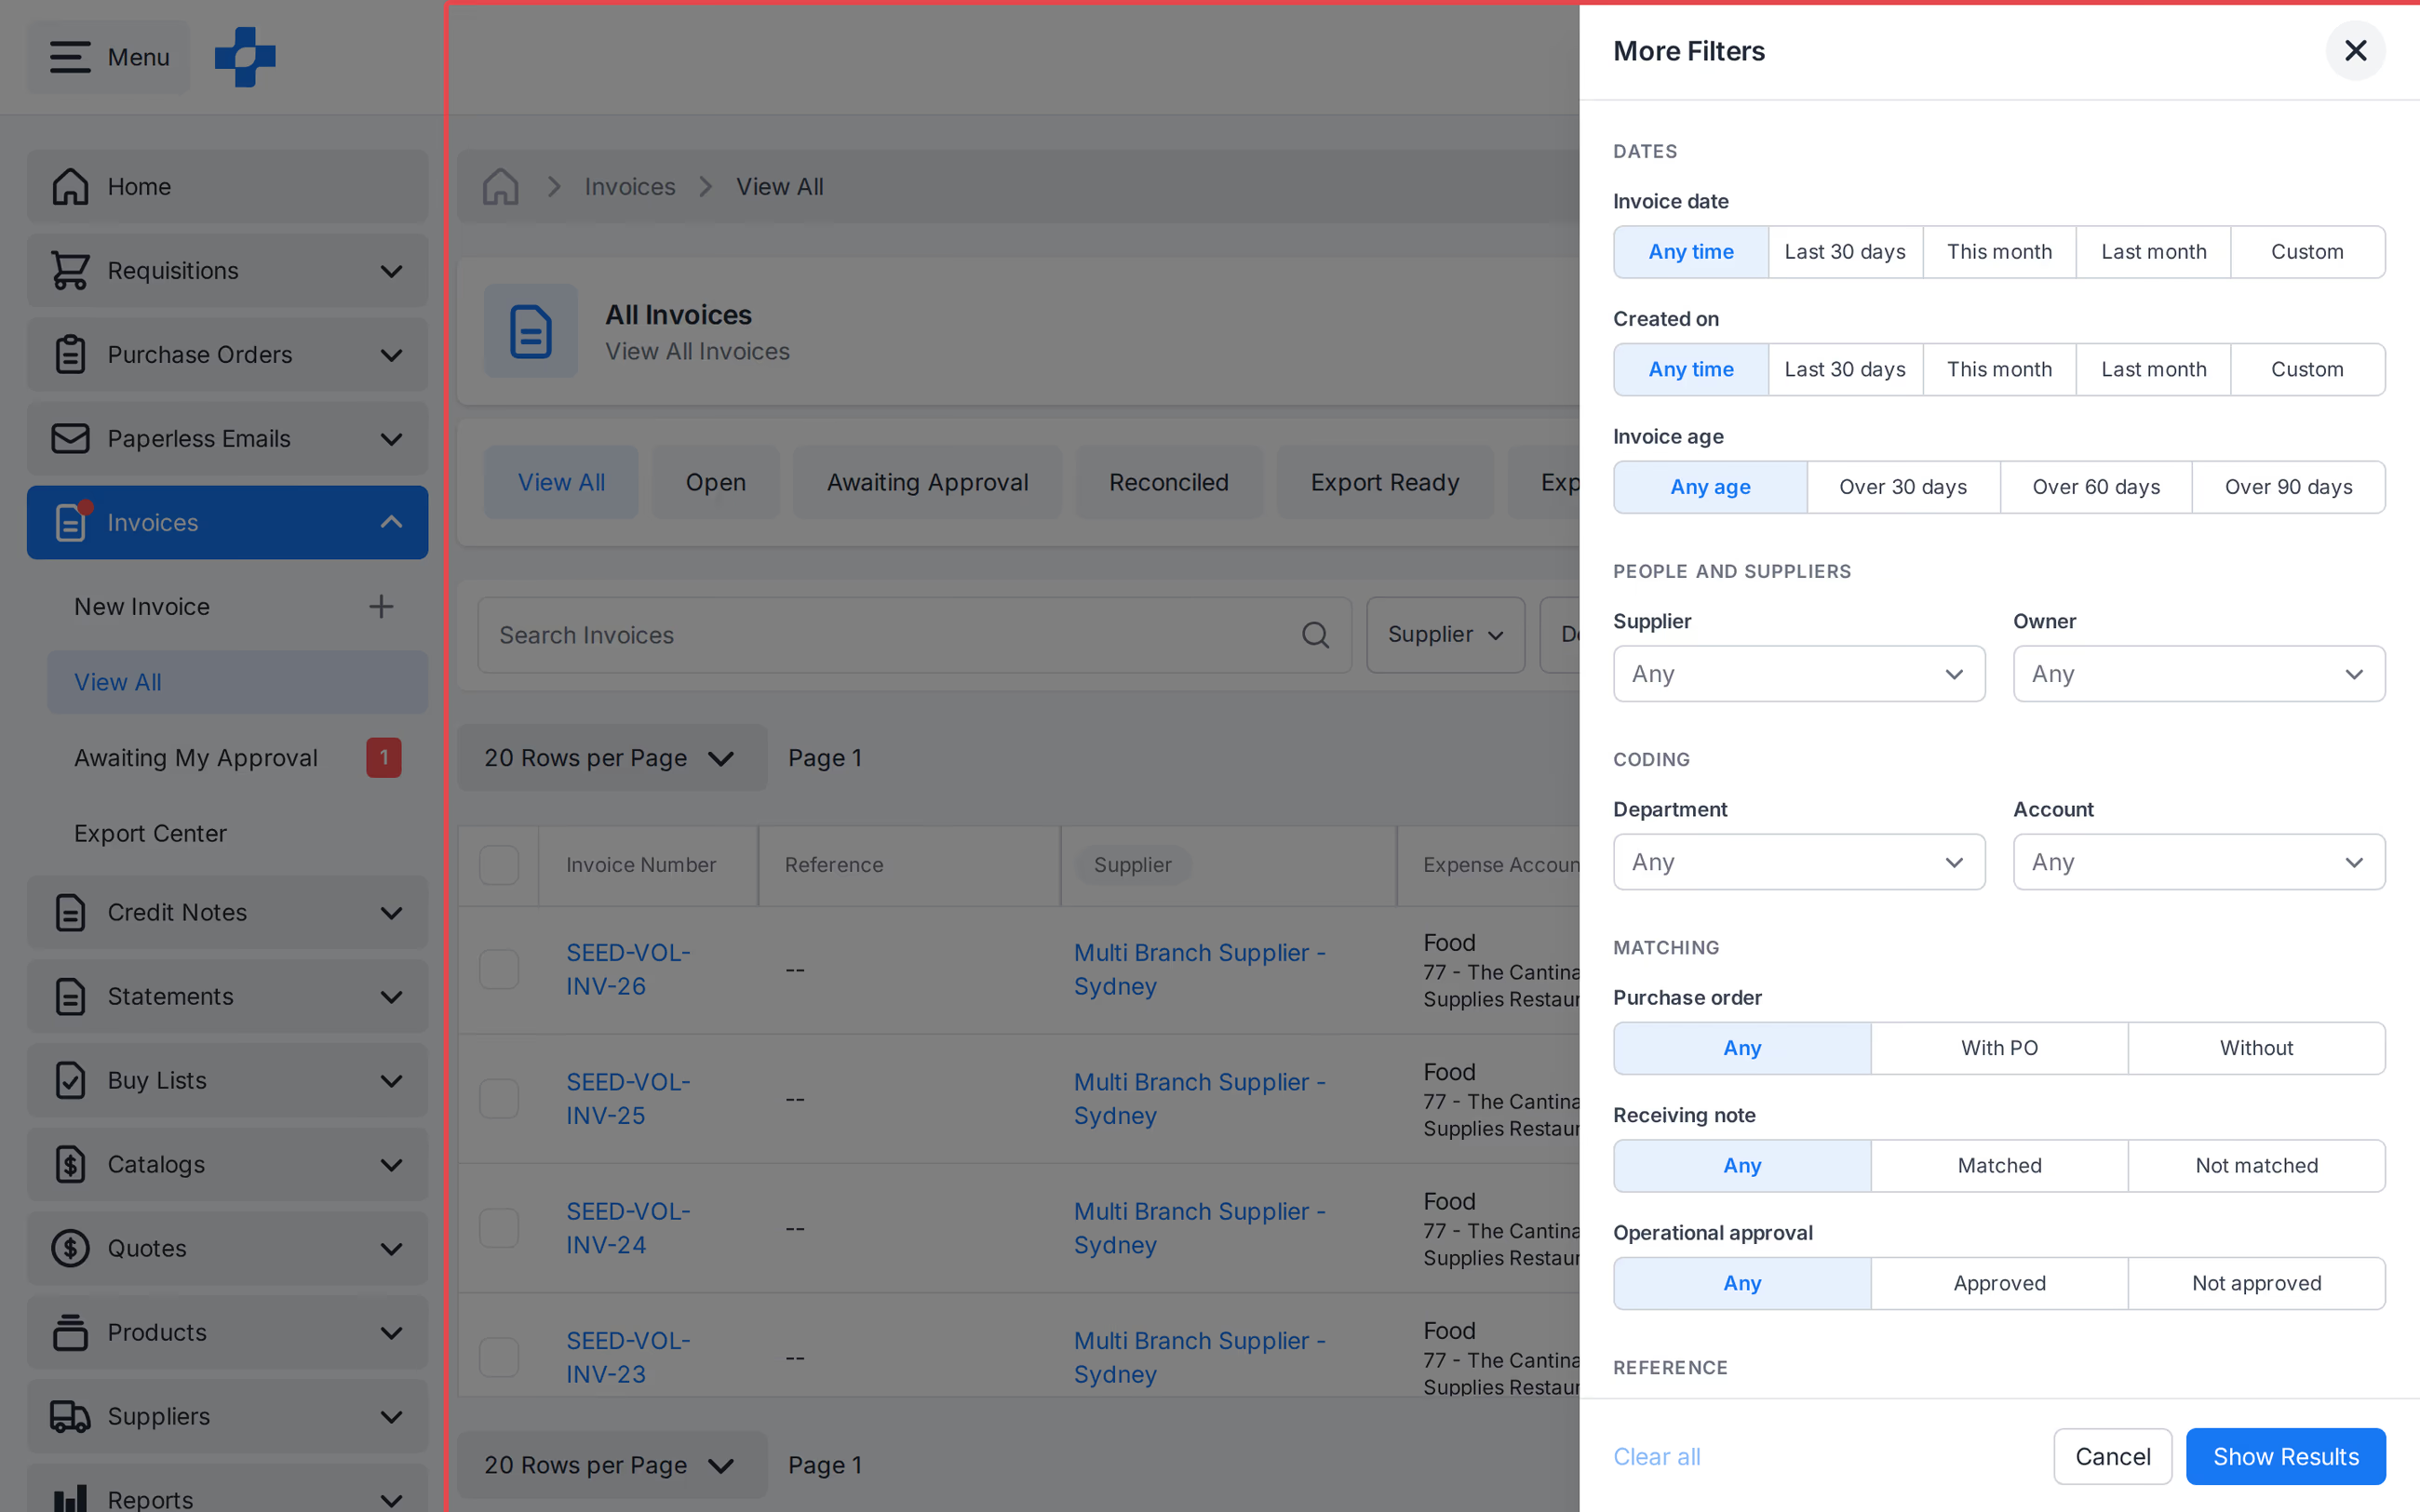
Note - On lists without quick-filter pills, use [More Filters] then [Show Results] only. There is no [Apply] on those lists.
Note - Draft match counts can update in [Show Results] before you confirm. The table still shows the previous result set until you select [Show Results] (or [Apply] on a quick-filter pill).
Active filters
When filters are applied, a results row under the filter bar shows how many rows match, for example 9 Invoices match 1 filter.
Use:
- [Clear all] to remove every active filter.
- [Copy link] to copy a URL that keeps the same filters.
Clear filters
- Remove one filter from its pill on the filter bar.
- Or select [Clear all] on the results row under the filter bar.
- Or open [More Filters], select [Clear all] in the panel, then select [Show Results].
Related
See our 'Table Columns' article to learn more about showing, hiding, and sorting columns on the same lists.